Appliances Direct WIFI SMART Owner’s Manual
Operation Instructions
Downloading the App
Scan the following QR code with your smart phone and download Wifi Smart.

Android

IOS
When successfully installed, the icon will be displayed on your phone.
Users can search for Gree+ in the apple store to download the apple version of the APP.
Configuration
- Short-distance control setting for air conditioner using Wi-Fi hotspot
Step 1: Air conditioner Wi-Fi is set to AP mode automatically. You can search for the air conditioner Wi-Fi hotspot through your smart phone. The name of Wi-Fi hotspot is the last 8 numbers of the air conditioner mac address. Password is 12345678.

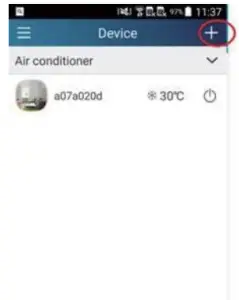
Step 2: Open the App and the screen will show the air conditioner that you just
connected. Click this air conditioner to enter and enable short-distance control, as shown below. Please refer to “Functions introduction” for specific control methods.
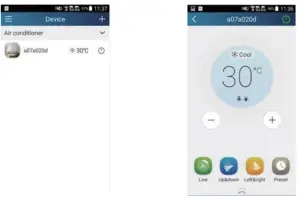
NOTE: One AC can be controlled by 4 mobile phones at the same time.
Short-distance and long-distance control settings for air conditioner.
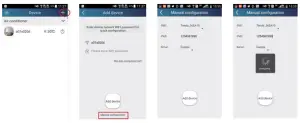
Step 1: Under short-distance control, return to the homepage “Device”. Tap ![]() at the top right corner of the homepage “Device”. Select “Add device”. Tap “Manual configuration”.
at the top right corner of the homepage “Device”. Select “Add device”. Tap “Manual configuration”.
Step 2: Select the correct network name and enter the password, select the server (The server setting here must keep the same as the server setting in “Settings” mentioned below ) then tap the button “Add device” for configuration.
At this time, “collocating” is displayed on the APP interface. The buzzer in the indoor unit will give out a sound when collocation is succeeded.
Functions introduction
User registration
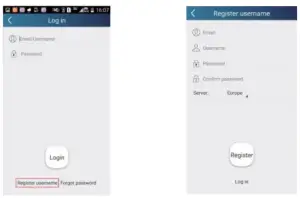
Operation instruction: For first-time login, you have to register a new username. If you already have a username, skip the registration step and enter your email address and password on the “Login Page” to log in.
Operation steps:
- Select the sever address

- Account login: Slide the page “Device”. and enter the menu page on the left. Tap “Login” to enter the page “Register username”. New user must first register a username. Tap “Register”.

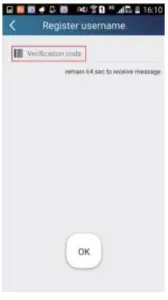
- Enter your email address. Wait until you receive the verification code. Enter the code and then tap “OK” to log in.

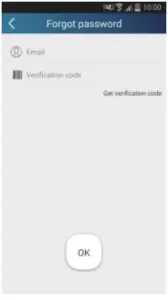
- If you have forgotten your password, you can reset it with your email address. Tap “Forgot password” and enter the page “Forgot password”. Input your registered Email account. Tap “Get verification code” to get an email verification code. Enter a new password and tap “OK” to log in.

Personal settings
Set name (device name, preset name, etc.) and images (device image) in order to identify a user easily.
- Set device name
After quick configuration, a list of controllable smart devices will be generated. Default name for air conditioner is the last 8 numbers of the air conditioner mac address.
Step 1: Tap and hold “a0b417ac” to enter the page “Edit device”. Tap “Image” to select the source of image. Select from “Default images” or “Take photo” or “Choose from photos” and save an image.
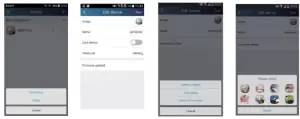
Step 2: Tap “Name” to change device name, save it and the new device name will be shown. enable button ”Lock device” to lock the device this means other smart phone can’t search the device now. Tap “Temp unit” to change the temperature unit.
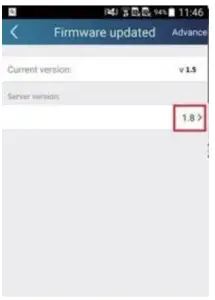
Step 3: Tap “Firmware updated” to upgrade the Firmware of the device, Tap”1.8″ the device will be upgraded automatically.
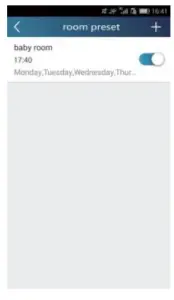
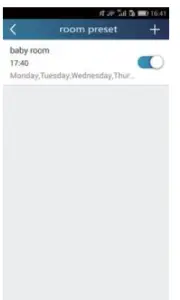
Set preset name
Step 1: Tap at the top right corner of the homepage “Device”. Select “Add
preset” and enter the page “Preset edit”.

Step 2: Choose the time. Tap “Name”. As shown in the picture, its name is “baby room”. For timer type, select “On”. Then select the repeating days. Save the setting of preset name.
Set device image
Please refer to step 1 in 2(1)
Control functions
Common control functions: General control on the operation of smart devices (On/Off, temperature, fan speed, mode, etc.) and the setting of advanced functions (air exchange, dry, health, light, sleep, energy saving upper limit)
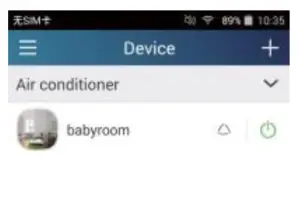
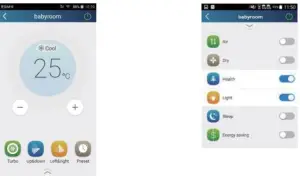
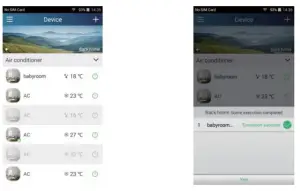
Step 1: General control Enter the homepage “Device” first. Take “babyhome”
as an example.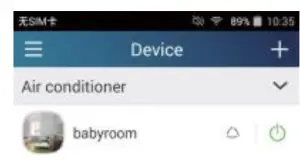
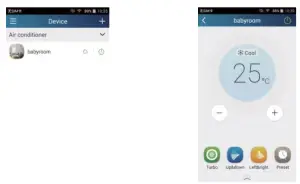
Tap “babyroom” to enter air conditioner control. Tap ![]() to turn on the control switch.
to turn on the control switch.
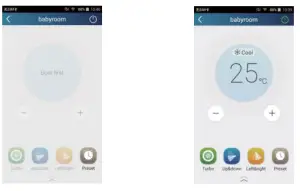
Tap ![]() or
or ![]() to increase or decrease temperature. Tap
to increase or decrease temperature. Tap ![]() to change working mode. Tap
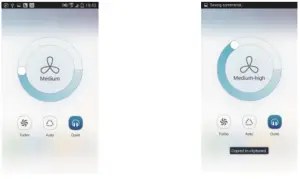
to change working mode. Tap ![]() to enter the page of fan speed adjustment.
to enter the page of fan speed adjustment.
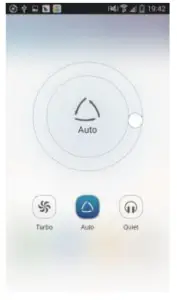
Tap ![]() and go around the circle to adjust fan speed
and go around the circle to adjust fan speed
Step 2: Advanced settings Tap to enter advanced settings. You may select “Air”, “Dry”, “Health”, “Light”, “Sleep” or “Energy saving”.
Advanced control functions: Set scene; Preset; Link: Infrared control (only applicable to smart phone with infrared emitter) Set scene: Preset the operation of several smart devices by one tap. On the page “Device”, tap the image of “Device” to enter the page “Edit scene”
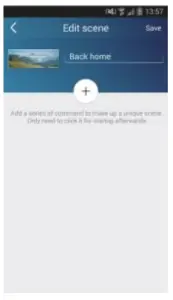
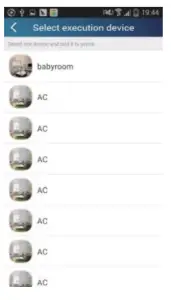
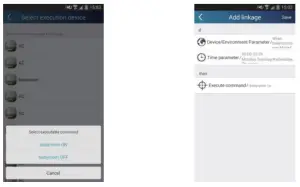
Tap “Add scene” and edit the scene name, for example, “Back home”. Add execution devices
Tap to add commands. On the page “Select execution device”, select the air conditioner named “babyroom”. Then select “ON” or “OFF”.
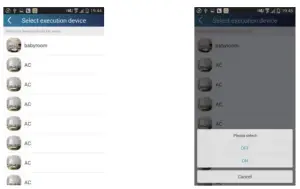
Continue to select the next execution device as instructed above. Tap ![]() to set the interval.
to set the interval.
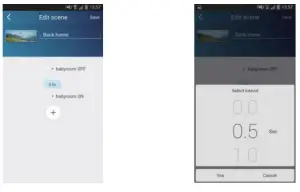
Tap “Save”. Tap the scene picture displayed in “Device” home page to send the command. Then the scene “Back home” will be in execution. You may view the execution condition of the scene.
Preset includes single-device preset and multi-device preset Single-device preset: This can preset a certain device to be On/Off at a specific time.
On the homepage “Device”, take air conditioner “babyroom” as an example. Tap![]() at the bottom of the page “babyroom”. Then you will enter the page “Preset edit”
at the bottom of the page “babyroom”. Then you will enter the page “Preset edit”
Slide up and down to set the time. If you need to synchronize the time, tap synchronize”. If such “Hint” interface hasn’t appeared, please skip this operation procedure.
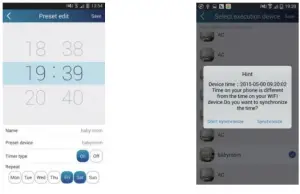
Tap “Name” to customize the preset name.
Preset device can’t be selected and it will default to “babyroom”. Select “On” f the timer type. Select repeating days to complete the preset
Multi-device preset: This can preset multiple devices to execute a command at a specific time.
Please refer to the instructions as how to set preset time, name, timer type and repeating days for a single device
Tap “Preset device” to select one or more devices. Then return to the page “Device”.
Link(This function is applicable to partial of models)
Select a master device. When the environment has satisfied the parameters as set in the master device, slave devices will execute commands to realize devices linkage.
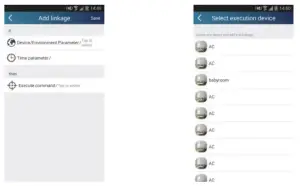
Step 1: Set the parameters of master device (Select master device, select environment parameters, select master device status).
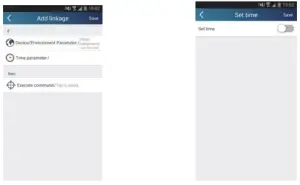
Tap ![]() at the top right corner of the homepage “Device”. Select “Link” and enter the page “Add linkage”. Tap “Device parameter” to enter the page “Select device”. Take “baby room” as an example. Tap “babyroom”.
at the top right corner of the homepage “Device”. Select “Link” and enter the page “Add linkage”. Tap “Device parameter” to enter the page “Select device”. Take “baby room” as an example. Tap “babyroom”.
Enter the page “Select environment parameters”.
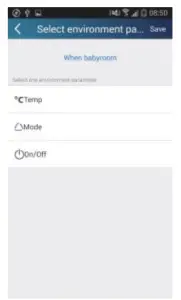
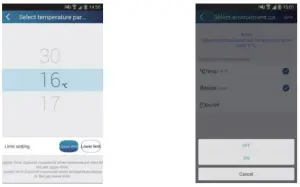
Tap “Temperature” to enter the page “Select temperature parameter”. Slide up or down to adjust temperature. Tap “Upper limit” or “Lower limit”.
Tap “Mode” and “On/Off” to select the status of master device. Then tap “Save”.
Step 2: Set time parameter for linkage. Tap “Time parameter” to enter the page “Set time”. Slide ![]() rightwards to turn on the setting time.
rightwards to turn on the setting time.
Tap “Execution time”; Then tap “Start” and “Stop” to set start time and stop time respectively. Tap “OK” at the top right corner to save the setting.
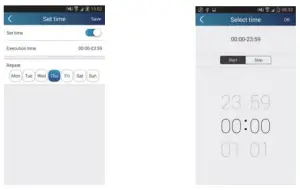
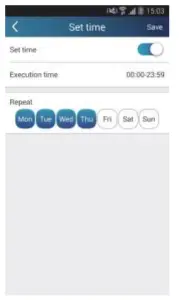
Tap the days below “Repeat” to select the repeating days. Then tap “Save”.
Step 3: Select “Execute command”
Tap “Execute command” and enter the page “Select device”.
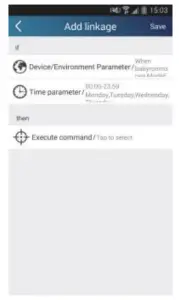
Tap the name of device that you want to control. Tap “ON” or “OFF” and then tap “Save” to complete the linkage.
Tap “Save” and then repeat the above steps to set linkage of several scenes.

Infrared control (only applicable to smart phone with infrared emitter).
Function: Smart phone can be used as a remote controller.
Tap ![]() at the top right corner of the homepage “Device”. Select
at the top right corner of the homepage “Device”. Select
“Infrared” and enter the page “Remote controller”. Tap ![]() and slide up to enter the page of advanced functions.
and slide up to enter the page of advanced functions.
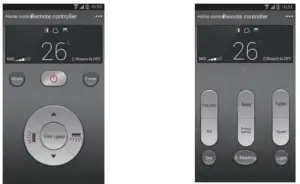
Tap ![]() to turn on the device. Tap
to turn on the device. Tap ![]() to select mode. Tap
to select mode. Tap ![]() to adjust fan speed and swing angle. Tap “Health”, “Energy saving”, “Sleep” etc. to set advanced functions.
to adjust fan speed and swing angle. Tap “Health”, “Energy saving”, “Sleep” etc. to set advanced functions.
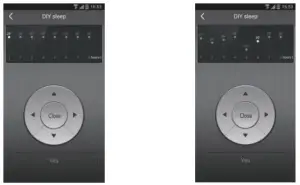
Tap “Sleep” to enter the page “DIY sleep”. Tap the left and right arrows to set sleep time. Tap up and down arrows to adjust temperature at a specific sleep time.
Menu functions (Share, Set, History, Feedback)
Share
To share quick configuration information and unit’s information, including local export and local import.
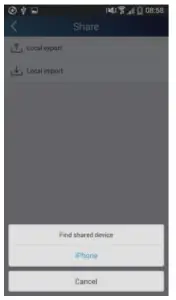
For local import, you just need to tap “Local import” and wait for the data download. Local export
Step 1: Export local data to another smart phone.
Enter menu page on the left side and tap “Share” to enter the page “Share”. Then tap “Local export”.
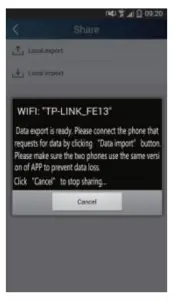
Step 2: Another smart phone to be imported.
Tap the model name and wait for the download.
Backup
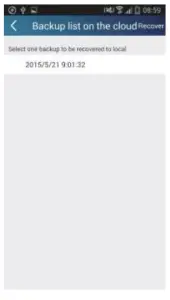
To keep backup of the quick configuration information and unit’s information, including backup to cloud and backup list on the cloud
Backup to cloud
Enter the menu page on the left and tap “Backup”.
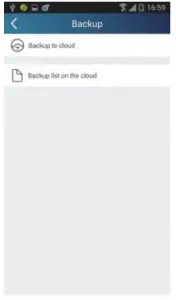
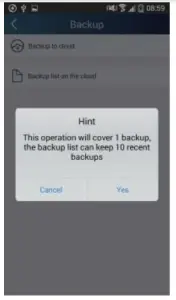
Tap “Backup to cloud” and then tap “Yes”. Then wait for the data download.
Select “Backup list on the cloud”. Then backup records will appear. Tap “Record” to download data and recover data to local unit.
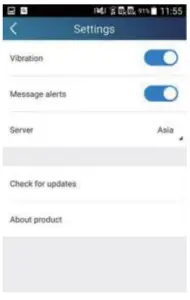
Settings
User can set vibration, message alerts, server, updates, etc. The server setting here must keep the same as the server setting in “Configuration” mentioned before. Otherwise, remote control will be invalid.
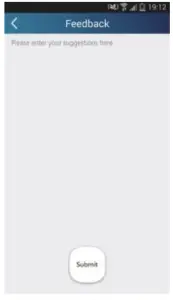
Feedback
User can feedback suggestions to back-stage management for maintenance and development.
Tap “Feedback”. Enter your suggestions and then submit it.