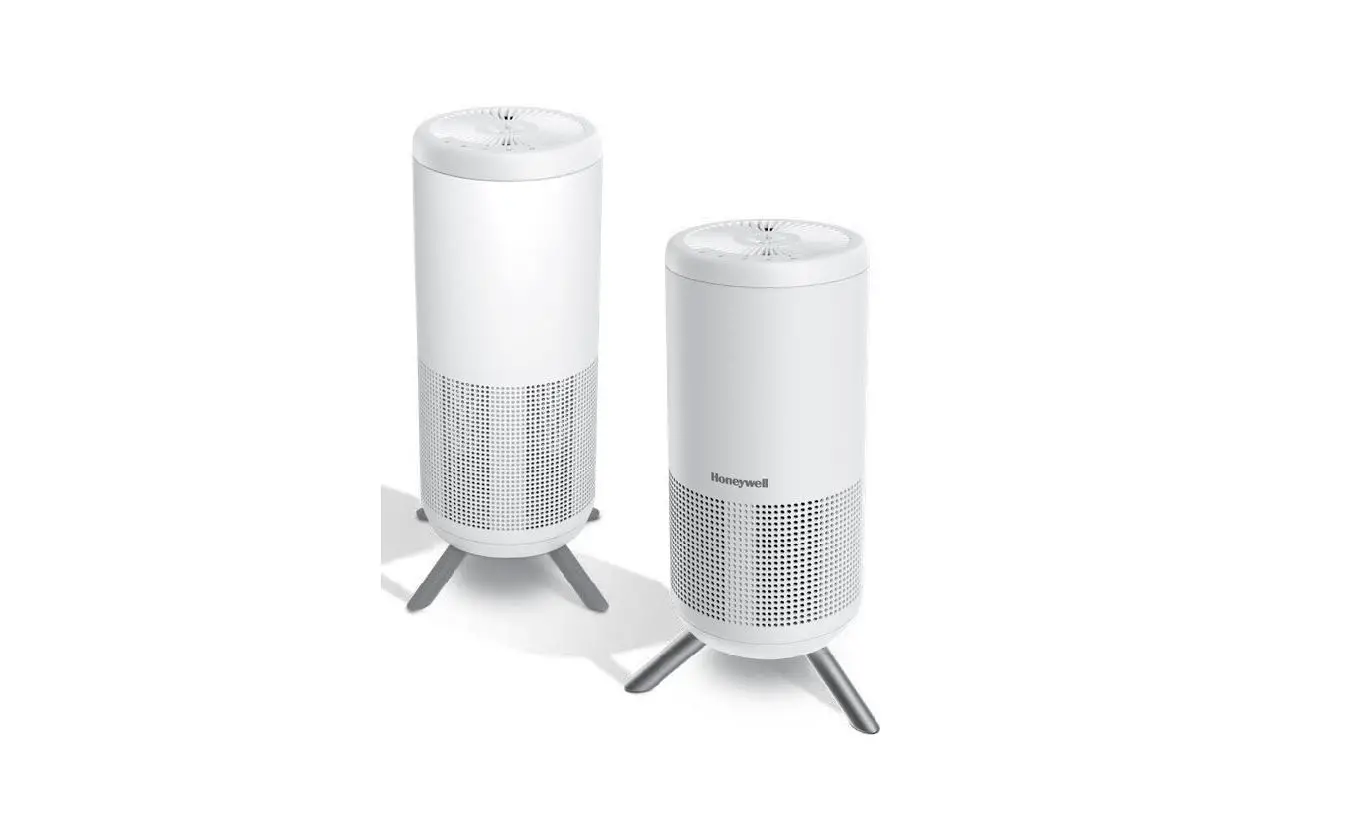
Honeywell HAH831 Designer Series HEPA Air Purifier Models

IMPORTANT SAFETY INSTRUCTIONS
READ AND SAVE THESE SAFETY INSTRUCTIONS BEFORE USING THIS AIR PURIFIER
When using electrical appliances, basic precautions should always be followed to reduce the risk of fire, electric shock, and injury to persons, including the following:
- Read all instructions before operating the airpurifier.
- Place air purifier where it is not easily overturned by persons in the household.
- ALWAYS turn the air purifier controls to the OFF position and unplug from the wall outlet when not in use.
- To disconnect the air purifier, make sure the unit is powered OFF then grip the plug and pull it from the wall outlet. NEVER pull by the cord.
- DO NOT use any product with a damaged cord or plug, any product that malfunctions, or any product that has been dropped or damaged in any manner. Keep the cord away from heated surfaces.
- DO NOT use air purifier outdoors.
- DO NOT use air purifier unless it is fully assembled.
- DO NOT run power cord under carpets, and DO NOT cover with throw rugs. Arrange cord such that it will not be a tripping hazard.
- DO NOT use air purifier where combustible gases or vapors are present.
- DO NOT expose the air purifier to rain, or use near water, in a bathroom, laundry area or other damp location.
- The air purifier MUST be used in its upright position.
- DO NOT allow foreign objects to enter ventilation or exhaust opening as this may cause electric shock or damage to the air purifier. DO NOT block air outlets or intakes.
- Locate air purifier near the outlet and DO NOTuse with extension cord or power strip.
- This appliance has a polarized plug (one blade is wider than the other). To reduce the risk of electric shock, this plug is intended to fit only one way in a polarized outlet. If the plug does not fit fully in the outlet, reverse the plug. If it still does not fit, contact a qualified electrician. DO NOT attempt to defeat this safety feature.
- A loose fit between the AC outlet (receptacle) and plug may cause overheating and a distortion of the plug. Contact a qualified electrician to replace loose or worn outlet.
- DO NOT sit, stand or place heavy objects on the air purifier.
- ALWAYS disconnect power supply before servicing.
- Keep out of reach of children and pets.
- Filters may be harmful if ingested.
- Avoid breathing dust when changing filters. When moving or lifting the full Water Tank, use two hands; one hand on the Tank Handle and the other on the bottom of the Tank.
- DO NOT add any medications, inhalants, scent products or essential oils into Base, Reservoir or Water Tank.
- DO NOT cover or insert objects into any openings on the humidifier
- DO NOT block intake or output vents.
- DO NOT operate the humidifier without water.Turn off and unplug unit when tank is empty.
- Humidifier requires regular cleaning. Refer to, and follow, cleaning instructions.
- SAVE THESE INSTRUCTIONS.
FOR FCC COMPLIANCE INFORMATION, PLEASE SEE LAST PAGE OF THIS MANUAL.
WARNING: TO REDUCE THE RISK OF FIRE OR ELECTRIC SHOCK, DO NOT USE THIS AIR PURIFIER WITH ANY SOLID-STATE
ASSEMBLING THE LEGS ONTO THE AIR PURIFIER
Before proceeding, install the legs included in the bottom of the package. Insert each leg into the hole at the bottom of the Air Purifier making sure to align the leg so it points outward. Insert each leg all the way until you feel it set into place. May have 3 or 4 legs depending on model.
GETTING TO KNOW YOUR AIR PURIFIER

- Aromatherapy Tray cover
- Air Outlet & Control Panel
- Main Body
- Air Quality Indicator Light
- Legs
- Pre-Filter & HEPA Filter
- Grille Cover
CONTROLS AND FEATURES

- Air Outlet Grille
- Aromatherapy Essential Oils Tray
- Filter Check/Reset & Indicator Light
- Cleaning Level & Indicator Light
- Auto Mode & Indicator Light
- Sleep Mode & Indicator Light
- Power Button & Indicator Light
AIR QUALITY INDICATOR

The built-in VOC sensor constantly monitors room air quality.
The Air Quality Indicator Light on the bottom of the Air Purifier will illuminate the floor below it with the current room air quality level: Green=Good Yellow=Moderate Red=Poor
FILTRATION

The Honeywell Designer Series Air Purifier delivers proven HEPA performance with an odor fighting Pre-Filter, Certified Honeywell HEPA Filter and an UltraQuiet motor.
GETTING STARTED


- Ensure that the unit is powered off and unplugged.
- Select a firm, level, and flat location. Ensure the unit is more than 6 inches away from the closest wall or furniture so that the grille is not blocked. Portable air purifiers are more effective in rooms where all doors and windows are closed.
NOTE: If the unit is placed on a light-colored carpet, a small mat or rug should be used underneath to prevent staining. This is especially important in homes with contamination from smoking, fireplaces, or where candles are burned. - Remove the filter grille cover by grasping the recess in the top center of the grille cover and pulling forward.
- Remove the round filter cartridge from the air purifier by pulling on the tab on the top of the filter. This cartridge contains a wrapped HEPA Filter and wrapped Pre-Filter.
- Remove protective plastic wrap from Filter(s).
- Wrap the Pre-Filter around the HEPA Filter cartridge and secure it with the fasteners provided.
- Place the Filter(s) back into the air purifier housing, making sure the plastic ring is at the top and the tab faces out.
- Replace the filter grille cover by placing the tabs on the bottom of the grille into the slots on the unit. Gently push the top of the grille until secure.
ENERGY STAR

The energy efficiency of this ENERGY STAR certified model is measured based on a ratio between the model’s CADR for Smoke and the electrical energy it consumes, or CADR/Watt. Versions with Humidifier are not Energy Star Certified.
OPERATION
- Ensure that the plastic wrap has been removed from the filters and the filters are replaced in the unit. Next, plug the power cord into a working electrical outlet.
- Tap Power Button to turn on the air purifier. The air purifier will start automatically on Auto Mode until another cleaning level is selected.
- To shut off, tap the Power Button once.
- Use the Cleaning Level button to choose a different cleaning level.
QUIET CLEAN: quietest setting and optimized to capture small particles.
GENERAL CLEAN: recommended for dust and general, everyday air cleaning.
POLLEN: optimizes pollen capturing performance.
Sleep Mode
Pressing the SLEEP MODE button sets the unit to the lowest cleaning level for ultra-quiet night time operation while dimming control panel LEDs to 10% and completely turns off the Air Quality Indicator light.
Automatic Cleaning Mode & Air Quality Indicator
When the Auto mode AUTO is activated, the air purifier will automatically operate at the appropriate cleaning level to reduce the VOCs that are detected in the room. To select this mode, tap the Auto button and the Auto Mode light will illuminate to indicate the setting has been activated. This air purifier is equipped with a VOC Sensor that detects the level of VOCs in the room and provides a visual display to indicate air quality. The Air Quality Indicator color display is located at the bottom of the air purifier. The VOC Sensor is constantly monitoring the air and the Air Quality Indicator light will illuminate the floor either green, yellow, or red depending on the level of VOCs detected in the room:
- Green – Good air quality. There is a low level of VOCs detected.
- Yellow – Moderate air quality. There is a moderate level of VOCs detected.
- Red – Poor air quality. There is an elevated level of VOCs detected.
VOCs are gases that are emitted from certain household cleaning, home improvement, and even common home decor products.
NOTE: Upon start up, the unit may take a few minutes to calibrate and measure the air quality. During this time, the Air Quality Indicator will pulse between green, yellow, and red until the air quality is determined. When the appropriate reading is determined, the indicator will then remain a solid color.
Filter Check/Reset
- This air purifier model has a Filter Check Light to remind you when it is time to replace the Pre-Filter and HEPA Filter based on the air purifier’s hours of use.
- When the Filter Reset Light illuminates, it is time to replace the Pre-Filter.
- When the Filter Reset Light blinks every 2 seconds, it is time to replace the HEPA Filter.
- For more detailed information, see the next section.
REPLACEMENT FILTERS

To help ensure stated product performance, use only Genuine Honeywell Replacement Filters You can purchase Genuine Honeywell Replacement Filters at the retailer where you purchased your air purifier or order directly from www.HoneywellPluggedIn.com
When the Filter Reset Indicator Light illuminates or blinks, it is time to replace one or more of the filters.
| FILTER CHECK/RESET LIGHT | FILTER | WHEN TO REPLACE | NUMBER OF FILTERS NEEDED |
| Solid Illumination (not blinking) | Honeywell Pre-Filter A A+ Pre-Filter Pre-Filter HRF-AP1 or HRF-APP1 | Every 3 Months | 1 Pre-Filter |
| Blinks every 2 seconds | Honeywell HEPA Filter J Filter
HRFJ830 | Every 12 Months | 1 HEPA Filter |
| For Humidifier Models: Wicking filter has no Filter Check/Reset Light | Honeywell Wicking Filter W Filter
HFTW800 | Replace every 30-60 days as needed | 1 Wicking Filter |
To change either air purifier filter, remove the filter cartridge. See the Getting Started section for filter removal and replacement instructions.
REPLACEMENT FILTERS (CONTINUED)
To change either filter, follow the steps described below:
- Remove the HEPA Filter Filter J and Pre-Filter A Pre-Filter cartridge from the Air Purifier. Remove fasteners holding the Pre-Filter and remove the Pre-Filter from the HEPA Filter cartridge. Cut a new Pre-Filter from the Universal HRF-AP1 Pre-Filter using the old Filter as a template (5.7 in x 22.5 in). If also replacing the HEPA Filter, discard the used HEPA Filter but keep the Pre-Filter fasteners to use on the new HEPA Filter.
- Wrap the new Pre-Filter around the HEPA Filter cartridge and secure it with the fasteners provided.
- Reinsert assembled filter cartridge into the Air Purifier. Ensure the plastic ring is on the top with the tab facing out.

These replacement intervals are intended as guidelines only. Performance of any filter media is dependent upon the concentration of contaminants going through the system. High concentrations of contaminants such as dust, pet dander, and smoke will reduce the useful performance of the filters.
NOTE: The Pre-Filter and HEPA Filters are not washable and should not be vacuumed. DO NOT immerse them in water.
WARNING: Filters may be harmful if ingested. Avoid breathing dust when changing filters.
RESET FILTER CHECK INDICATOR
After you have replaced the appropriate filters, plug the unit back in. The Filter Reset Light will remain on or blinking until it is reset. To reset the Filter Check/Reset Light: With the unit powered ON, press and hold the Filter Reset button for 3 seconds until light turns off or stops blinking. The light will stay off until the next filter needs replacing.
NOTE: This procedure is the same whether you are resetting the Pre-Filter or HEPA Filter Reset Light.
USING THE HUMIDIFIER
These replacement intervals are intended as guidelines only. Performance of any filter media is dependent upon the concentration of contaminants going through the system. High concentrations of contaminants such as dust, pet dander, and smoke will reduce the useful performance of the filters. Once water is added to the appropriate level. Plug in the appliance and press the power button. Air from the purifier will now pass through the humidifier. Most of the air will flow past the wicking filter helping water evaporate into the air returning both purified and humidified air back into the room. NOTE the humidifier design allows some of the air from the purifier to bypass the wicking filter and released directly into the room. For Maximum moisture output use the highest fan speed. This setting will require more frequent refilling of the humidifier.
Low Fan Speed or Sleep mode will last longer (up to ??? Hours).
Refill the reservoir when water runs out or the filter will become dry. Do not leave a wet filter in the humidifier without it running. This could allow mildew to form. It is best to let the wicking filter dry out completely by running the humidifier until it is dry if you plan on leaving it off for a few days. Never place essential oils directly in the humidifier water. If desired, an additional essential oils tray on the top of the humidifier can be used to provide optional aromatherapy while the humidifier is being used. (See instructions for Essential Oils on page 9)
USING THE AROMATHERAPY TRAY
This Designer Series Air Purifier features an Aromatherapy Tray (Essential oils not included). Follow the steps below to use the Aromatherapy feature on your Designer Series Air Purifier.
Add Essential Oil to the Aromatherapy Tray:

- Open the cover of the Aromatherapy Tray.
- Place cotton ball or other absorbing material (not included) into the tray.
- Add a few drops of your favorite essential aroma oils (not included) onto the material.
- Once essential oils have been added, replace the cover by aligning the larger tab with the large slot and then pressing down until it snaps in place. Aroma will be infused with the cleaner air being returned back into the room while the unit is in use.
Note: The use of scented aromatherapy oil may trigger the VOC to illuminate yellow or red under the unit and cause the unit to operate at a higher speed on AUTO mode.
CLEANING THE AROMATHERAPY TRAY
The aromatherapy tray can be removed from the unit for easier cleaning.

- To clean the aromatherapy tray, remove the aromatherapy tray cover, and discard the absorbent materials or cotton.
- Twist the essential oils tray counter-clockwise (to the left) until it loosens, then lift it out of the unit.
- Wipe down the tray and wash it under clean tap water until it is clean.
- Insert clean essential oils tray and replace into the unit by aligning the tabs and twisting clockwise (to the right).
- Add new cotton or other absorbent material and add a few drops of essential oils if desired and replace the cover as directed above.
CLEANING AND STORAGE
We recommend that you clean the air purifier at least once every 3 months and before extended storage. Use only a dry cloth to wipe the external surfaces of the air purifier.
Do Not Use Water, Wax, Polish, Or Any Chemical Solution.
If your Air Purifier will not be used for more than 30 days, we recommend that you:
- Remove the HEPA and Pre-Filter cartridge from the unit.
- Wrap the HEPA and Pre-Filter cartridge in an air-tight plastic bag.
FREQUENTLY ASKED QUESTIONS
My Air Purifier is starting to make noise and the air output is less. What’s wrong?
The filters may be dirty. High amounts of particles can block the pores in the filter and stop the air from moving through it. Replace the Filters. The HEPA Filters should be replaced every year and the Pre-Filter should be replaced every 3 months. Please note these are guidelines only and filters should be checked periodically as individual home conditions may vary. To ensure the unit continues to perform properly, replace with Genuine Honeywell Filters.
How long should I run my Air Purifier?
In general, the unit will be most effective when doors and windows are closed. It is recommended that you run your air purifier while you are at home to help clean the air. If desired or conditions warrant, you may run your air purifier 24 hours a day.
Can I wash any of the filters in my Air Purifier?
No. Washing the filters will ruin them.
What are VOCs?
Volatile Organic Compounds (VOCs) are emitted from various solids and liquids such as paints, cleaning supplies, building materials, and permanent markers. Some of these compounds have higher concentrations indoors than outside.
Why did my Air Purifier suddenly turn on a higher setting?
Is the air purifier set to Auto Mode? If it is, the unit may have sensed a higher level of VOCs and has adjusted the cleaning level accordingly.
5 YEAR LIMITED WARRANTY
You should first read all instructions before attempting to use this product.
- This 5 year limited warranty applies to repair or replacement of product found to be defective in material or workmanship. This warranty does not apply to damage resulting from commercial, abusive, unreasonable use or supplemental damage. Defects that are the result of normal wear and tear will not be considered manufacturing defects under this warranty. KAZ IS NOT LIABLE FOR INCIDENTAL OR CONSEQUENTIAL DAMAGES OF ANY NATURE, ANY IMPLIED WARRANTY OF MERCHANTABILITY OR FITNESS FOR A PARTICULAR PURPOSE ON THIS PRODUCT IS LIMITED IN DURATION TO THE DURATION OF THIS WARRANTY. Some jurisdictions do not allow the exclusion or limitation of incidental or consequential damages or limitations on how long an implied warranty lasts, so the above limitations or exclusions may not apply to you. This warranty gives you specific legal rights, and you also may have other rights which vary from jurisdiction to jurisdiction. This warranty applies only to the original purchaser of this product from the original date of purchase.
- At its option, Kaz will repair or replace this product if it is found to be defective in material or workmanship.
- This warranty does not cover damage resulting from any unauthorized attempts to repair or from any use not
in accordance with the instruction manual. - This warranty does not cover the HEPA Filter or Pre-Filter, except for material or workmanship defects. Please go to www.HoneywellPluggedIn.com/warranty-registration to register your product and receive product information updates and new promotional offers.
CONSUMER RELATIONS
We are here to help. Call us toll-free at: 1-800-477-0457
Or visit our website at: www.HoneywellPluggedIn.com/contact-us;
In Canada visit: www.HoneywellPluggedIn.ca
Please be sure to specify the model number.
NOTE: IF YOU EXPERIENCE A PROBLEM, PLEASE CONTACT CONSUMER RELATIONS FIRST OR SEE YOUR WARRANTY. DO NOT RETURN TO THE ORIGINAL PLACE OF PURCHASE. DO NOT ATTEMPT TO OPEN THE MOTOR HOUSING YOURSELF, DOING SO MAY VOID YOUR WARRANTY AND CAUSE DAMAGE TO THE AIR PURIFIER OR PERSONAL INJURY.
Documents / Resources
 | Honeywell HAH831 Designer Series HEPA Air Purifier Models [pdf] Owner's Manual HAH831, HPA830, Designer Series HEPA Air Purifier Models |


![Levoit Smart True HEPA Air Purifier Instruction Manual [with WiFi] Levoit Smart True HEPA Air Purifier Instruction Manual [with WiFi]](https://manualsee.com/img/279/68975/2021/02/Levoit-Smart-True-HEPA-Air-Purifier-Instruction-Manual-with-WiFi.jpg)
