CONFER plastics LASS36 Deluxe Spa Step
 To reduce the risk of drowning, falls, paralysis, electrocution, or other serious injury or death: To reduce the risk of drowning, falls, paralysis, electrocution, or other serious injury or death:Dealer/Installer: Give manual to homeowner. Installer: Read “Safe Installation” on p. 2 and all instructions before beginning. For proper assembly and installation, instructions must be followed completely. Homeowner: Read “Safe Use” in the instructions for the step. Save these instructions. Installation must comply with local codes and may require permits. |
Safe Use
Weight limit – 300 lbs maximum. Exceeding maximum weight may cause the step to fail. |
CONFER PLASTICS INC. FIVE YEAR WARRANTY |
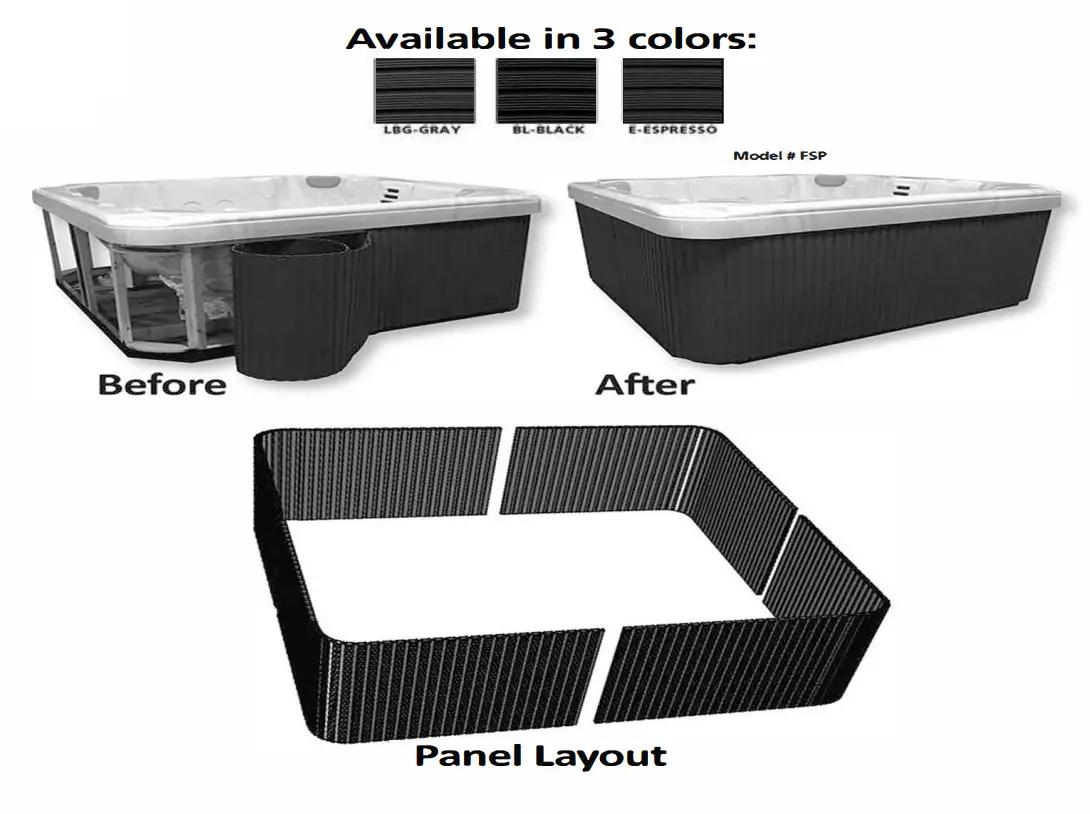
REPLACEMENT SPA SKIRTING
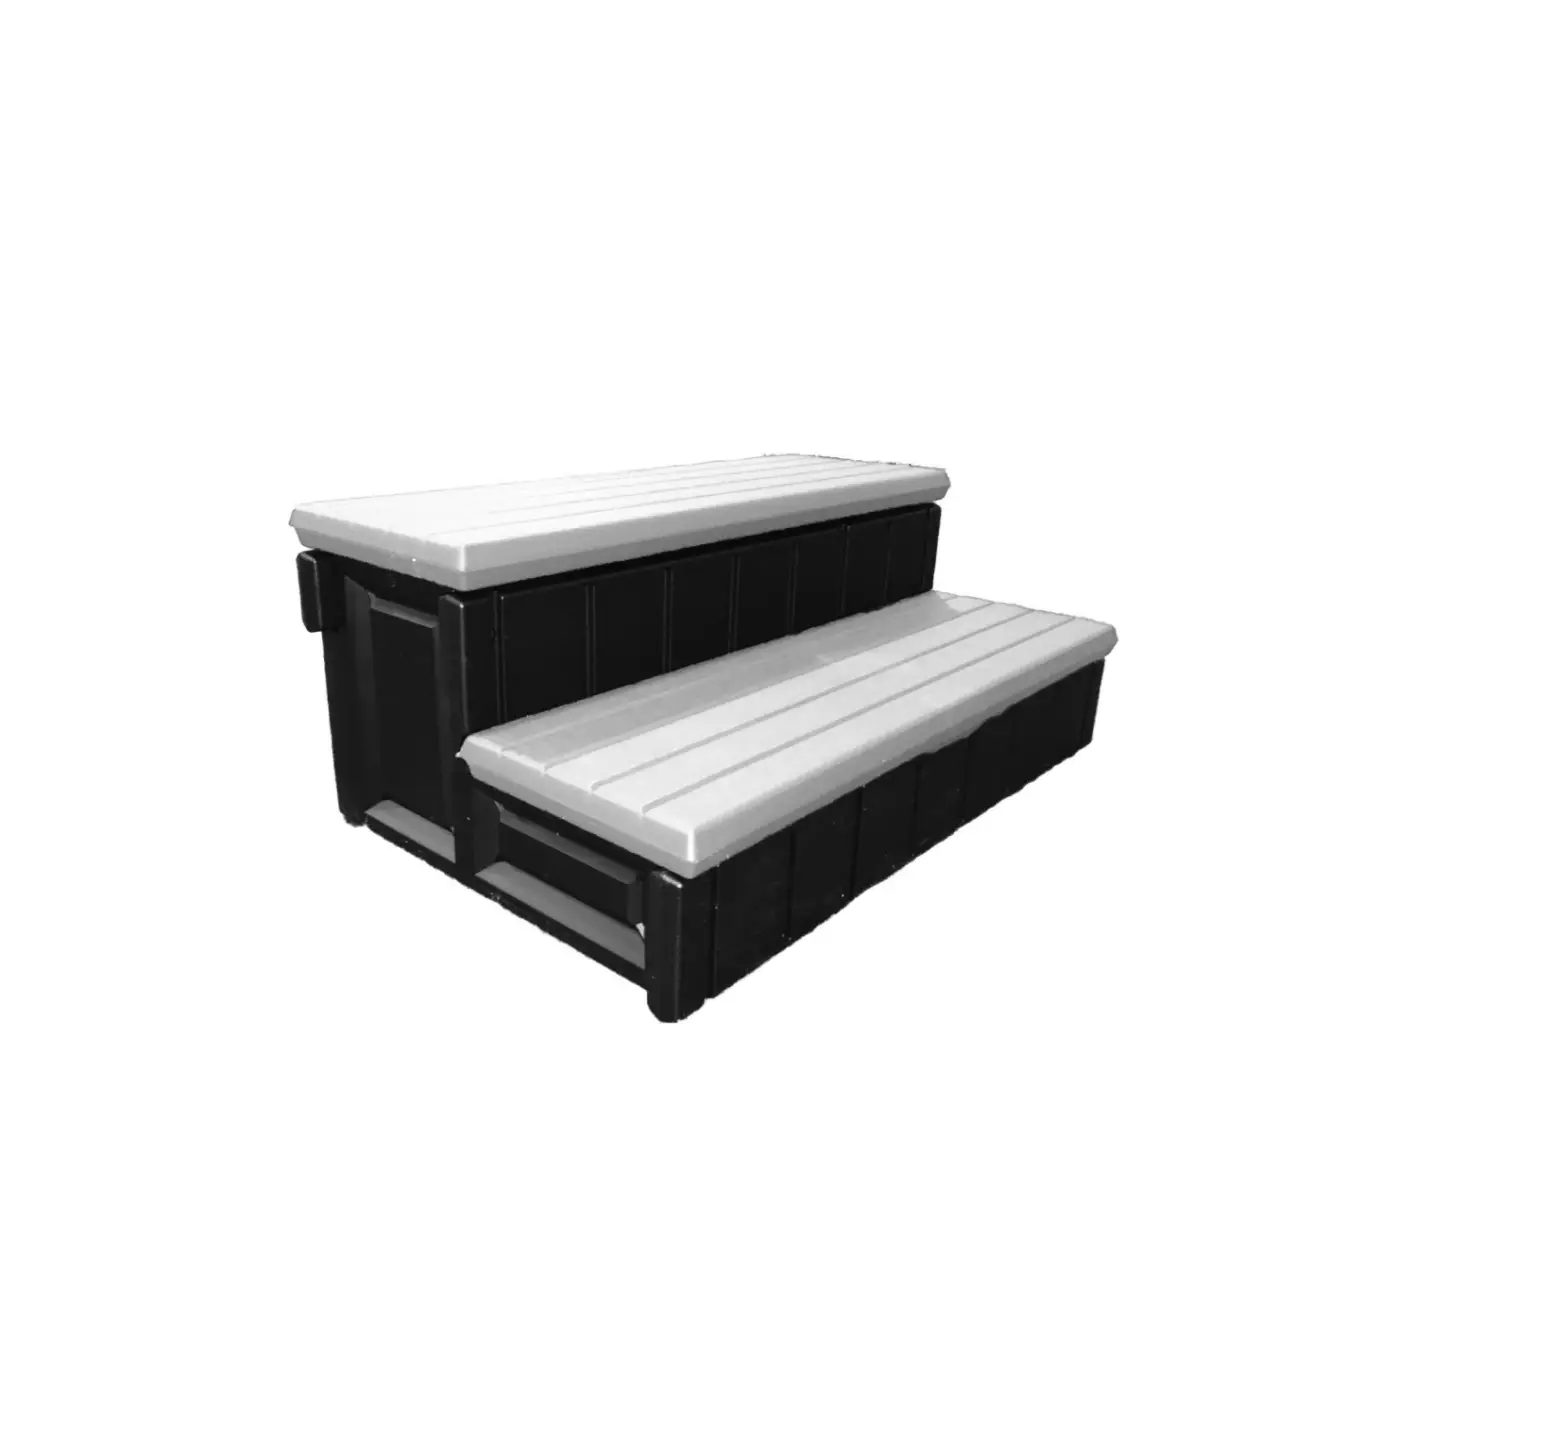
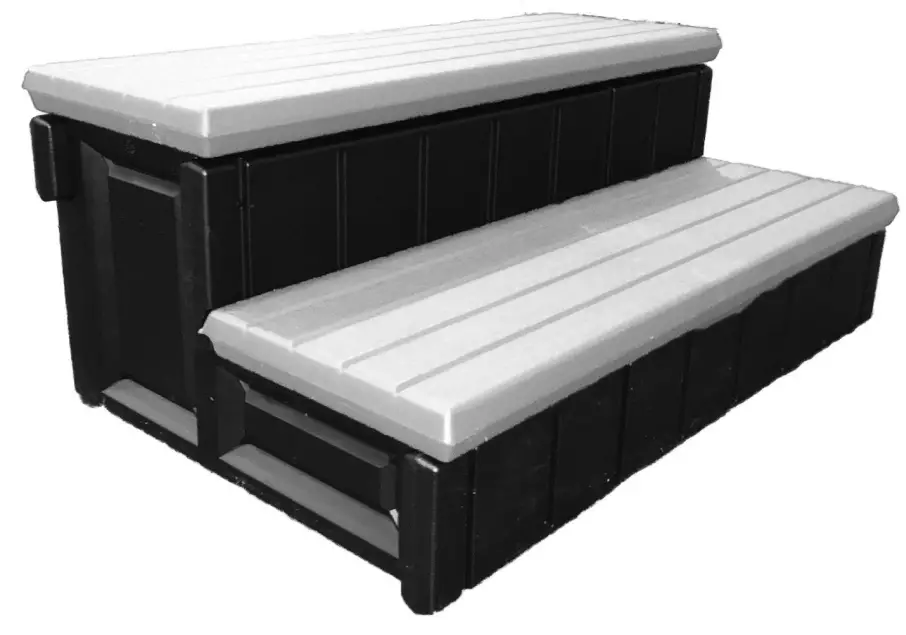
THE DELUXE SPA STEP
f missing parts call – Toll free U.S./Canada – 800-635-3213 or www.conferplastics.com
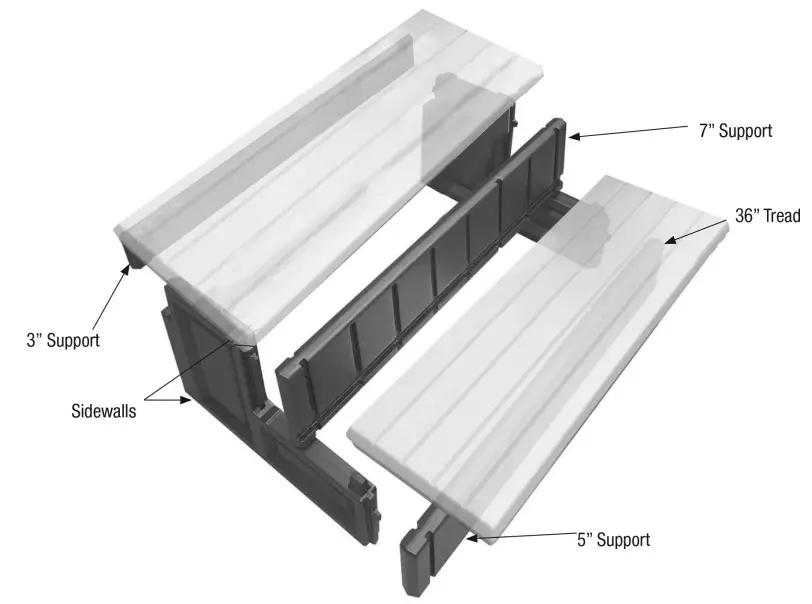
| Parts list | 36” step |
| Spa step sidewall | 2 |
| 3” support | 1 |
| 5” support | 1 |
| 7” support | 1 |
| Tread | 2 |
| Self-adhesive pad strip | 1 |
| Instructions | 1 |
| #10 x 1-1/4” S.S. screw | 4 |
Tools required
- rubber mallet
- cordless drill
- 1/8” drill bit
- Phillips head screwdriver
Safe Installation
To reduce the risk of electrocution, drowning, falls, or other serious injury or death:
Check building codes/permitting. Consult your local Building Department before installation of your spa and equipment. Spa/equipment installation must comply with the codes of the authority having jurisdiction and may require permits (e.g., building, plumbing, electrical, zoning, etc.).
Use for intended purpose only
- Use only as spa stairs.
Check that you have all required parts. Check the contents of the carton with the Parts list for this step system. All parts and hardware are required. If any parts are missing, DO NOT attempt to assemble or install the steps. Instead, call Toll Free U.S. – 800-635-3213 or visit our web site at www.conferplastics.com for assistance.
Select an appropriate location – The step must be located on a level solid base and in a location that will be in full view of competent adult supervision when in use.
Follow all instructions
- For stable, correct assembly and installation, all instructions must be followed completely and in the sequence shown.
- Follow the manufacturer’s recommendations for the safe use of all hand tools and equipment used during installation.
Cordless drill only – no corded drills near spa. Use a cordless drill for assembly and installation. To reduce the risk of electrocution, NEVER use a corded drill in or around a spa.
Lift safely. When lifting awkward or heavy loads, have another person help you.
Double check after installation
- Before using the product, after assembly and installation, go over the instructions and procedures again to make sure nothing has been overlooked.
ASSEMBLY INSTRUCTION
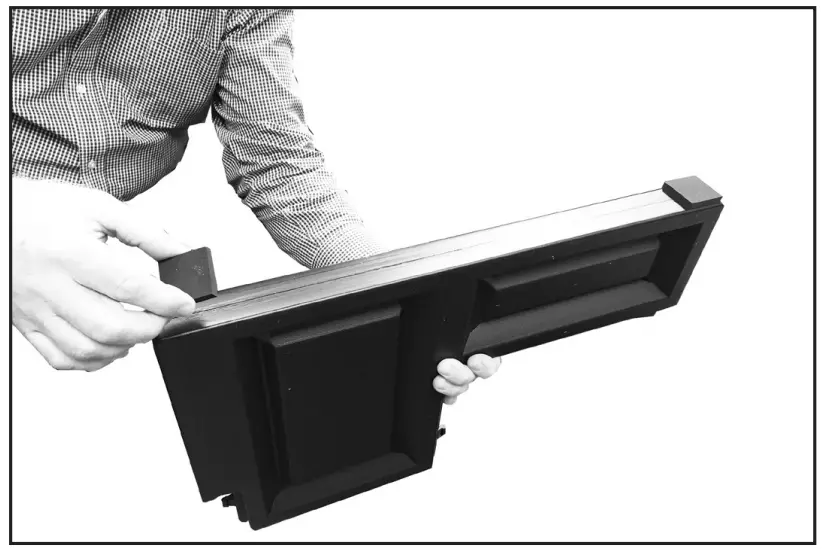
#1: Install 2 self adhesive pads on each of the sidewalls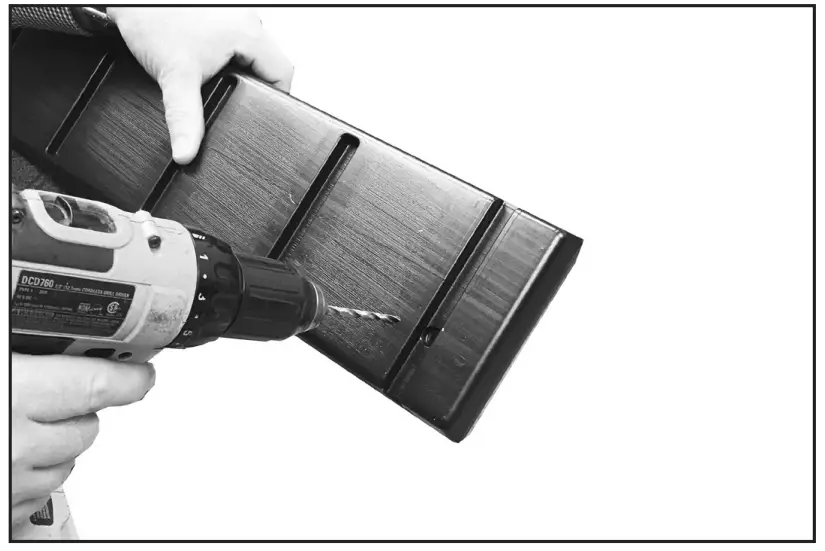
WARNING! Using a corded drill near spa may result in electrocution.
#2: Pre-drill 1/8” pilot holes in the two marked locations at the ends of the 5” support.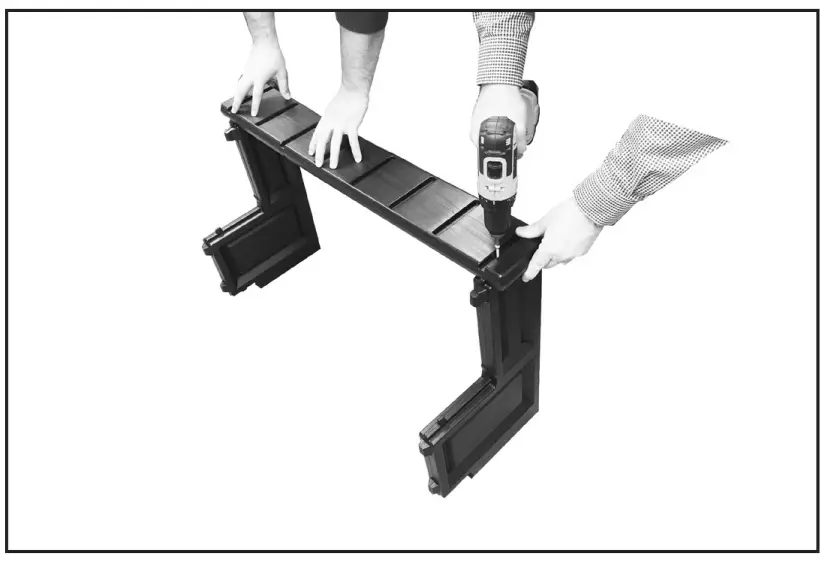
#3: With a helper, place the 5” support over the two locking tabs on the sidewalls. Tap down with mallet until seated on the locking tabs. Secure the support at both ends using 2 – #10 x 1-1/4” screws.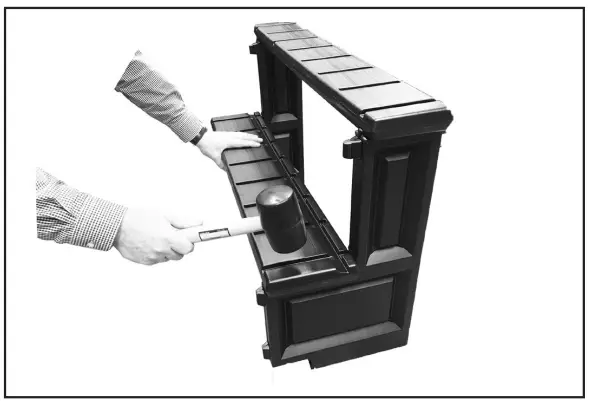
#4: Place the 7” support over the two locking tabs with the groove facing up. Tap down with a rubber mallet until seated on the locking tabs. No screws are required.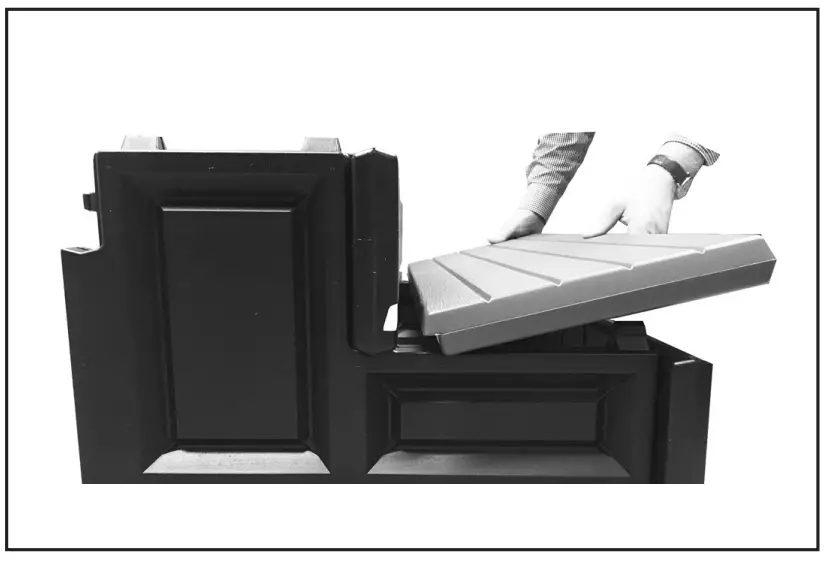
#5: To install the bottom tread, place the tapered edge into the groove on the 7” riser. Apply pressure to force the tapered edge into the groove. While holding the tread in place, have your helper tap the front of the tread with the rubber mallet. This will help seat the tread into the groove. Tap down on top of the tread until seated on the locking tabs.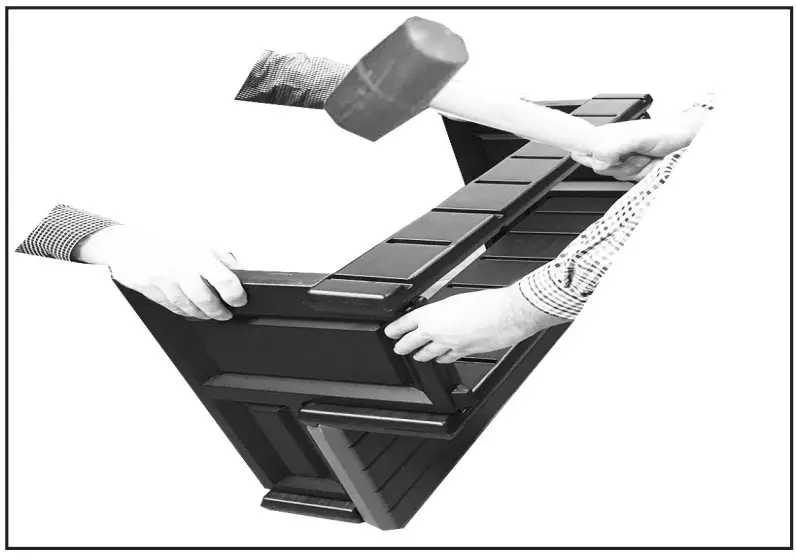
#6: Stand the step up on the front edge. While holding, have your helper place the support over the locking tabs on back of the step. Tap down until seated onto the locking tabs.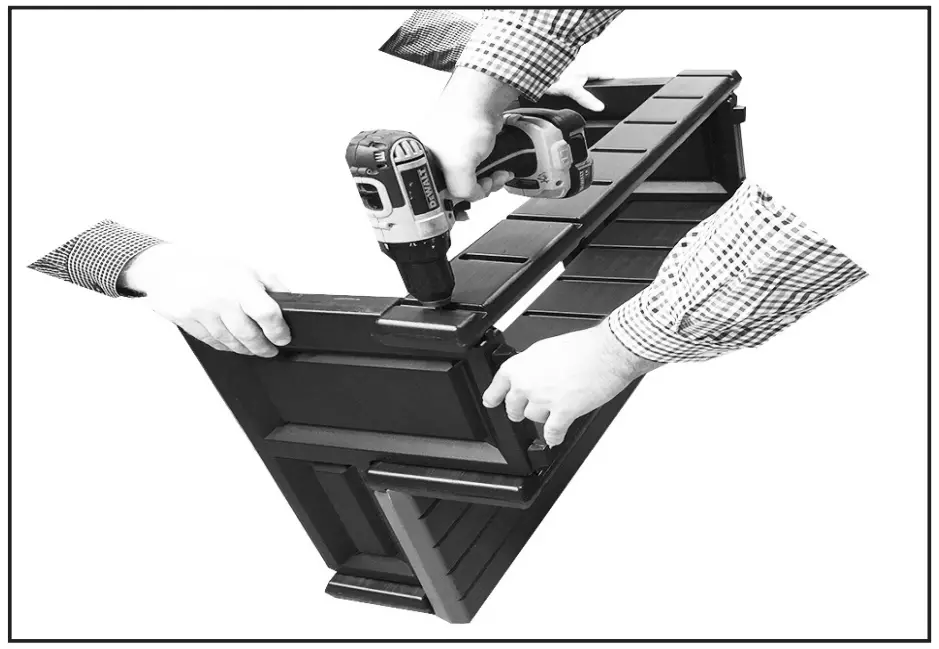
#7: Pre-drill 1/8” pilot holes in the two marked locations at the ends of the 3” support. Attach support using 2 – #10 x 1-1/4” self-tapping screws.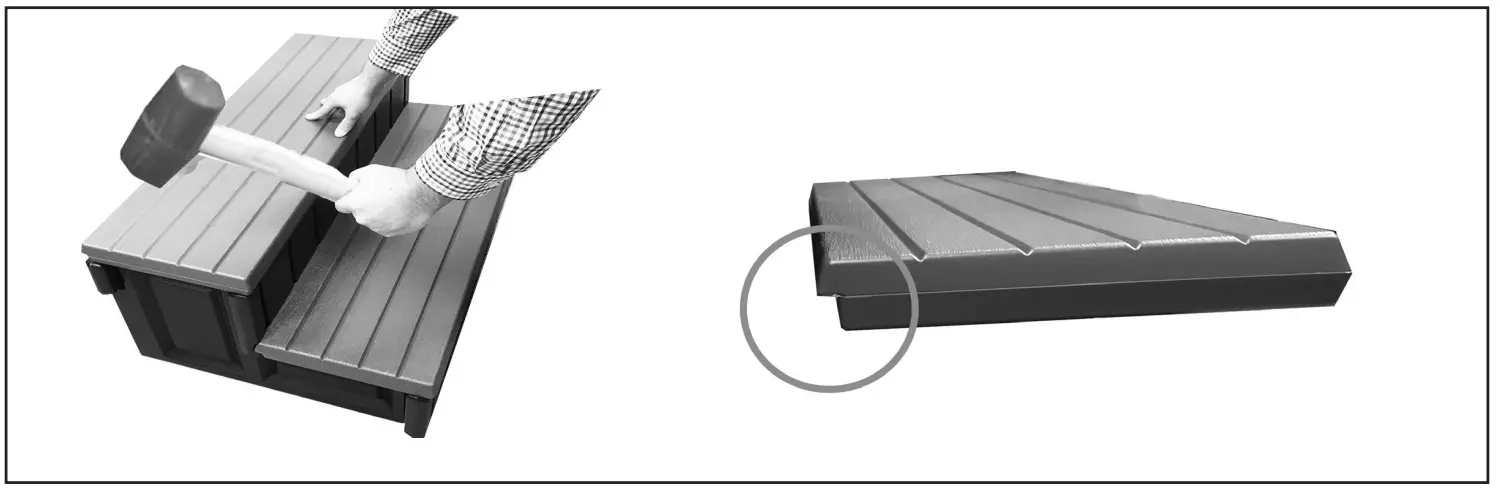
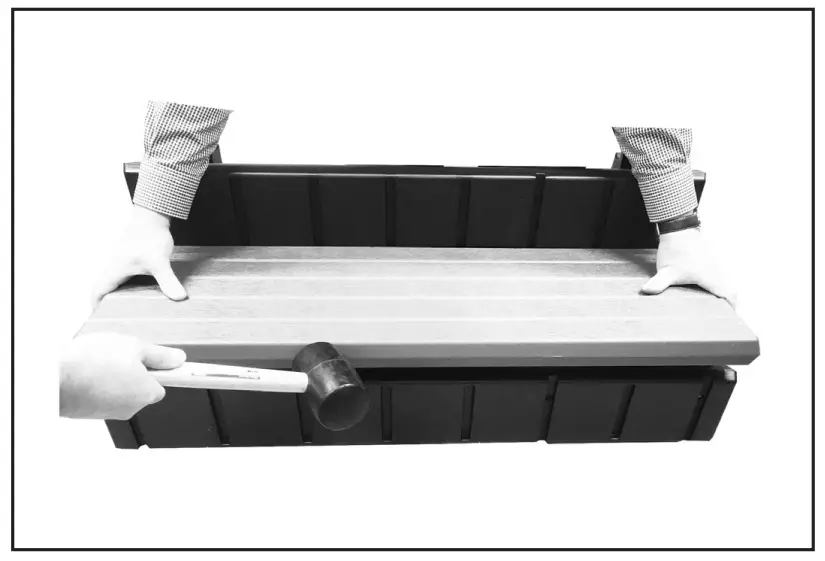
#8: Position the top tread over the locking lugs making sure the notch is facing the back of the step. To lock in place strike the top of the tread directly over the locking lugs with the rubber mallet.