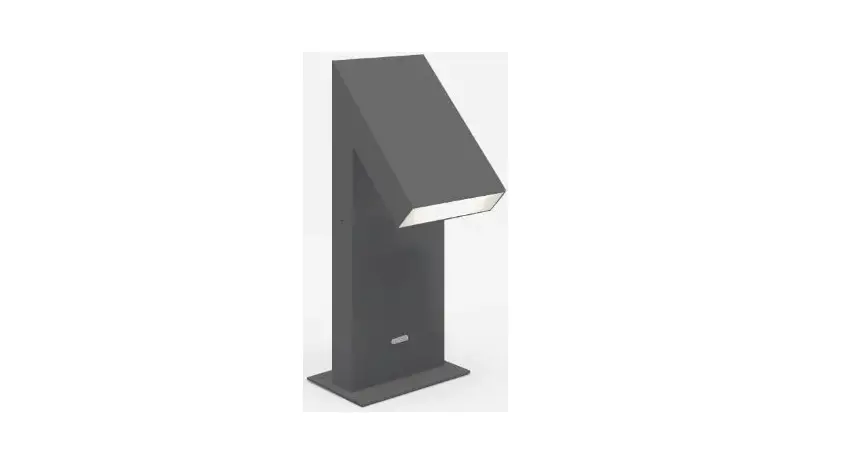
Artemide Chilone Outdoor LED Floor Lamp Installation Guide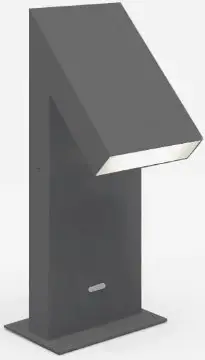
NOTE
Prior to any work on the fixture always switch off the mains.ARTEMIDE S.p.a. does not shoulder any responsibilities for products which are modified without prior authorisation.
The light fitting requires a concrete base-plate A with draining well (fig.1). Do not position the base-plate where water may stagnate. Cast concrete in the position selected and take care to leave the passage for routing the corrugated sheath B through the centre.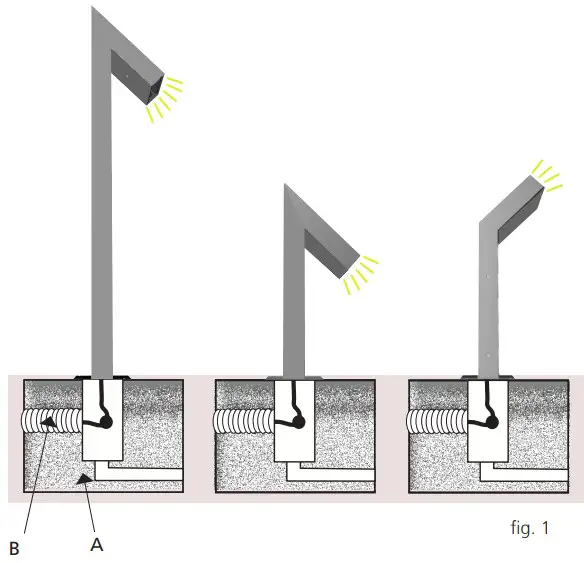
ASSEMBLY INSTRUCTIONS FLOOR 45-90-UP
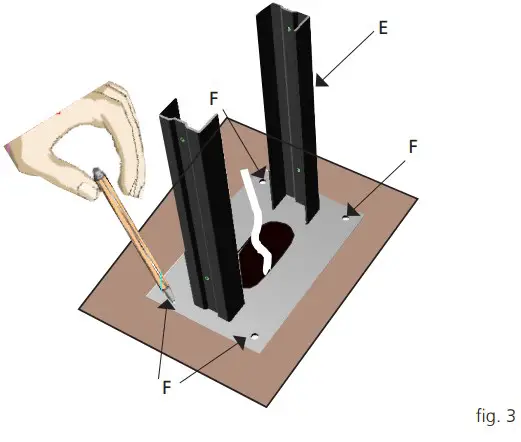
Loosen the 4 screws C. Remove column D from light fitting mounting E (fig.2). Using mounting E as a template, mark positions for holes F (fig.3).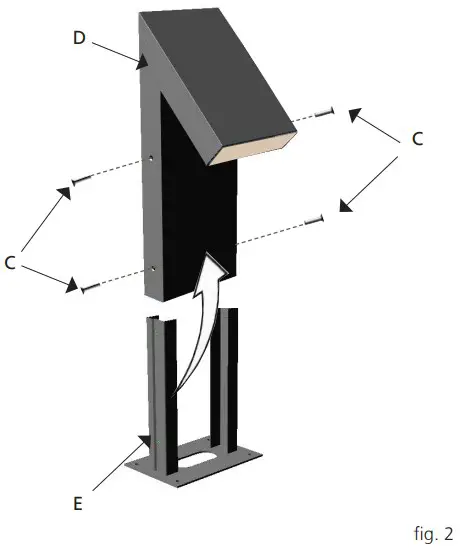
INSTRUCTIONS DE MONTAGE FLOOR 45-90-UP
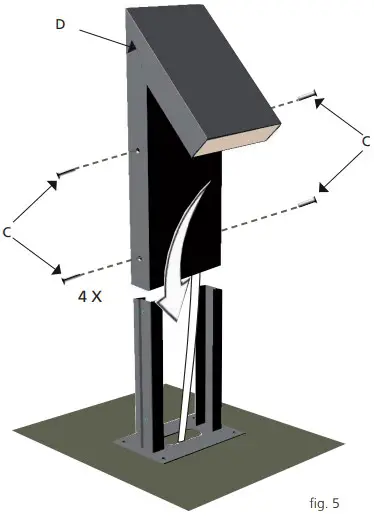
Use heavy-duty screw anchors (fi g. 4). Carry out the wiring according to the polarity white / white, black / black and green / green creating a water-resistant connection. Fit the connection inside the draining well made earlier. Put column D back into place. Screw in the 4 screws C (fi g.5).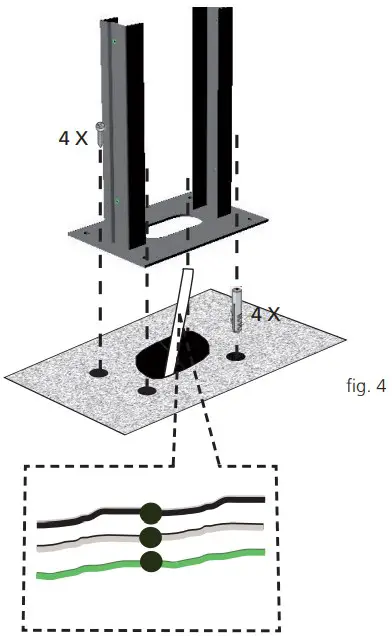
ASSEMBLY INSTRUCTION WALL
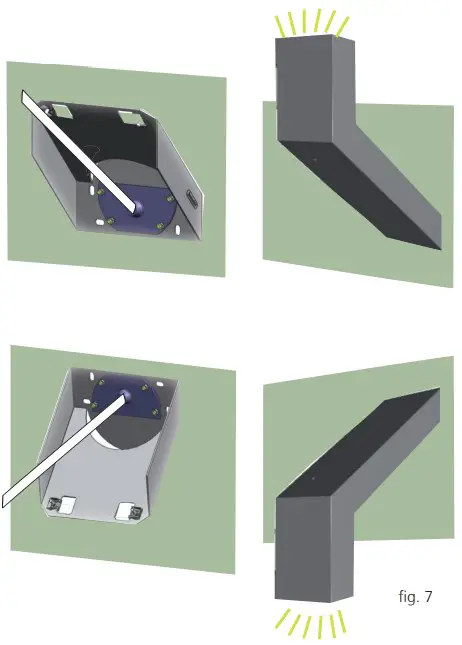
Remove the 2 screws G with the washer and take out the fi xture body H (fi g.6). Drill according to the desired orientation (fi g.7). Use the bracket I as template. For the fi xing, use dowels for heavy duty anchors. Unscrew the closing cover L from the bracket I.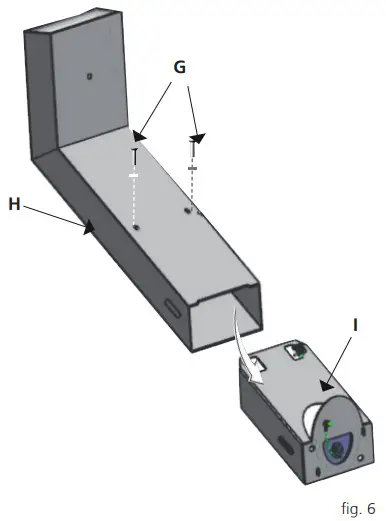
Apply silicone on the jbox edge and fasten the bracket I to the wall. Connect the black cable of the jbox to the black cable of the fi xture body, the white cable of the jbox to the white cable of the fi xture body and the green cable of the fi xture and the green cable of the bracket to the H green cable of the jbox. Fix the cover L to the bracket (fi g.8).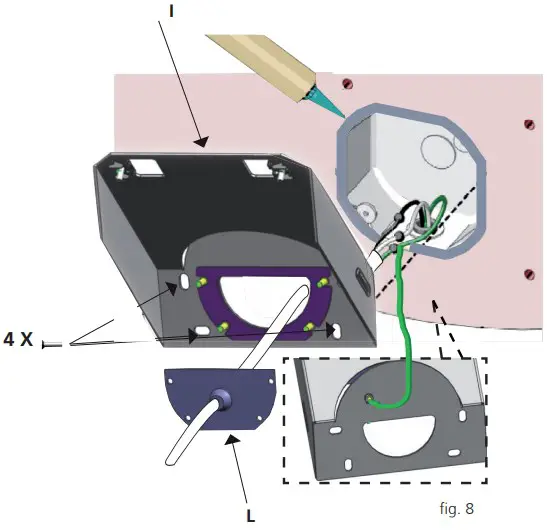
Put light fi tting body H back into place paying attention to correctly place cable inside of it. Screw the 2 screws G with washer (fi g.9)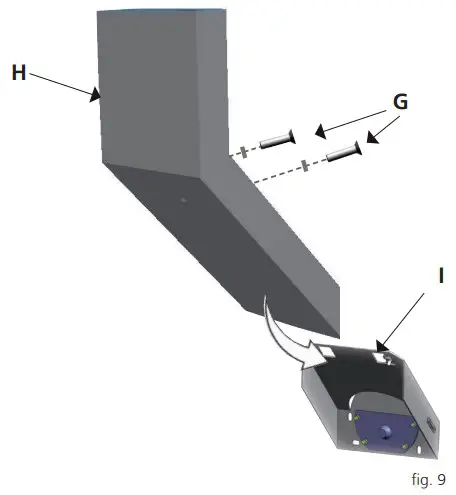
| LIGHT SOURCE | TERRA 45/ 90 | LED 8W |
| SOURCE LUMINEUSE | UP / PARETE | LED 15W |
LED REPLACEMENT
The fixture is provided with a light source having a long life. Anyway, if the led needs to be replaced, this operation must be carried out only by our specialized staff. Therefore, we recommend contacting the nearest dealer. For the addresses of Artemide dealers in the world, visit our website: www.artemide.com.
Artemide reserves the right to introduce all the technical and structural changes required for the improvement of the product.
Warning: this equipment is guaranteed only when used as indicated in these instructions. Therefore they should be kept for future reference.
Support
In case of complaint, please quote number
cod. Y503002120A
Via Bergamo, 18
I-20010 Pregnana M.se (MI) – ITALIA
t. +39 02.935.18.1
f. +39 02.935.90.254-496
[email protected]
www.artemide.com
P. Iva IT 00846890150
![]()


