![]() NT 25/1 Ap
NT 25/1 Ap
NT 35/1 Ap
![]() 59661400
59661400
02/15
No recognized text !
www.kaercher.com/register-and-win![]()
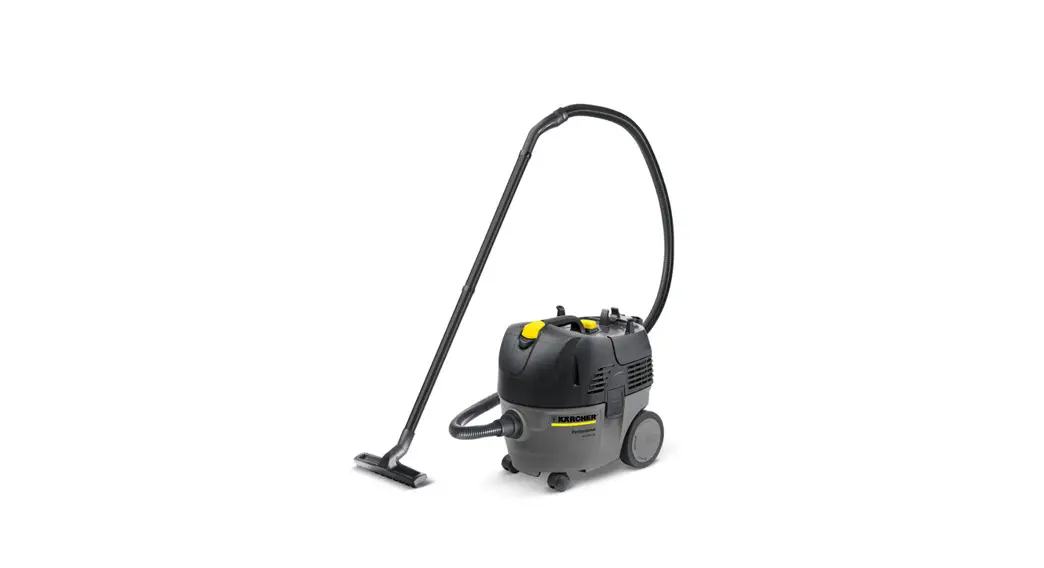
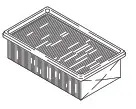
NT 25-1 Ap Wet-Dry Shop Vacuum
IMPORTANT SAFETY INSTRUCTIONS
READ ALL INSTRUCTIONS BEFORE USING THIS MACHINE
- Inform your dealer immediately if there is any shipping damage.
- Completely remove the accessories from the box.
- The suction unit is not suitable for sucking up hazardous dusts as asbestos. Please consult your Kärcher branch or your Kärcher dealer with regard to such applications.
- Only operate the vacuum from a grounded outlet. Refer to the Technical data for the necessary main fuse.
When using an electrical machine, basic precautions should always be followed, including the following: This vacuum is intended for commercial use.
- DISCONNECT VACUUM CLEANER FROM POWER CIRCUIT before removing the cover, performing maintenance work, and when not in use.
- DO NOT LEAVE the machine unattended when plugged in.
- ALWAYS CHECK THE POWER SUPPLY CORD for damage or signs of any aging before each use.
- DO NOT PULL OR CARRY VACUUM CLEANER BY CORD. Do not close door on cord or pull cord around sharp edges.
- KEEP CORD AWAY FROM HEAT AND OIL. Do not leave cord lying around after job is complete. It can become a tripping hazard.
- DO NOT RUN VACUUM OVER CORD.
- TURN SWITCH TO OFF before unplugging power supply cord.
- DO NOT UNPLUG BY PULLING CORD. To unplug, grasp plug, not cord.
- DO NOT GRASP PLUG WITH WET HANDS.
- A DAMAGED CORD OR PLUG should only be replaced by an authorized service center representative. DO NOT ATTEMPT TO REPAIR POWER CORD.
- TO AVOID SHOCK, do not expose to rain. Store indoors.
- USE ONLY AS RECOMMENDED BY THIS MANUAL. Use only with recommended attachments.
- KEEP HAIR, CLOTHING, LOOSE JEWELRY, FINGERS and all parts of the body away from openings and moving parts.
- DO NOT BLOCK OR OBSTRUCT OPENINGS. Keep openings free of lint, hair, dust, and anything that restricts air flow.
- DO NOT PICK UP ANYTHING THAT IS BURNING, smoldering, or smoking such as matches, cigarettes, or hot ashes.
- DO NOT USE TO VACUUM COMBUSTIBLE EXPLOSIVE MATERIALS, such as coal, grain, and other finely divided combustible material.
- DO NOT USE TO VACUUM COMBUSTIBLE, hazardous, toxic, or carcinogenic materials, including gasoline, diesel fuel, acetone, paint thinner, heating oils, undiluted acids and solvents, pesticide, and asbestos.
- USE RECOMMENDED FILTERS when vacuuming drywall materials.
- DO NOT USE WITHOUT FILTER and/ or dust bag in proper place.
- DO NOT ALLOW VACUUM CLEANER TO BE USED AS A TOY. Keep children away from Vacuum Cleaner.
- DO NOT LEAVE UNATTENDED while Vacuum Cleaner is running.
- DO NOT USE IF CORD, PLUG, FILTER, OR VACUUM CLEANER IS IN POOR CONDITION. If the Vacuum Cleaner has been dropped, damaged, exposed to weather, or dropped into water; have it checked by an authorized service.
- ALWAYS USE EYE PROTECTION when operating Vacuum Cleaner. 24 USE EXTRA CAUTION when operating on stairs.
- STAY ALERT! Do not use Vacuum Cleaner when you are tired or under the influence of drugs, alcohol or medication.
SAVE THESE INSTRUCTIONS
This vacuum is intended for commercial use.
SAFETY INSTRUCTIONS
Servicing of double-insulated machines
In a double-insulated machine, two systems of insulation are provided instead of grounding. No grounding means is provided on a double-insulated machine, nor should a means for grounding be added to the machine. Servicing a double-insulated machine requires extreme care and knowledge of the system, and should be done only by qualified service personnel. Replacement parts for a double-insulated machine must be identical to the parts they replace.![]() Please read and comply with these original instructions prior to the initial operation of your appliance and store them for later use or subsequent owners.
Please read and comply with these original instructions prior to the initial operation of your appliance and store them for later use or subsequent owners.
– The non-compliance of the operating and safety instructions may lead to damages of the appliance and to dangers for the operator and other persons.
– In case of transport damage inform vendor immediately
Environmental protection
 The packaging material can be recycled. Please do not throw the packaging material into household waste; please send it for recycling.
![]() Old appliances contain valuable materials that can be recycled; these should be sent for recycling. Batteries, oil, and similar substances must not enter the environment. Please dispose of your old appliances using appropriate collection systems.
Old appliances contain valuable materials that can be recycled; these should be sent for recycling. Batteries, oil, and similar substances must not enter the environment. Please dispose of your old appliances using appropriate collection systems.
Notes about the ingredients (REACH)
You will find current information about the ingredients at:
www.kaercher.com/REACH
Danger or hazard levels
![]() DANGER
DANGER
Immediate danger that can cause severe injury or even death.![]() WARNING
WARNING
Possible hazardous situation that could lead to severe injury or even death.![]() CAUTION
CAUTION
Pointer to a possibly dangerous situation, which can lead to minor injuries.
ATTENTION
Pointer to a possibly dangerous situation, which can lead to property damage.
Proper use
![]() WARNING
WARNING
The appliance is not suitable for vacuuming dust which endangers health.
– The machine is meant for dry and wet cleaning of floors and walls.
– This appliance is suited for the commercial use, e.g. in hotels, schools, hospitals, factories, shops, offices, and rental companies.
Device elements
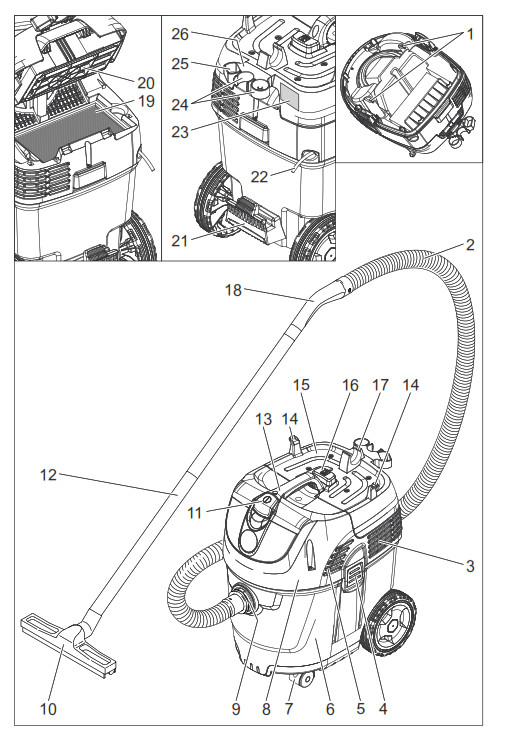
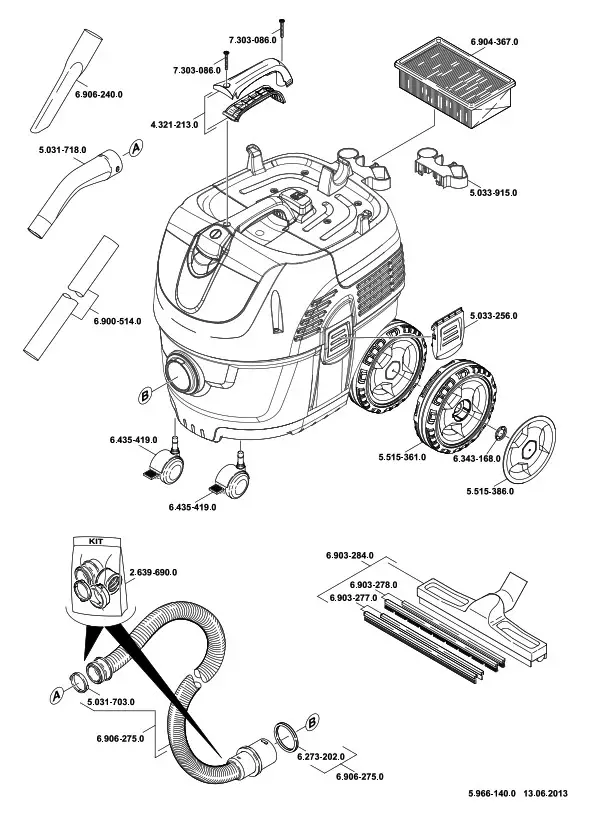
| 1 Electrodes 2 Suction hose 3 Air outlet, working air 4 Suction head lock 5 Air inlet, motor cooling air 6 Dirt receptacle 7 Steering roller 8 Suction head 9 Suction support 10 Floor nozzle 11 Main switch 12 Suction tube 13 Carrying handle | 14 Cable hook 15 Filter cover 16 Button for filter shake off system 17 Hose switch 18 Bender 19 Flat fold filter 20 Filter dedusting 21 Floor nozzle holder 22 Power cord 23 Nameplate 24 Holder for suction pipes 25 Holder for crevice nozzle 26 Holder for accessories |
Start up
ATTENTION
The flat pleated filter must always be in place while vacuuming.
Dry vacuum cleaning
– To vacuum up fine dust, a fleece filter bag or a membrane filter (special accessory) can additionally be used.
Install fleece filter bag
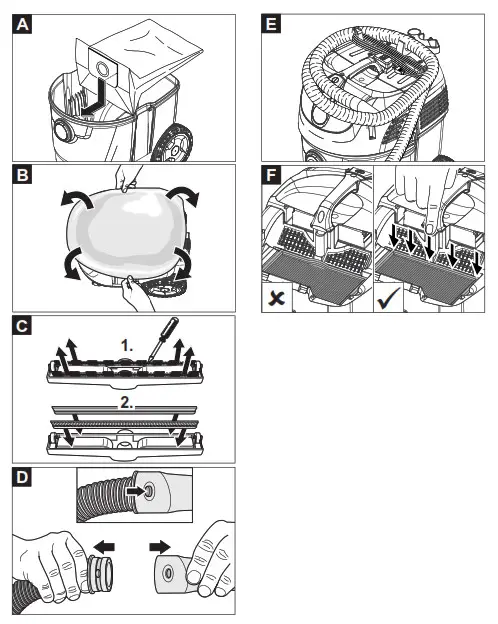
Illustration A
→ Release and remove the suction head.
→ Insert the fleece filter bag.
→ Insert and lock the suction head.
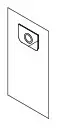
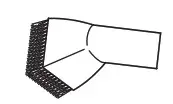
Install membrane filter
Illustration B
→ Release and remove the suction head.
→ Pull the membrane filter (option) over the container edge.
→ Insert and lock the suction head.
Changeover from wet to dry vacuum cleaning
ATTENTION
Please note the following when switching from wet to dry vacuum cleaning:
If you vacuum dry dust while the filter element is still wet the filter will become obstructed and may be damaged beyond repair.
→ Dry the wet filter properly before use or replace it with a dry one.
→ Change the filter, if required, according to instructions under the section “Maintenance and Care”.
Note: For permanent wet vacuum cleaning it is advisable to use a PES flat pleated filter (see filter systems).
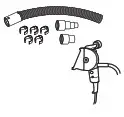
Wet vacuum cleaning
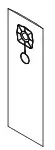
Inserting the rubber lips
Illustration C
→ Remove the brush strips.
→ Install the rubber lips.
Note: The structured side of the rubber lips must point outwards.
Removing the fleece filter bag/ membrane filter
– If the appliance is used to vacuum up wet dirt, the fleece filter bag or the membrane filter (special accessory) must always be removed.
– It is recommended to use a special filter bag (wet) (see Filter systems).
General
– If wet dirt is vacuumed with the upholstery or crevice nozzle, or if mostly water is suctioned from a container it is recommended not to activate the “manual filter dedusting” function.
– If the maximum liquid level is reached the appliance will turn off automatically.
– In case of non-conductive liquids (such as emulsion drilling fluids, oils, and greases) the appliance is not turned off when the container is full. The filling level must be continuously monitored and the container must be emptied in time.
– After the wet vacuuming: Clean the flat folded filter with the filter cleaning. Clean the electrodes with a brush. Clean the container with a damp rag and dry it.
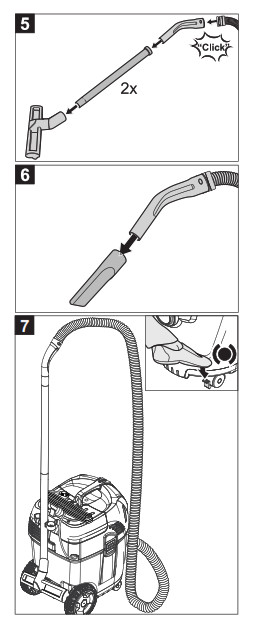
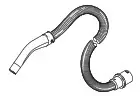
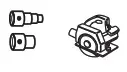
Clip connection
Illustration
The suction hose is equipped with a clip system. All C-35/C-DN-35 accessories can be connected.
Operation
Turning on the Appliance
→ Plug in the mains plug.
→ Switch on the appliance at the main switch.
Semi-automatic filter dedusting
Note: A filter dedusting every 5 to 10 minutes will increase the life of the flat folded filter.
Note: The semi-automatic filter dedusting function can only be switched on when the appliance is switched on.
→ Press the semi-automatic filter dedusting key five times. The flat folded filter is automatically cleaned through an air jet (pulsating sound).
Turn off the appliance
→ Press the semi-automatic filter dedusting key five times.
→ Switch off the appliance at the main switch.
→ Pull out the mains plug.
After each operation
→ Empty the container.
→ Vacuum and wipe the appliance inside and outside with a damp cloth.
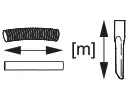
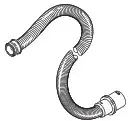
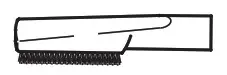
Storing the Appliance
Illustration E
→ Store the suction hose and the mains cable as shown in the illustration.
→ Place the appliance in a dry room and secure it from unauthorized use.
Transport
![]() CAUTION
CAUTION
Risk of injury and damage! Observe the weight of the appliance when you transport it.
→ Remove the suction pipe with the floor nozzle from the holder. Hold the appliance at the handle and at the suction pipe to transport it.
→ When transporting in vehicles, secure the appliance according to the guidelines from slipping and tipping over.
Storage
![]() CAUTION
CAUTION
Risk of injury and damage! Note the weight of the appliance in case of storage.
This appliance must only be stored in interior rooms.
Care and maintenance
![]() DANGER
DANGER
First pull out the plug from the mains before carrying out any tasks on the machine.
Exchanging the flat pleated filter
→ Open filter door.
→ Replace the flat pleated filter.
→ Close the filter door, it must lock into place.
Cleaning the electrodes
→ Release and remove the suction head.
→ Clean the electrodes with a brush.
→ Insert and lock the suction head.
Troubleshooting
![]() DANGER
DANGER
First pull out the plug from the mains before carrying out any tasks on the machine.
Suction turbine does not run
→ Check the receptacle and the fuse of the power supply.
→ Check the power cable, the power plug and electrodes of the device.
→ Turn on the appliance.
Suction turbine turns off
→ Empty the container.
Suction turbine does not start again after the container has been emptied
→ Turn off the appliance and wait for 5 seconds, turn it on again after 5 seconds.
→ Clean the electrodes as well as the space between the electrodes with a brush.
Suction capacity decreases
→ Remove blockages in the suction nozzle, suction tube, suction hose, or flat pleated filter.
→ Replace fleece filter bag.
→ Press the semi-automatic filter dedusting key five times with the appliance switched on.
→ Ensure the filter cover properly locks into place.
→ Clean or replace the membrane filter (special accessory) under running water.
→ Replace the flat pleated filter.
Dust comes out while vacuuming
Illustration F
→ Check/correct the correct positioning of the flat fold filter.
→ Replace the flat pleated filter.
Automatic shut-off (wet vacuum cleaning) does not react
→ Clean the electrodes as well as the space between the electrodes with a brush.
→ Continuously check the filling level in case of non-conductive liquid.
Semi-automatic filter dedusting does not work
→ Suction hose is not connected.
Semi-automatic filter dedusting does not shut off
→ Inform Customer Service
Semi-automatic filter dedusting cannot be switched on
→ Inform Customer Service Customer Service
If malfunction can not be fixed, the device must be checked by customer service.
Warranty
The warranty terms published by the relevant sales company are applicable in each country. We will repair potential failures of your appliance within the warranty period free of charge, provided that such failure is caused by faulty material or defects in manufacturing. In the event of a warranty claim please contact your dealer or the nearest authorized Customer Service centre. Please submit the proof of purchase.
Accessories and Spare Parts
– Only use accessories and spare parts which have been approved by the manufacturer. The exclusive use of original accessories and original spare parts ensures that the appliance can be operated safely and trouble free.
– At the end of the operating instructions you will find a selected list of spare parts that are often required.
– For additional information about spare parts, please go to the Service section at www.kaercher.com.
Technical specifications
| NT 25/1 Ap | NT 35/1 Ap | ||
| Mains voltage | V | 120 | 120 |
| Frequency | Hz | 1— 60 | 1— 60 |
| Rated current | A | 9 | 9 |
| Container capacity | gal (I) | 6.6 (25) | 9.2 (35) |
| Filling quantity (liquid) | gal (I) | 3.4 (13) | 6.9 (26) |
| Air volume (max.) | CFM (Ifs) | 123 (58) | 123 (58) |
| Negative pressure (max.) | mm (kPa) | 2250 (22.0) | 2250 (22.0) |
| Type of protection | — | IPX4 | IPX4 |
| Protective class | II | II | |
| Suction hose connection (C-DN/C- ID) | in (mm) | 1.38 (35) | 1.38 (35) |
| Length x width x height | in (mm) | 20.0 x 14.5 x 19.0 (510 x 370 x 480) | 20.0 x 14.5 x 22.5 (510 x 370 x 575) |
| Typical operating weight | lbs (kg) | 24.3 (11.0) | 25.4 (11.5) |
| Max. ambient temperature | °F (°C) | 104 (+40) | 104 (+40) |
| Values determined to EN 60335-2-69 | |||
| Sound pressure level LpA | dB(A) | 70 | 70 |
| Uncertainty KpA | dB(A) | 1 | 1 |
| Power cord | SJTW-A 2/16 AWG | |
| Part no.: | Part no.: | |
| 6.648-370.0 | 25 ft (7.5 m) | |
Filter Systems
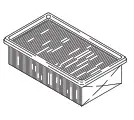 |  |  |  |  | |
| Flat pleated filter * | Flat pleated filter (PES)* | Fleece filter bag triple layered* | Diaphragm filter | Special filter bag, wet | |
| Order No. NT 25/1 | 6.904-367 | 6.904-360 | 6.907-478 | 6.904-212 | 6.904-171 |
| Order No. NT 35/1 | 6.904-367 | 6.904-360 | 6.907-479 | 6.904-212 | 6.904-171 |
| Quantity | 1 | 1 | 5 | 1 | 5 |
| Normal dust | X | X | X | ||
| Fine dust | X | X | X | ||
| Abrasive dust | X | X | X | X | |
| Liquids, wet dirt | X | X |
* Dust class M, Retention > 99,9 %
Accessories
 |  |  |  | |
 | 4.440-626 4.440-653 | CDN 35 CDN 35 EL | 2,5 2,5 | |
 | 6.906-208 6.906-241 6.906-242 6.906-321 6.906-279 6.906-546 6.906-714 | C 35 C 35 C 35 C 40 C 40 C 40 EL C 40 Oil | 2,5 4,0 10,0 4,0 10,0 4,0 4,0 | |
 | 6.906-237 6.906-277 6.906-344 | C 35 C 35 EL C 40 extension, | 2,5 2,5 2,5 | |
 | 2.639-483 | DN 35 | 0,45 | |
 | 2.639-484 2.639-485 | DN 35/27 DN 35/27 EL | 3,5 3,5 | |
 | 5.453-042 5.453-052 5.407-112 5.407-111 5.407-113 | C 35 EL C 35 EL C 35 – DN 35 C 40 – DN 40 C 40 – C 35 | ||
 | 5.031-718 5.031-939 5.031-904 5.032-427 | DN 35 DN 35 EL C/DN 40 C/DN 40 EL | ||
 | 6.900-514 6.900-275 | DN 35 M DN 40 M | 0,5 0,5 | |
 | 6.906-513 6.906-384 6.906-554 6.903-018 6.906-383 | DN 35 DN 35 M DN 40 DN 40 M DN 40 M | 360 370 360 370 450 | |
| 6.906-511 | DN 35 | Z270 | ||
| 6.900-922 6.903-033 | DN 35 M DN 40 | 0,5 0,29 | ||
 | 6.902-104 6.902-105 | DN 35 DN 40 | 0,2 0,2 | |
 | 6.903-862 | DN 35 | ||
 | 6.900-425 6.903-863 | DN 35 hard DN 35 soft | 0,25 0,25 |
EL = electrical conductive,
C = Clip connection,
DN = Cone connection,
M = metal,
Oil = oil resistant,
NT 25/1 Ap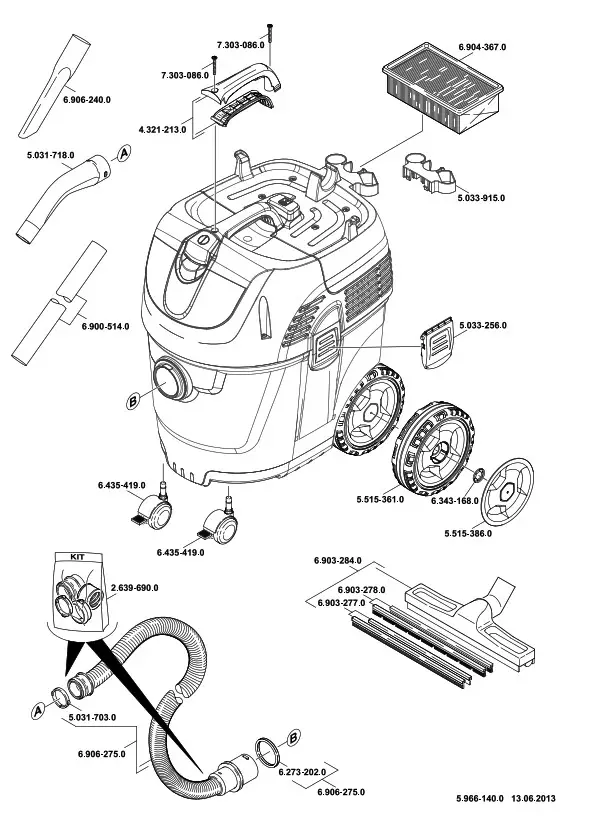
NT 35/1 Ap
![]() http://www.kaercher.com/dealersearch
http://www.kaercher.com/dealersearch 5.033-915.0
This manual was downloaded from wet-dry-vac.com
The most comprehensive source of information about wet/dry shop vacuums on the Internet!  Wet-dry-vac.com allows you to learn about how to purchase a wet/dry vac, compare and review detailed specifications on hundreds of models, and find compatible filters.
You can also view manuals, parts lists and brochures for hundreds of models. Plus, you can find the best prices for vacuums and filters, and purchase online right from the site.
Wet-Dry-Vac.com Site Copyright ©2023 Christopher Komuves
![]()


