Festival Depot PF18200 3-Piece Wicker Outdoor Day Bed Installation Guide
Safety and Care Advice
- Please check and make sure you have all the parts indicated before you start with the assembly.
- Assembly work should be performed on a soft surface to prevent the finish to be scratched during assembly.
- Easy wipe clean with a dry or slightly damp cloth. Do NOT use chemical products.
- Please make sure there’s no sharp objects (e.g. garden tools, knives and etc.) careful when sitting on the furniture for your own safety. Such items might tear down fabrics or pierce through resin weave, causing permanent damages.
- We recommend furniture to be covered or put away when not in use, in order to prolong product life.
Packing List
- A 1pc

- B 1pc

- C 1pc

- D 2pcs

- E 1pc

F 1pc
- Ga 1pc

- Gb 1pc

- Ha 1pc

- Hb 1pc

- I 1pc

- J 3pcs

- Ka 1pc

- Kb 1pc

- La 1pc
- Lb 1pc
- Ma 1pc

- Mb 1pc

- N 2pcs

- O 1pc
- P 1pc

- Q 18+5pcs

- R 12+3pcs

- S 8+2pcs
- T 3+1pcs

- U 44+6pcs

- V 3+1pcs

- W 10+3pcs

- X 2pcs

- Y 1pc

- Z 2pcs

WARNING:Cushions must be put away in rainy and windy days in case they are diminished or blown away.


ASSEMBLY TIPS: Please use the hardware and accessories included in the set. DO NOT use other electrical or manual tools. In order to facilitate the assembly and make your final product firmand stable, please tighten by a few rounds each screw one by one. After all screws are connected, then you start to tighten each screw to the end.
DO NOT tighten any screw to the end before you have connected all screws. The assembly requires minimal level of DIY skills if you follow the instructions carefully. In case you encounter any difficulty or have any questions, feel free to contact the store or manufacturer.
ASSEMBLY INSTRUCTIONS
ASSEMBLY TIPS:
Please use the hardware and accessories included in the set. DO NOT use other electrical or manual tools. In order to facilitate the assembly and make your final product firm and stable, please tighten by a few rounds each screw one by one. After all screws are connected, then you start to tighten each screw to the end.DO NOT tighten any screw to the end before you have connected all screws. The assembly requires minimal level of DIY skills if you follow the instructions carefully. In case you encounter any difficulty or have any questions, feel free to contact the store or manufacturer.
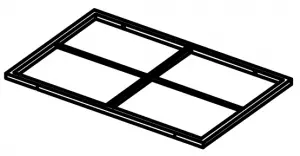
| A | 1 | |
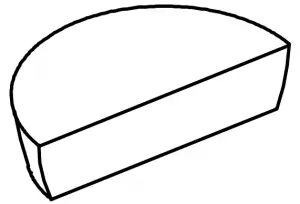
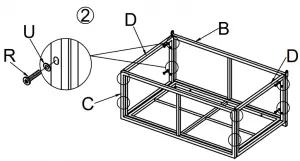
| B |  | 1 |
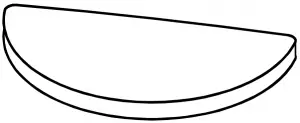
| C | 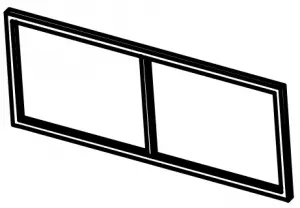 | 1 |
| D |  | 2 |
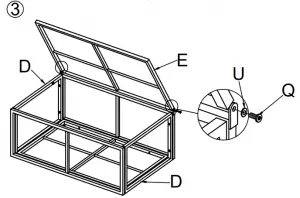
| E | 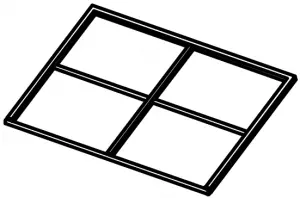 | 1 |
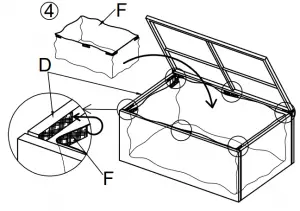
| F |  | 1 |
| Q |
| 2 |
| R |
| 12 |
| U |
| 14 |
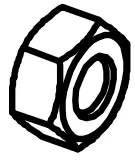
| X |  | 1 |
 Ø13*Ø6.5*1.0
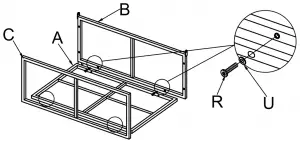
ASSEMBLY TIPS:
Please use the hardware and accessories included in the set. DO NOT use other electrical or manual tools. In order to facilitate the assembly and make your final product firm and stable, please tighten by a few rounds each screw one by one. After all screws are connected, then you start to tighten each screw to the end.DO NOT tighten any screw to the end before you have connected all screws. The assembly requires minimal level of DIY skills if you follow the instructions carefully. In case you encounter any difficulty or have any questions ,feel free to contact the store or manufacturer.
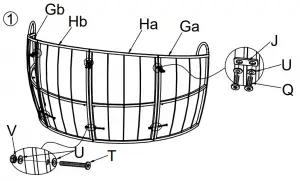
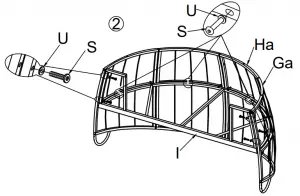
| Ga |  | 1 |
| Gb |  | 1 |
| Ha | 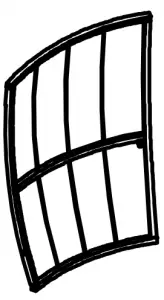 | 1 |
| Hb | 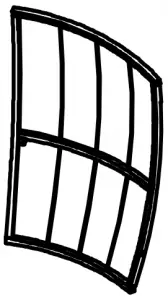 | 1 |
| I | 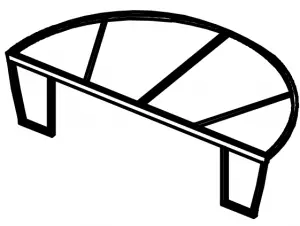 | 1 |
| J | 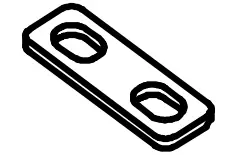 | 3 |
| Q |
| 6 |
| S |
| 8 |
| T |
| 3 |
| U |
| 20 |
| V |
| 3 |
| X | | 1 |
| Z |  | 1 |
ASSEMBLY TIPS:
Please use the hardware and accessories included in the set. DO NOT use other electrical or manual tools. In order to facilitate the assembly and make your final product firm and stable, please tighten by a few rounds each screw one by one. After all screws are connected, then you start to tighten each screw to the end.DO NOT tighten any screw to the end before you have connected all screws. The assembly requires minimal level of DIY skills if you follow the instructions carefully. In case you encounter any difficulty or have any questions, feel free to contact the store or manufacturer.
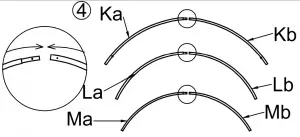
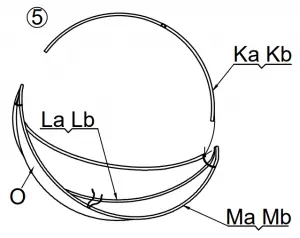
| Ka | 1 | |
| Kb | 1 | |
| La | 1 | |
| Lb | 1 | |
| Ma | 1 | |
| Mb | 1 | |
| N |  | 2 |
| O | 1 | |
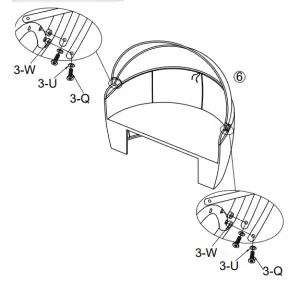
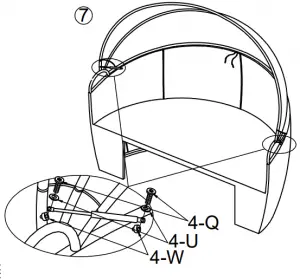
| Q |
| 10 |
| U |
| 10 |
| W |
| 10 |
| X | | 1 |