
BLU M8L Smart Tablet
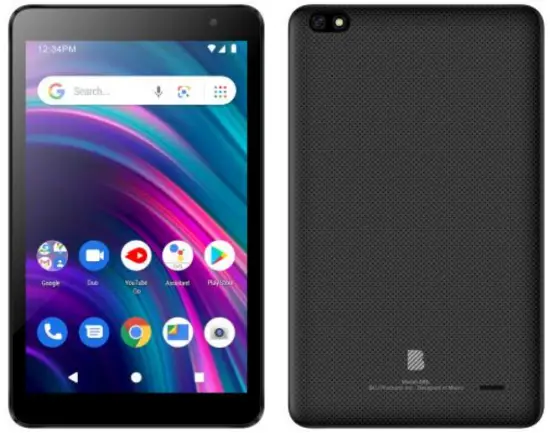
ABOUT YOUR DEVICE
Transportation Safety
Observe all transportation laws and regulations.
PLEASE DRIVE RESPONSIBLY – DO NOT TEXT & DRIVE
Hospital Safety
Follow hospital rules and limitations and turn off your device when near medical instruments.
Airport Safety
Remember to follow all airport and flight safety regulations.
Water Hazard
Your device is not waterproof. Keep your device away from water or liquid to avoid damage.
Emergency Calls
Make sure your mobile device is switched on and in a service area. On home screen, tap the phone key and dial the emergency number.
Battery Usage
For better performance and longer battery life, it is recommended that you charge the battery fully before using the device for the first time and that you initially complete two to three charge cycles.
IMEI Information
To check your IMEI, press *#06#
KEY FUNCTIONS
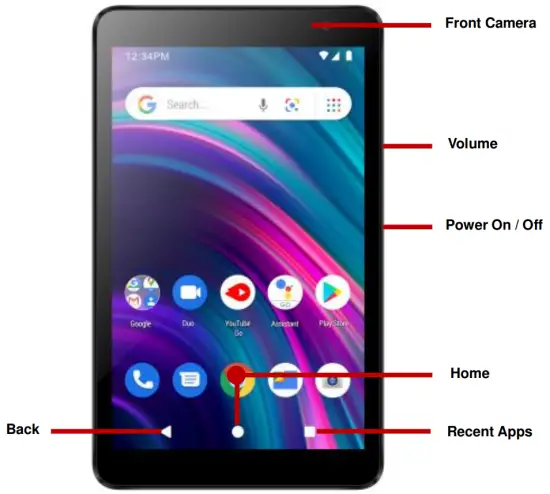
| Power On / Off | Used to power on/off the device and to lock the screen. » Long press the power button to power on » While the device is powered on, long press to access the power off menu or click to lock the screen |
| Volume | Adjusts the ringer volume, call volume, and multimedia volume |
| Home | The home button pauses any current action and returns to the home screen. |
| Recent Apps | Opens a list of recently opened applications that allows you to switch conveniently between them. This option can also close any open applications by swiping to the side. |
| Back | Returns to the previous screen; Closes the keyboard, any open program, or any menu option. |
| USB Port | Charges the device and transfers data such as documents, music, and video between your device and a PC. |
| Headset Port | Connect earphones to this port for hands-free capabilities. You may also to listen to music or FM radio |
| Front Camera | A high-resolution front camera to take pictures and video. This option is ideal for self-portraits |
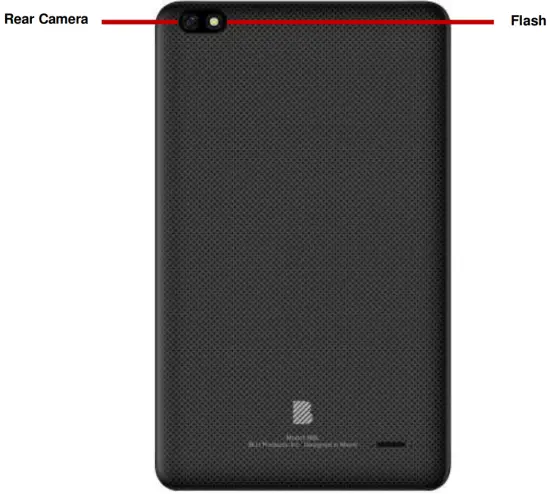
| Rear Camera | A high-resolution rear camera to take pictures and video. |
| Flash | Provides light for pictures in low-light conditions. It also may be used as a flashlight. |
INTRODUCTION
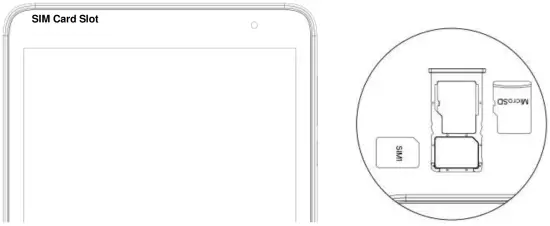
Installation of the SIM Card
Warning: Please keep the SIM card out of the reach of children. The SIM card and its contact are easily damaged due to scratching or bending. Please use caution when carrying, installing, or taking out the SIM card. Note: Please contact your service provider directly to obtain your SIM card.
To insert SIM card:
- Remove the SIM card tray (with tool). Insert the SIM card.
- Insert the SD card (For additional storage capacity)

- Replace the SIM card tray and power on the phone.
DEVICE CONFIGURATION
When you initially power on your device, there will be a series of steps to set up basic features.
INSERT SIM
Insert your SIM card so the device can register to the network.
SELECT LANGUAGE
While on the Welcome screen, please scroll to select your language. In this step, you also have the option to adjust Vision Settings such as magnification, font, and display size. You have the ability to place an Emergency Call.
CONNECT TO WI-FI
This step allows the device to connect to the internet. Click on the desired Wi-Fi network that the device that will be connected. Please note that any unsecured Wi-Fi networks can be connected to without credentials and any secured Wi-Fi networks require a password for credentials prior to connection. It is recommended that you connect to a Wi-Fi network to check for software updates prior to startup to avoid any data overages.
COPY APPS & DATA
This step allows you to select transfer options such as applications, pictures, music and more from a previous device. You may also setup as new if you choose not to from a previous device.
ADD YOUR ACCOUNT
Sign in to your GoogleTM account in order to keep accounts streamlined with Google services. Your account will be used for Google programs such as Google PlayTM, Google Drive, Google + and Google Wallet. If you do not have a Google account, click to create a new account. If the device is not recognized by your Google account, you will have to complete a security verification.
GOOGLE SERVICES
Click to add Google services that include Backup and Restore, Location Services, Install Updates and Apps, and Google Now.
DEVICE PROTECTION
Click to setup device protection such as a PIN or Password. This option can be done at a later time.
FINALIZE SETUP
The last step allows you to setup Google Assistant and Google Pay. You may also add another email address, control what information is visible through the devices lock screen, and lets you also review any additional apps. You may skip this step and setup later.
Google, Android, Google Play, YouTube, and other marks are trademarks of Google LLC.


