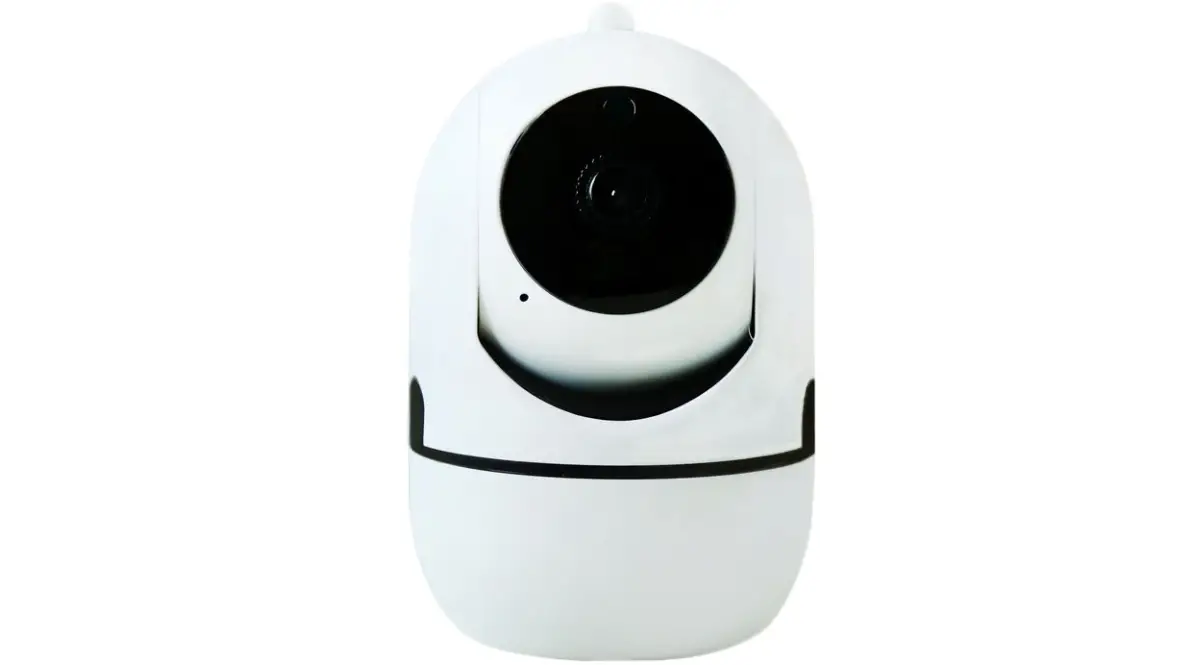
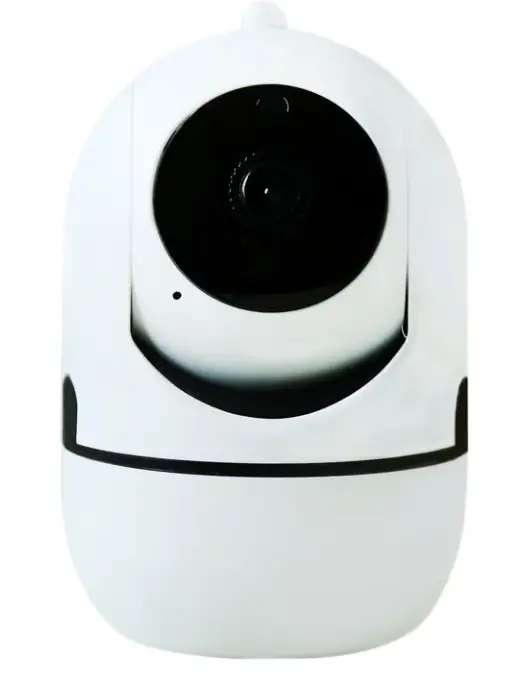
 YCC365 Plus Camera Instructions Manual
YCC365 Plus Camera Instructions Manual
How To Download APP
- When you use this app at the first time, you need to use your email to register an account, click”Sign Up”and set a password according this procedure,or choose Long in with mobile phone mumber.
- If you forget your password, you can reset your password, just click “Forgot password” on the login page.
- Password should be at least 6 characters and not longer than 26 characters,It should be a combination of letters and numbers.

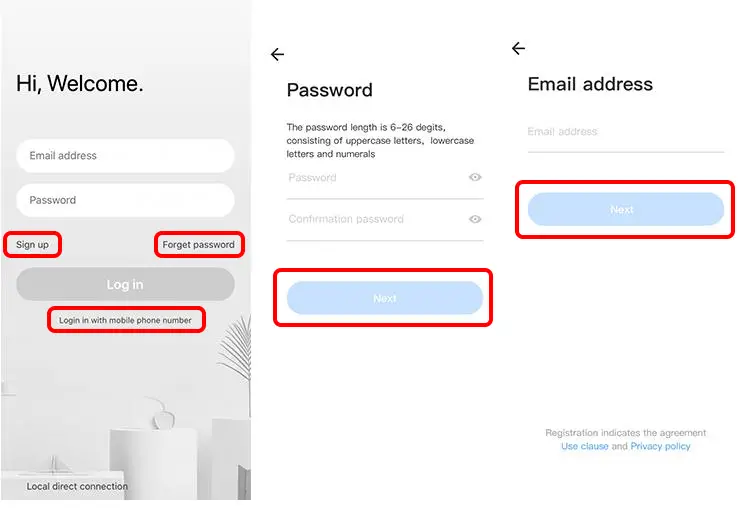
Only support mobile phone number registration in some regions. Please use email to register in other areas.
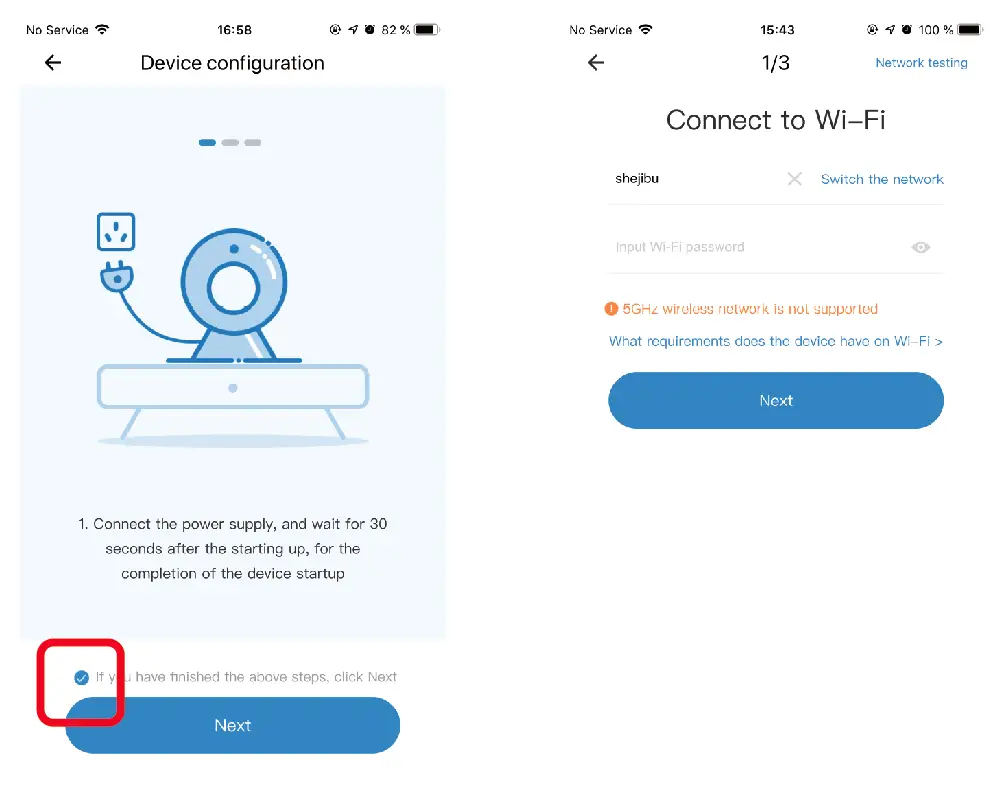
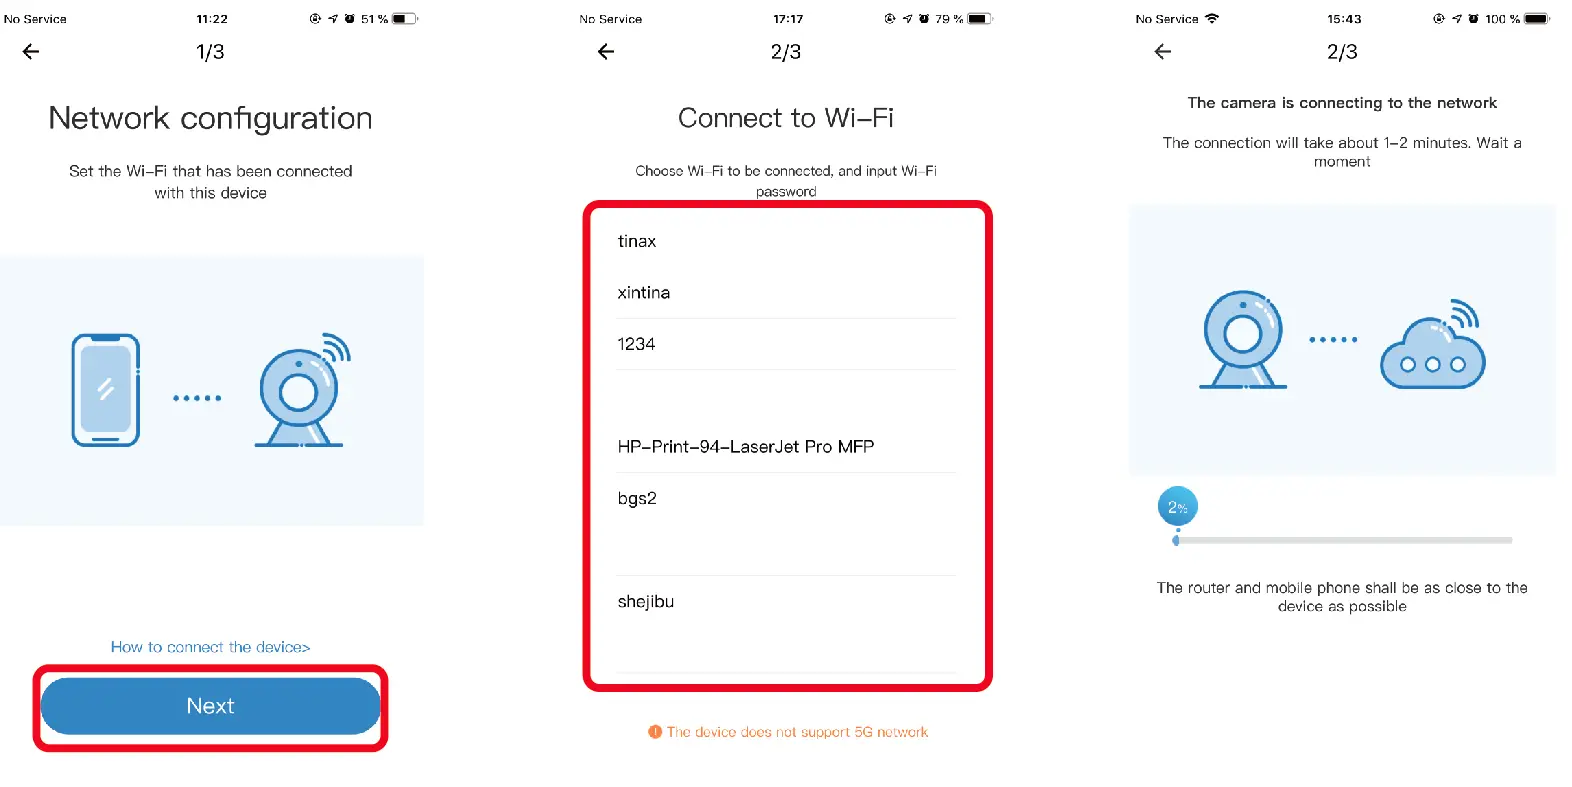
- Please make your phone connect to the Wi-Fi.
- Select your own 2.4GWi-Fi and enter your password.(5G network is not supported).
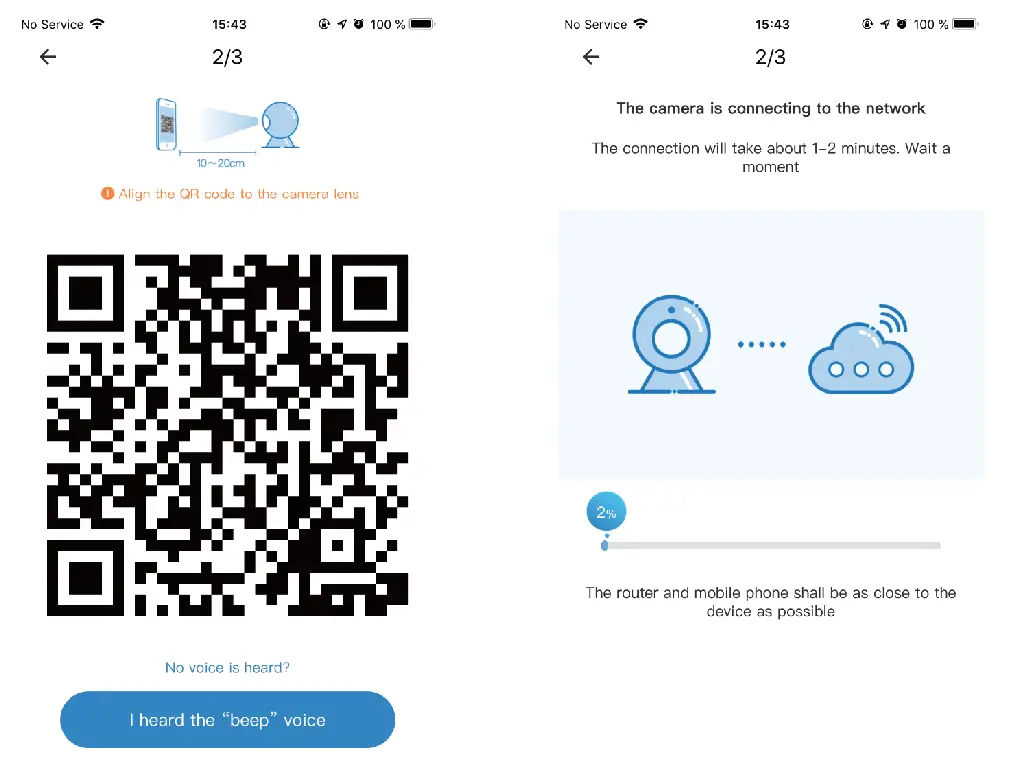
- Scan the camera lens toward the QR code of the phone,(Align the QR code with camera lens at a distance of 10-20cm)Hear a voice prompt,Click”When you hear a beep or a green linght”after hearing the beep, Keep the camera cas close as possible to the router, The connection process takes about 1-2minutes,after you will hear welcome to use camera.

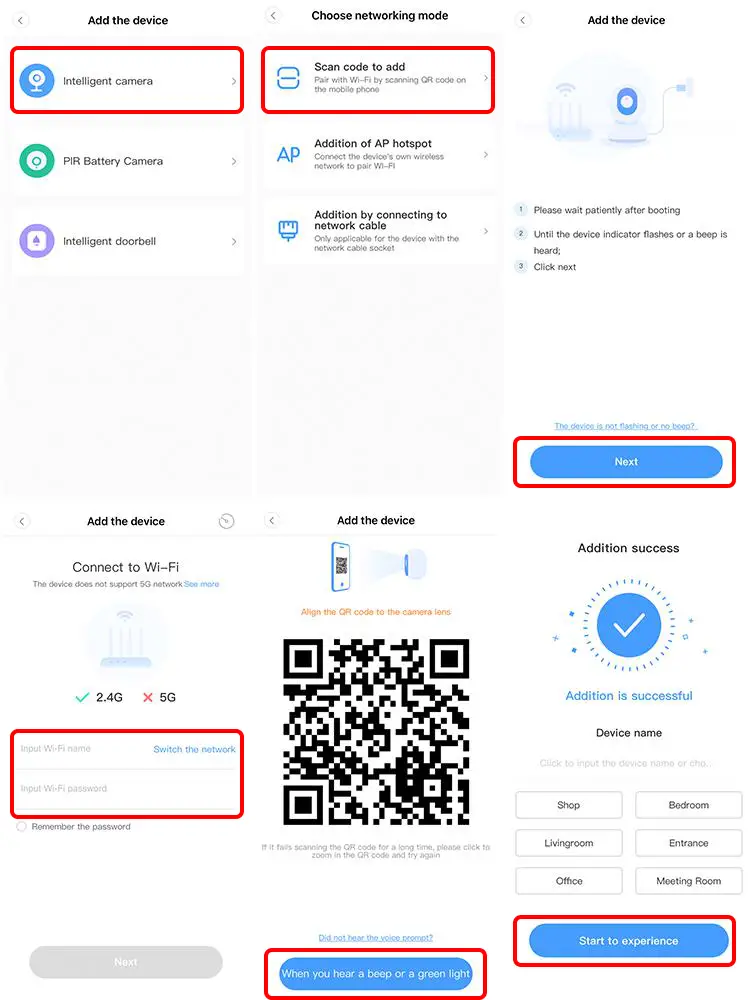
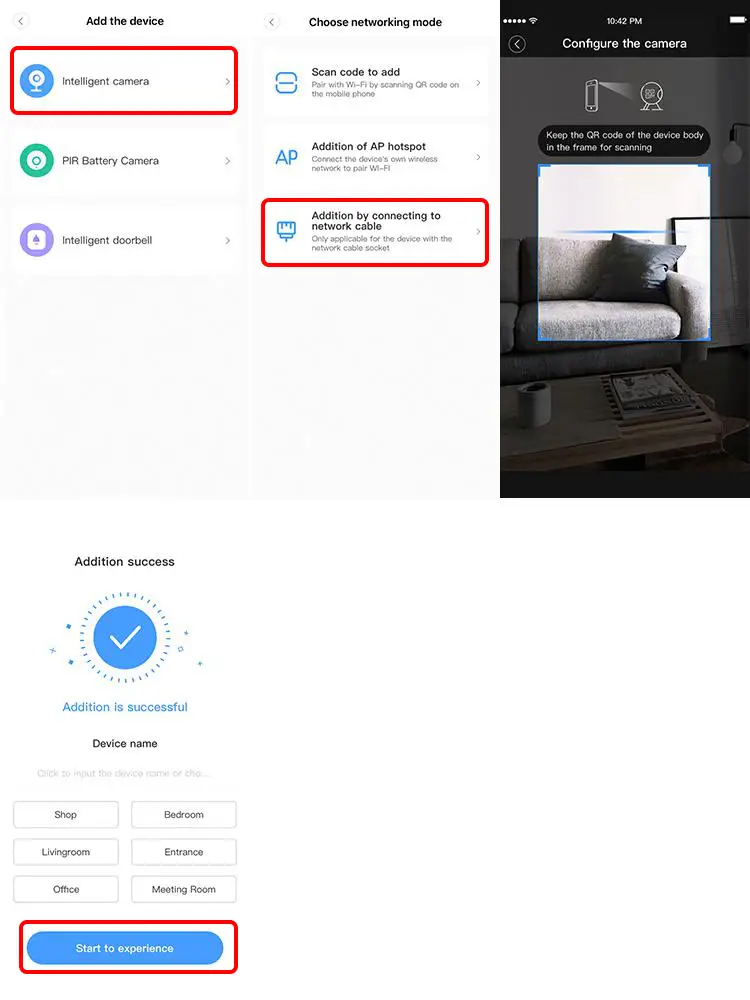
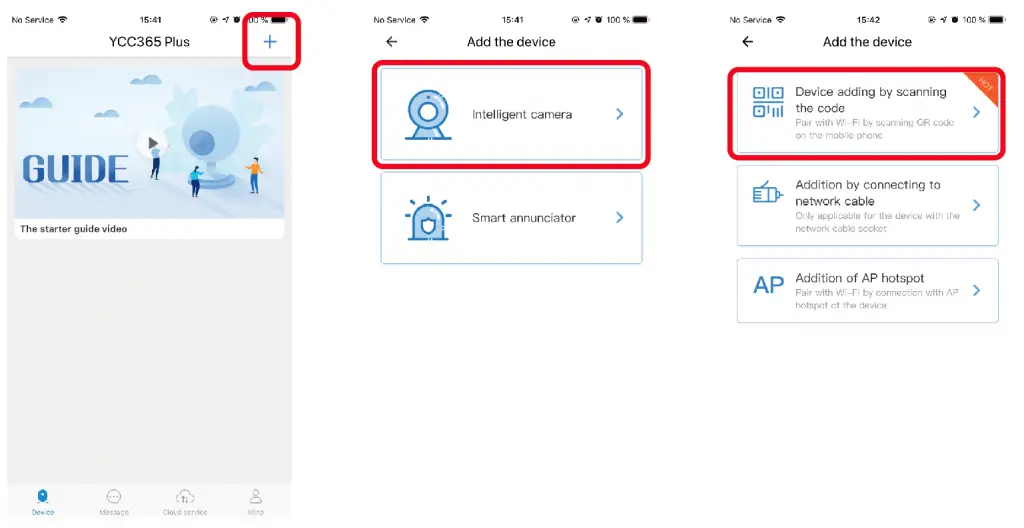
- Click the button in the upper right comer on the app homepage.
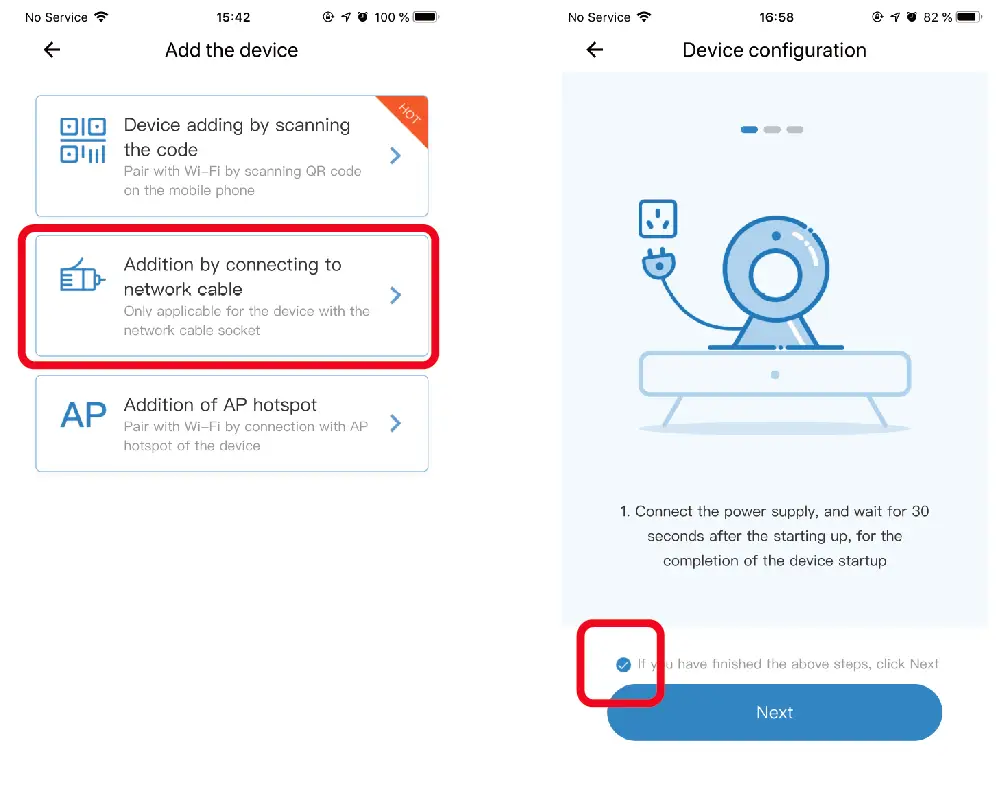
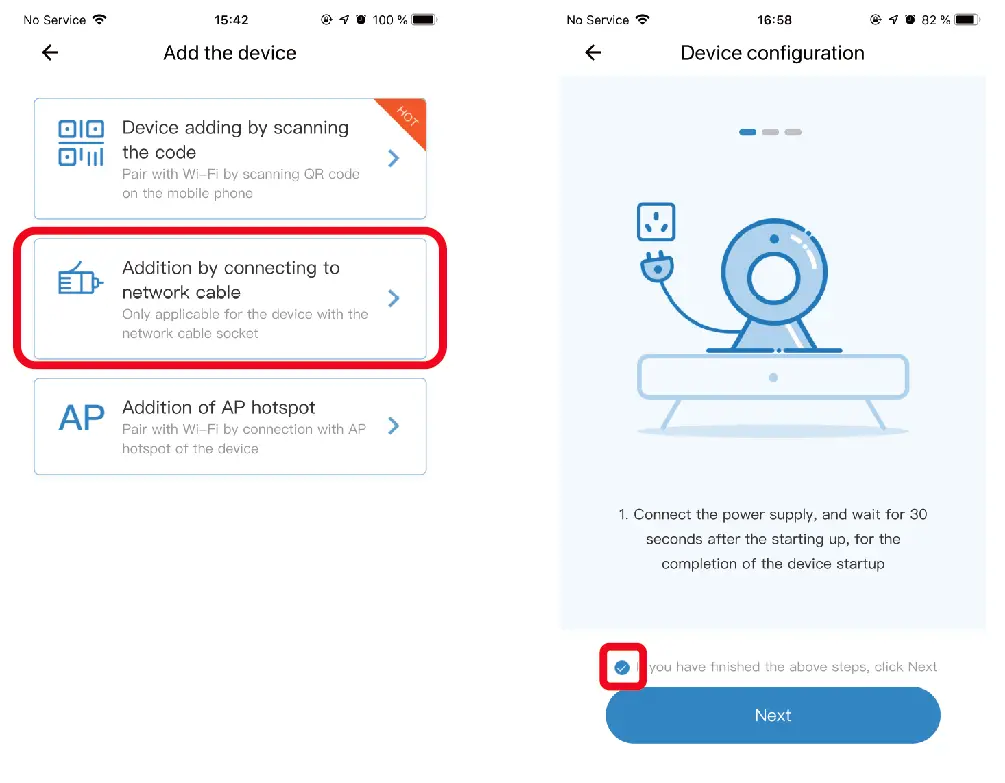
- Choose the device type intelligent camera,choose the addition by connecting to network cable.
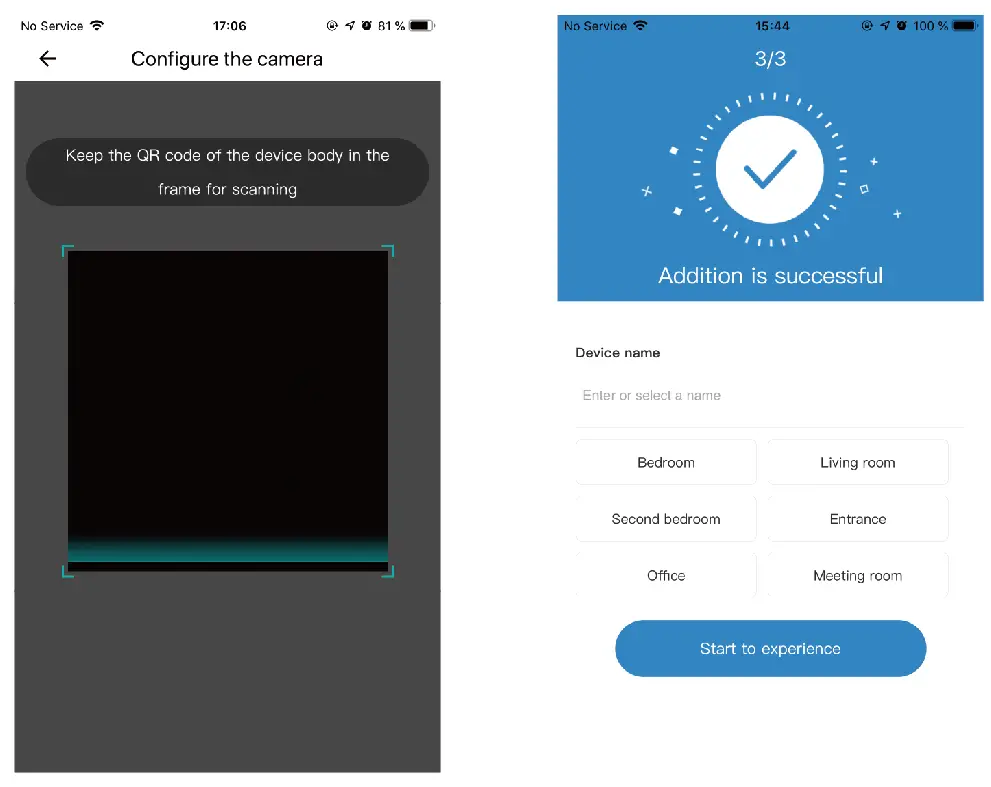
- Plug in the power to the camera,Device network port is connected to the network cable Scan device body QR code,put the QR code on the device body into the box and scan it.
- Please wait patiently ,The connection process takes about 1-2minutes,after you will hear welcome to use camera.
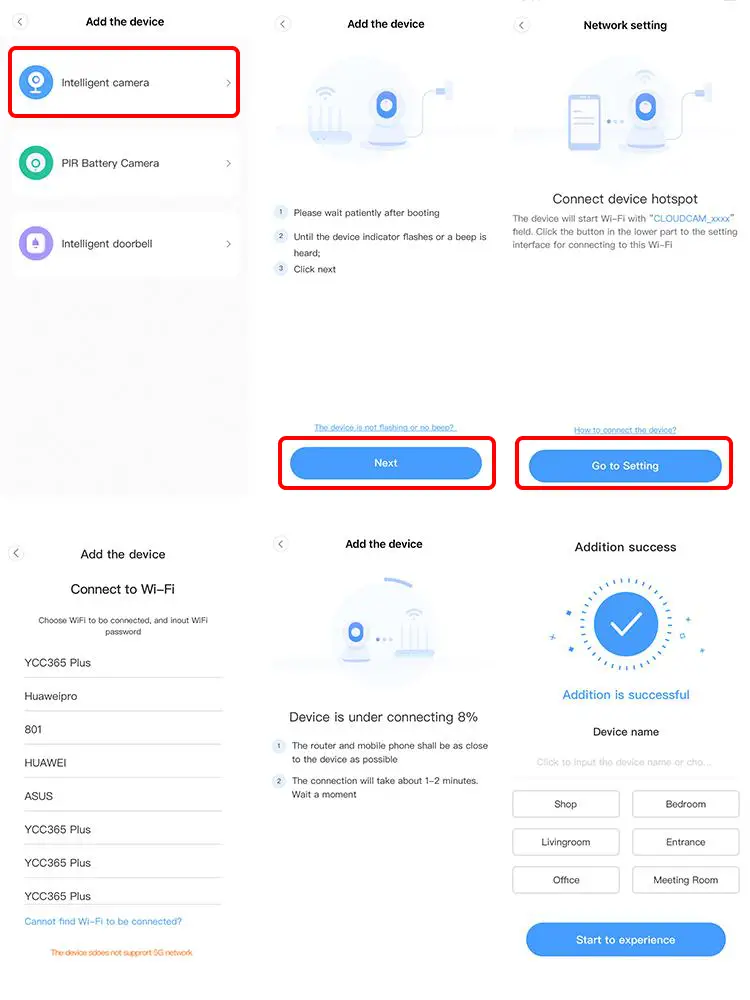
- Click the button in the upper right comer on the app homepage.
- Choose the Addition of AP hotspot,Plug in the power to the camera,Wait patienty for the device light to blink or hear a tone,Click Next when done.
- If you don’t see any tips,try resetting your device,Find the reset button,Long press for at least 5s,click next after prompted.
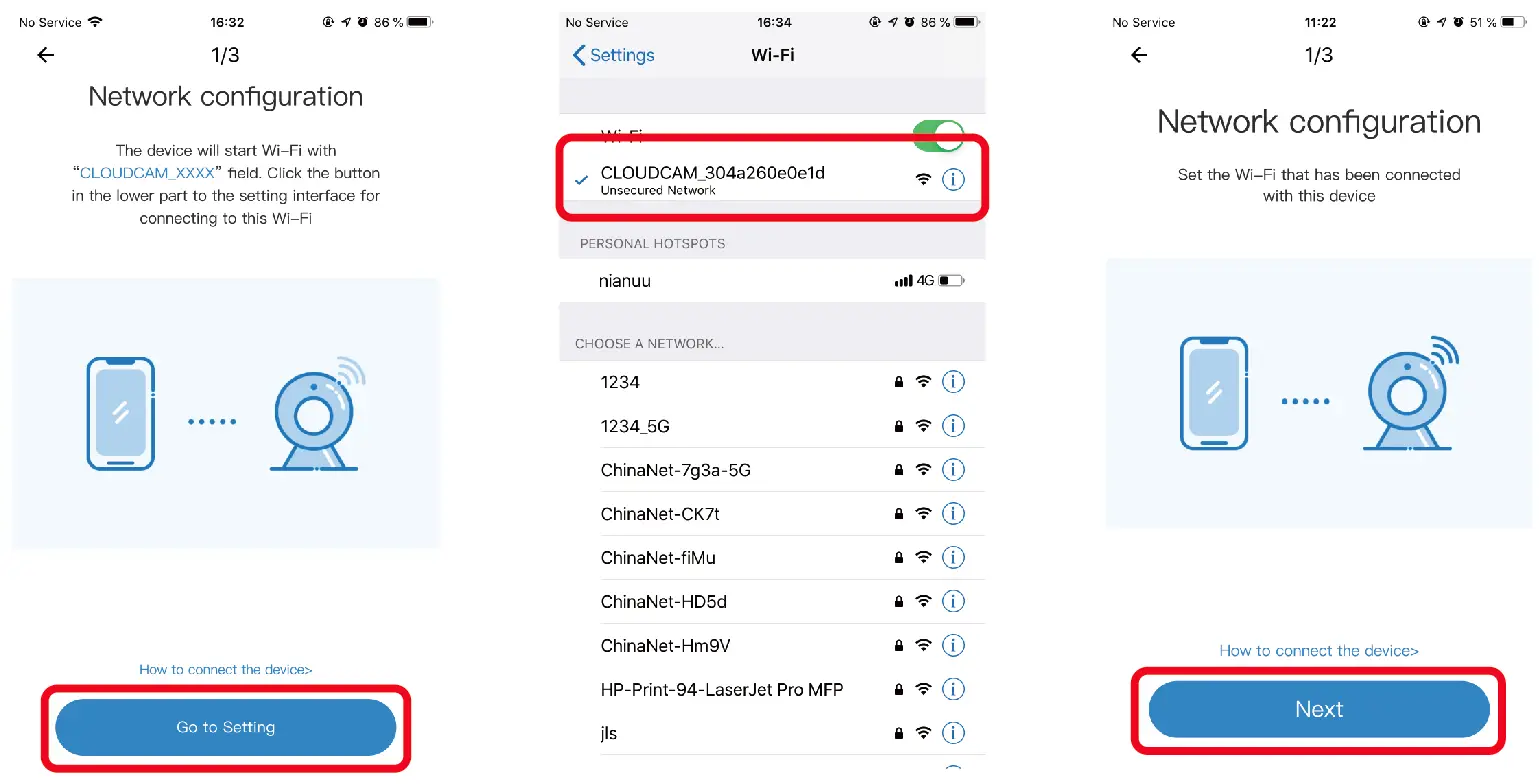
- please go to the Wi-Fi list and connect the Wi-Fi in the blue field “CLOUDCAM_XXXX” Select the Wi-Fi that matches the prefix and connect Return to APP after successful connection.
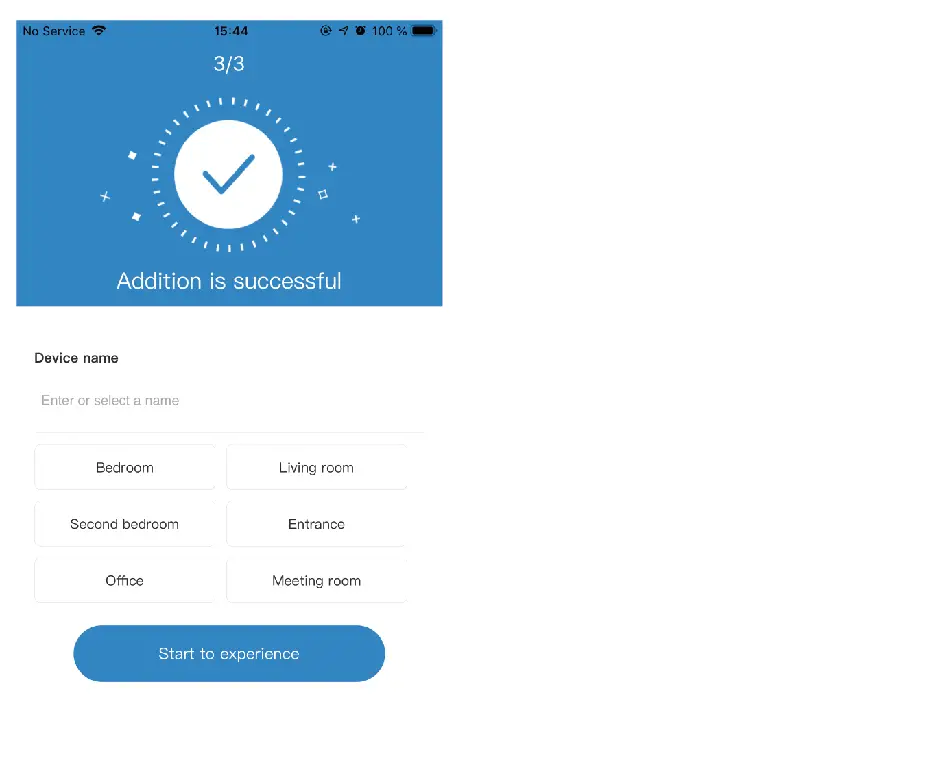
- After connecting the device successfully click next,Choose your router Wi-Fi,Enter Wi-Fi password,Click confirm,Addition is successful,then your can preview the screen.
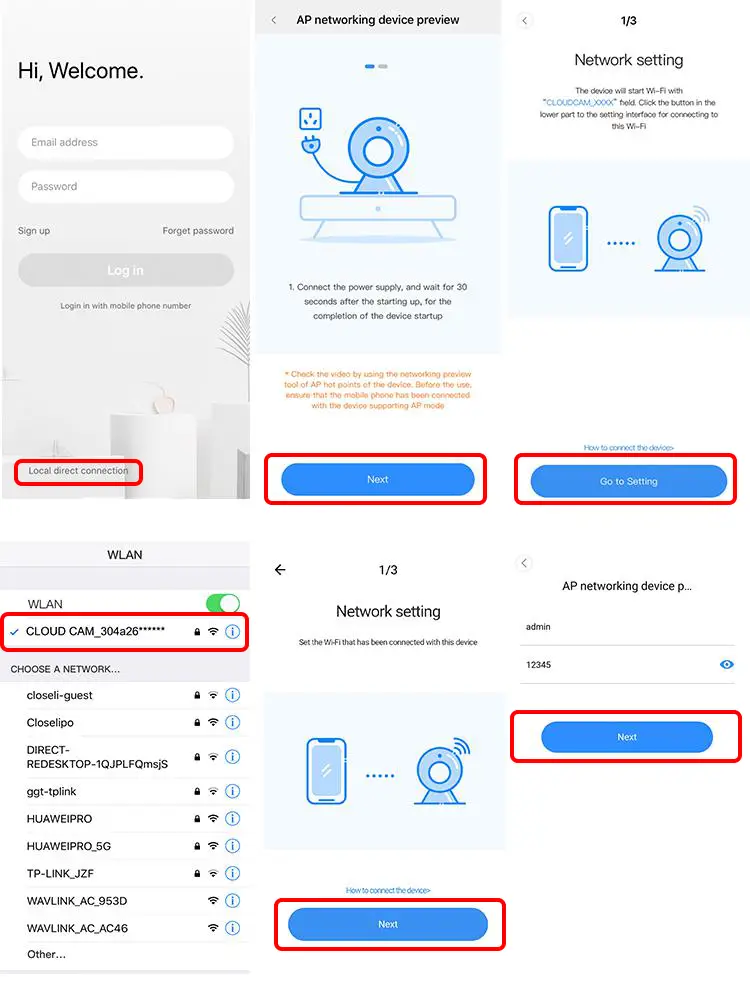
- Open the YCC365plus app to enter the login interface, click “Local login” .
- Click the button in the upper right “+” on the app homepage.
- Click “AP networked device preview” and Click “Next” .
- Go to Setting Network click your phone connect to “CLOUDCAM_XXXX” network.
- Network setting set the Wi-Fi has been connected with this device and Click “Next” .
- Enter user Name: admin Password: 12345 Click “Next”, then your can preview the screen.
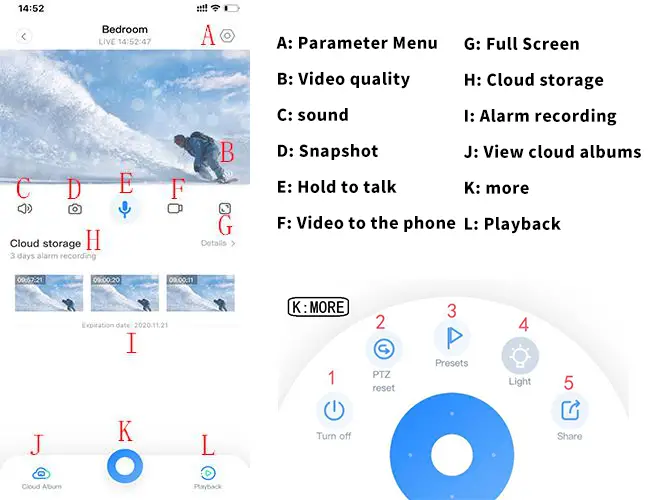
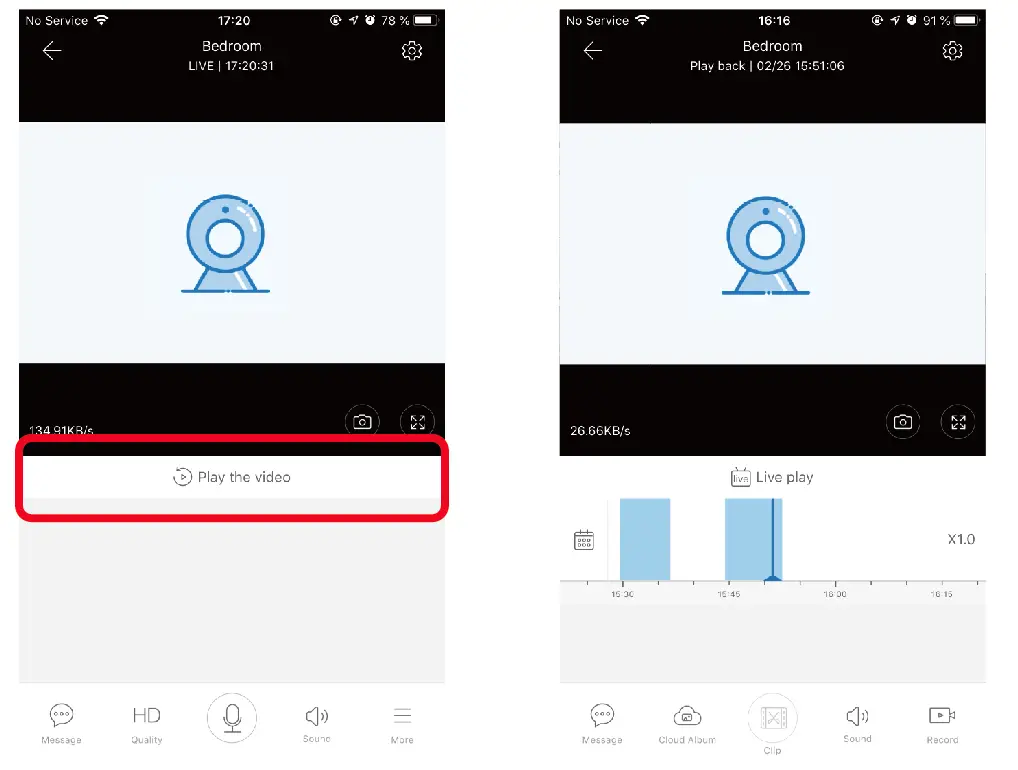
A: Select “View Playback” at the bottom right corner of the live interface to view the playback video of the camera.
B: Switch playback path, you can choose to watch cloud playback/memory card playback.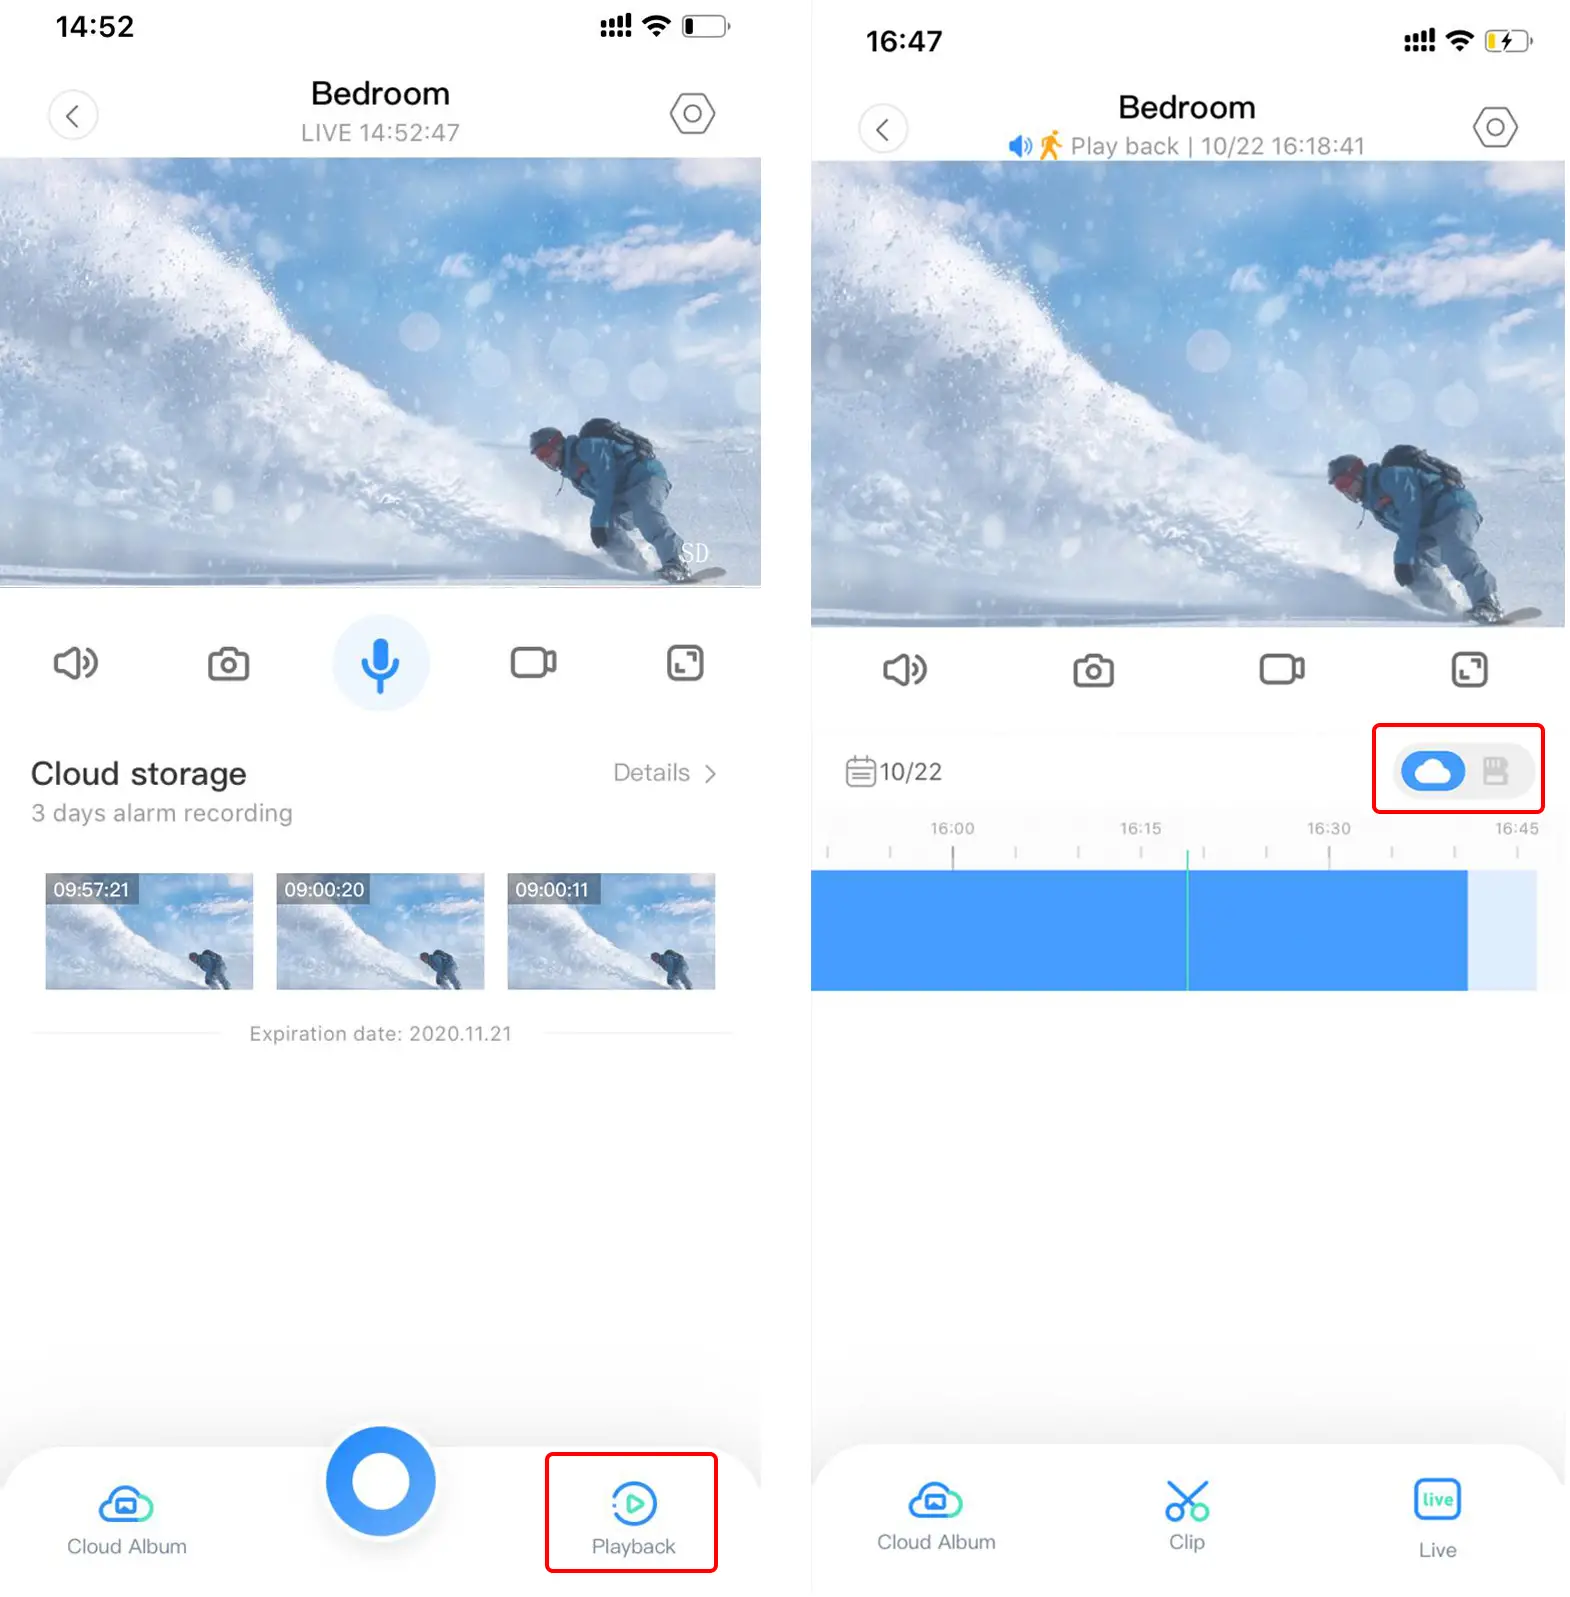
Click ” Set icon ” in the preview screen check the parameter menu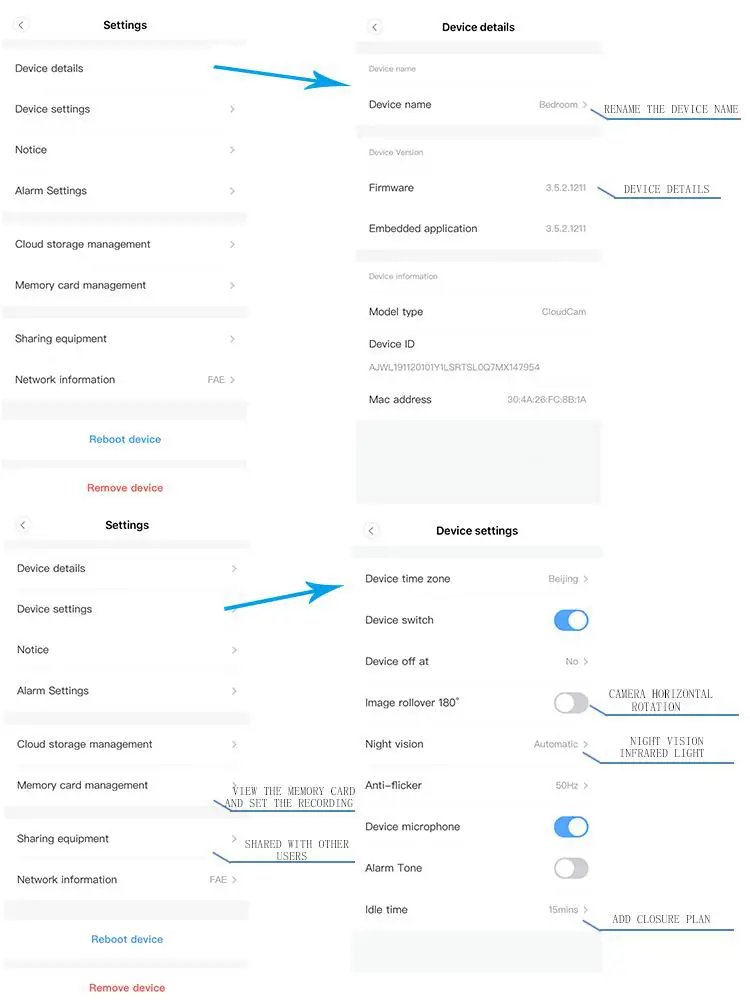
Picture for reference
Since different cameras have different functions, the actual display interface shall prevail
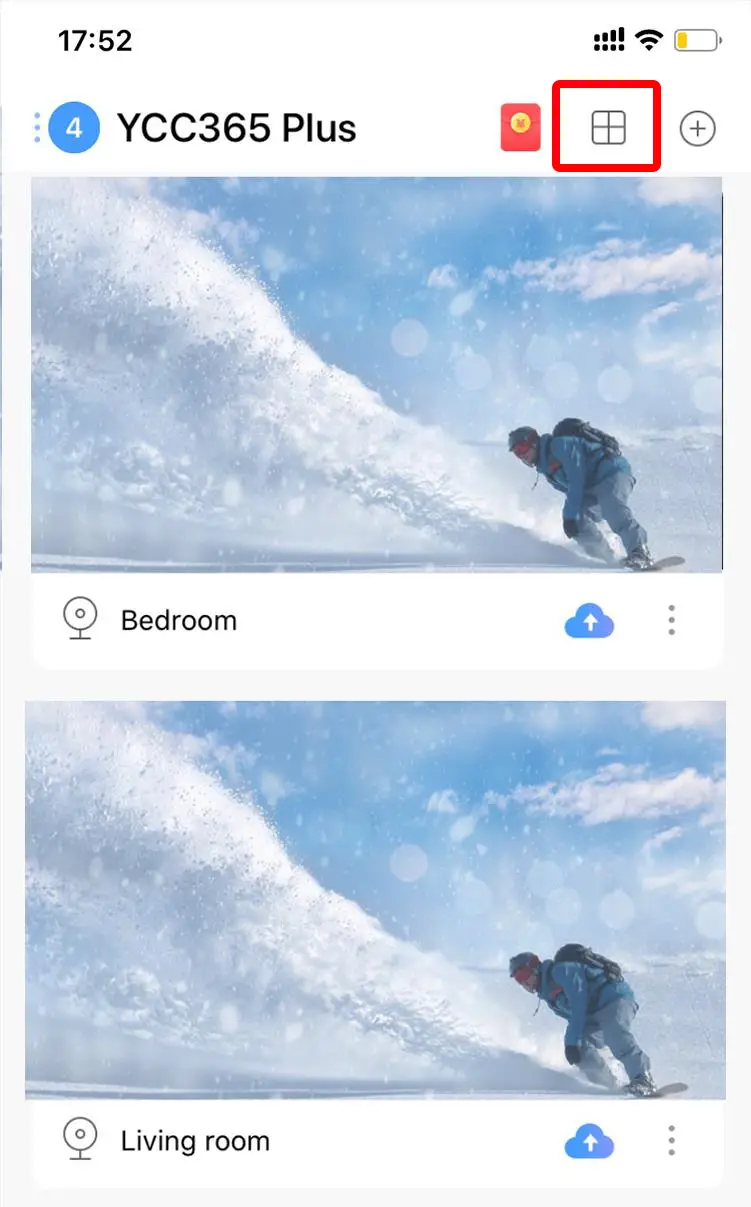
- Click on the split screen button to realize simultaneous preview of multiple devices
- Note: More than two machines, with split screen function.


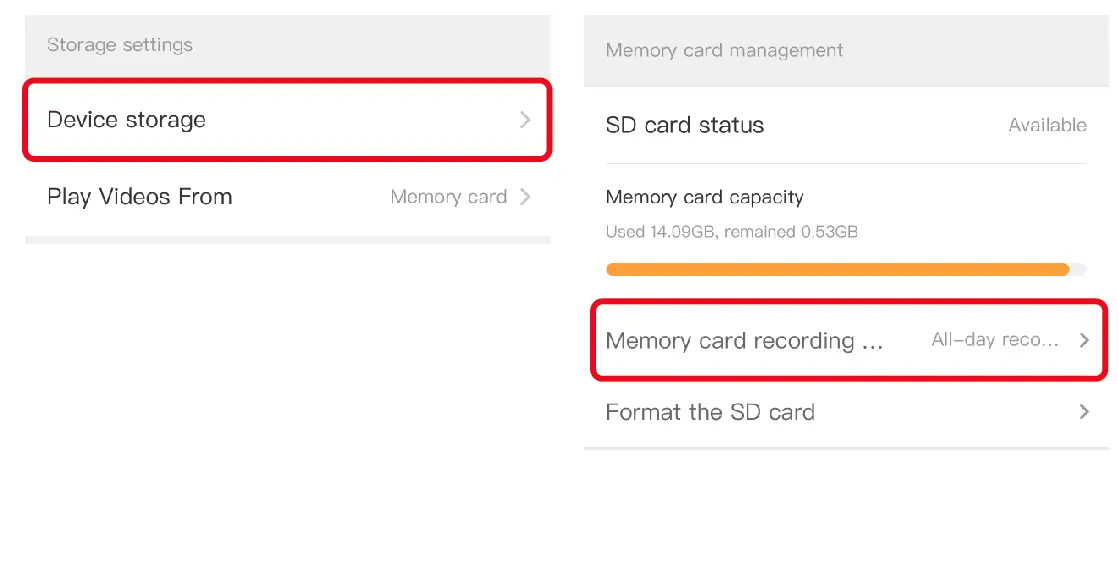
1. Event recording is started by default, it will record only when an alarm occurs.
If you want to record videos 24 hours, please set it in ‘Device Storage’ >‘ Recording Mode’
2. Click ‘View Playback’ to view the video playback, slide the time bar to view the video.
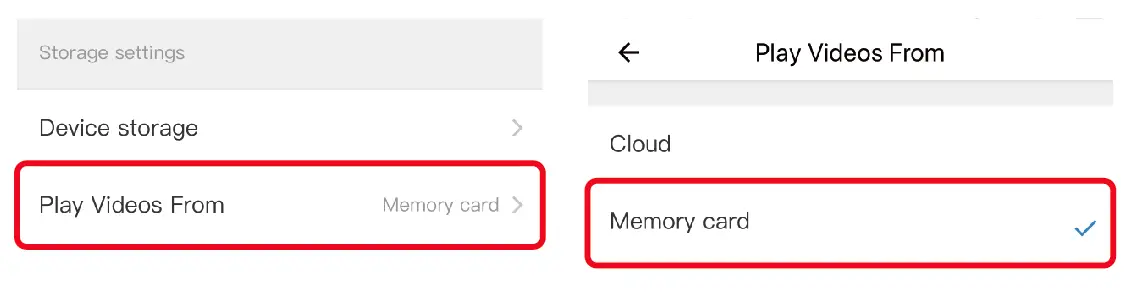
3. The cloud storage videos will be displayed by default. When it is changed to SD memory card in the video viewing path, the memory card recording videos will be displayed.
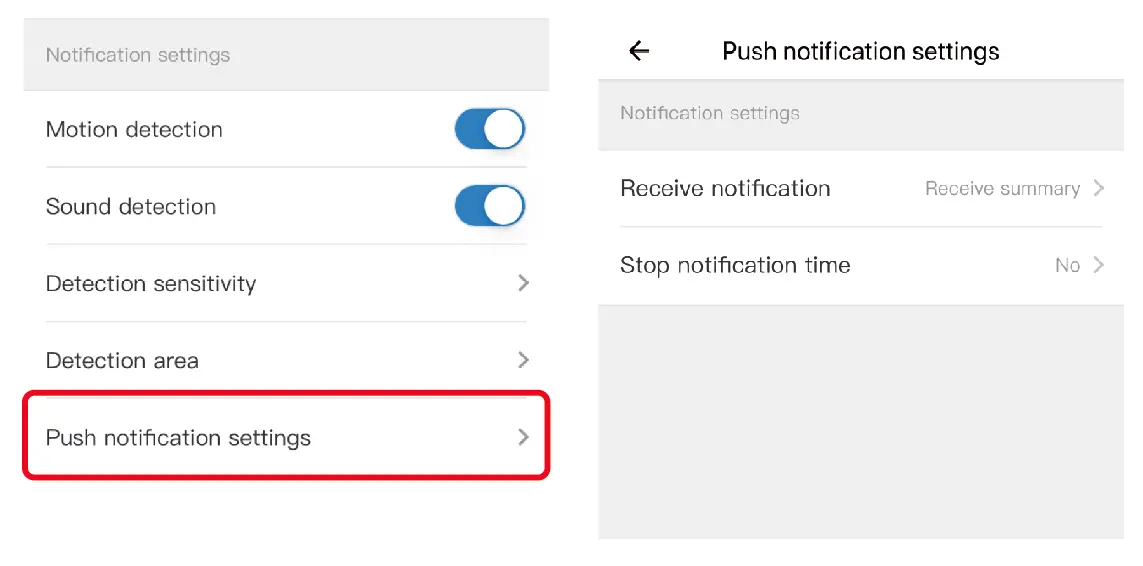
Motion detection and sound detection are enabled by default and do not need to be set.The alarm notifies once every 10 minutes by default.
Notification frequency can be set in the notification push settings. You can also turn off the alarm notification, motion detection and sound detection in here if you don’t need them.
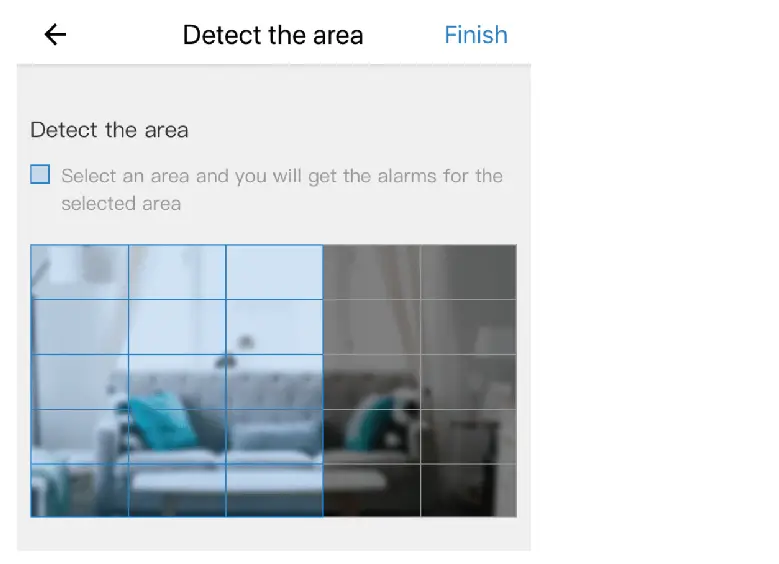
Detection sensitivity – Set the motion detection sensitivity.
Detection area – Set the motion detection area. After setting, the camera only detects the specified areas. Blue screen indicates detection and gray screen indicates no detection.
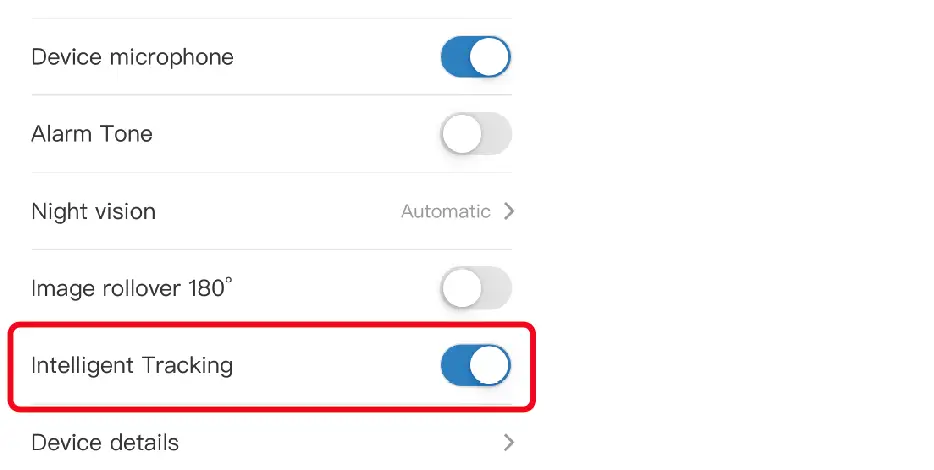
Smart Tracking is enabled by default, and the camera will follow when an object moves.
1. Register and log into the software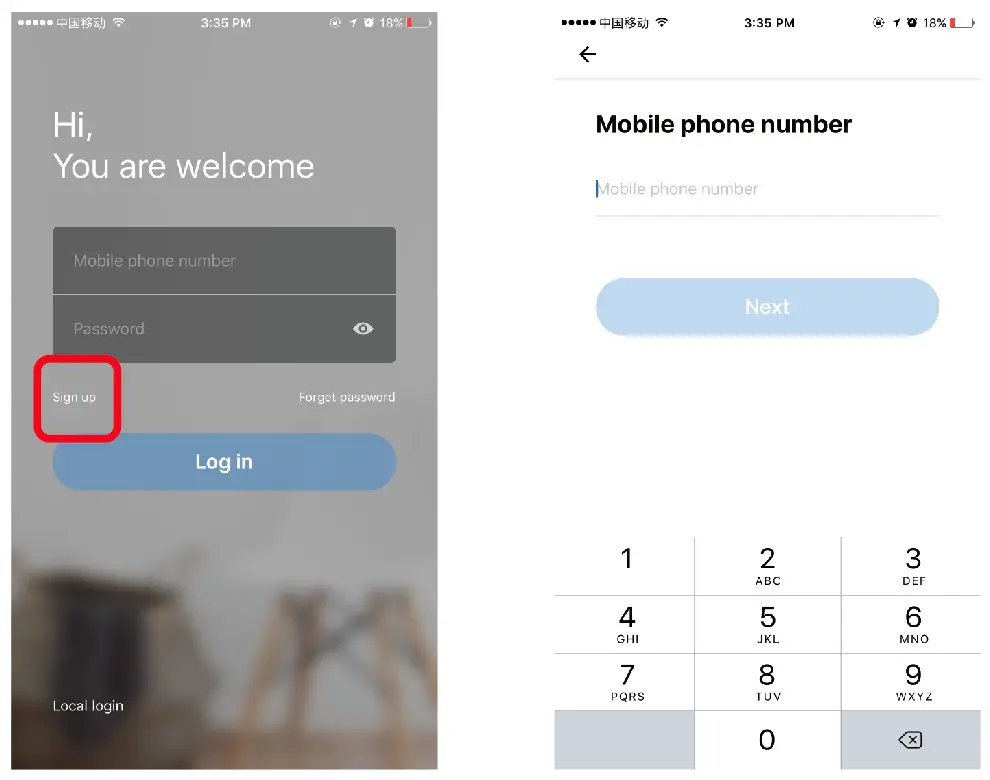
2.Click‘+’> Smart Camera > Scan to add the device
3. View the app tips, click ‘ ![]() ’ after completing the steps, then enter your wifi password.
’ after completing the steps, then enter your wifi password.
4. Align the displayed QR code to the camera lens until the camera makes a beep sound, click (I hear the‘beep’), then wait it to be connected.
Or use other adding methods to add the camera.
5. Successfully connected, the camera will be online.

Please check if the wifi password is correct and if the wifi is 2.4 GHz.
Reconnect next to the router.
Adding the camera: add by AP hotspot
1. Select Add by AP Hotspot, click‘ ![]() ’ after completing the steps.
’ after completing the steps.
2. Connect the phone to the wifi named‘ CLOUDCAM_XXX’ and return to the app.
3. Click“ Next”, select your wifi and enter the wifi password, then wait for the connection.
4. Successfully connected. The camera will be online.
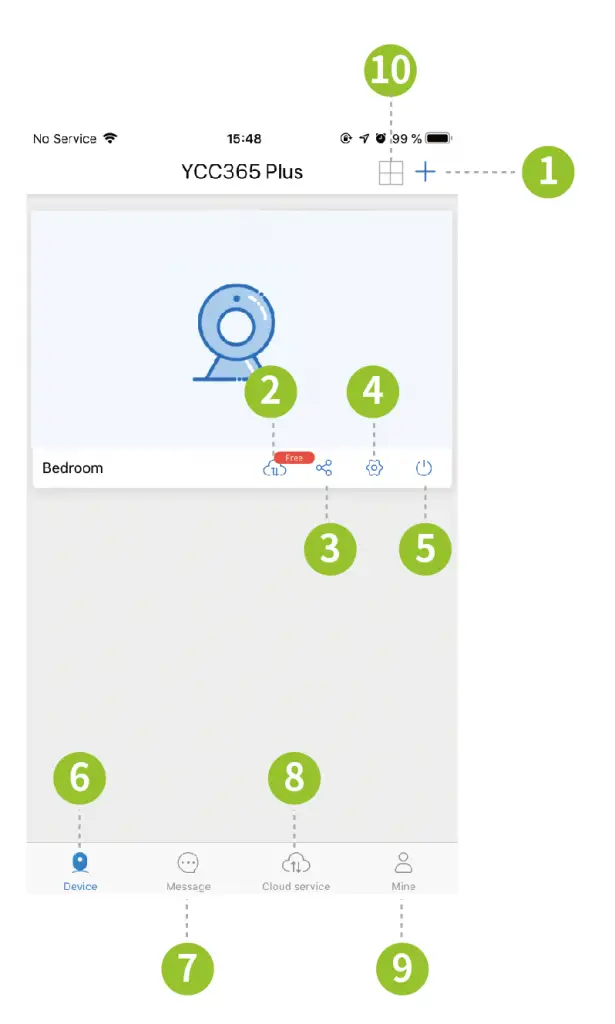
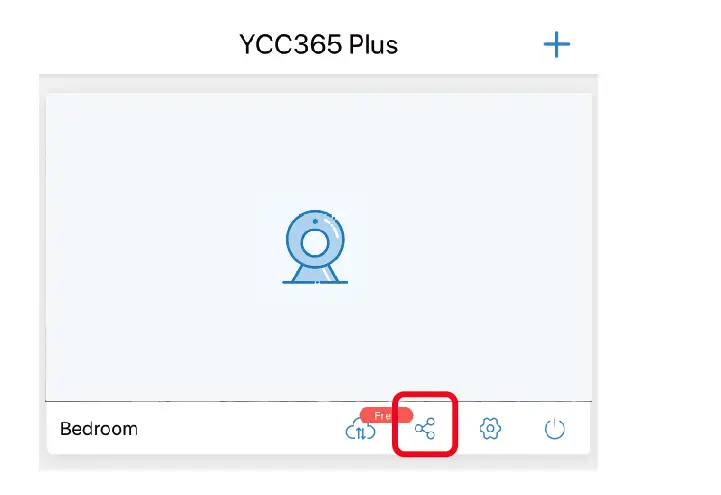
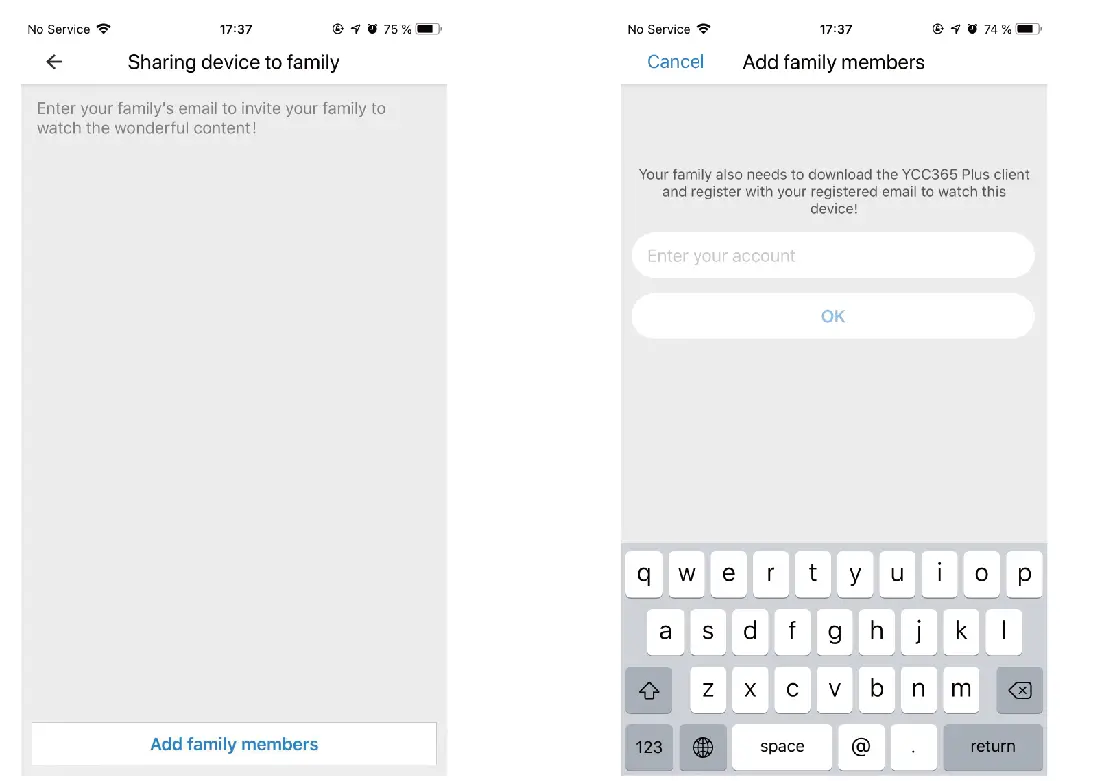
1. Click ‘ icon ’ >‘ Add family members’ > Enter the account that you want to share with.
1. Select to add directly by network cable, plug in the network cable to the camera, and click ‘![]() ’ after completing the steps.
’ after completing the steps.
2. Scan the QR code on the camera after hearing the voice prompt from the camera and add the camera.
You can use the app to view live video and take photos.
Please click “Camera”on the top of the screen,and then you can edit the name of camera.
Please click “Camera”on the top of the screen,and then you can select a device,and click “Delete”to delete it.
Please click “Forgot password”on the login page, and enter your email address,then you will receive an email with a link to reset your password.
Please check whether your phone is connected to 2.4G Wi-Fi, and then try again. If you still have problems logging in, please restart your phone and try again. If you still have problems logging in after restarting your phone, please contact our customer service center at [email protected] .
Warning: file_put_contents(gpt_tmp/87416): failed to open stream: No space left on device /mnt/volume_nyc3_01/import-admin/faq.php on line 55.
![]()


