Delonghi CAM51025MB True Brew Stainless/Black Drip Coffee Maker

EASILY REGISTER YOUR MACHINE & GET MORE OUT OF YOUR COFFEE EXPERIENCE
Register your Automatic Coffee Machine and become De’Longhi Club Member. Join the De’Longhi Club to get more out of your coffee experience
- RECEIVE 1 ADDITIONAL YEAR OF WARRANTY FOR REGISTERING PRODUCT

- MEMBERSHIP DISCOUNT ON ACCESSORIES

- PRIVATE ONLINE SALES

- OE LONGHI SPECIALIST SUPPORT

- EASY ORDERING

- EXCLUSIVE COFFEE EVENTS &NEWS


STEP #1. TAKE A PHOTO
- Snap o photo of the comera icon, including the points.


STEP #2: SEND PHOTO
- Send a photo via text, Facebook Messenger or upload o nline.
 TEXT PHOTO TO 71 403
 MESSENGER@
PHOTO REGISTER ONLINE:
WWW.DELONGHI.PHOTO
NEED HELP?:
Visit photoregister.com/help
or text HELP to 71403.
CONTACT US
• Call 1-800-945-0929
• Online: Delonghi.com
IN THE BOX
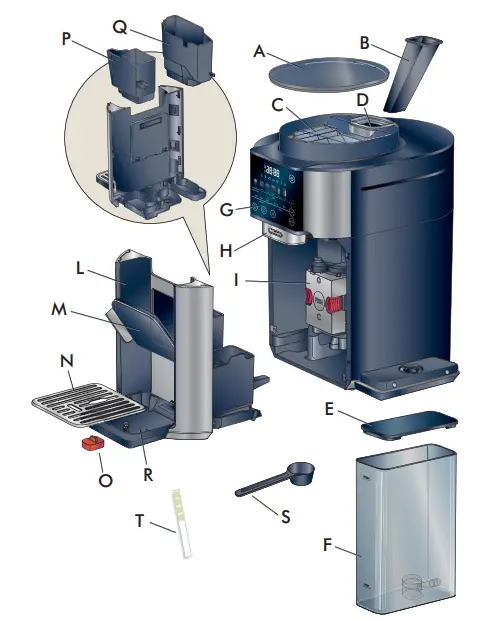
A. Beans container and pre-ground coffee lid
B. Pre-ground coffee funnel
C. Beans container
D. Pre-ground coffee funnel seat
E Water tank lid
F. Water tank
G. Control panel
H. Coffee spout
I. Infuser
L. Tray assemble
M. Cup holder
N. Cup tray
O. Drip tray water level indicator
P. Disposal water container
Q. Coffee grounds container
R. Drip tray
S. Ground coffee measuring spoon
T. Total Hardness indicator paper test
Get Started & Owner’s Instructions Booklets
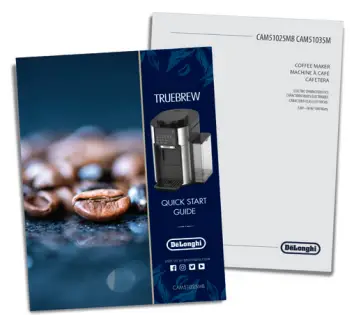
This short guide is not intended to explain all the functions of the appliance.
Please read all the owner’s instruction booklet before use.
CONTROL PANEL
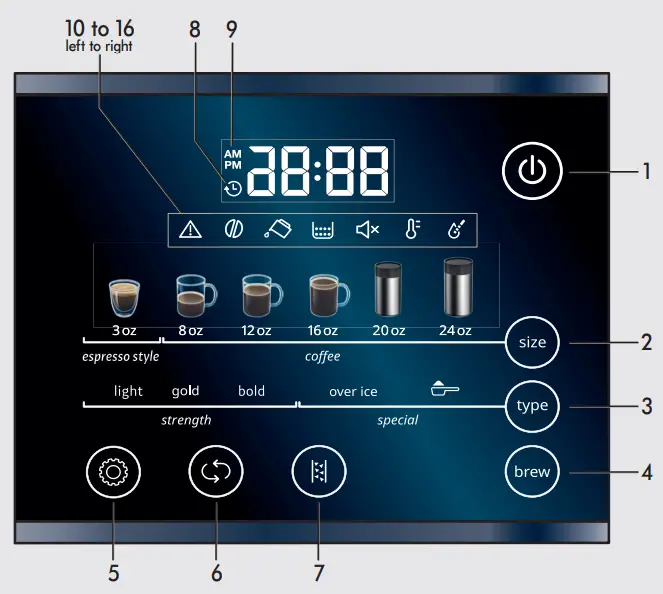
- On/Off button
- Size selector button
- Type selector button
- Brew button
- Settings menu button
- Scroll button
- Descale button
- Auto ON light
- AM /PM selector light
- General alarm
- Beans light
- Water tank light
- Ground container light
- Beep sound off light
- Temperature light
- Water hardness light
FIRST USE
Remove all stickers and clean all accessories with warm water and mild detergent and dry them. Priming the machine is only required the first time out of the box
![]() Connect the machine to the mains socket.
Connect the machine to the mains socket.
![]() Water tank light is on and the “brew” button blinks.
Water tank light is on and the “brew” button blinks.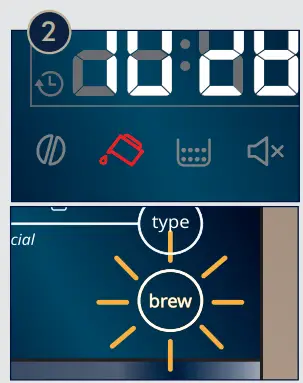
![]() Add water to the water tank up to the “max” level.
Add water to the water tank up to the “max” level.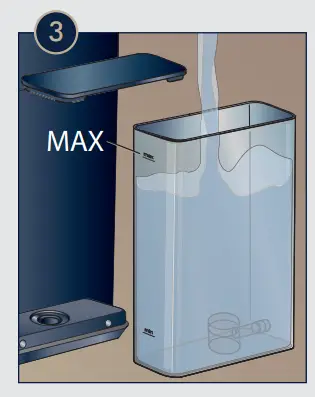
![]() Place a 7 floz (minimum) container under the coffee spouts. Attention: Water will be delivered during the priming process.
Place a 7 floz (minimum) container under the coffee spouts. Attention: Water will be delivered during the priming process.
![]() Press the “brew” Button.
Press the “brew” Button.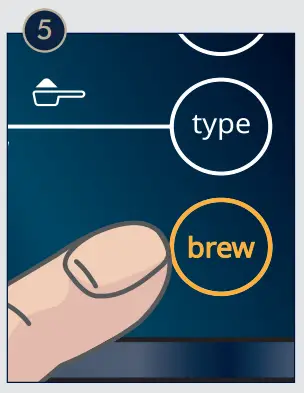
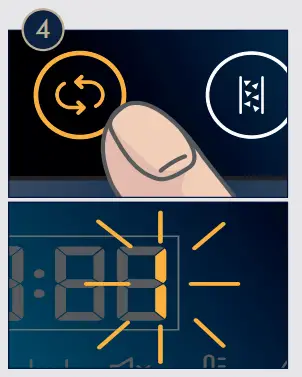
![]() Set the time: Press the Settings
Set the time: Press the Settings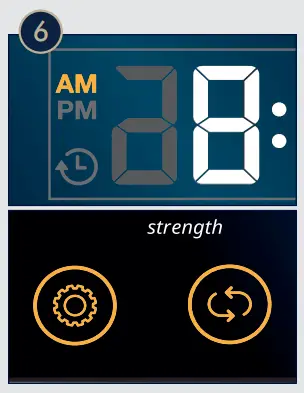
![]() button and the AM light will turn on.
button and the AM light will turn on.
Select using the Scroll ![]() button. Then use the Settings
button. Then use the Settings ![]() button to select hours and minutes. Press Scroll button
button to select hours and minutes. Press Scroll button ![]() until the desired time is displayed.
until the desired time is displayed.
BREW
![]() Make sure the water tank is full of fresh water and turn on the machine.
Make sure the water tank is full of fresh water and turn on the machine.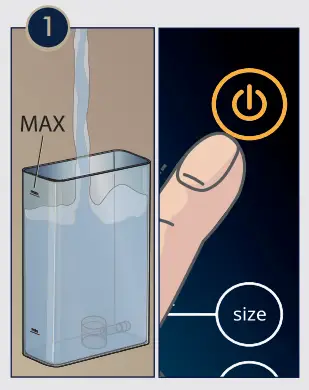
![]() Add fresh beans into the bean container.
Add fresh beans into the bean container.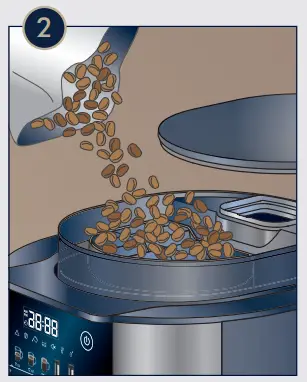
![]() Select the size of your beverage by pressing “size”
Select the size of your beverage by pressing “size” ![]() button.
button.![]() Select the Strength of your beverage by pressing the ”type”
Select the Strength of your beverage by pressing the ”type” ![]() button. See about “over ice” and
button. See about “over ice” and ![]() on page 7 and 8.
on page 7 and 8.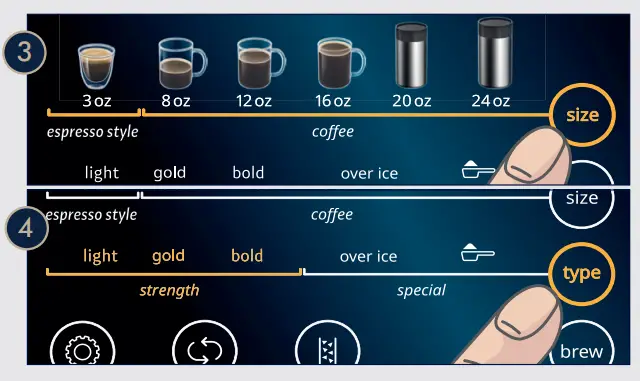
![]() Place a cup under the spouts. Use the Cup holder for smaller cups.
Place a cup under the spouts. Use the Cup holder for smaller cups.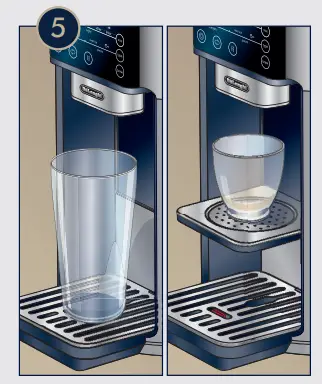
![]() Press “brew”
Press “brew” ![]() to start Brewing. The delivery is complete when the Brew button stops blinking.
to start Brewing. The delivery is complete when the Brew button stops blinking.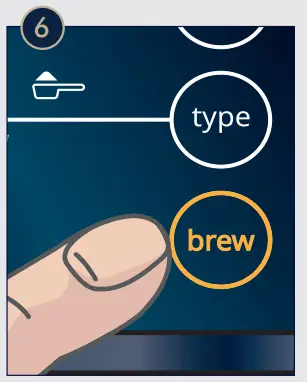
Espresso Style:
Recipe inspired by the famous Italian Espresso, brewed with higher pressure and topped with a layer of nut-brown crema.
USING PREGROUND COFFEE
![]() To use preground coffee, select the desired beverage size by pressing “size” button. With this function you can only brew 3oz, 8oz, 12oz, 16oz.
To use preground coffee, select the desired beverage size by pressing “size” button. With this function you can only brew 3oz, 8oz, 12oz, 16oz.![]() Press the “type”
Press the “type” ![]() button until
button until ![]() lights up.
lights up.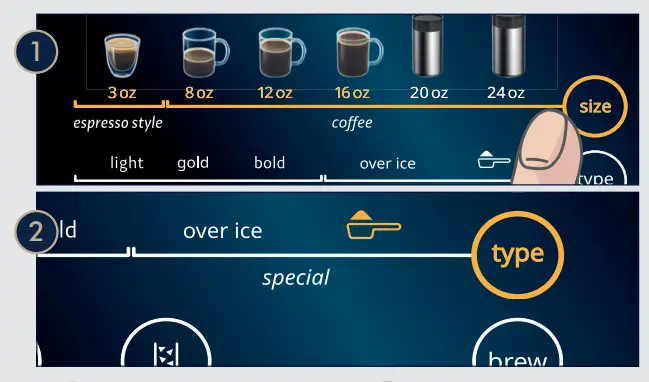
![]() Press brew and
Press brew and ![]() will start blinking.
will start blinking.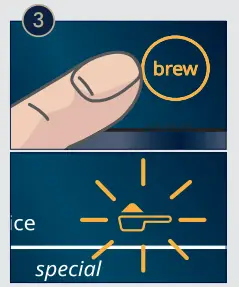
![]() Add the preground coffee into the funnel.
Add the preground coffee into the funnel.
- 1-2 measuring scoop for Espresso Style (3oz)
- 2 measuring scoops for 8oz coffee
- 3 measuring scoops for 12oz and16oz coffee.
![]() Once preground coffee is added, press “brew” button to start brewing.
Once preground coffee is added, press “brew” button to start brewing.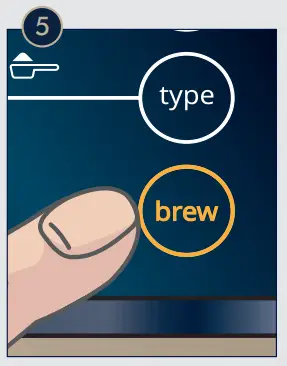
OVER ICE
![]() Select the Size of your beverage.
Select the Size of your beverage.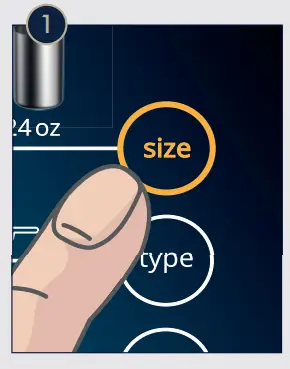
![]() Select Over Ice by pressing “type” button until “over ice” light comes on.
Select Over Ice by pressing “type” button until “over ice” light comes on.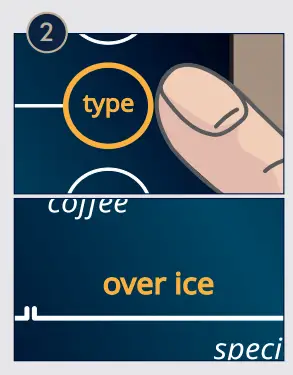
![]() Press “brew” button: the strength and preground options start blinking.
Press “brew” button: the strength and preground options start blinking.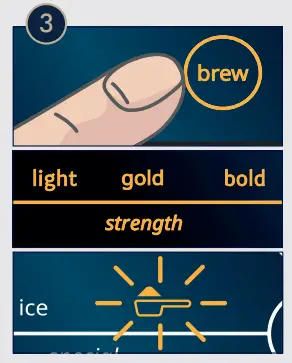
![]() Press “type” button to select the desired strength.
Press “type” button to select the desired strength.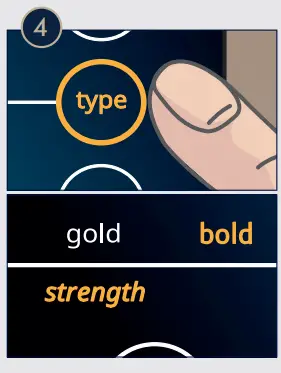
![]() Place a cup filled half way with ice cubes under the coffee spouts.
Place a cup filled half way with ice cubes under the coffee spouts.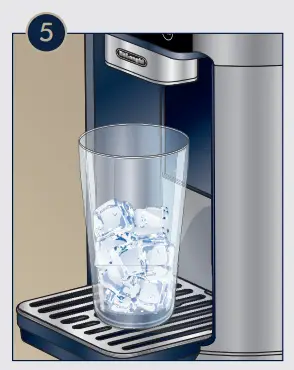
![]() Press “brew”
Press “brew” ![]() to start brewing. Add more ice cubes once coffee delivery is ended. If you selected preground option, add now the ground coffee into the funnel and press “brew” again to start delivery
to start brewing. Add more ice cubes once coffee delivery is ended. If you selected preground option, add now the ground coffee into the funnel and press “brew” again to start delivery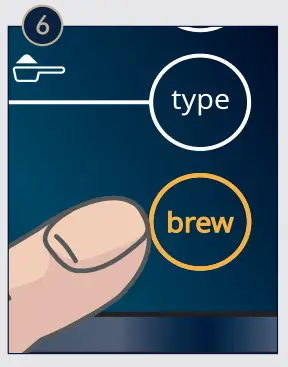
AUTO ON
With the Auto On function you can set your machine to brew your beverage at a certain time.
![]() Press
Press ![]() until the
until the ![]() light starts blinking.
light starts blinking.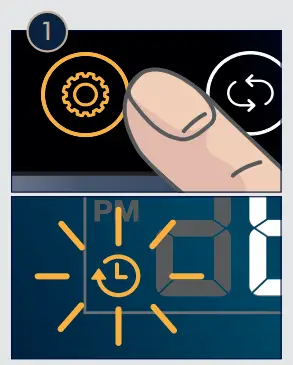
![]() Press
Press ![]() The
The ![]() will stay steady on.
will stay steady on.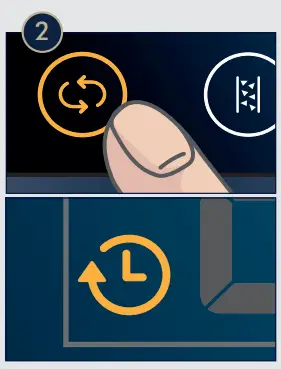
![]() Press
Press ![]() You can now proceed to select your beverage size using
You can now proceed to select your beverage size using ![]() the button and the strength (light, gold, bold) using the
the button and the strength (light, gold, bold) using the ![]() button.
button.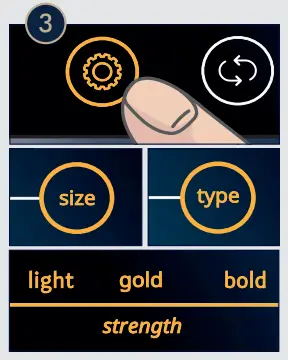
![]() Press
Press ![]() to confirm.
to confirm.
The time will start blinking.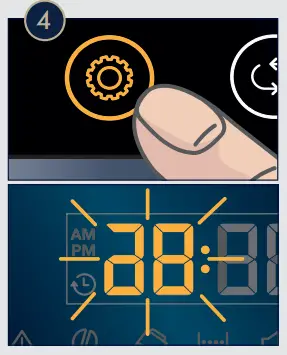
![]() Use the
Use the ![]() button to change the time and the
button to change the time and the ![]() to switch from hours to minutes.
to switch from hours to minutes.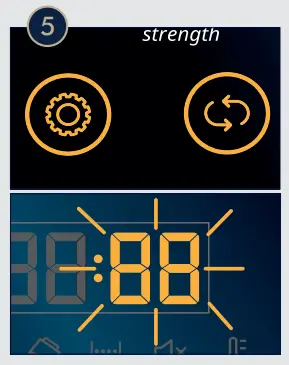
![]() Press
Press ![]() to confirm and save the parameters. You will see the
to confirm and save the parameters. You will see the ![]() steady on.
steady on.
Remember to place a cup under the coffee spouts.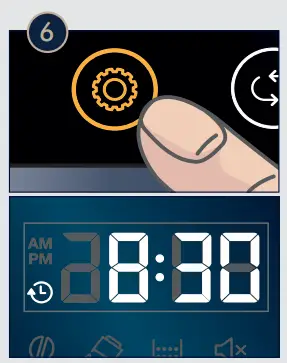
CLEANING
Keeping your machine clean will improve quality of the beverage and life span of the machine. When the ![]() light turns on, it’s time to clean the ground container.
light turns on, it’s time to clean the ground container.
![]() Open the Tray assemble.
Open the Tray assemble.
![]() Remove and clean ground container and water container.
Remove and clean ground container and water container.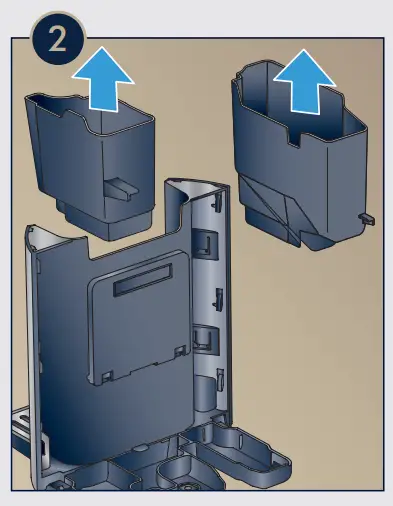
![]() Empty and clean the driptray.
Empty and clean the driptray.
![]() Even if the
Even if the ![]() (ground container light) is off, if the red indicator is raised, it means it is full of water. Please proceed with the cleaning process (steps 1, 2, 3).
(ground container light) is off, if the red indicator is raised, it means it is full of water. Please proceed with the cleaning process (steps 1, 2, 3).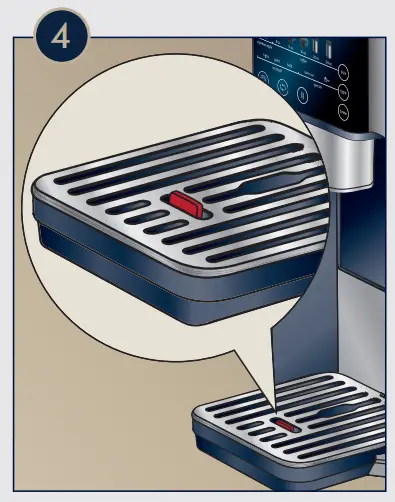
MAINTENANCE
Once a month, clean the inside of the machine
![]() Turn off the machine and open the Tray Assemble.
Turn off the machine and open the Tray Assemble.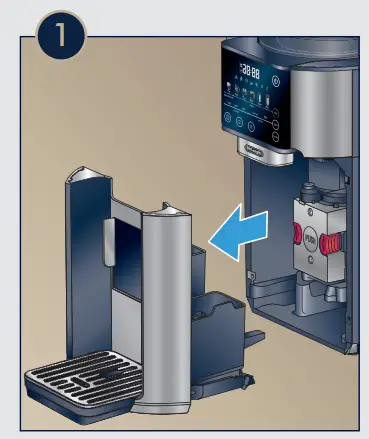
![]() Press the two red release buttons inwards and at the same time pull the infuser outwards.
Press the two red release buttons inwards and at the same time pull the infuser outwards.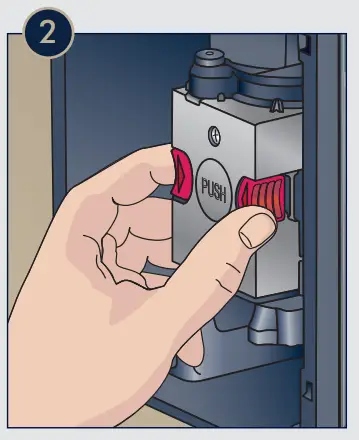
![]() Soak the infuser in warm water for about 5 minutes, then rinse under the tap. Do not use any soap or detergent, as it might damage the unit.
Soak the infuser in warm water for about 5 minutes, then rinse under the tap. Do not use any soap or detergent, as it might damage the unit.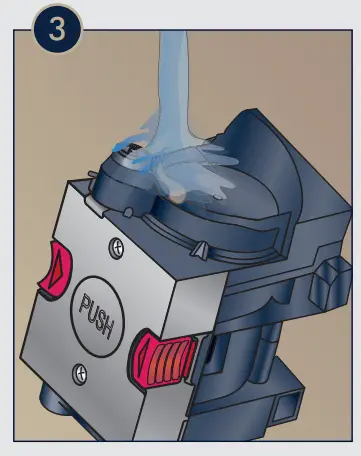
![]() Clean the housing of any residues and push the infuser back in place until it clicks.
Clean the housing of any residues and push the infuser back in place until it clicks.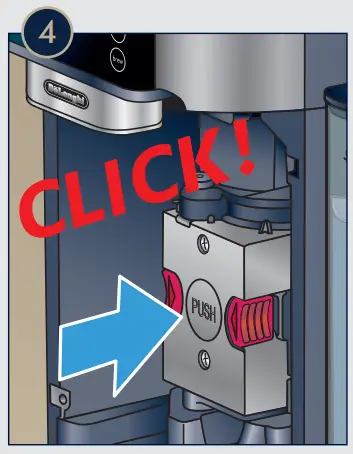
DESCALING

Promptly descale when the descale button lights up.
Follow the step by step instruction in the User Manual, under the Descaling section. This process will take about 30 minutes and it’s necessary to ensure longevity of the machine and brewing quality.
Frequency of the need of descaling depends on the hardness of the water you use. See next section.
SET WATER HARDNESS
Analyze the hardness of your water to set your machine accordingly.
![]() Dip the provided Total Hardness Indicator in a glass of water for one second and shake it.
Dip the provided Total Hardness Indicator in a glass of water for one second and shake it.
![]() Wait a couple of minutes. Read the Indicator paper colors and compare with this table.
Wait a couple of minutes. Read the Indicator paper colors and compare with this table.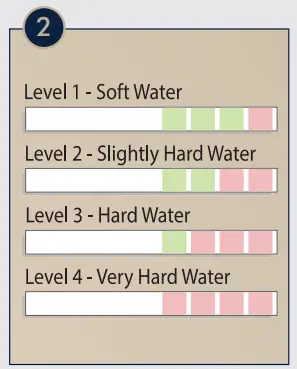
![]() Set water hardness on your machine by pressing the Settings Menu
Set water hardness on your machine by pressing the Settings Menu ![]() button, until the
button, until the ![]() light is on.
light is on.
![]() Press the Scroll button
Press the Scroll button ![]() to select the level (1, 2, 3 or 4) based on your water hardness test results.
to select the level (1, 2, 3 or 4) based on your water hardness test results.