PHILIPS SP780 Pureline Slim 50mm

Mounting Instruction
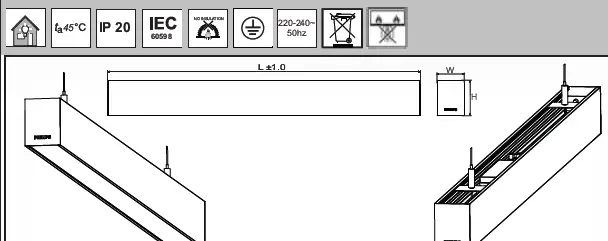
| Type | Dimensions L x Wx H_mm | Voltage | Frequency | Kg |
| SP780HW5L112 | 1126x 53x 70 | 220-240V~ | 50Hz | 1.9 |
| SP780XHW5L112 | 1126x 53x 70 | 220-240V~ | 50Hz | 1.9 |
| SP780HW5L168 | 1686x 53x 70 | 220-240V~ | 50Hz | 2.6 |
| SP780XHW5L168 | 1686x 53x 70 | 220-240V~ | 50Hz | 2.6 |
| SP780HW5L224 | 2248x 53x 70 | 220-240V~ | 50Hz | 3.8 |
| SP780XHW5L224 | 2248x 53x 70 | 220-240V~ | 50Hz | 3.8 |
| Legend | |
| SP | Suspended Mounting |
| 780 | Down Standalone Version |
| 780X | Down Continuous Version |
| H | H Section |
| OD | Opaque Version |
| OC | Prismatic Version |
| W5 | Width 53mm |
| L112 | Length 4 Feet |
| L168 | Length 6 Feet |
| L224 | Length 8 Feet |
Suspension Cable adjustment
IMPORTANT: Do not force cable into adjuster. To insert cable into adjuster , follow the steps below.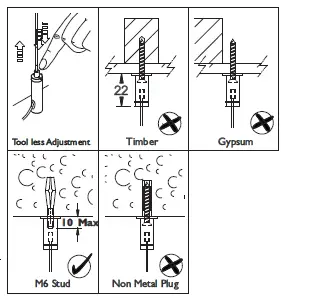
- CUT
If required, cut cables ends cleanly prior to inserting into adjuster. - INSERT
Carefully insert cable from top end. if cable does not insert easily or becomes jammed, use the release tool to remove tool to remove cable. Trim cable ends again and repeat process. DO NOT BEND OR LOOP CABLE BELOW BOTTOM OF ADJUSTER. - TEST
Once cable is inserted, apply a 12Kg point load to each mount bracket to ensure all connections are secure.
Suspension Cable fixing location (recommended)

| Continuous | No. of Suspensions | A |
| 4′ Version | 2 | 800 |
| 6′ Version | 2 | 1360 |
| 8′ Version | 2 | 1900 |
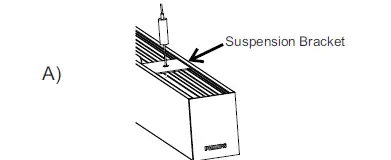
Luminaire mounting
- For standalone version, fix the suspension wire with hex screw ( Provided in Accessories bag ) to suspension bracket. slide at desired location.

- For continuous version, follow the process A.

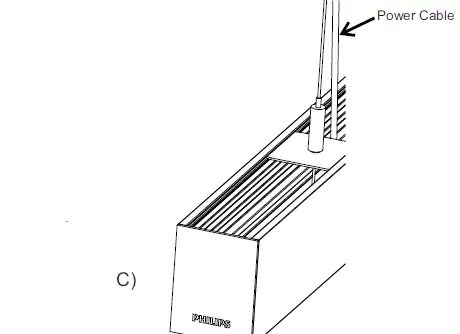
- For mounting height adjustment and to level the fixture , squeeze the tip of the bottom part and pull the suspension wire to desire height.


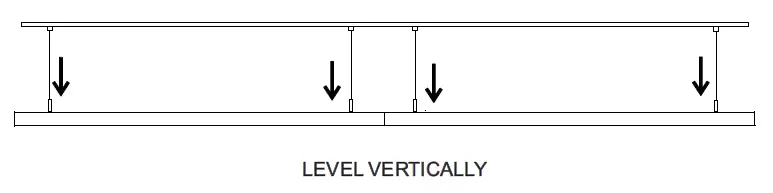
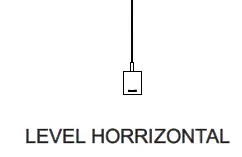
- Ensure fixture is level end to end. Support fixture from below and use adjuster release tool to make final height adjustments. Check level by spirit level in both the planes, Horizontal and Vertical.
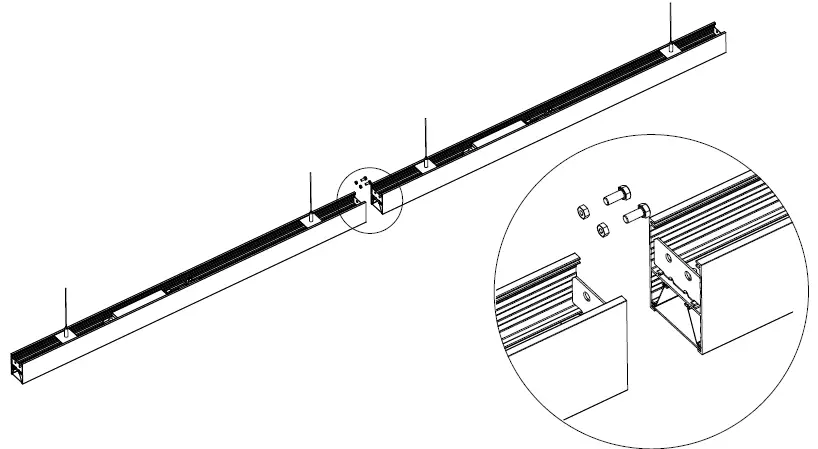
Joining of Luminaires – Continuous mounting
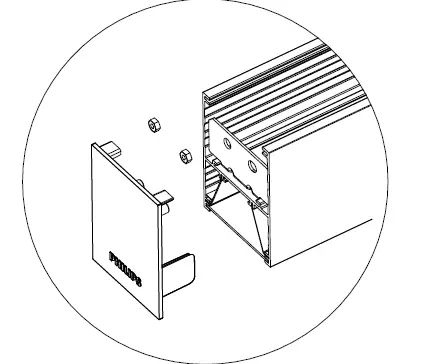
- Both the suspended luminaries is connected in one movement as shown below and fix with M5 hex screw with nut (x2).

- Fixing of end cap with first and last luminaries with M5 nut.

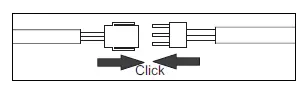
- Complete electrical connections at joints by using supplied click connector . Tuck the wire properly on the side or above the of bracket.

- Pass the wire harness provided as accessory from the first fixture in the row and complete connection with click connector as above.
Notes: Turn off the power before installation to avoid possible electrical shock. - Raise the complete row of fixtures to ceiling with adequate support and at each end of the module, insert suspension cables into fixture and ensure fixtures are vertically and horizontally as per the installation instructions for suspension cable supplied.
Supply Connection ( Place Driver plate assembly behind the ceiling after connection)
Connect the transparent cable from luminaire with 3-Pole connector on driver output side, LED+, LED- (DC power supply), and earth connection.
Connect mains supply cable (AC power) with the 3-Pole connector on the driver plate.(L-N-E)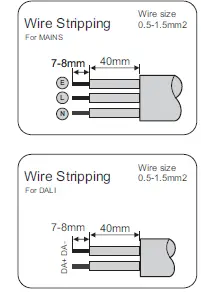
Mains Connections for PSU series
NOTE: DO NOT OPEN ANY OTHER SCREWS (open only Connector screws)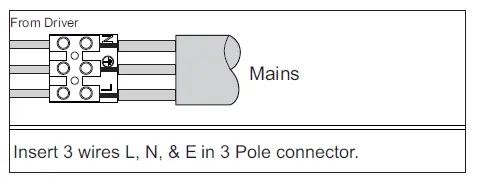
Mains Connections for PSD series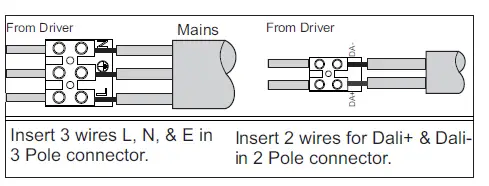
Caution
- “The light source of this luminaire is not replaceable. when the light source reaches its end of life the whole luminaire shall be replaced”.
- Do not stare at the operating light source.
- If the external flexible cable or cord of this luminaire is damaged, it shall be exclusively replaced by the manufacturer or his service agent or a similar qualified person in order to avoid a hazard.
Warning
- Choosing an appropriate fixing to suit the mounting surface is the responsibility of the installer.
- The luminaire shall be installed by a qualified electrician and wired in accordance with the latest IEE electrical regulations or the national requirements.
- The luminaire should be earthened properly for Safety and Performance.
- Do not switch on before complete installation.
Maintenance
Ensure power supply is switched off before attempting any maintenance work.
The luminaire must be used within the applicable product specifications, installation instruction and environmental conditions for storage & operations according to application guidelines provided by Signify for product warranty to be valid.
Signify Innovations India Limited
formerly known as Philips Lighting India Limited
PS ARCADIA CENTRAL, 3A, 3rd floor, 4A,
Abanindranath Thakur Sarani (Camac Street), Kolkata – 700 017


