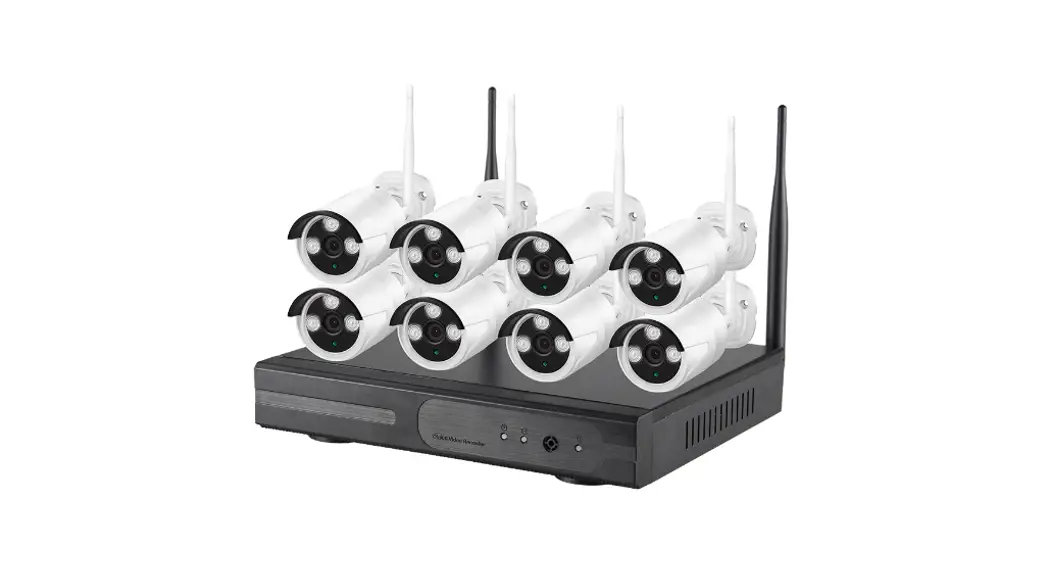
![]() HD NVR KIT 8 Cameras Smart WiFi Video Surveillance
HD NVR KIT 8 Cameras Smart WiFi Video Surveillance
User Manual 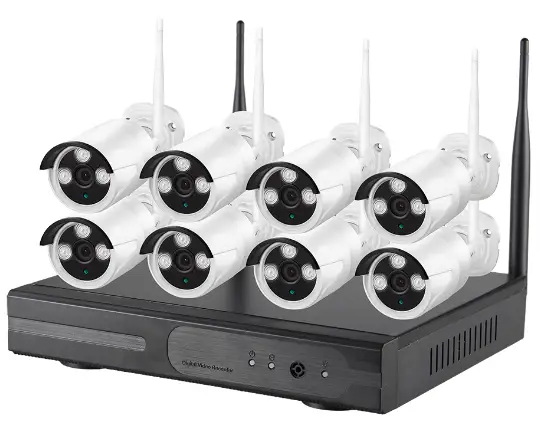
Statement
Thank you purchasing our products, if you have any questions or needs, please contact us.
This manual applies to wireless network video recorder.
Attentions
- Please check when unpacking boxes, confirm the items and lists.
- Please don’t make the kit fall to ground or be hit by strong forces.
- Please keep good ventilation environment around this product.
- Avoid installation in severe vibration environments.
- Please avoid environment with much humidity, dust, extreme heat or extreme cold of the power supply carefully.
- Please avoid environment with much humidity, dust, extreme heat or extreme cold of the power supply carefully.
- Please keep the product box to facilitate transfer or removal of the equipment.
- Please make sure to turn off power of all items during installation. Check the voltage properly.
- Please contact the distributor or service center if the kit is damaged or not working.
Open-package inspection
After receive product, please open gift box then check accessories. If any damage or lack,kindly please contact to the distributor.
Packing list
| S/N | Item | QTY |
| 1 | NVR Host | 1 |
| 2 | Screw bag(4 screws for HDD) | 4 |
| 3 | USB Mouse | 1 |
| 4 | DC 12V@2A Power supply | 1 |
| 5 | Product user manuals | 1 |
| 6 | Wireless IP Camera | 4/8 |
| 7 | DC 12V@1A Power supply | 4/8 |
| 8 | Screw bag(4 screws for HDD) | 4/8 |
Product description
4.1 Wireless Camera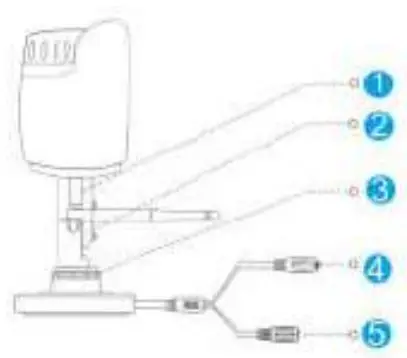
| S/N | Item | Description |
| 1 | Antenna interface | Install antenna |
| 2 | Setscrew | Fixed bracket |
| 3 | Knob | Adjust the camera angle |
| 4 | Reset | Pair button |
| 5 | Power Supply | 12VDC power supply. |
4.2 Wireless NVR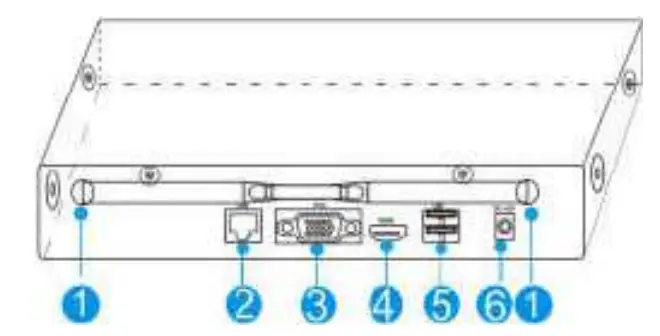
| SIN | Item | Description |
| 1 | Antenna | Install antenna |
| 2 | Reset | Pair button |
| 3 | VGA | DB9 connector for VGA output |
| 4 | HDMI | HDMI video output connector |
| 5 | USB | USB ports for additional devices such as USB mouse, U disk |
| 6 | Power | 12VDC power supply. |
Installation of device
Note:
- A factory recommended HDD should be installed befor power on.
- The maximum of hard disk capacity is 4TB.
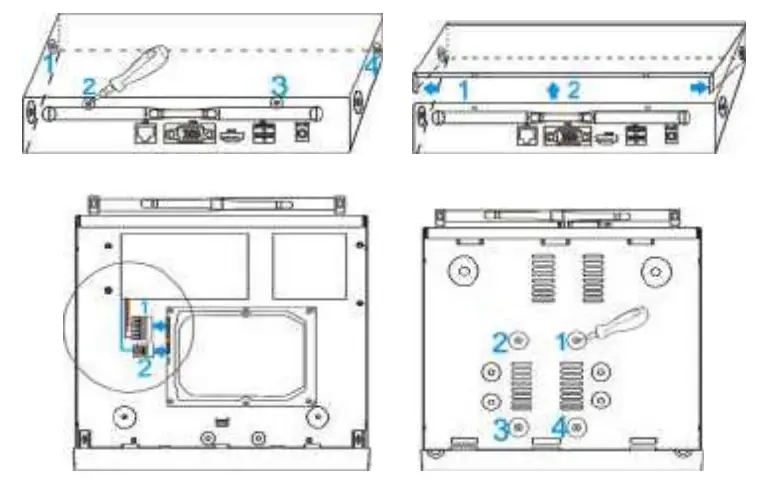
5.1 Install HDD to NVR
- Unfastening the screws on the rear panel,and side panel. and Remove the cover from the NVR.

- Connect the data cable and power cable to HDD.
- Fasten the screws on the bottom to fix the HDD.
- Re-install the cover of the NVR and fasten screws.
5.2 Cable Connection
Connect the wire as below diagram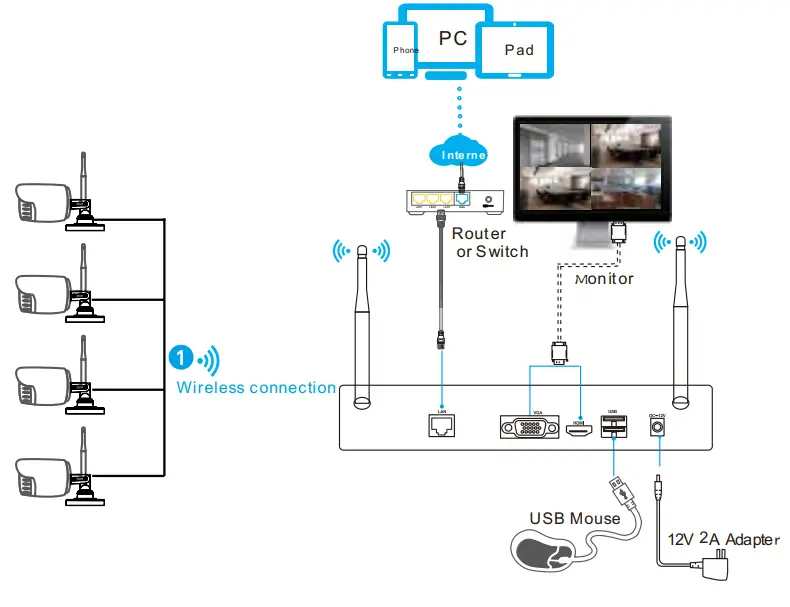 Notes:
In order to guarantee the video quality, IPC antenna should try to keep in parallel or tangent with NVR antenna.
Because the signal of surrounding antenna is much stronger ,but much weaker if antenna endpoints back off direction.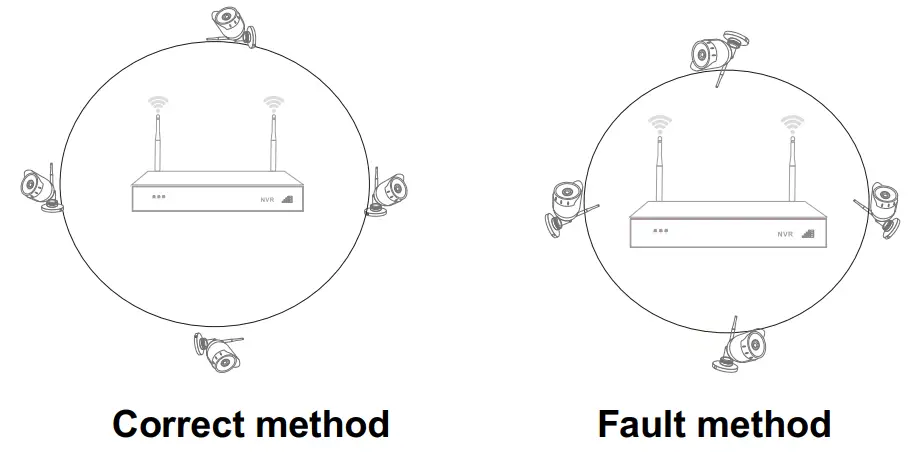
Local Operation
6.1: Power on
Check the power supply is plugged into an electrical outlet,and turn on the button.Then the power LED should red,and the video will automatic display on the monitor, after several minutes.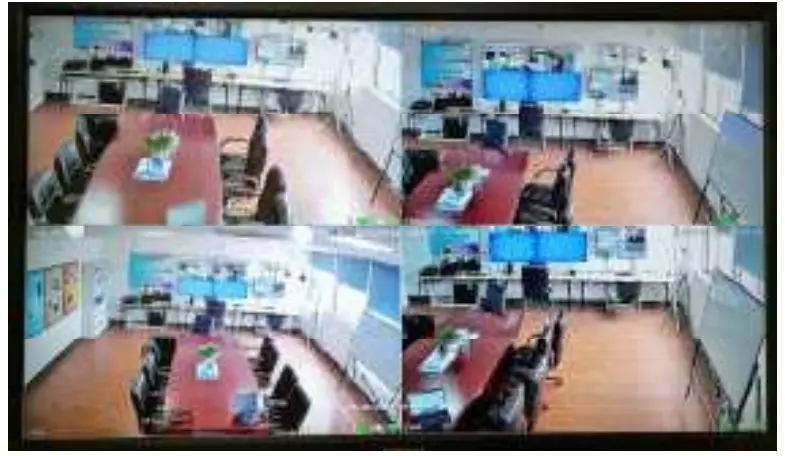
6.2: Login
- Click right mouse button, log-in menu pops up.
- Enter the correct password, default password is admin.
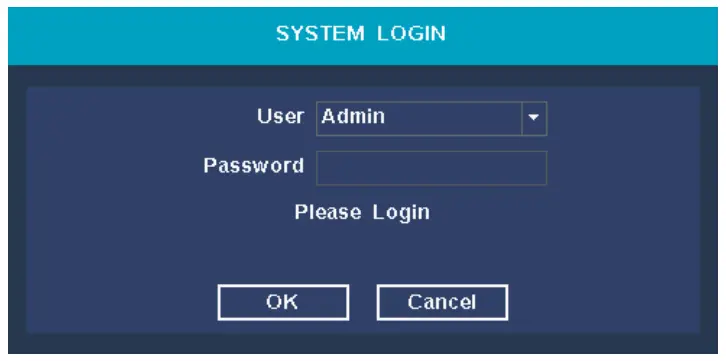
Note:
Please modify the user password before using the product to protect your privacy.
Password modification: Main menu → The system menu → Account →Modify Pwd
6.3: Format the hard disk
- Right click to login and enter “Main menu→System →HDD manager”.
- Then click “Format Disk” button.
- The hard disk status would turn on “in use”.


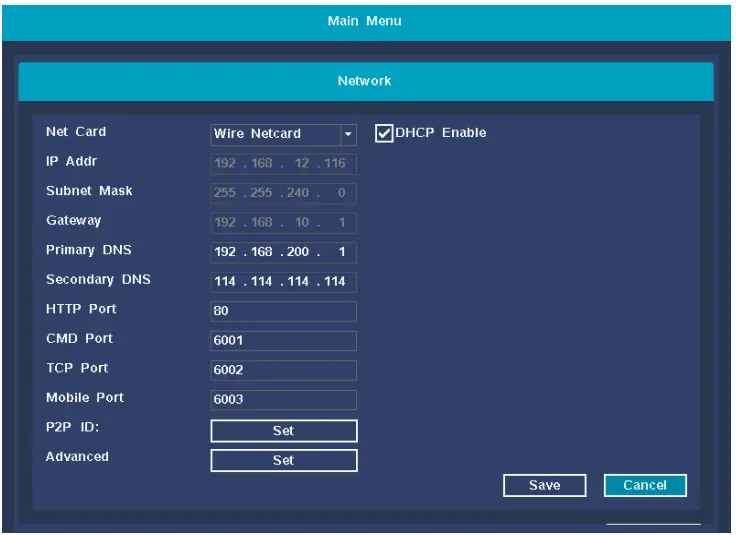
6.4: Network configuration
- Conform network cable is connected to LAN correctly for access the internet.
- Enter into”Main menu→System→Network Config” menu.
- Select”DHCP”,and click “save” button,it”ll request IP address from the DHCP server automatically.
- The configuration is Sucessful,if the IP address is not 0.0.0.0.After refresh. Otherwise,please set the IP address and gateway information Manually.

Mobile Phone view
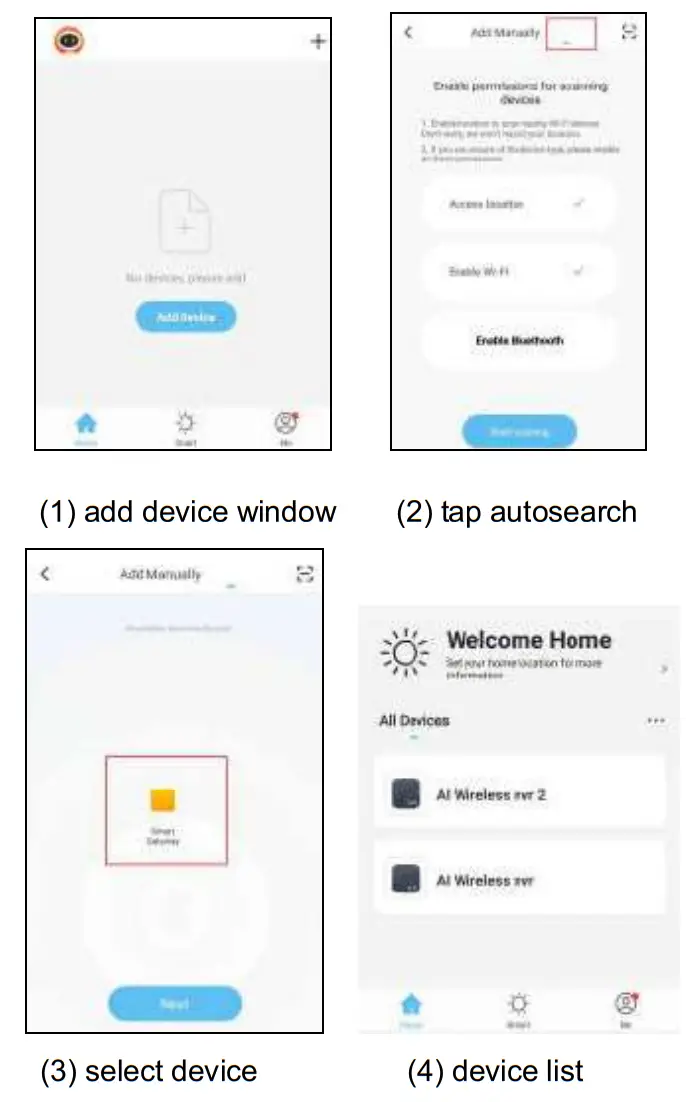
Step 1:Install software
Scanning the QR code in the user manual to download,and install it.
https://testapp.tuya.com/hiseeprosmart?version=1.0.0
Step 2:
Tap “Register” button to register Account.
Step3:
Add device After login,Tap “+” button in the main interface view to open the device adding view.
Step 3:Live view
Tap the online device icon in the device list, the channel’s video will be connected and display automatically.
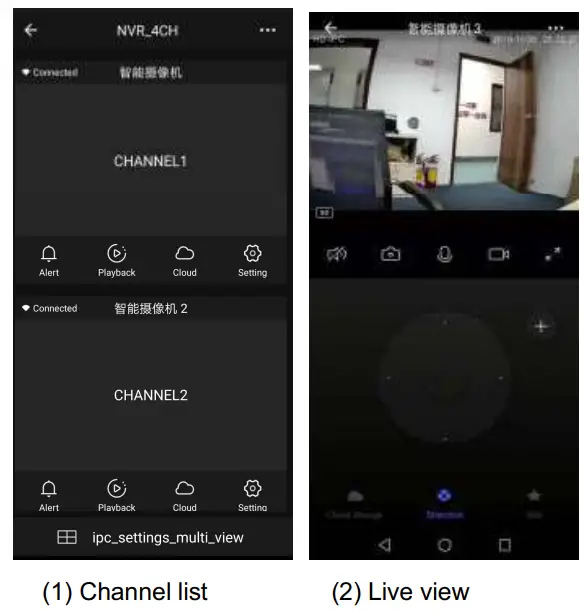
| Icon | description | Icon | description |
| Device info and share | Multi-screen | ||
| Alarm info list | Snap | ||
| Playback on device | Talk | ||
| Cloud Record | Record | ||
| Channel Setting | SD/HD |
Other oparetion
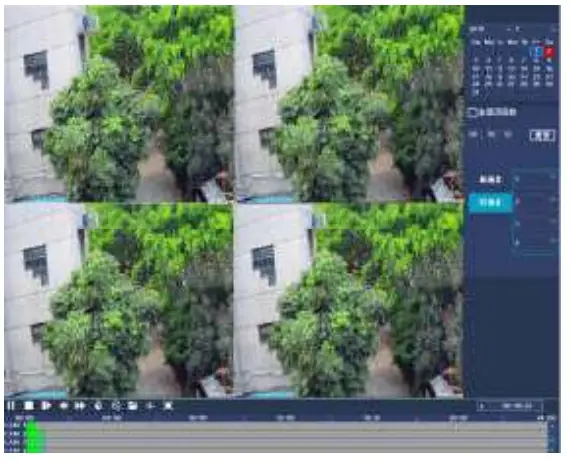
8.1 Video playback
Steps:Right click to select playback → login→ select singal or multi channel playback mode →select channel →select date →double click to start play record.
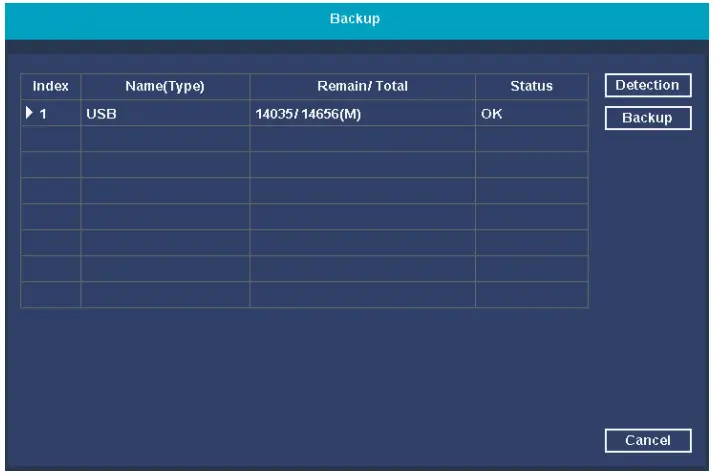
8.2 Video backup
Steps:Insert U disk to USB interface→Right click to select Main menu→login→select backup→select channel→set starting time and ending time→click Search”button→select the record→select or create new file→click “Backup” button to backup record.
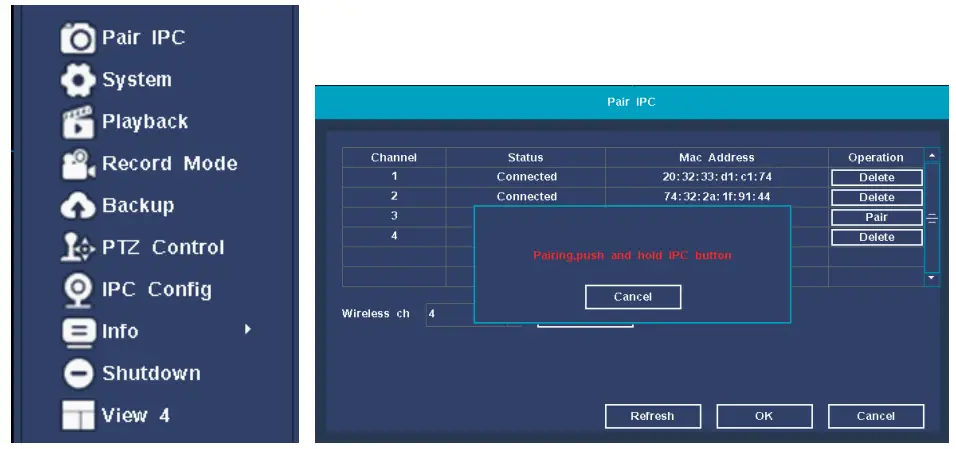
8.3 Add camera
Add or replace wireless camera,please fellow the steps below.
a) Wait 1 minutes for camera start up.
b) Enter ”Main menu→Pair IPC” window, →delete not connected camera → Click ”Pair” button, pop-up a textbar → Push the pair button in IPC within 5 seconds. pair successfully when dispaly “connected” in status column.
c) Repeat step b, then click [OK] button to finish.
Hiseepro download QR code