FORTRESS POWER 11-01-21 eVault Max 18.5 LFP Battery
System Start-Up
Before starting up the battery for the first time ensure the following:
- The system inverter/equipment is De-energized
- eVault Max is Turned off (screen off)
- eVault DC breaker is in the “Off” position
WARNING
Read this entire document, in addition to the Installation Manual, before installing or using eVault Max. Failure to do so or to follow any of the instructions or warnings in this document can result in electrical shock, serious injury, or death, or can damage eVault Max, potentially rendering it inoperable.
INSTALLATION INSTRUCTION
STEP 1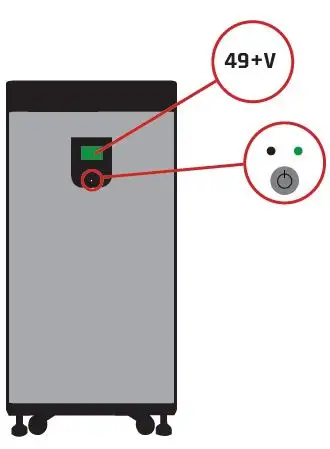
After un-boxing, turn on unit by hold-ing the push button for ~10 seconds (wait for the green status light to turn on)
- Verify Voltage is above 49V on the LCD Screen
- Turn battery off if Voltage is above 49V
If Voltage is below 48V, contact tech support
STEP 2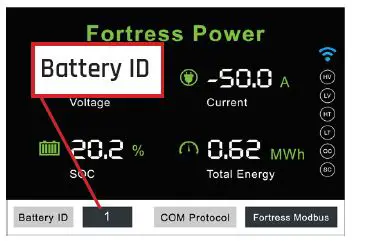
- For single battery systems set the Battery ID to 0
- For multiple battery systems. set the bat-tery ID to 1, 2, 3…N
- NOTE: Please see the full installation manual for multi-battery systems
- Power cycle the battery by using the push button after changing this value.
STEP 3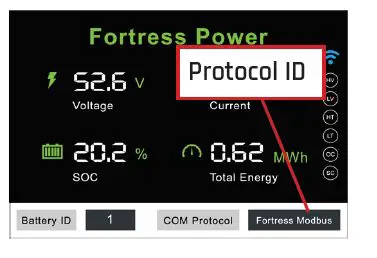
- When configuring closed-loop communication set this ID to match your inverter type.
- Fortress/SolArk RS485 = 1 SMA CAN = 2
- Fortress CAN = 3 Victron CAN = 4
- Schneider RS485 = 5
STEP 4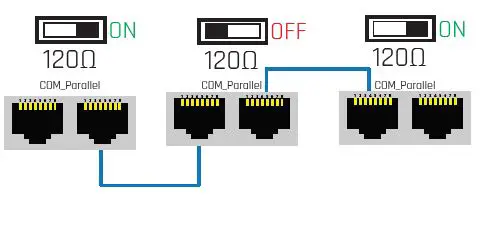
- For multiple battery systems you will need to set the battery termination resistor of the first and last battery to ON, with all others set to OFF.
- In addition, you will need to connect the included ethernet communication cables as shown from battery-to-battery
STEP 5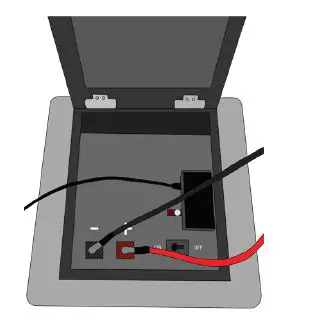
- With the battery off, connect proper DC ca-bling to the terminals of the eVault Max
- Land the other ends on the inverter DC input, or bus bar/battery combiner
STEP 6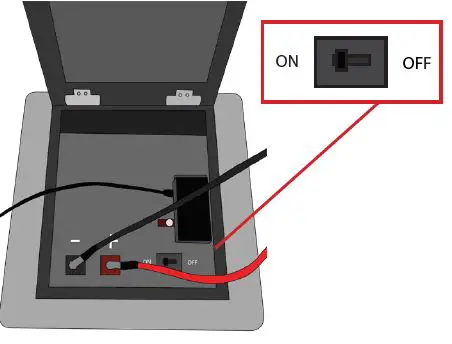
Turn the DC breaker on the eVault max to the “On” position
STEP 7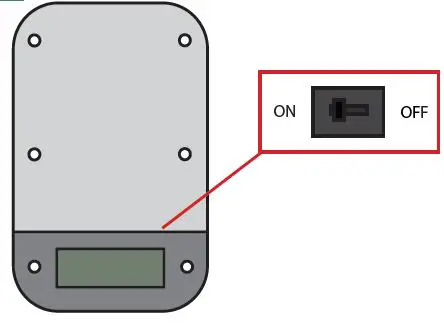
- Turn on the inverter DC input disconnect
- Turn on the eVault Max(s) using the push button
Inverter Programming for eVault Max
Before operating the eVault Max be sure to read the Quick Start Guide, this Setup Guide. and the full Installation Manual. It is critical to program your inverter or charge controller’s settings for correct operation, im-proper programming of your system equipment may invalidate your battery warranty and could degrade system performance.
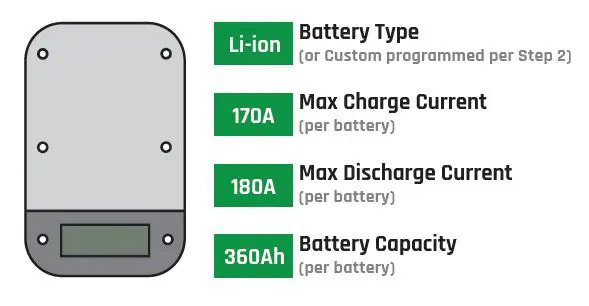
Basic Battery Settings
Charging Settings for open-loop control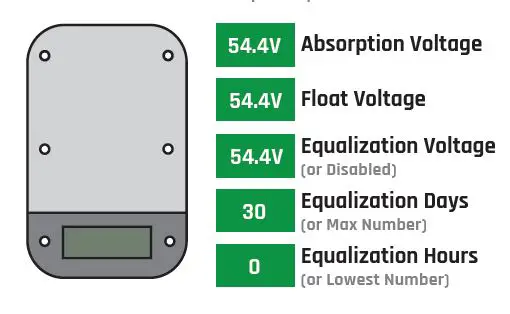
Discharge/Cutoff Settings for open-loop control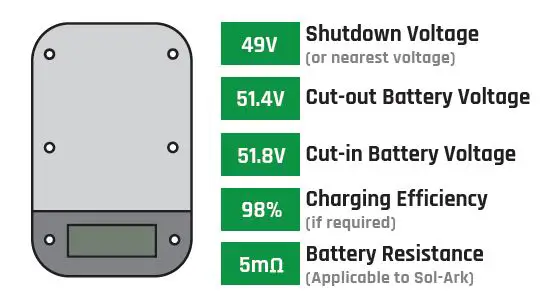
Advanced Settings for closed-loop control
Closed-loop is only supported by select inverters and requires a custom communication cable. For detailed instructions on implementation and a full compatibility list please visit our website at: http://fortresspower.com/inverter-guides
USB Logging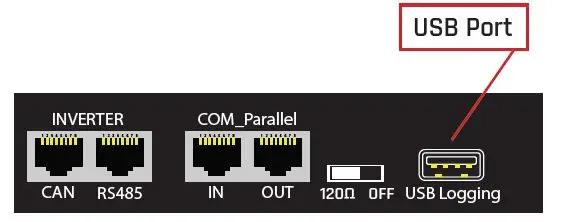
The default Max includes a USB stick for data logging information from the battery when requested by tech support. This should be left unplugged when not in use or it can cause performance issues with the battery.
- www.fortresspower.com
- (877) 497-6937
- [email protected]


