Hiwonder Lesson 3
Getting Ready
APP Installation
Android user: Please find the installation pack under the same folder and transfer it to your phone to install. Please note that enable all permissions for App in your phone settings, otherwise it may affect the normal realization of functions!
iOS user: Please search “WonderPi” in APP store.
Please open GPS and WIFI service before trying this APP.
Start the Device
Please connect the battery pairing wires in red to red and black to black according to the previous steps. Then turn Tony Pi’s power switch to the ON position.
Device Connection
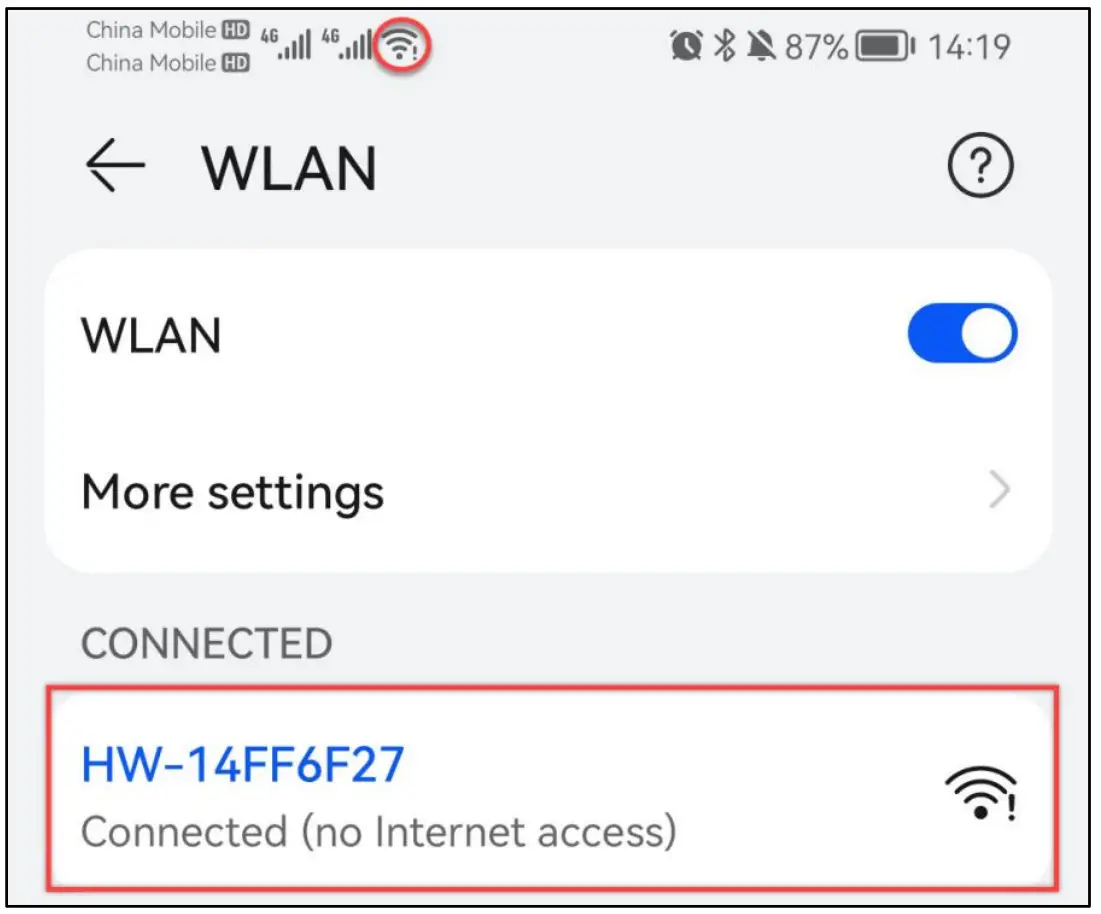
After booting up successfully, TonyPi Pro will generate a hotspot started with “HW”, and then connect to this hotspot in the “settings” on your phone.
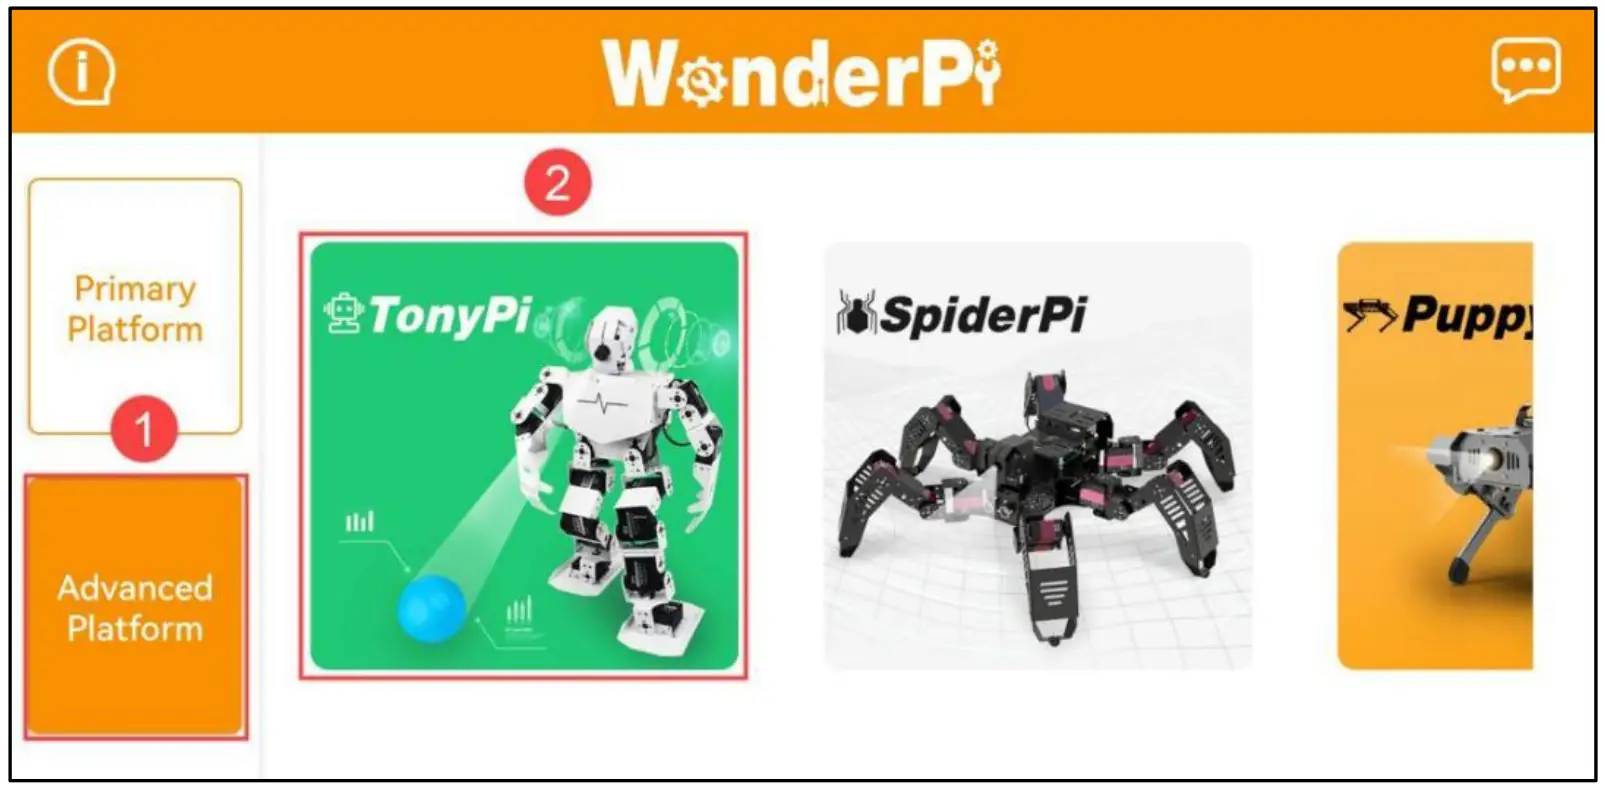
- Open the APP first and choose “Advanced platform”, and then “TonyPi” in the home interface.

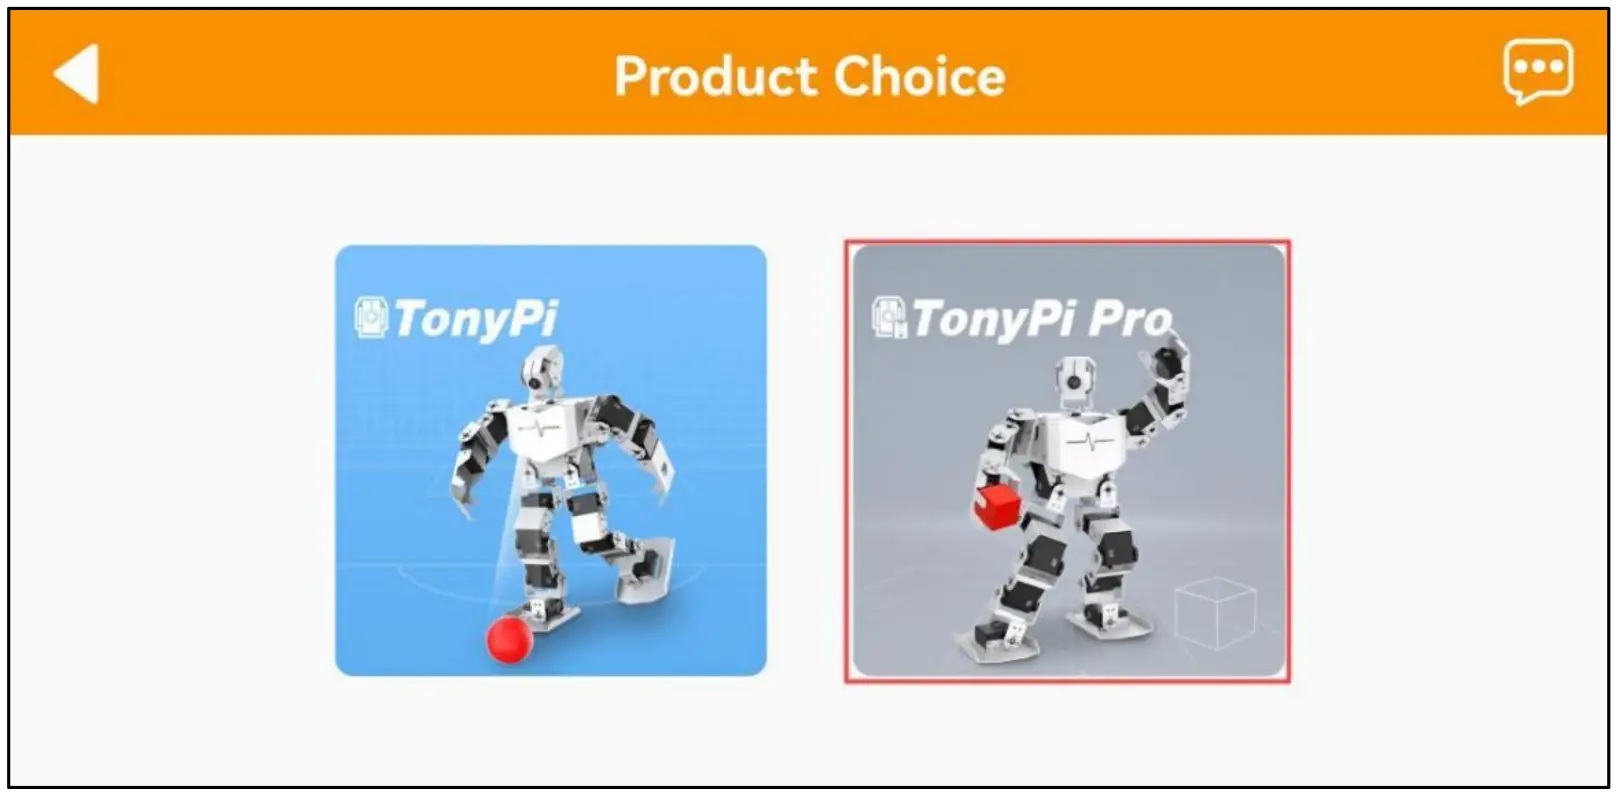
- Click “TonyPi Pro” icon.

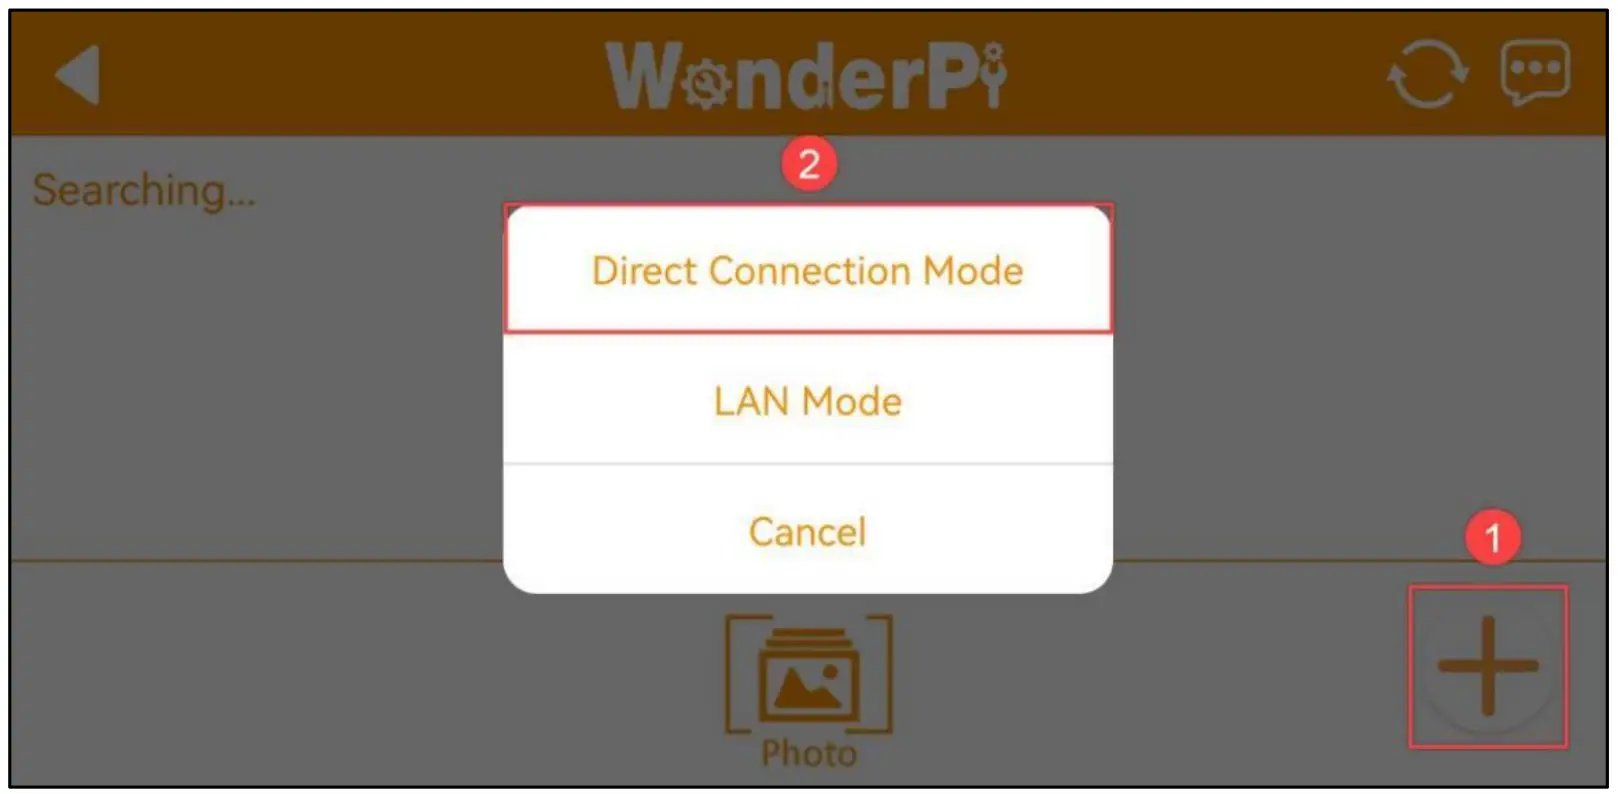
- Then click “+” icon to select “Direct Connection Mode”
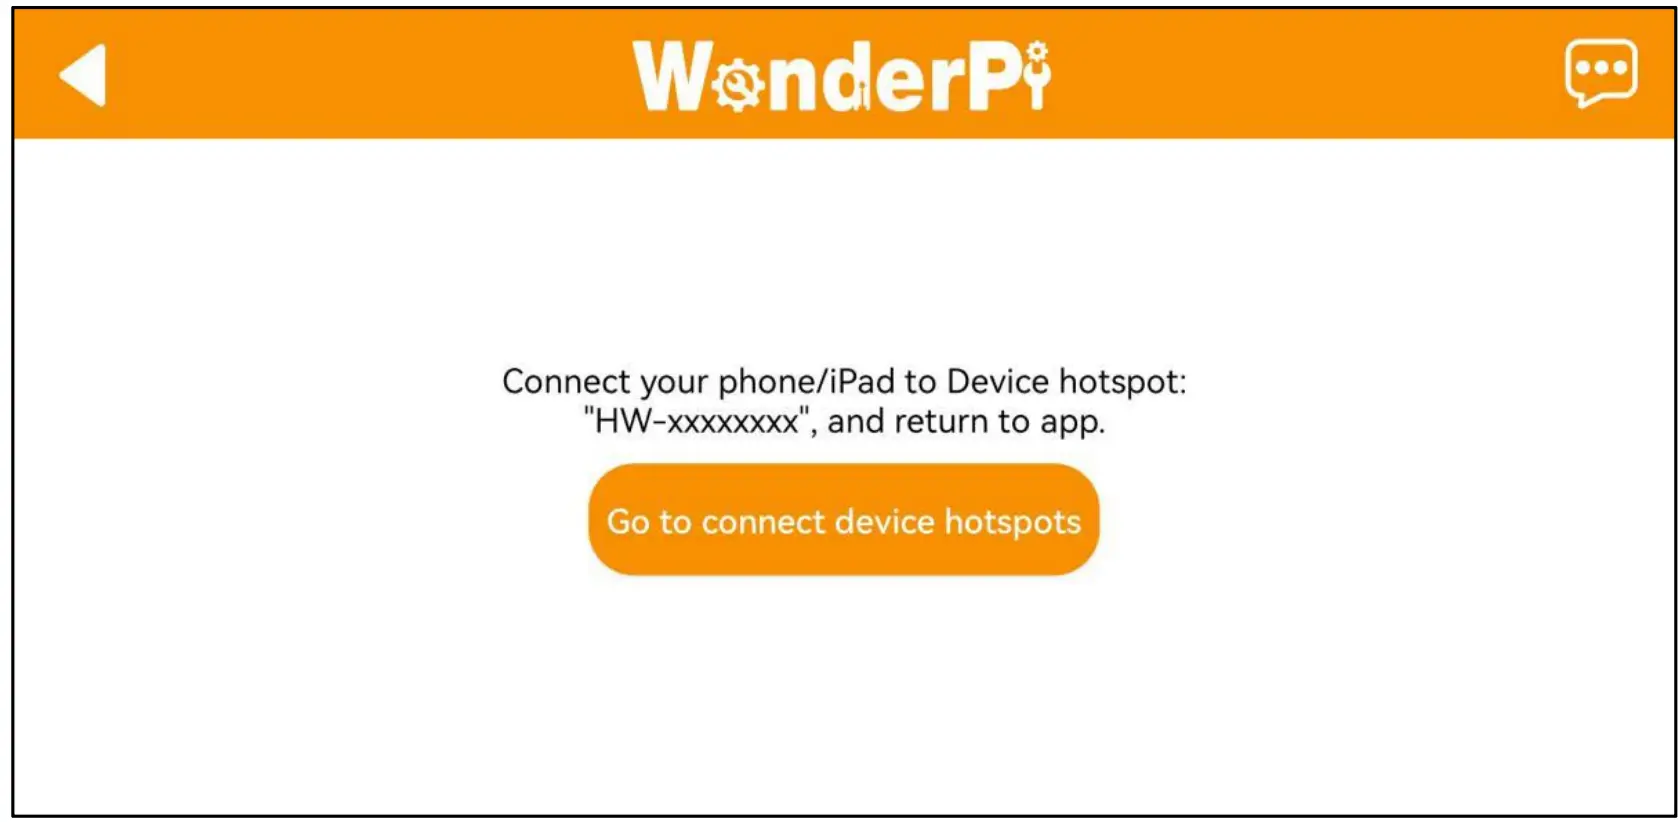
- Connect to the hotspot started with “HW” in your phone settings according to interface prompts.


- Back to WonderPi after connecting WI-FI, and then APP will connect the device automatically.
Wait for a moment. When the robot icon appears, as the figure shown below, it means that the connection is successful.
Note: If you are an iOS user, when connecting to a hotspot, please do not return to the app until Wi-Fi icon appears on the top of your phone, otherwise the device may not be searched. In case of this situation, you can click ![]() icon to refresh multiple times to search for the device.
icon to refresh multiple times to search for the device.
 If the prompt “The network is unavailable, do you want to continue to connect” pops up, please click “Keep connecting”
In addition to using the mobile phone to connect Wi-Fi directly, you can set RaspberryPi and mobile phone under same network at the same time. Please refer to folder “4. Raspberry Pi Board Basic Lesson/4. Raspberry Pi Basic Lessons/ Lesson 7 RaspberryPi WLAN Connection”.
Mobile APP Operation
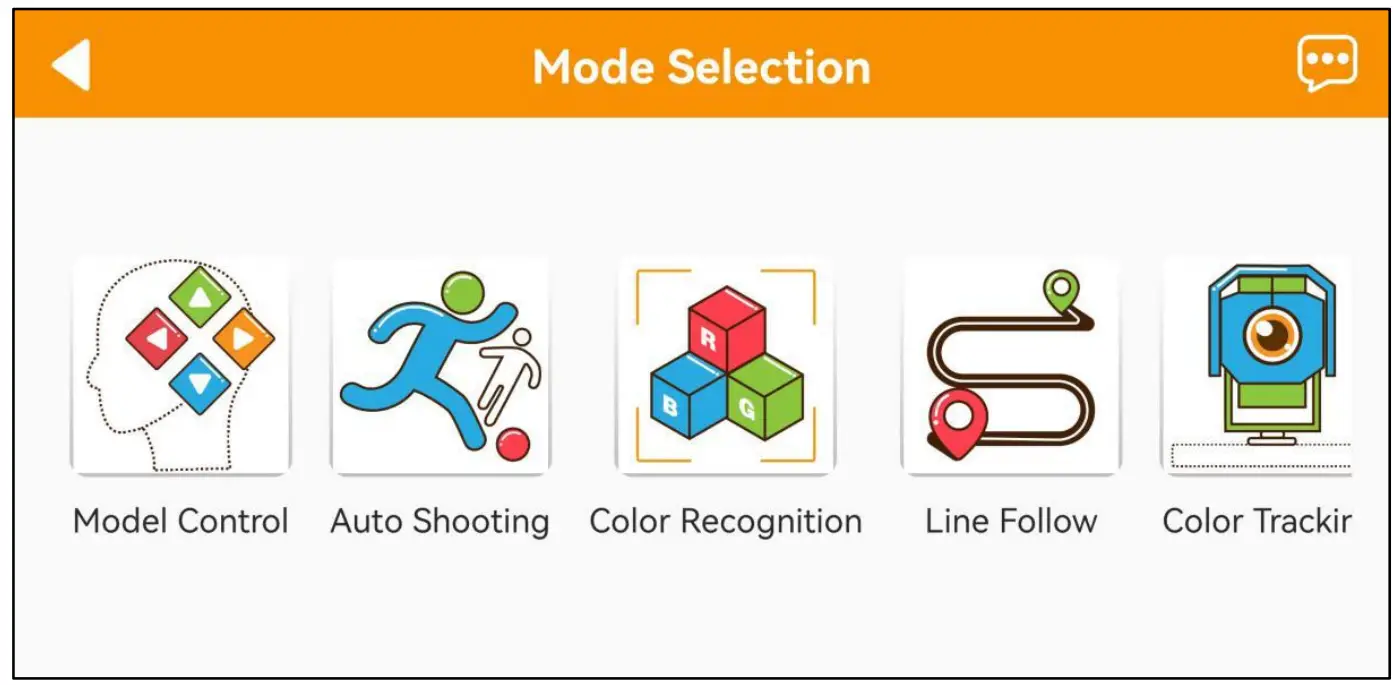
- Click robot icon to enter game selection interface.

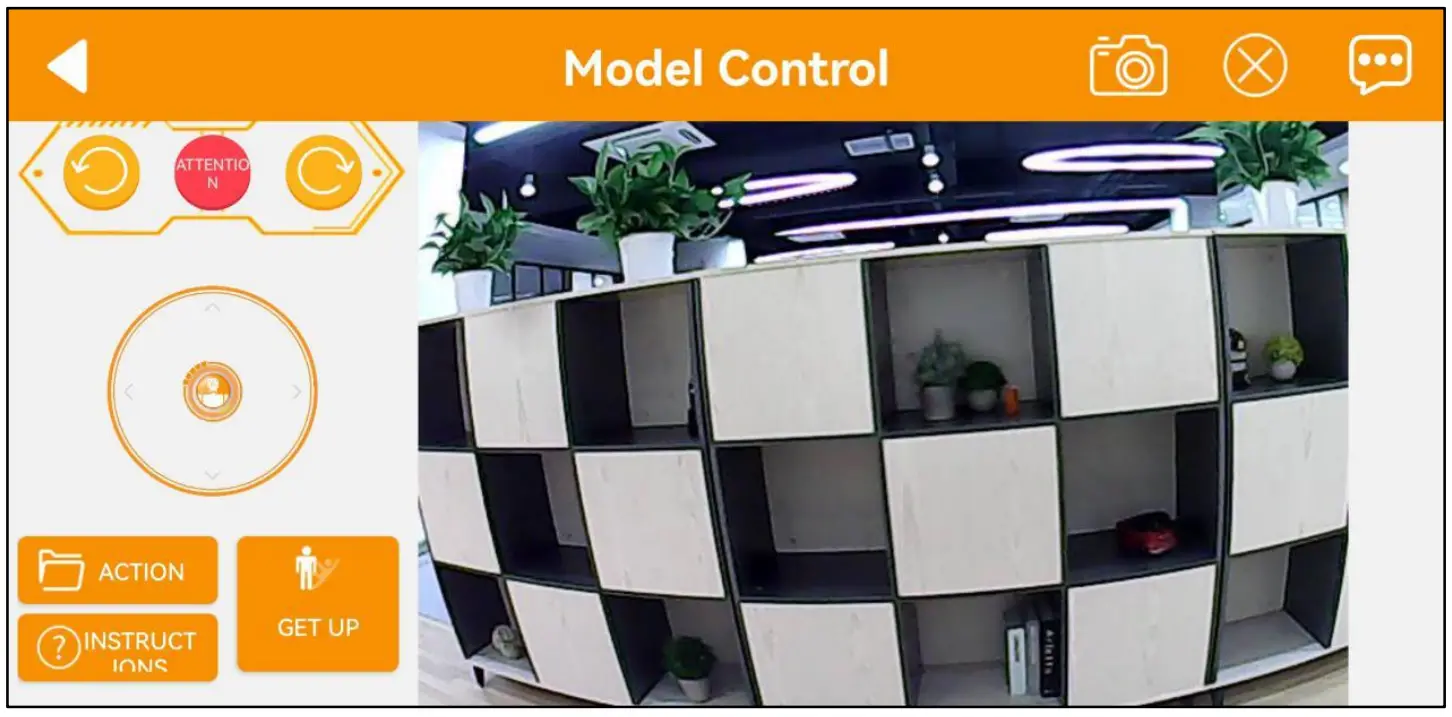
- Select a game, such as “Model Control” to enter the corresponding interface, and then TonyPi Pro will return to the initial posture.

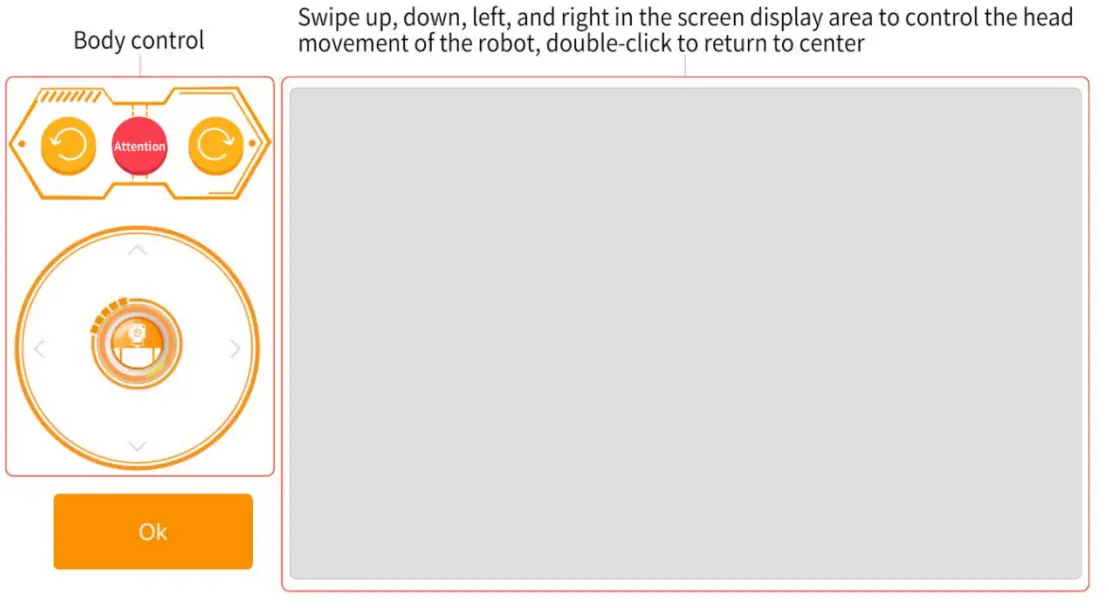
- The “Model Control” interface consists of two parts. On the left side, you can drag the icon to control the movement of TonyPi Pro. The functions of other icons can refer to the following table:
Icon
Function

Drag to control the movement of TonyPi Pro 
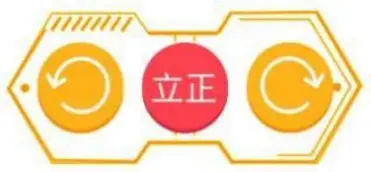
Control robot to move right and left, and attention. 
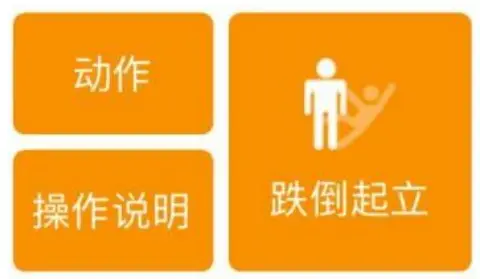
Perform built-in actions and falling and standing up action. The left side of interface is the real-time image transmitted by camera and you cans wipe screen to control the head’s movement.
Please note that the servo on head has position limitation protection. After turning to the extreme position, sliding the screen again will give vibration feedback. Donor continue to turn for the servo protection. - You can refer to “operation instruction” in lower-right corner of interface. Thespecific content is as the figure shown below:

TonyPi Pro will back to the initial posture when you switch to another game. - If you want to back to the home interface, please click the blank area to display menu and click

If you want to learn the working principle of each game function, please come to folder “3. AI Vision Games Lesson”.
The remaining games can refer to the following table:
- If the screen get stuck, please exit and enter again.
- No.8 and No.9 is the games specially designed for TonyPi Pro. (user who purchased standard and advanced versions can skip it.)
No. | Game | Instruction |
| 1 | Model Control | Control the movement of TonyPi Pro and camera to perform action group and the function of falling and standing up. |
2 | Auto Shooting | Select a specific color and then TonyPi Pro will adjust its position to kick the ball. |
| 3 | Color Recognition | TonyPi Pro will nod when detect the red and shake its head when the green and blue are detected. |
| 4 | Line Follow | Select the color and then TonyPi Pro will move along the specified color line. |
| 5 | Color Tracking | Select the color and then TonyPi’s camera will track the color to move. |
6 | Facial Recognition | TonyPi Pro will look around to search a humanoid face with 1 meter. It will wave to greet when the face detected. |
| 7 | Tag Recognition | Recognize the tag to execute the corresponding actions. |
8 | Cross Hurdle | Recognize the blue part of hurdle tool, and then perform “hurdling” action. |
| 9 | Go Up and Down Stair | Recognize the red part of stair tool, and then perform “going up and down stair” action. |


