![]()
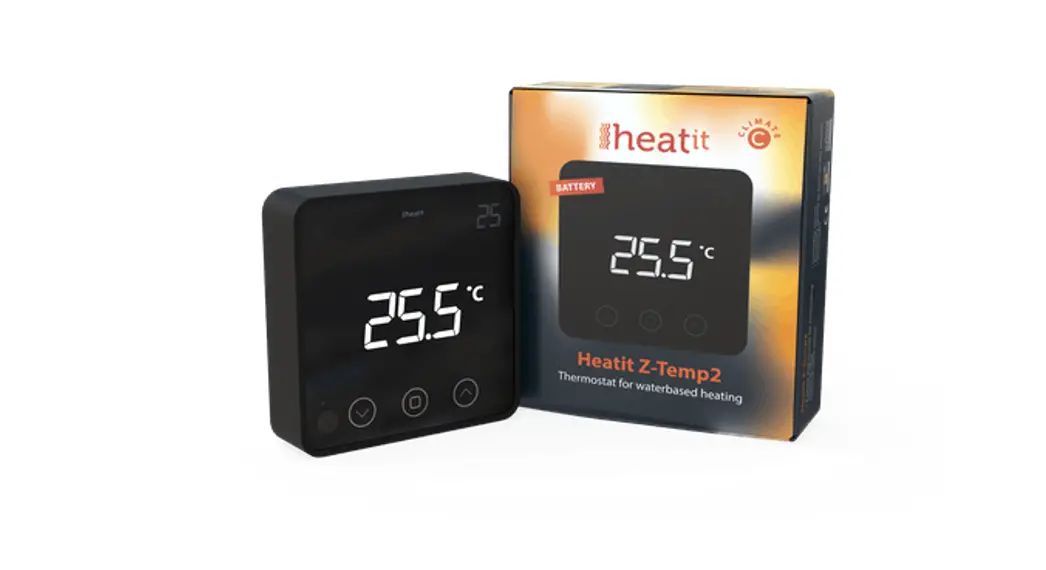
HEATIT WIFI
Installers manual
INTRODUCTION
Heatit WiFi thermostat is an electronic thermostat for electrical underfloor heating. The thermostat has a simple user interface and can be easily programmed via capacitive buttons. The color screen displays an accessible user interface. The thermostat has a built-in WiFi chip that allows you to control it from a user-friendly app. The ”Heat WiFi” app is available on Google Play and in the App Store. Works with Amazon Alexa and Google Home (pending). If you are installing multiple thermostats in the same house, you may copy the settings from one thermostat to the next. This simplifies installation.
Heatit WiFi thermostat 16A is equipped with a single-pole switch and fits into most common frames (e.g. System 55, Elko RS16, Schneider Exxact). The thermostat can withstand a load of max 16A/3600W at 230VAC. We recommend a contactor for loads above 13A. The thermostat may be connected to an external sensor.
The thermostat is designed for electrical heating.
INSTALLATION
Installation must be done by a qualified electrician in accordance with the national building codes. Before installation, disconnect any power to the device mains. During the installation of the device, power to the device must be disconnected AT ALL TIMES!
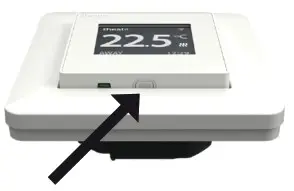
Release the front cover by pressing e.g. a screwdriver gently into the ejector latch at the bottom of the thermostat.
Now connect the wires to the thermostat terminals:
| L LOAD (N) LOAD (L) N PILOT SENSOR | Power connection (Live) Heating Cable connection (Neutral) Heating Cable connection (Live) Power connection (Neutral) Pilot Wire (if applicable) Floor temp sensor, NTC type |
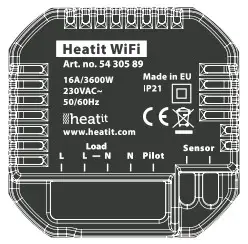
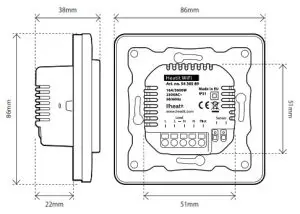
Wires must be stripped 9-10mm. Wires can be released by pressing the connector’s release switch. The floor sensor must be placed into a protective tube when used in concrete. Make sure there is no water in the tube. Next, position the thermostat and fasten it onto the wall mounting box using 2-4 screws. Open the frame retaining spring, position the frame and close the spring. Then attach the front part, making sure the connector between the front and bottom parts are correctly placed. Press the front part until it snaps in place. The front part may later be removed by pressing the ejector latch.
STARTUP
After connecting the power to the thermostat for the first time or after performing a factory reset, the startup wizard will prompt the following questions:
| Language | Set language |
| Set timezone | Timezone compared to GMT |
| Daylight saving | Daylight saving in use Y/N |
| Date & time | Set current date & time |
| Thermostat use | Heating or Cooling |
| Heating system | Floor (Slow), Floor (Fast), Other (Fast) |
| Floor-type | Concrete or wooden |
| Floor Temp limit | 5°C – 40°C (concrete) or 5°C – 27°C (wood) |
| Choice of sensor | Room/Floor |
| Gradual Heating | ON or OFF – used with new concrete floors to limit temperature rise time. Only in-floor sensor mode. |
Note: Wooden floors require a floor sensor to be connected, in order to set the floor temperature limit to 27°C.
SYMBOLS
 | Home |
 | Power regulation |
 | Week schedule |
 | Away |
 | Anti-frost |
Operation mode
 | Heating enabled |
 | Cooling enabled |
 | Cooling |
Heating/Cooling Active
 | The wooden floor has reached the maximum temperature of 27°C, thus heating is being limited. |
Note
Gradual heating
Gradual heating will raise the temperature slowly over the course of 20 days. This is mainly used for new installations.
CONTROLS
The thermostat is controlled by three touch-sensitive buttons:
- Left (Up)
- Center (Confirm)
- Right (Down)
Each button has its own background light. When the background light is lit on a button, the button is available for use.
Tip: Holding the left button for 2 seconds at any time will make a quick return to the main screen.
Tip: While browsing the thermostat menu, pause at any menu item for a moment, and a help text will be shown. This help text gives useful information and guides the user through the functions related to that menu item. The help text delay can be adjusted under “Settings” in the main menu.
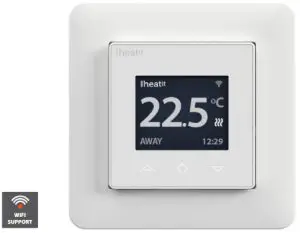
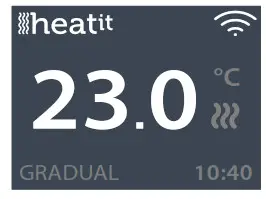
STANDBY AND MAIN SCREEN
If the thermostat is not touched for a while, it will automatically go to the standby screen. While in standby, touching any of the buttons will display the main screen below:
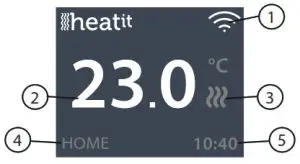
- WiFi indicator
- Measured temperature
- Heating switched on/off
- Operation mode
- Time
In the main screen, pressing the center button will access the main menu. Pressing the left or right button will change the set temperature.
The main menu has the following items:
| Operation Mode | See point 8: ”Operation Mode” |
| Schedule | See point 9: ”Weekly schedule” |
| Settings | Adjust the settings |
| WiFi | Adjust WiFi settings |
| Energy consumption | Show energy consumption |
| Child Lock | Activate lock |
| Info | Thermostat information |
| Shut down | Switch thermostat on/off |
Tip: “Energy Consumption” shows consumption statistics over different time periods. Press the center button to reset statistics.
Tip: Select “Child Lock” and press the center button three times to activate/ deactivate the lock.
OPERATION MODE
The thermostat has three main modes: Home, Away, and Weekly schedule. The additional modes are Anti-frost and Power regulation.
 Home
Home
The preset temperature while you are at home. The temperature setting may be changed and automatically saved.
 Away
Away
Preset (reduced) temperature while you are away. The temperature setting may be changed and automatically saved. An external pilot signal will also change operation mode between Home and Away.
 Weekly schedule
The thermostat follows the settings in the Schedule menu. Programming may also be done through the phone app.
 Anti-frost
This mode lowers the setpoint to 7 degrees. This may be used e.g. in a summer cottage during winter time to prevent frost damage.
 Power regulation
The engineering model operates without feedback from sensors. Relay conduction time is selected e.g. 20% relay is ON 20% and 80% OFF during the cycle time. The cycle repeats automatically.
WEEKLY SCHEDULE
Create customized daily schedules to minimize energy consumption and maximize comfort. The user can define up to five set points per day. A setpoint gives a target set time and a target set temperature for the thermostat to regulate automatically. You may view your daily heating schedule in this menu. Setpoints may be added and removed according to your preferences.
Tip: Create a daily schedule for a weekday according to your preferences. Then use the copy/paste function to duplicate the given day’s schedule to other weekdays.
HEATIT WIFI ZONES
All thermostats are added to zones. Zones can control multiple thermostats at a time.
If there is only one thermostat in a zone, the zone settings will adhere to changes made locally on the thermostat. If there are multiple thermostats in a zone, the changes made locally on one thermostat will make that thermostat enter custom settings mode. When in custom settings mode the thermostat will not receive updates from the zone. You can still control the thermostats individually in the app.
To make the thermostat adhere to the zone settings again, you will have to set it back to zone settings in the app.
ADVANCED SETTINGS
WARNING: Advanced Settings is recommended only for expert users. Consult your supplier or use with extreme caution! Incorrect settings may damage your floor or heating system!
Advanced settings menu has the following items:
| Heating setup | Change heating or cooling |
| NTC sensor | Change NTC type |
| Hysteresis | Change temperature variation (not in slow floor mode) |
| Calibration | Fine-tune temperature measuring |
| Temperature limits | Set limits for room and floor temperature |
| Pilot wire | Change pilot wire setting |
| Adaptivity | See the description below! |
| Factory reset | Perform a full factory reset |
| Restart device | Perform reboot |
Adaptivity: The thermostat will automatically start/stop heating proactively to reach the set temperature at the set time. If adaptivity is switched off, the thermostat will start/stop heating at the set time instead of operating proactively to reach the set temperature at the set time.
WIFI SETTINGS
When the thermostat is not connected to the cloud, “Connect to the cloud” can be started from the WiFi settings menu. The connection is made using the phone application “Add thermostat”. The thermostat will show two 3 digit PIN codes that must be copied to the phone application. The password for the selected WiFi network will be given in the phone application. When the ”Add Thermostat” operation is finalized, the thermostat will reboot.

After the thermostat is connected to the cloud, the WiFi settings menu will offer the option to turn WiFi OFF/ON. Existing WiFi settings will be used when turning WiFi back to ON.
To change the WiFi network or password please use the ”Connect to cloud” menu along with the ”Reconfigure WiFi” menu in the phone app.
PHONE APPLICATIONS
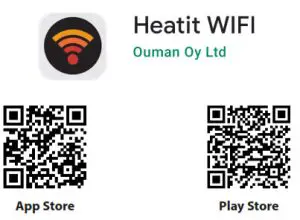
https://itunes.apple.com/us/app/heatit-wifi/id1568098480
https://play.google.com/store/apps/details?id=com.thermofloor.heatitwifi
PRODUCT INFO
Heatit WiFi Thermostat
![]()
FEATURES
| • Floor sensor or external sensor • Internal room sensor • Power regulator •Adaptive regulation • Temperature limiter • Weekly schedule • Home/Away/Anti-frost • Control via app | • Alarm/notifications in-app • Firmware update (OTA) • Energy calculator • Single pole switch • Lock mode/Child lock • Calibration • Amazon Cloud • Norwegian/Swedish/ English/Finnish/Dutch languages |
TECHNICAL DATA
| Protocol | WiFi 2.4GHz 802.11bgn |
| Display | 1.8” TFT, 128×160 resolution |
| Rated voltage | 230VAC 50Hz |
| Max load | 3600W (resistive loads only) |
| Max current | 16A |
| Power consumption | <2W |
| Ambient temperature | 2°C to 30°C |
| Temperature range | 5°C to 40°C |
| Hysteresis | 0.2°C to 2°C (0.5°C standard) |
| Compatible with NTC sensors with value | 6.8, 10, 12, 15, 22, 33, 47, 100 kΩ @ 25°C |
| IP Code | IP 21 |
| Approvals | CE EN 60730-1:2016, EN 60730-2-9:2019, ETSI EN 300 328 V2.2.2, RoHS 2011/65/EU, LVD 2014/35/EU |
Approved for use in bathrooms.
TERMINAL
Use 1.5mm² or 2.5mm² according to load.
MAINTENANCE
The device is maintenance-free, but must never be covered.
| ART. NO. | PRODUCT | COLOR |
| 54 305 89 | Heat WiFi Thermostat | White RAL 9003 |
Heatit Controls AB can not be held liable for typographical errors, other errors or omittances in our information.
Product specifications may change without further notice. All electrical installations must be carried out by a licensed electrician. The product must be installed in accordance with national building codes and our installers manual.
![]()
Heatit Controls AB l Läkarvägen 4, 454 31 BRASTAD, SWEDEN
Phone: +47 61 18 77 77 l [email protected] – www.heatit.com


