![]()
011240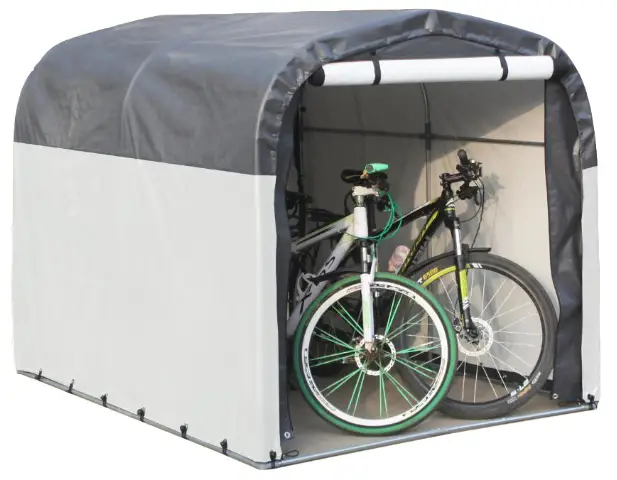
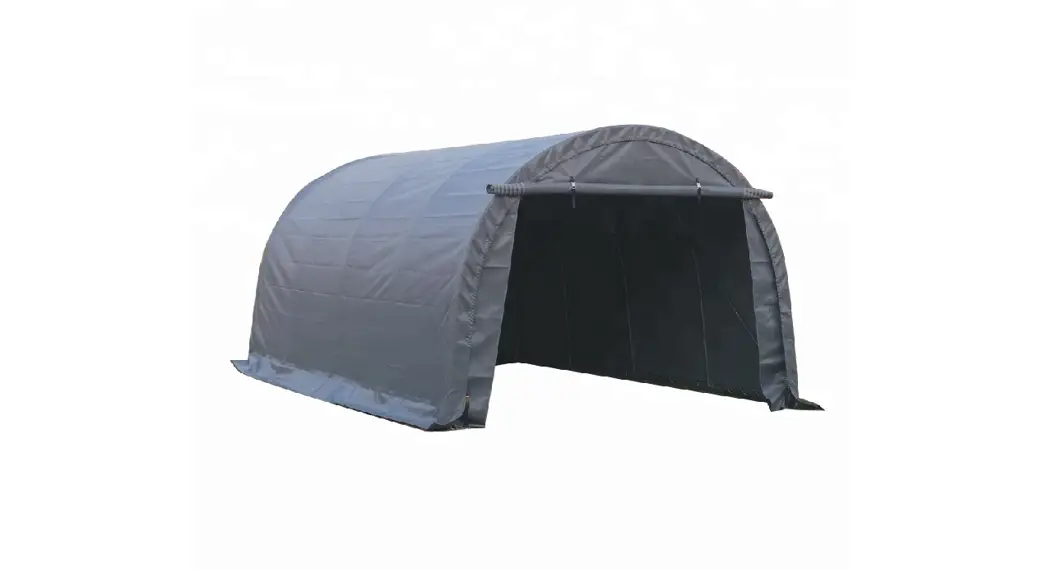
![]() GARAGE TENT
GARAGE TENT
OPERATING INSTRUCTIONS
Important! Read the user instructions carefully before use. Save them for future reference. (Translation of the original instructions)
JULA AB, BOX 363, SE-532 24 SKARA 2022-01-06 © Jula AB
 |  |
 |  |
 |  |
SYMBOLS
| Read the instructions. | |
 | Approved in accordance with the relevant directives. |
 | Recycle discarded products in accordance with local regulations. |
TECHNICAL DATA
| Size | L2.2 x W1.57 x H1.63 m |
| PE cloth | 195 g/m2 |
DESCRIPTION
A tent made of galvanized steel tubing and UV-protected PE cloth. Four earth anchors included.
| Pos. | Designation | Qty |
| 1 | Longitudinal support tubes | 10 |
| 2 | Post | 6 |
| 3 | Door support tubes | 4 |
| 4 | Roof tubes | 6 |
| 5 | Corner connector, base | 4 |
| 6 | Middle connector, base | 6 |
| 7 | 4-way connector | 2 |
| 8 | 3-way connector, roof | 2 |
| 9 | 4-way connector, roof | 1 |
| 10 | Connector | 2 |
| 11 | Door panel | 1 |
| 12 | Back panel | 1 |
| 13 | Roof tarpaulin | 1 |
| 14 | Anchor A | 4 |
| 15 | Strap, short | 30 |
| 16 | Strap, long | 20 |
| 17 | Clamping ring | 4 |
| 18 | Anchor B | 4 |
| 19 | Wire, 30 cm | 4 |
| 20 | Wire lock | 4 |
ASSEMBLY
Do not leave the product unattended during its assembly. This can result in personal injury and/or material damage.
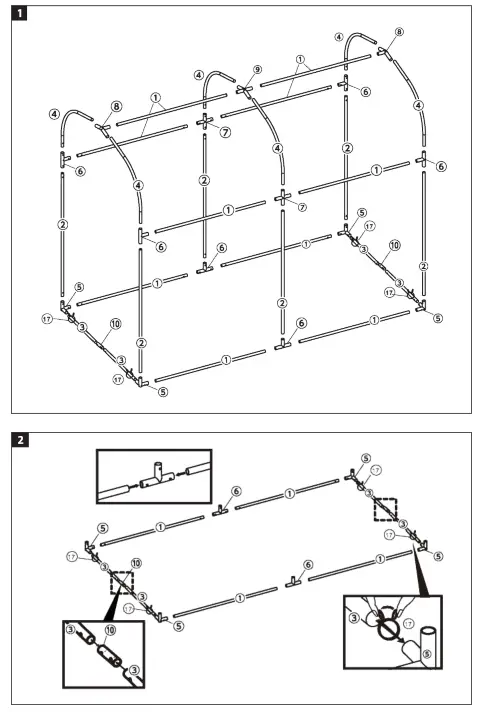
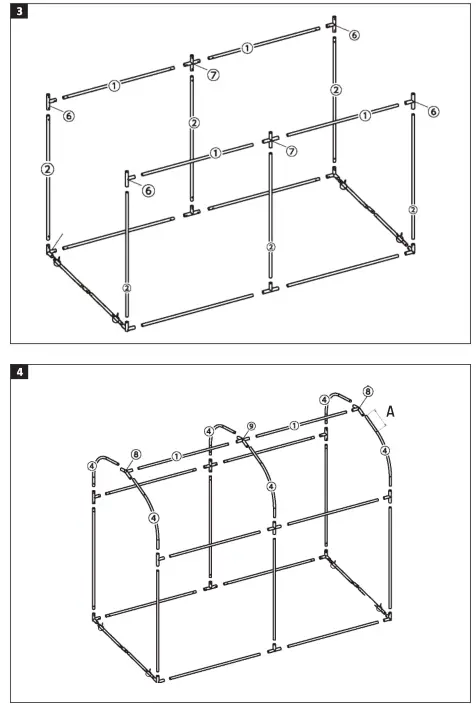
- First assemble the base frame as shown in the diagram.
FIG. 1
Fasten the clamping ring (17) on the door support tube (3) first.
FIG. 2 - Fit the posts and the upper, longitudinal support tubes.
FIG. 3 - Now assemble the roof. FIG. 4
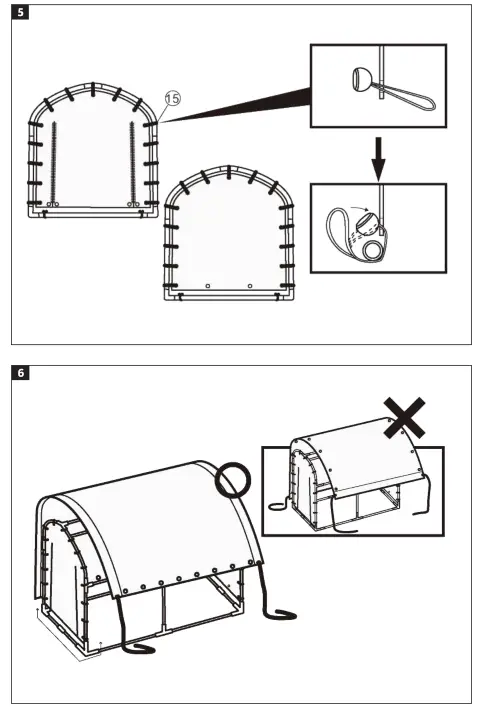
The “long” part (A) of the roof tube (4) should be on top. - Fasten the door panel to the frame with the short straps (15).
FIG. 5 - Fasten the roof tarpaulin as shown in the diagram. The tarpaulin should be turned so that the rows of eyelet reinforced holes run along the long sides of the frame.
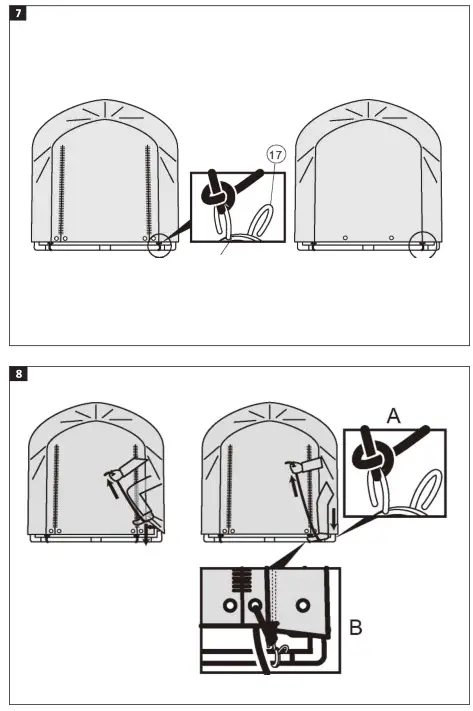
FIG. 6 - Tie one end of the tarpaulin lines in the clamping rings (17).
FIG. 7 - Tie the other end of the tarpaulin lines in the clamping rings (17) as shown in the diagram. A. Thread the line ends through the eyelets in the door panel and tie as shown in the diagram. B.
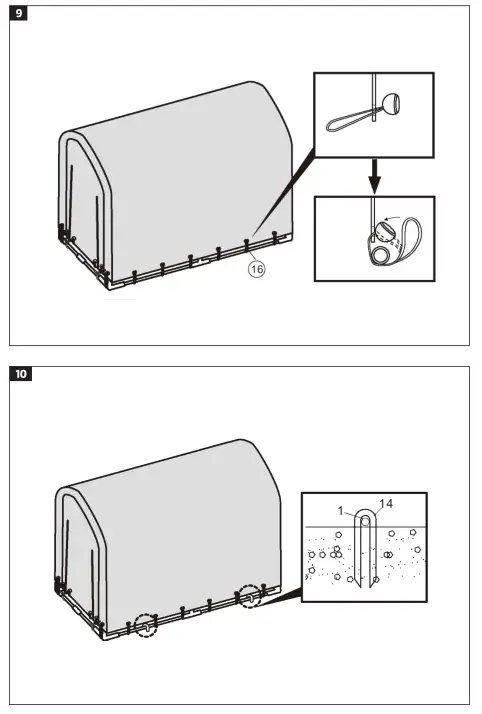
FIG. 8 - Fasten the tarpaulin to the frame with the
long straps (16).
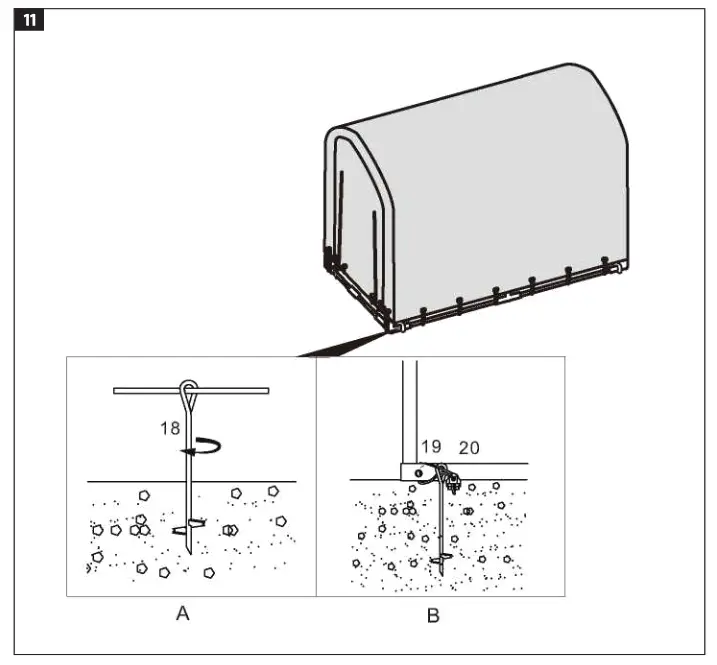
FIG. 9 - Fit the anchors.
The four anchors A (14) should be used to anchor the bottom longitudinal tubes (1) to the ground. Fit two anchors on each long side.
FIG. 10
The four anchors B (18) with wires (19) and wire lock (20) are used to anchor the four corners.
FIG. 11
MAINTENANCE
- Wash when necessary with a soft sponge or brush and mild soap solution, and rinse well with water.
- Do not use abrasive utensils or detergents.
- Do not use strong solvent.


