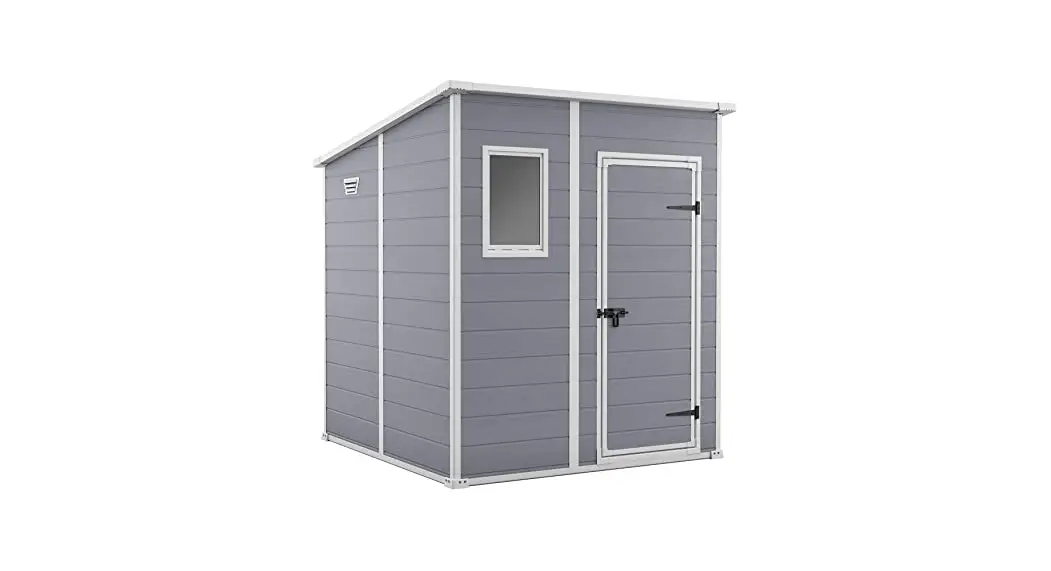
 MANOR Pent 6×6
User Manual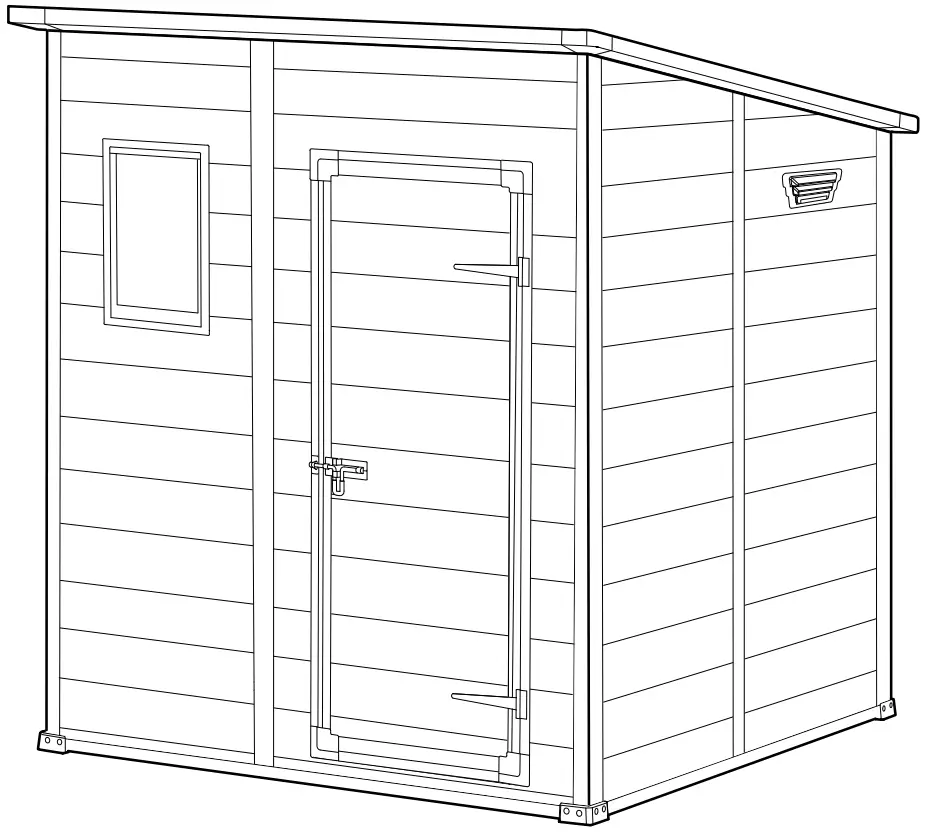
US, Canada
Tel: +1877-638-7056, [email protected]
Mon – Fri | 8am – 6pm ET / Lundi-Vendredi 8h -18h
Sat – Sun | 9am – 6pm ET / Samedi-Dimanche 9h-18hUK
Tel: +44-121-506-0008, [email protected]
Mon – Fri | 8:30am – 5pm
For other European countries see the last page
WARRANTY ACTIVATION
Thank you for your purchase of the Keter shed. In order to activate your warranty, please log onto our website and fill in the form under warranty activation. keter.com/en/warrant-activation
SITE PREPARATION
Level the ground surface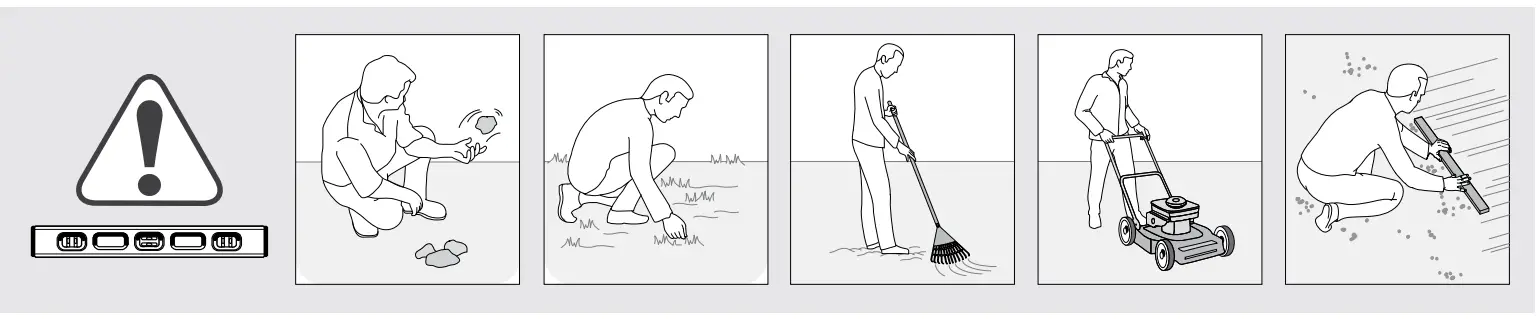
Recommendation: Construct a wooden or concrete base as a foundation 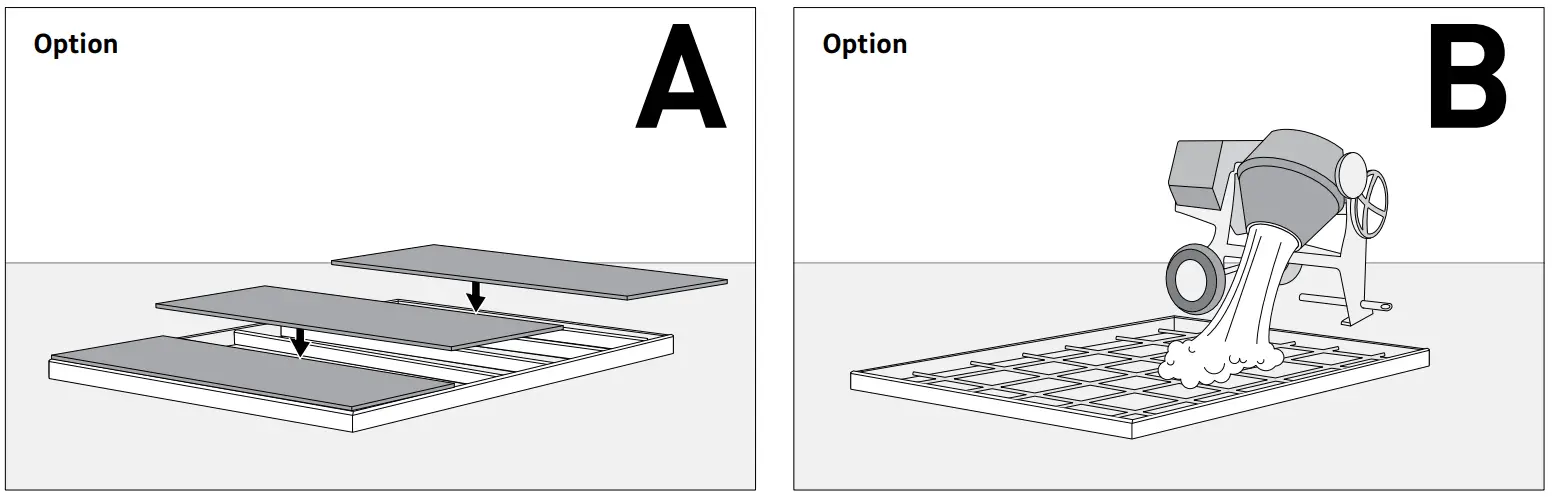
External floor measurements are: 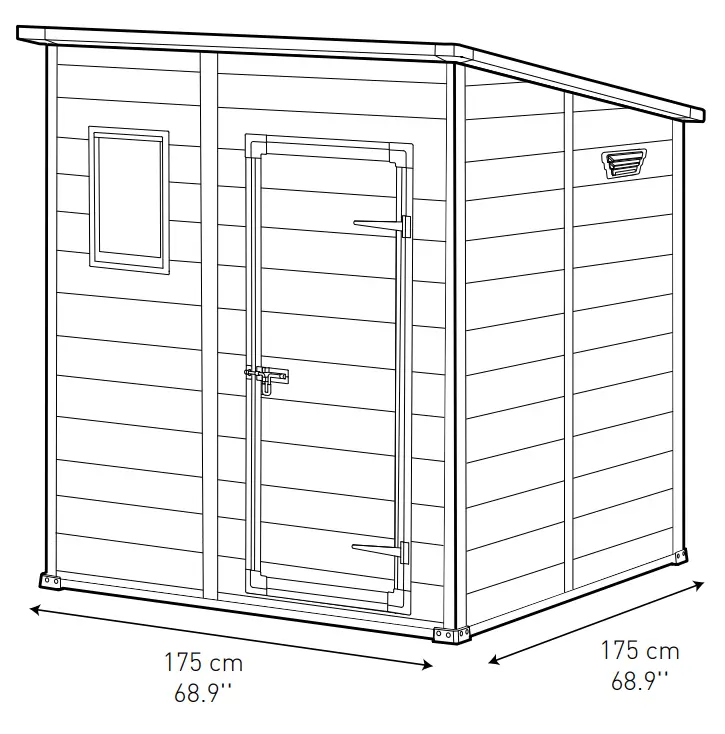
BEFORE STARTING ASSEMBLY
Read the care and safety guidelines at the end of this manual
Check to ensure that there are no missing or damaged parts BEFORE starting or arranging assembly
Remove all parts from the package(s) and spread them out on a clean work surface
Review all assembly instructions
Assemble all the parts according to the directions in this manual. Do not skip any steps.
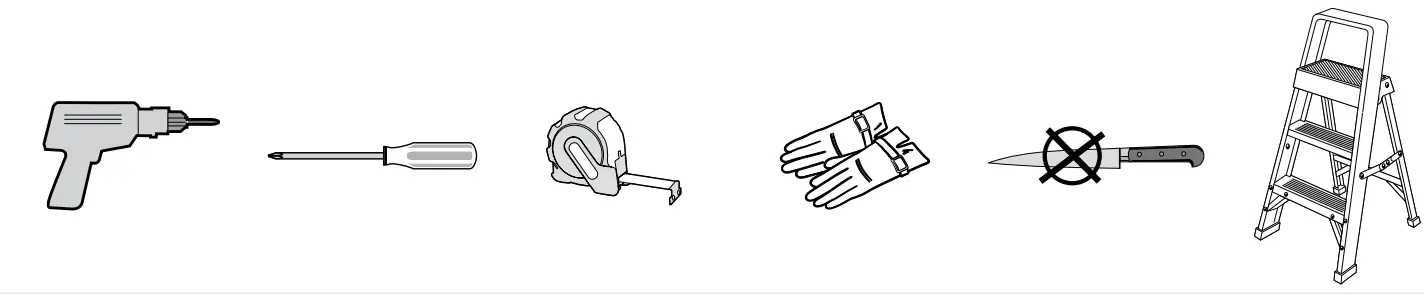
REQUIRED TOOLS
 SPATULA
Use a spatula (part “SPA”) for easier insertion of the panel into profile.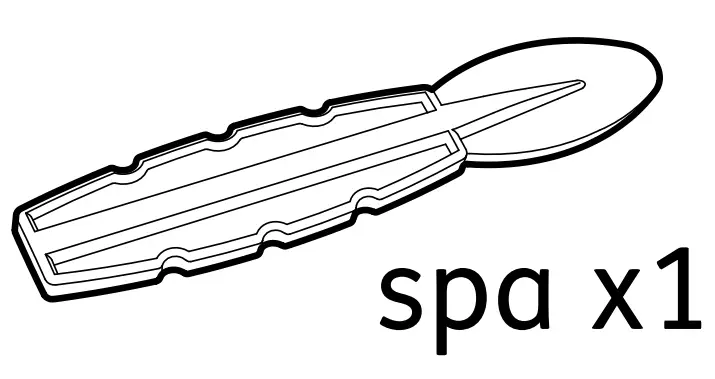
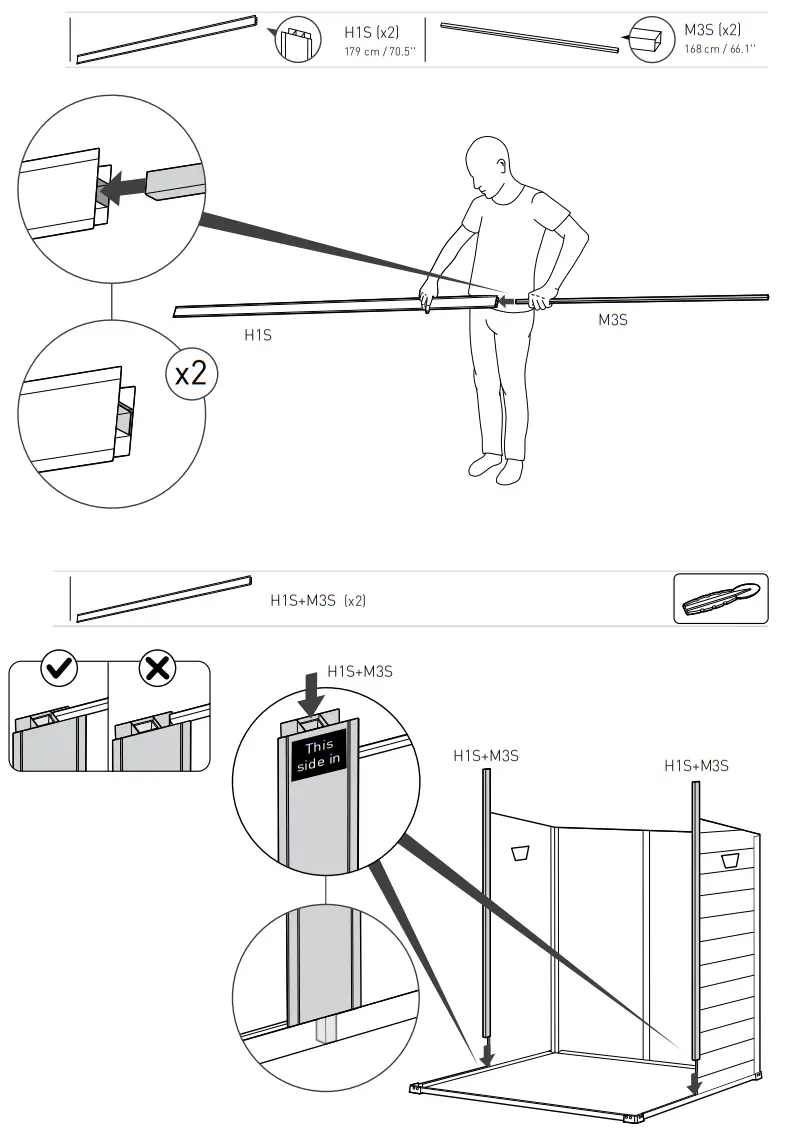
 ASSEMBLY REQUIRES TWO PEOPLE
SHED PARTS
Remove all parts from the package(s) and spread them out on a clean work surface
FLOOR PARTS 
ROOF PARTS 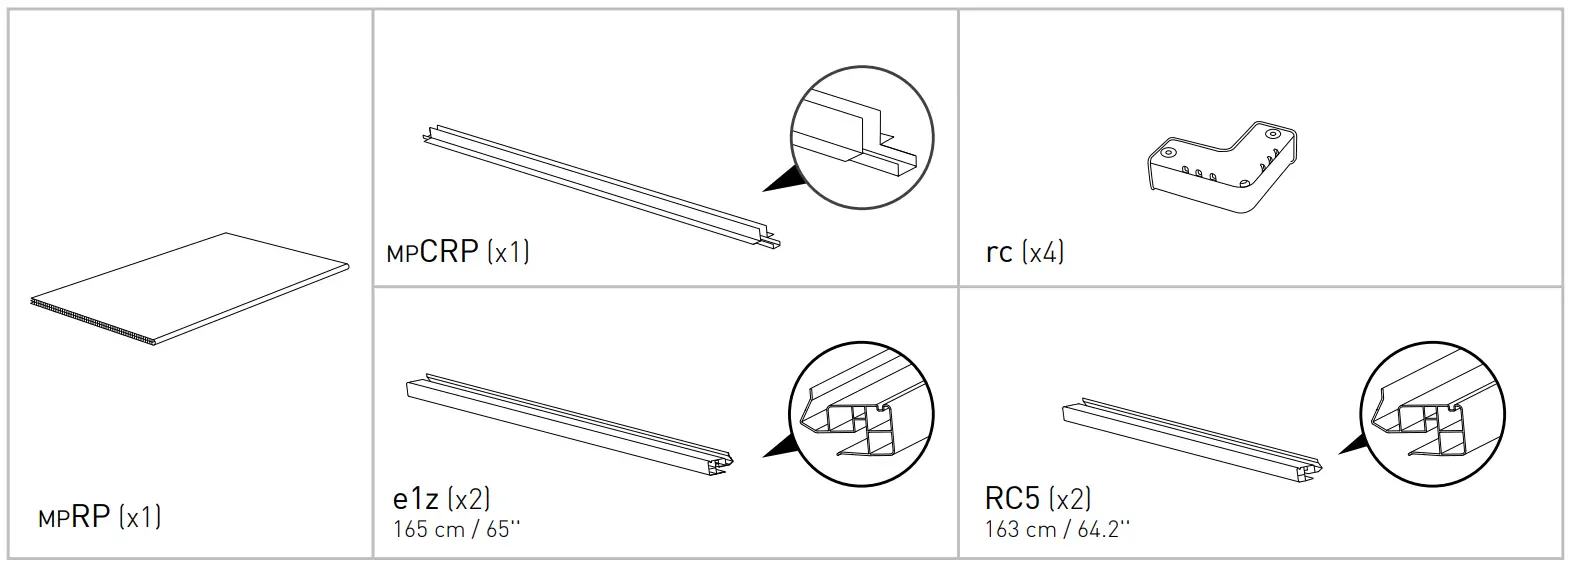
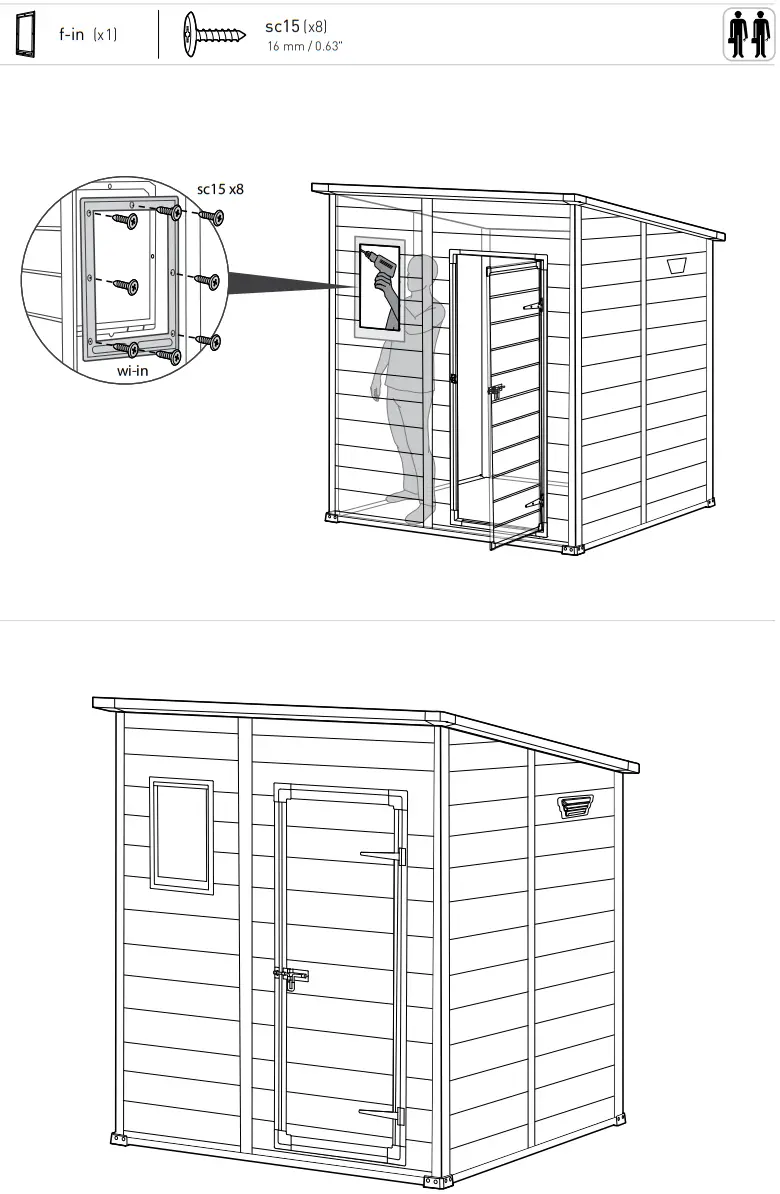
WINDOW PARTS

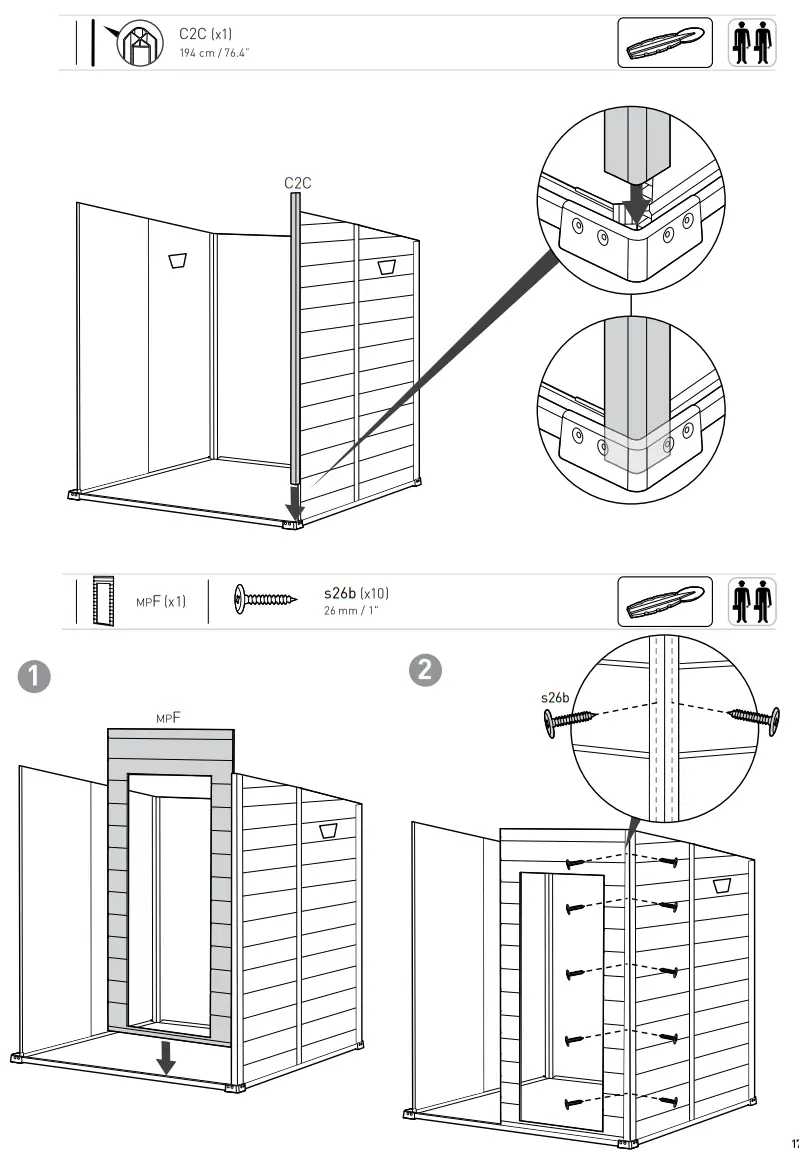
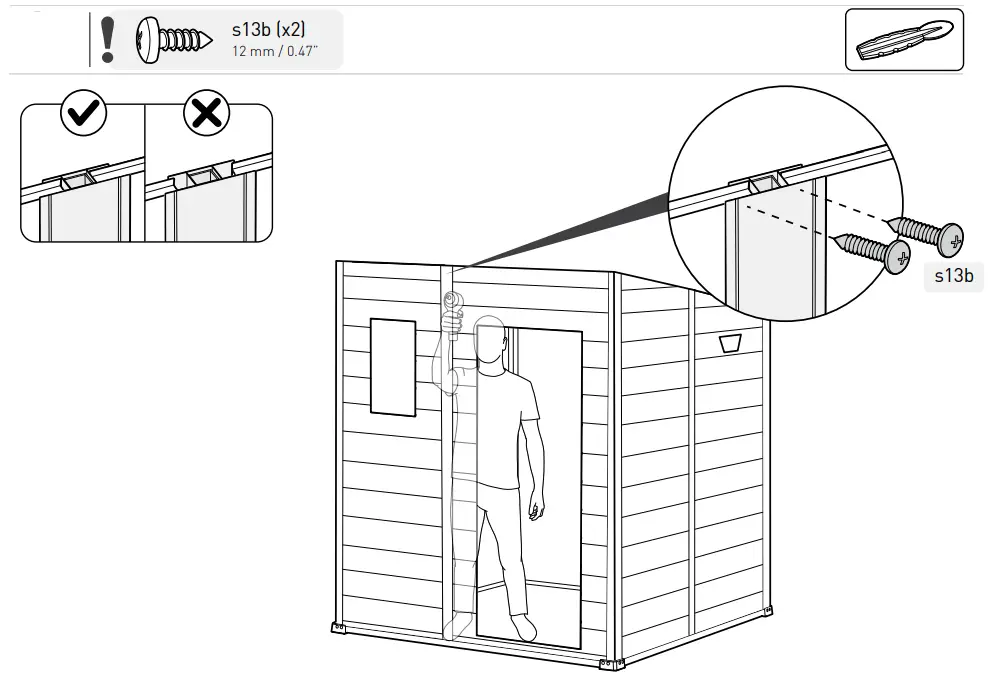
WALL PARTS 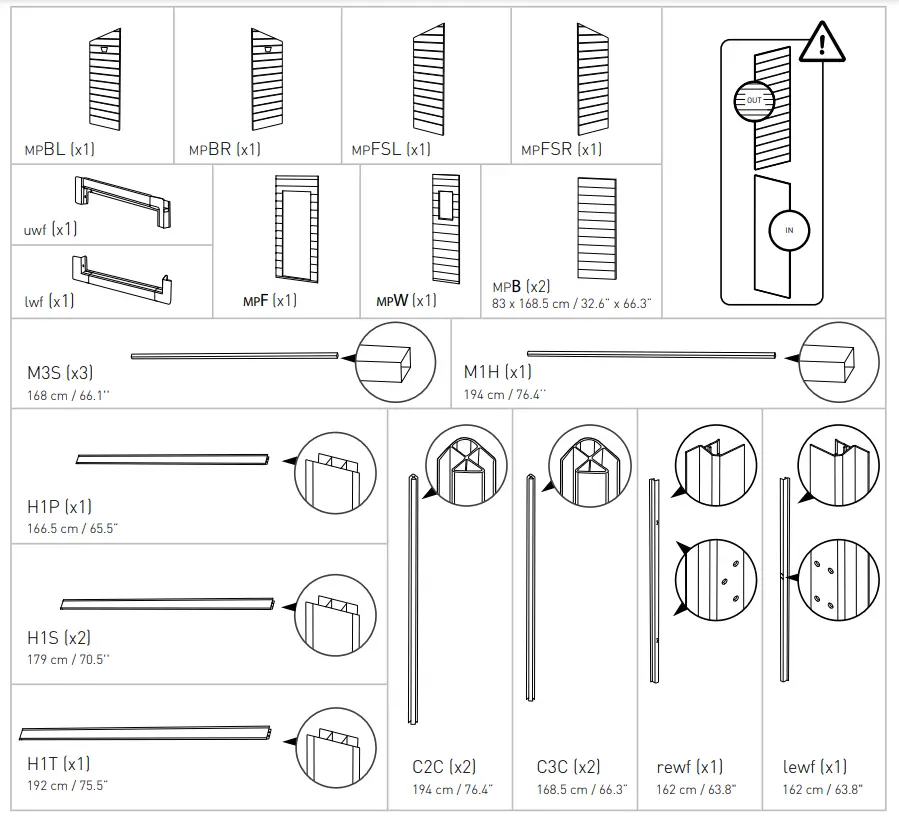
DOOR PARTS 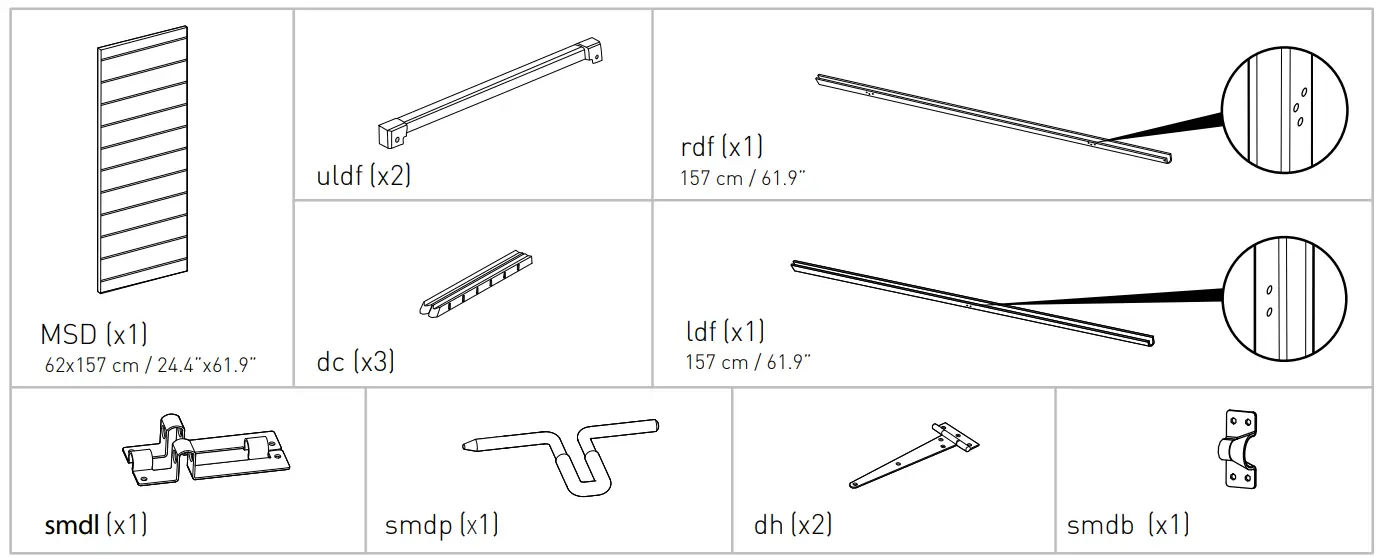
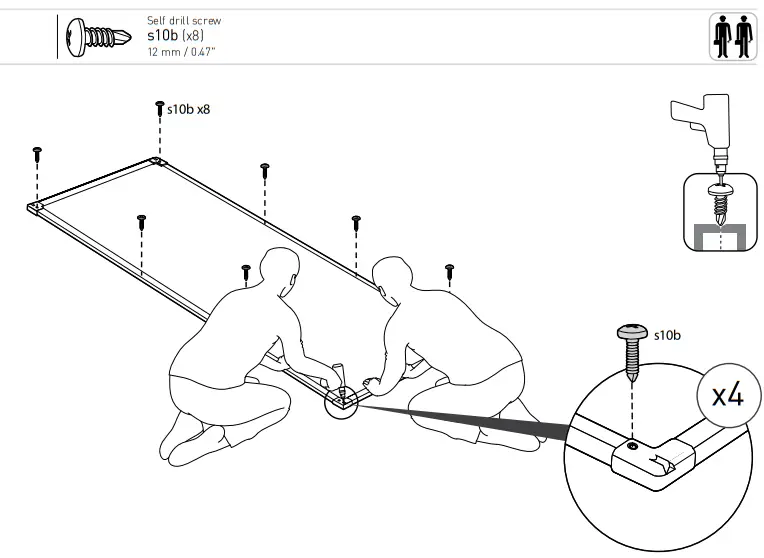
SCREWS 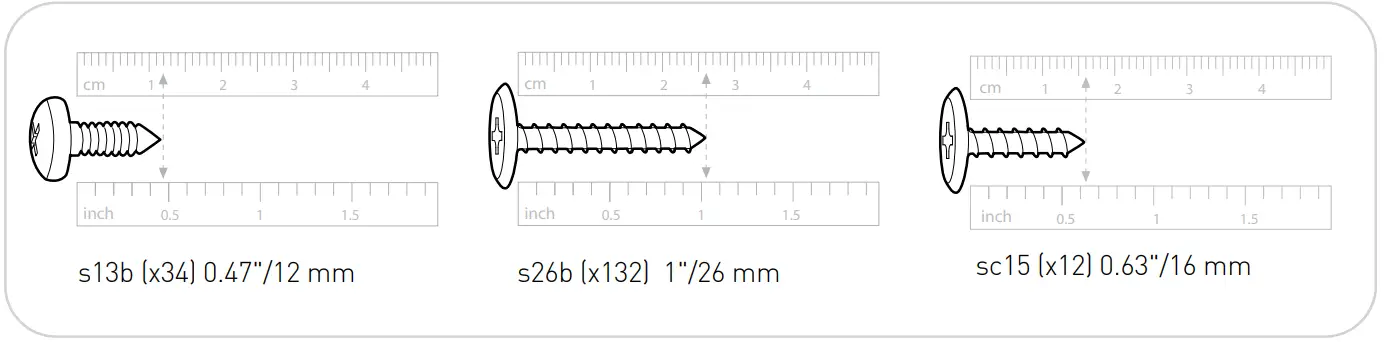
SELF-DRILLING SCREW
 Use a powerful electric screwdriver. The screw should drill itself to a metal profile.
Packaging may contain some additional small parts for use as spare parts
NOTE: Due to variations in production, the actual assembled size may vary slightly from the specified dimensions.
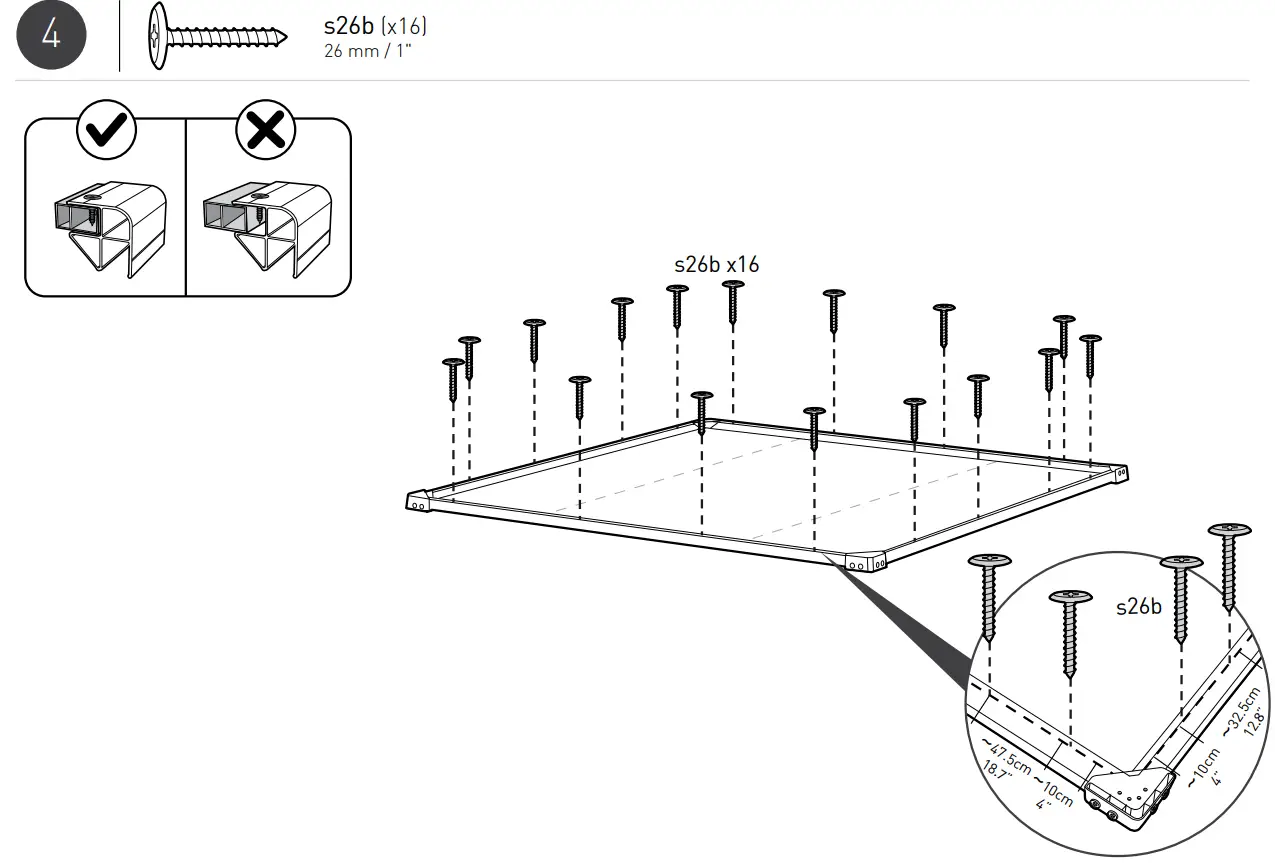
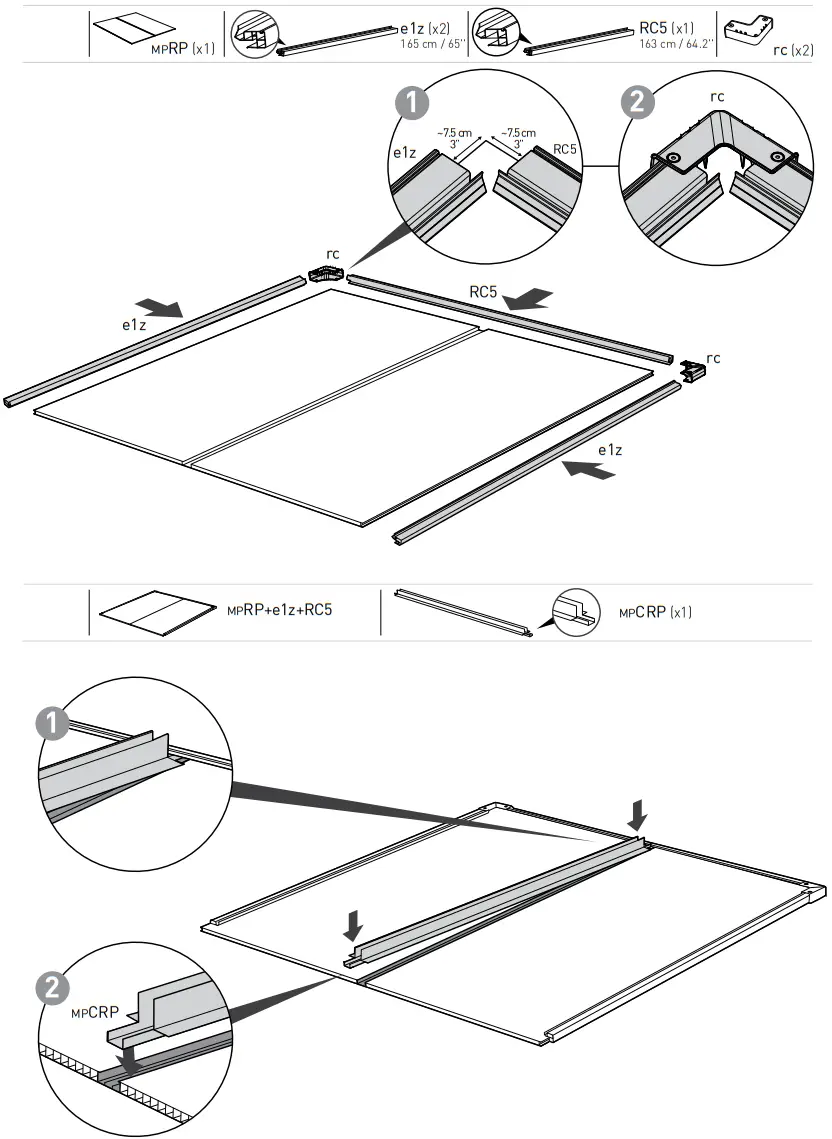
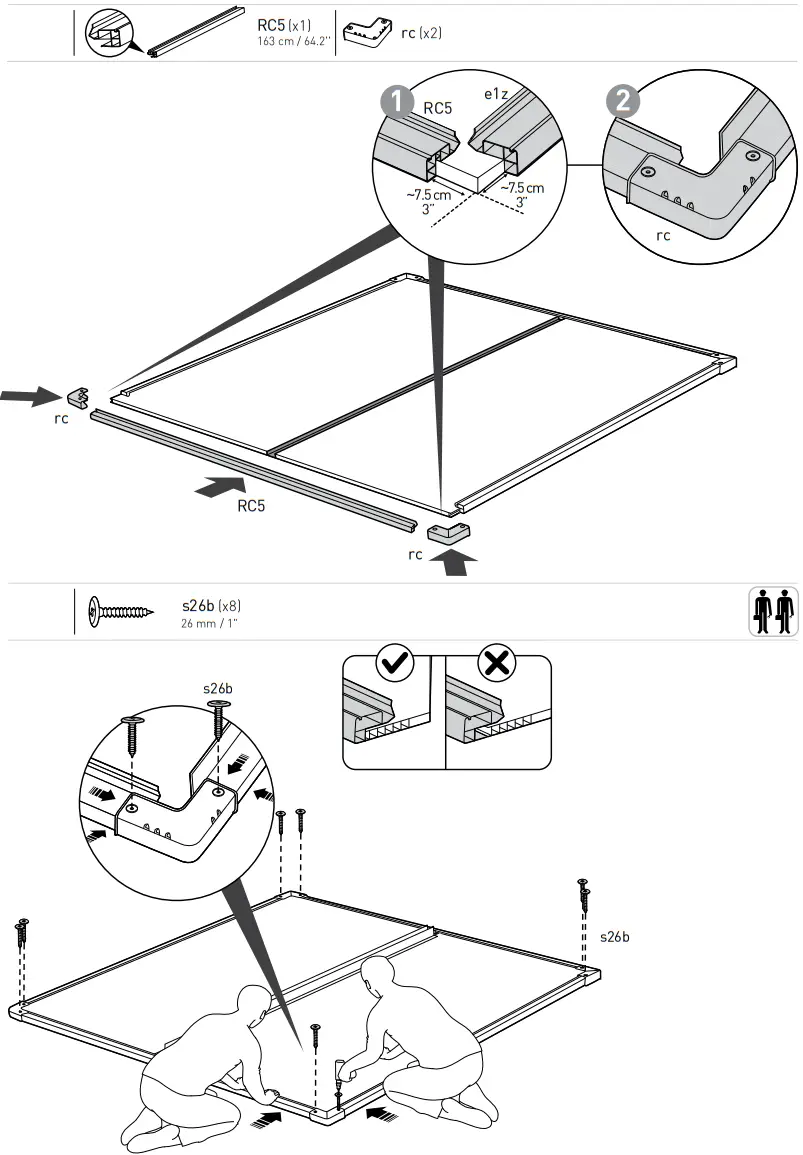
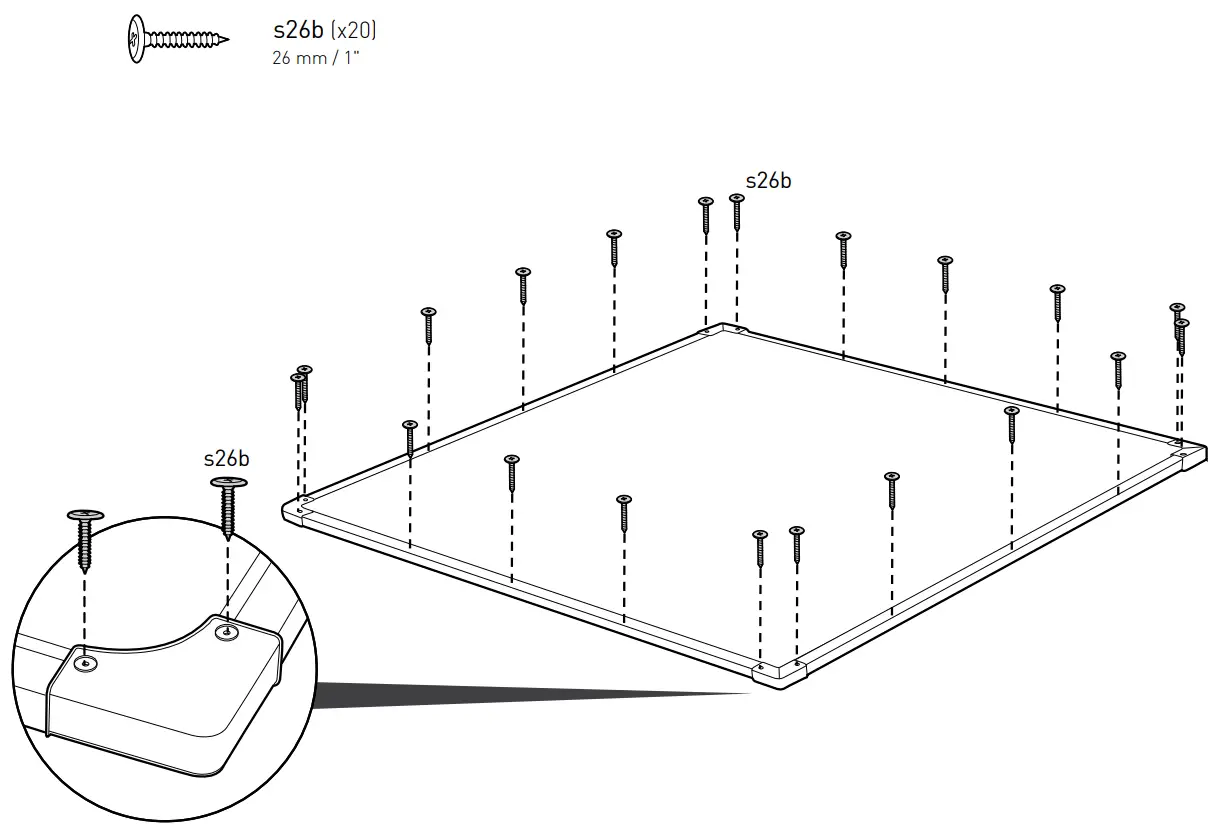
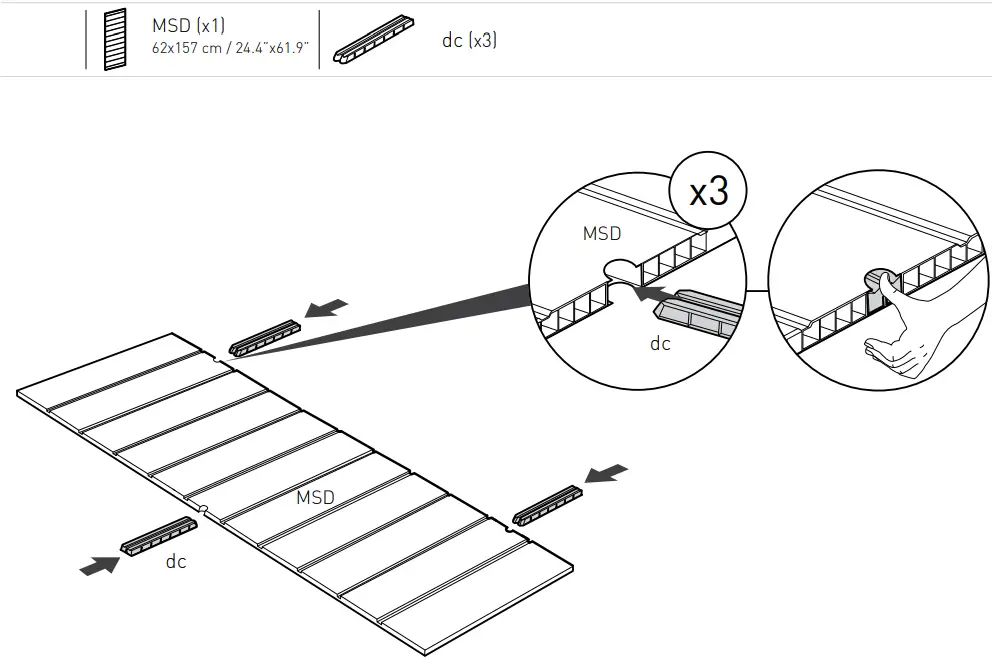
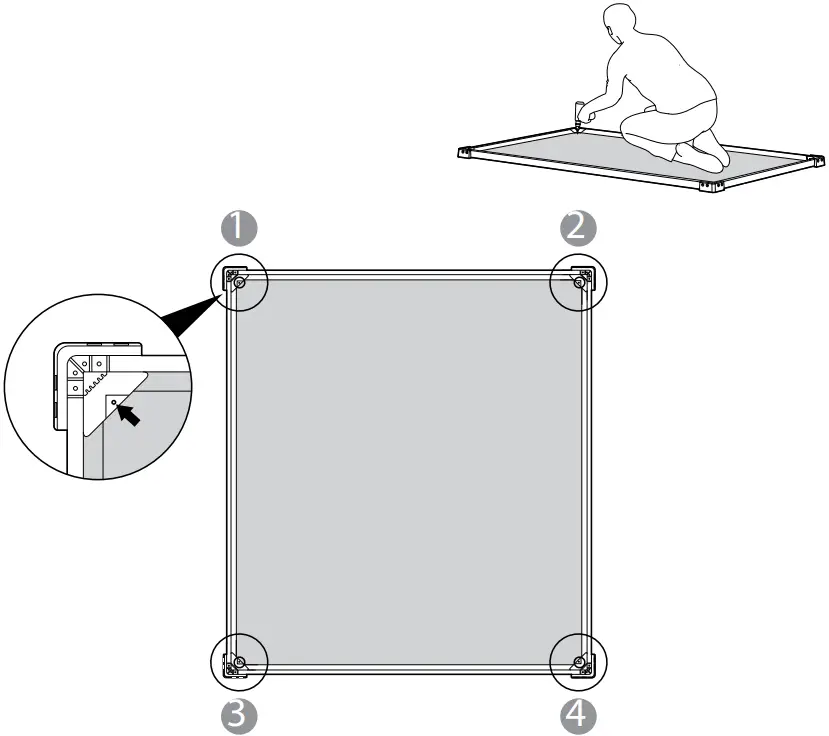
FLOOR ASSEMBLY
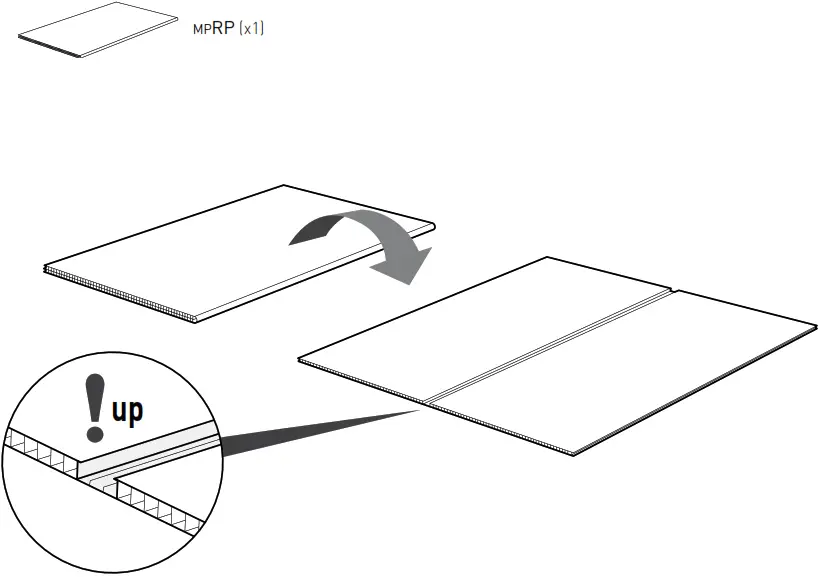
 MPFP (x1) 168 x 168 cm / 66.1”x66.1”
![]() Note: The crease line of the floor must be underneath
Note: The crease line of the floor must be underneath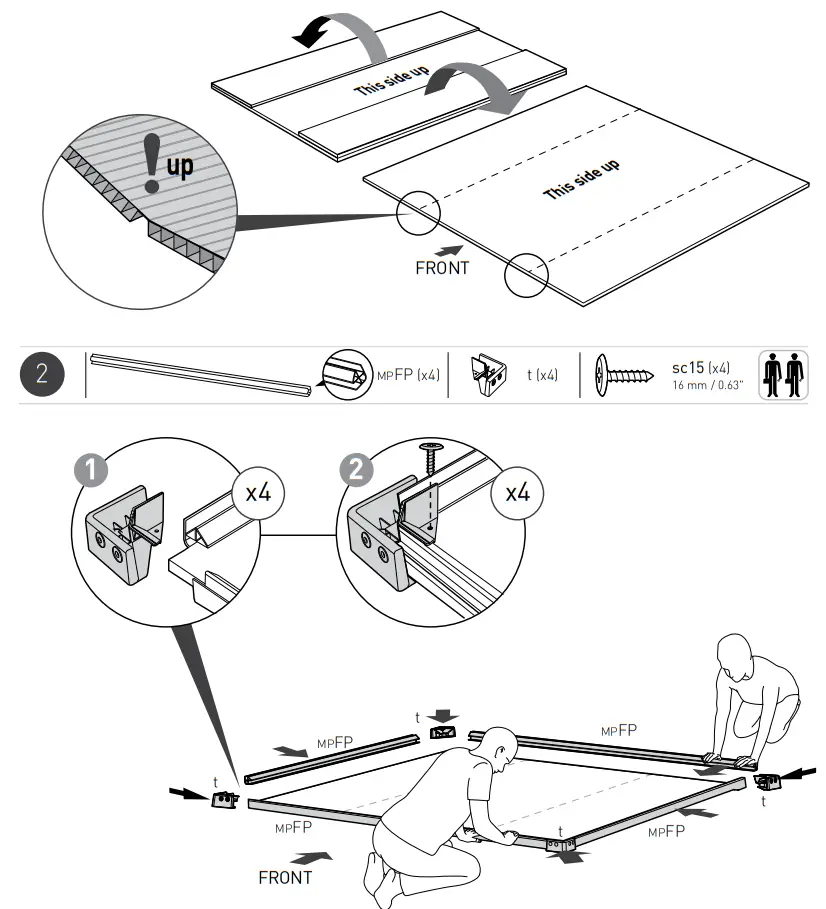
Turn over the floor panel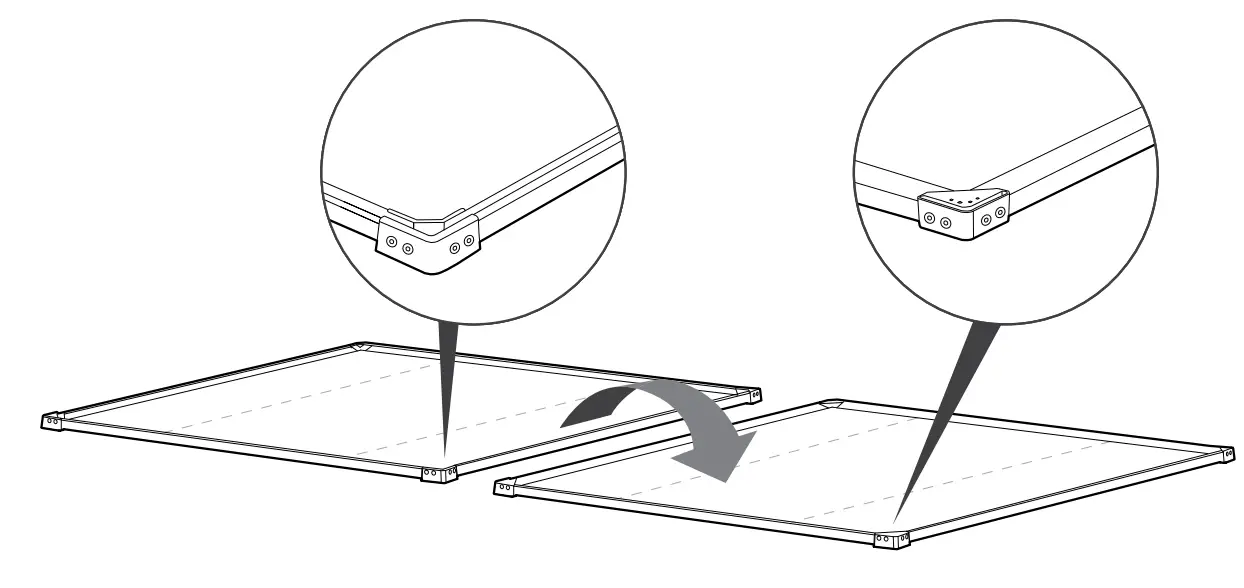
Fully fit the panel inside the profile
Turn over the floor panel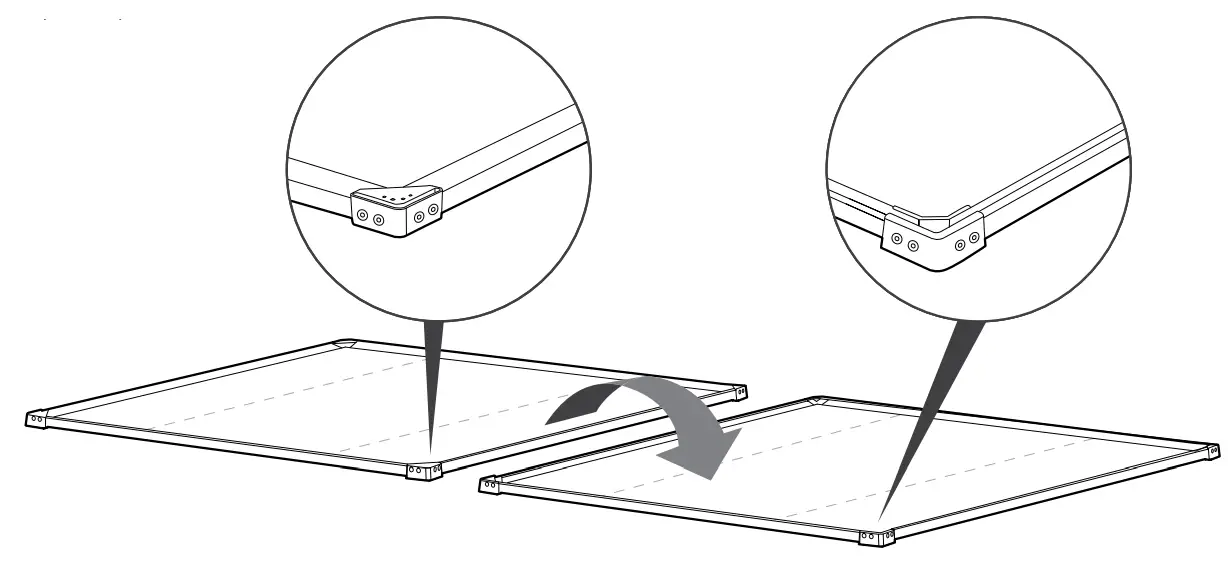
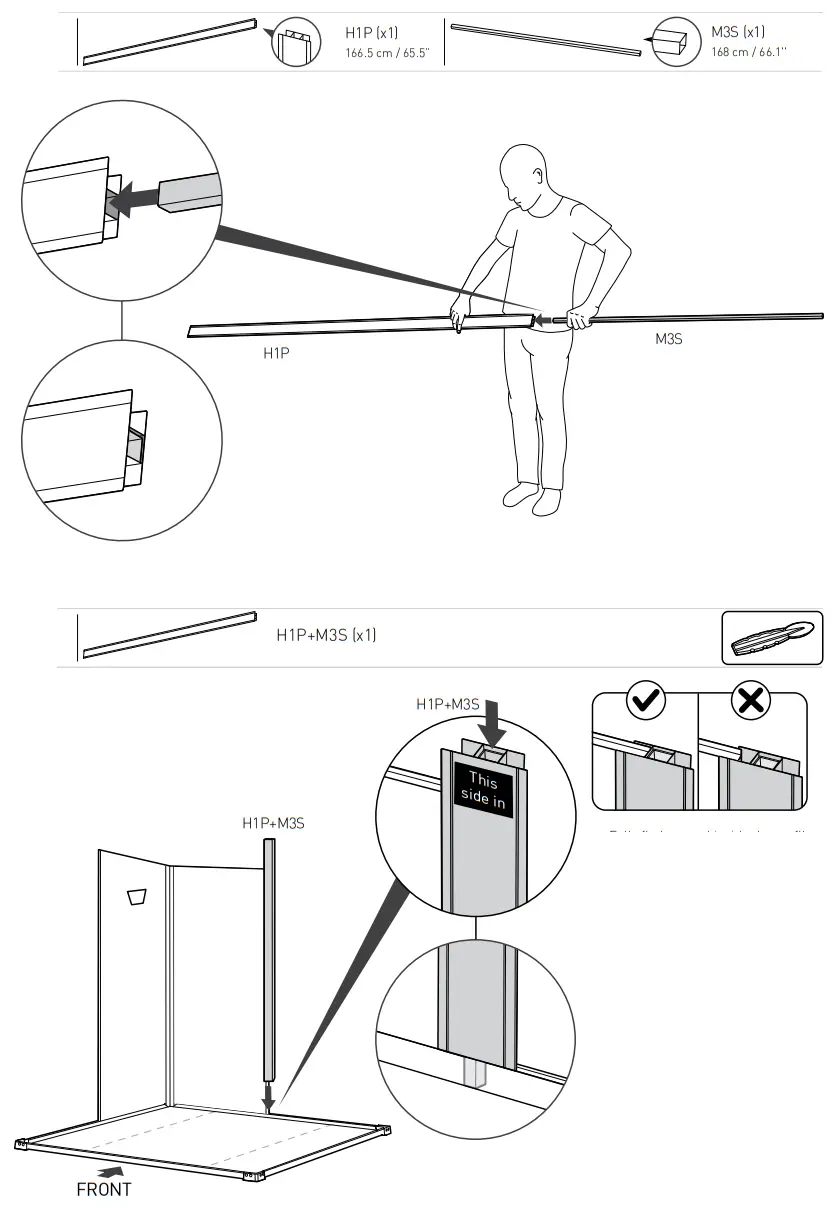
WALL ASSEMBLY 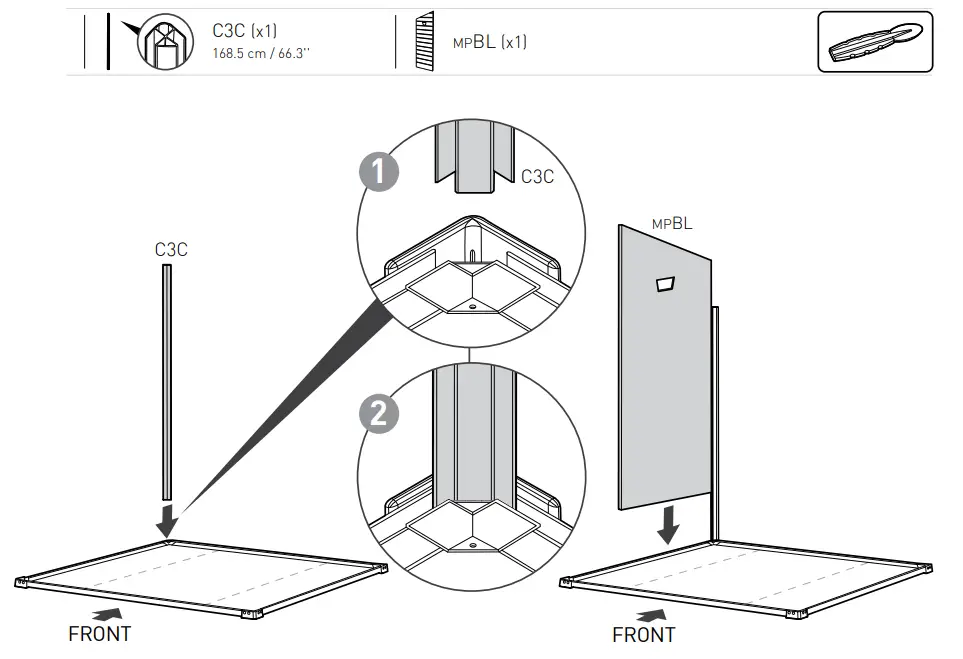
Use a spatula (part “SPA”) for easier insertion of the panel into the profile.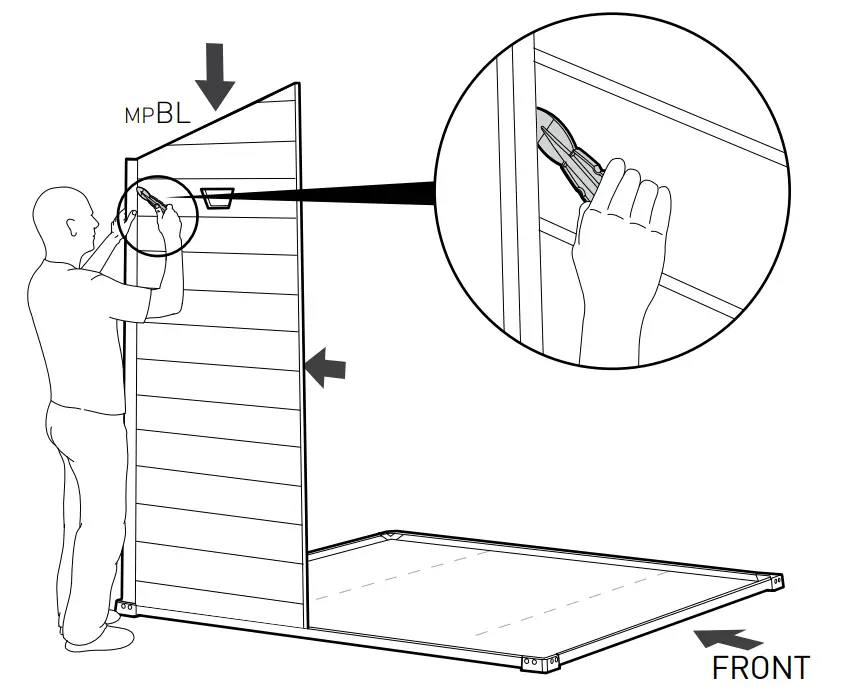
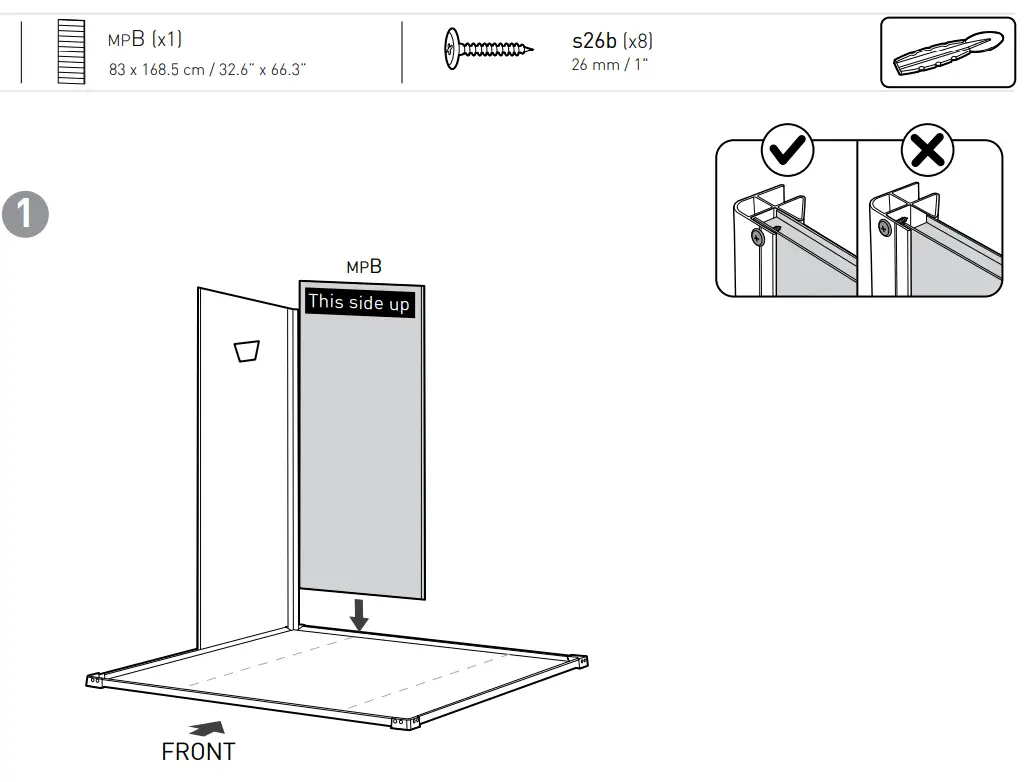 Fully fit the panel inside the profile
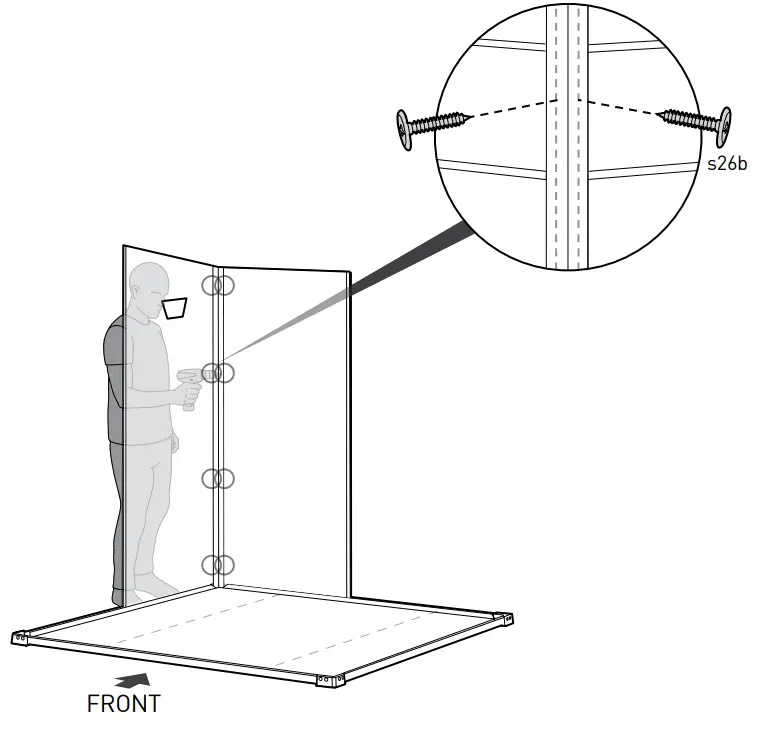
Fully fit the panel inside the profile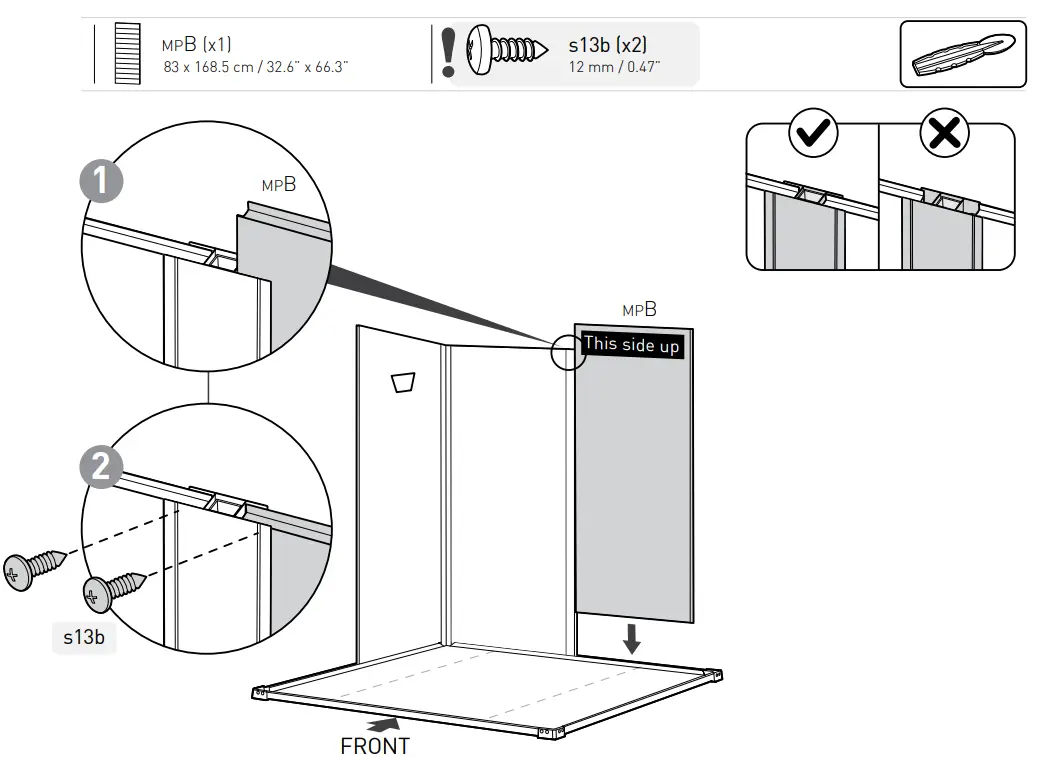
Fully fit the panel inside the profile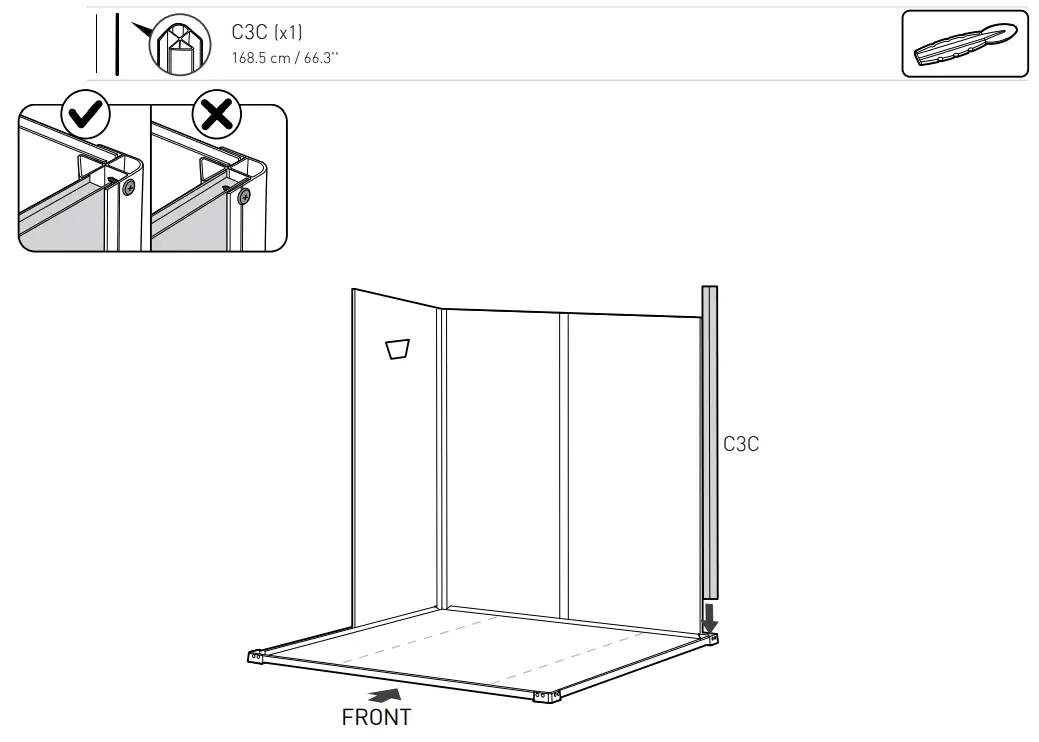
Fully fit the panel inside the profile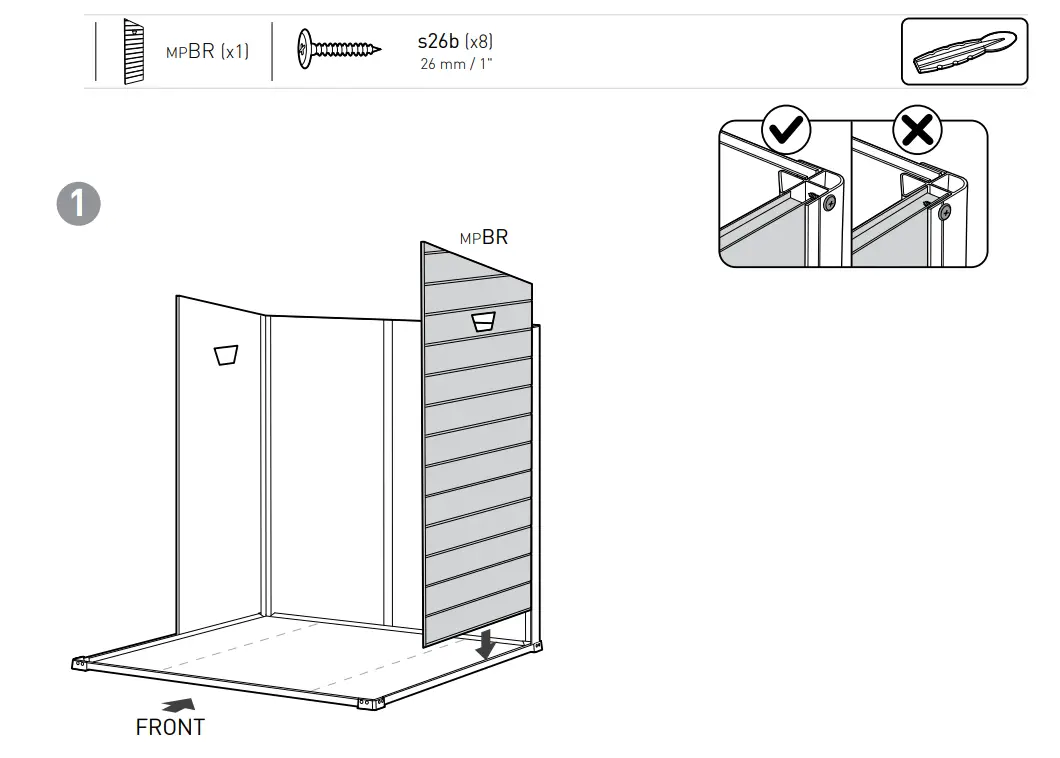 • Fully fit the panel inside the profile
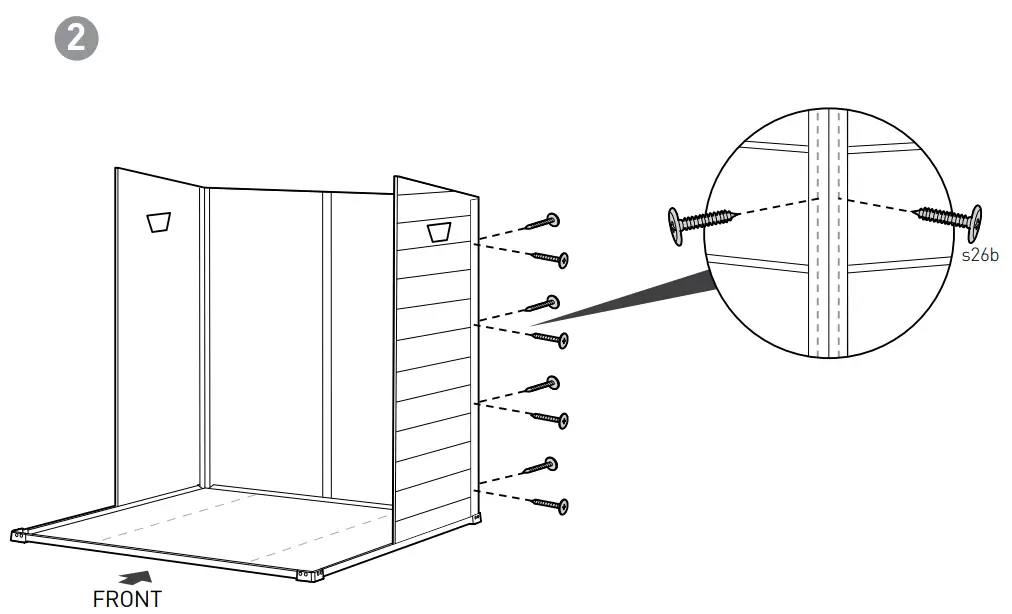
Fully fit the panel inside the profile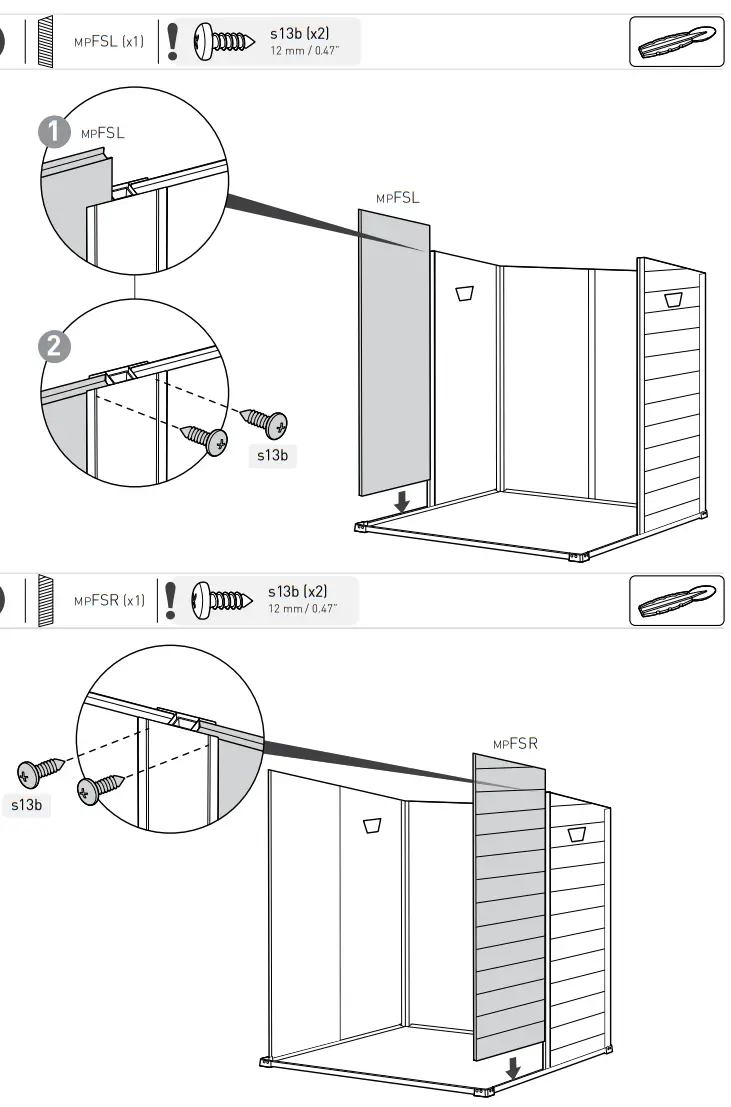
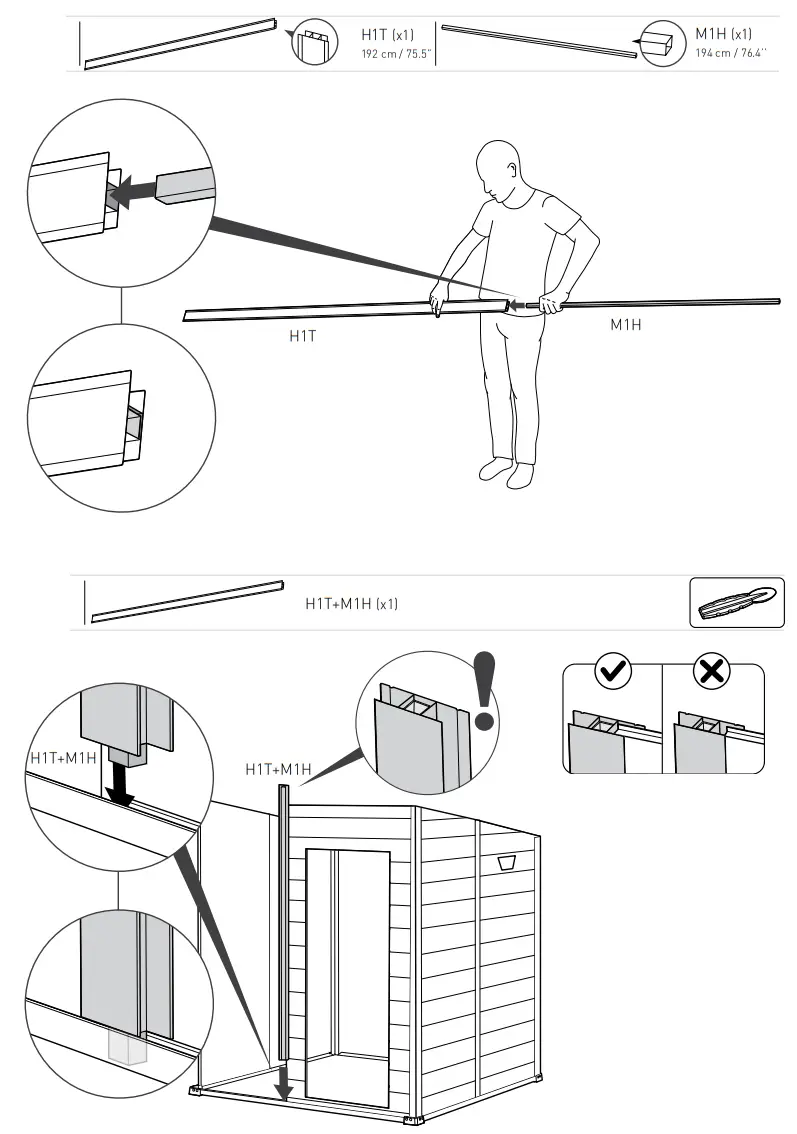
Fully fit the panel inside the profile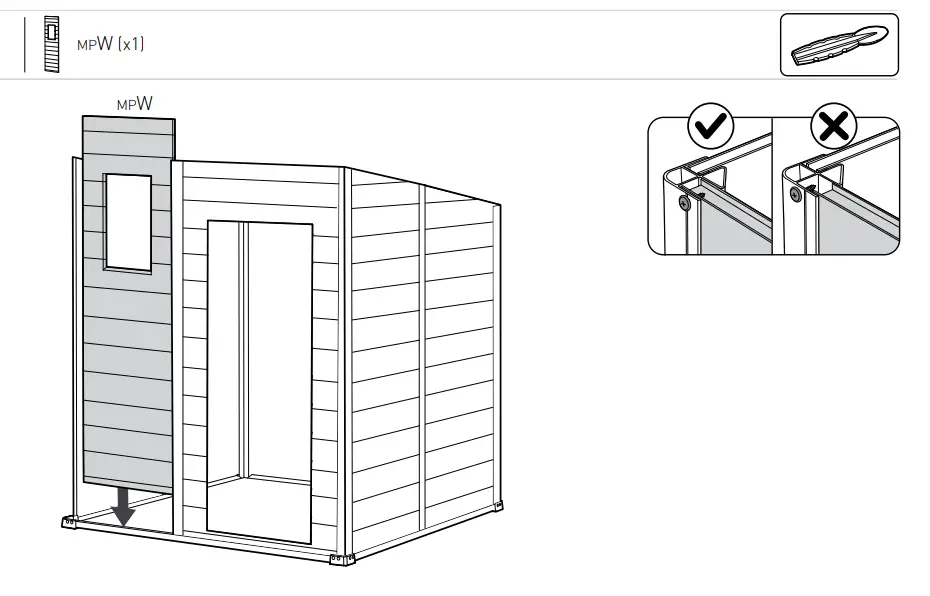 Fully fit the panel inside the profile
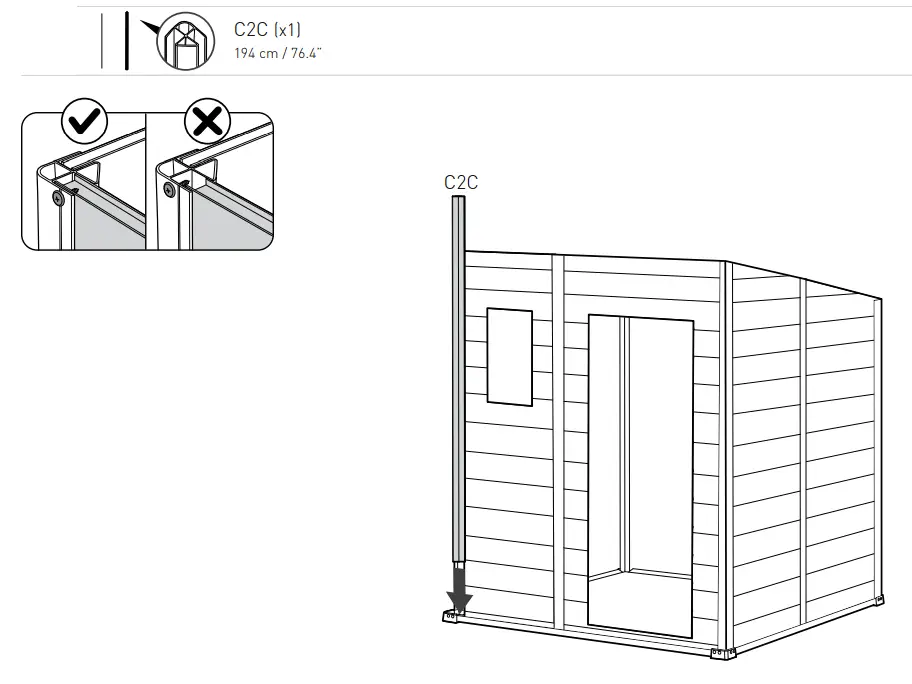 Fully fit the panel inside the profile
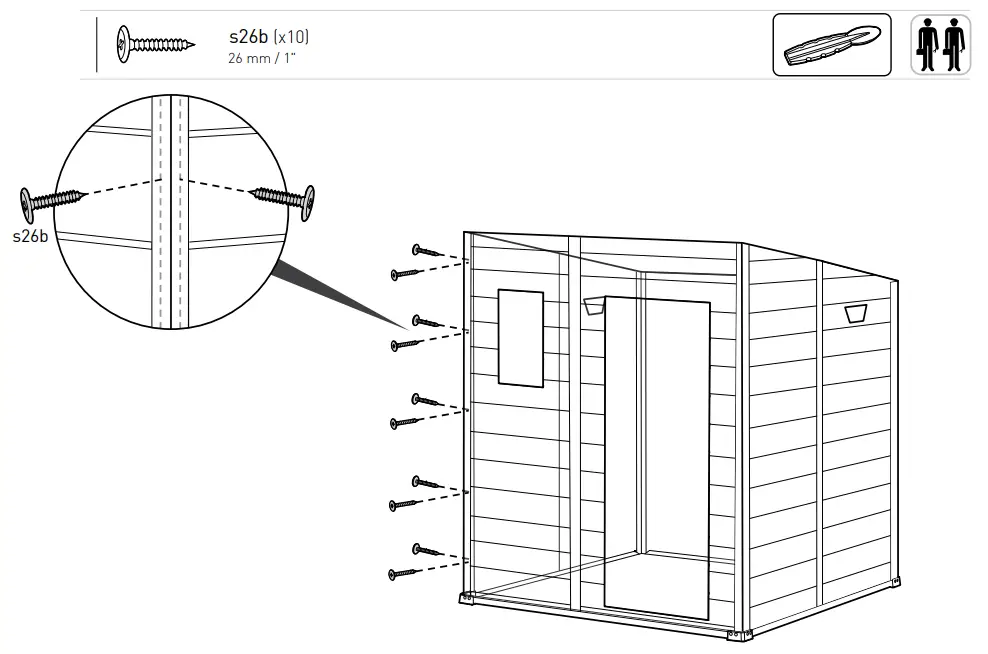
Fully fit the panel inside the profile
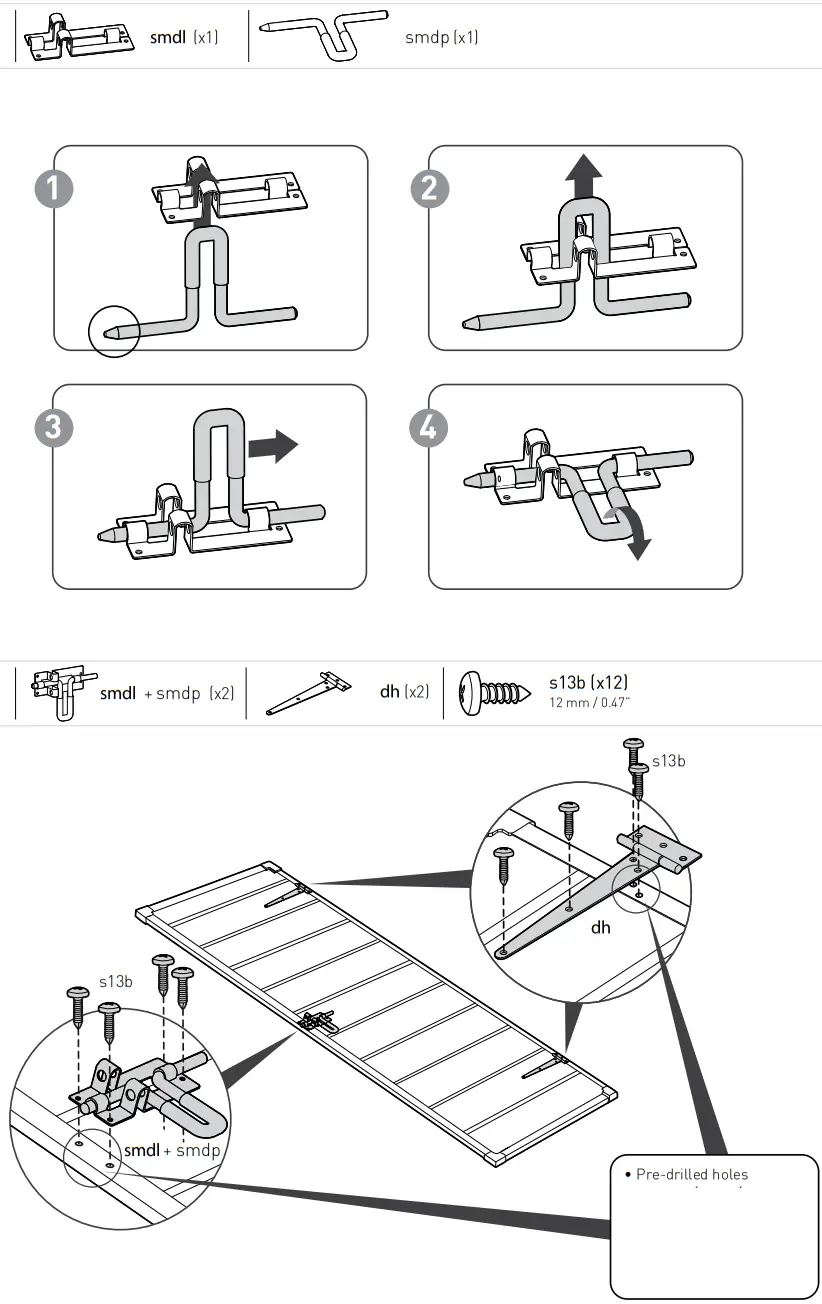
ROOF ASSEMBLY
• Fully fit the panel inside the profile

• Turn over the roof panel

• Ensure the roof is set fully down; use a spatula as shown in the figure
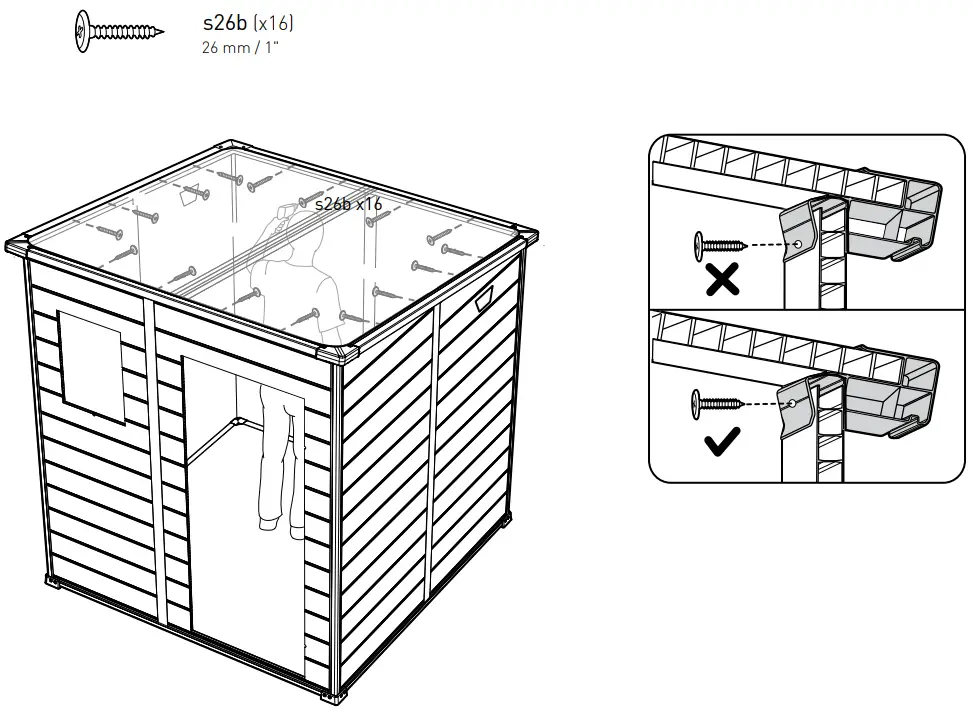
• Screw on the marked line

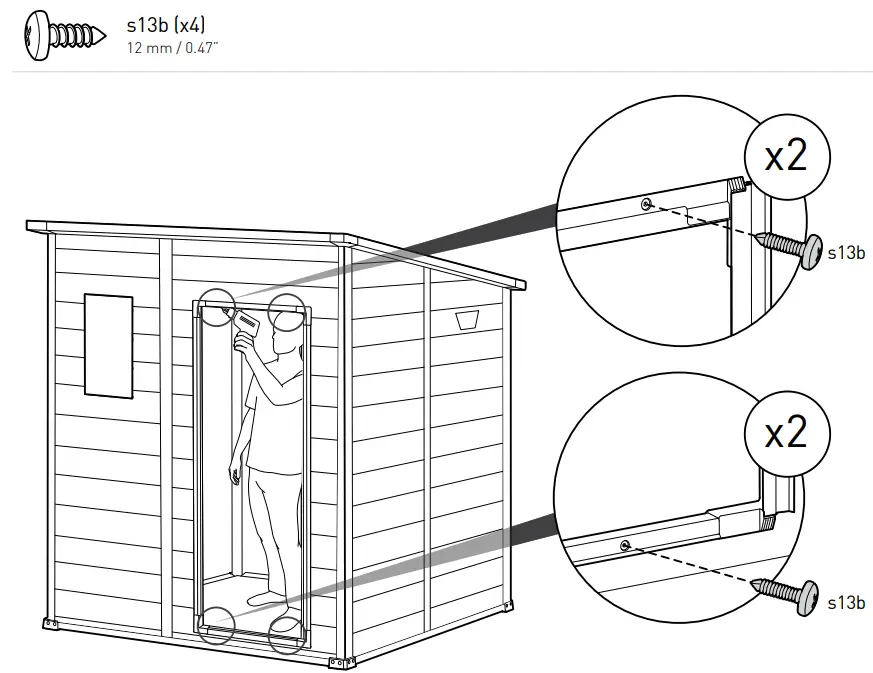
![]() • Align holes in aluminum profiles with slits in the door panel
• Align holes in aluminum profiles with slits in the door panel
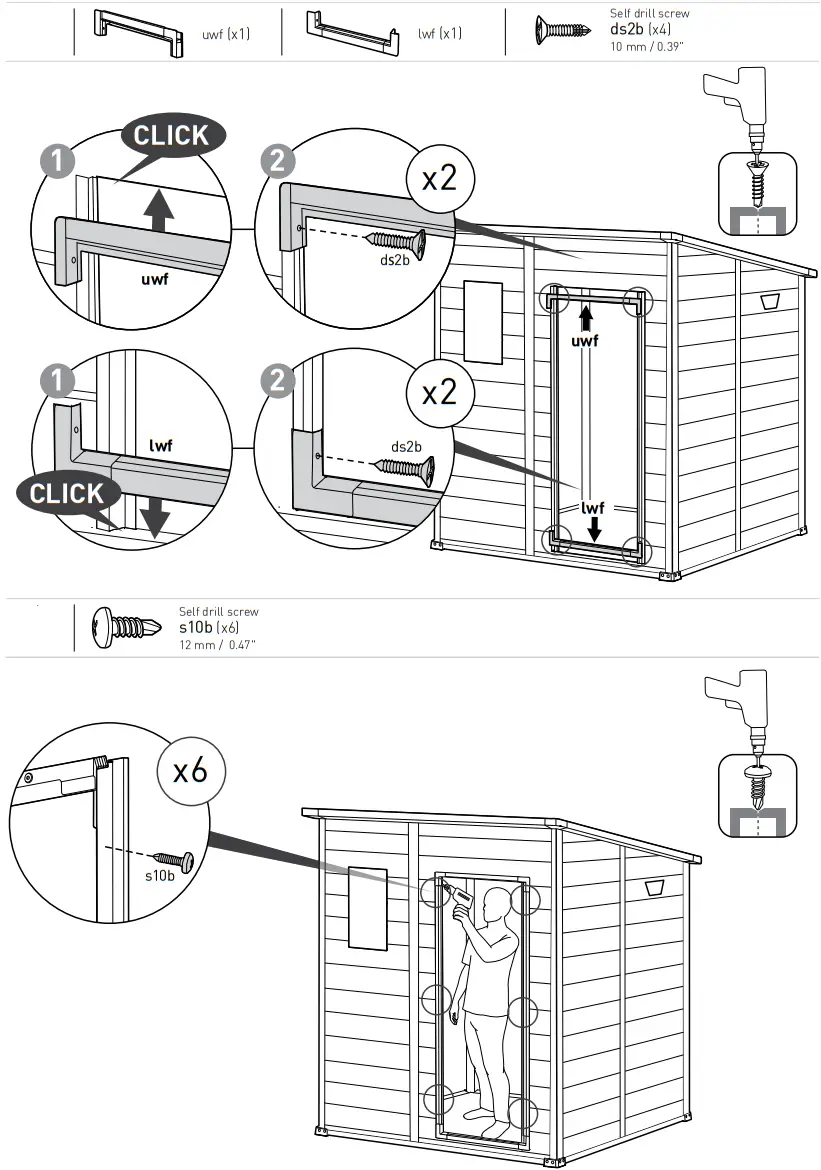
DOOR ASSEMBLY
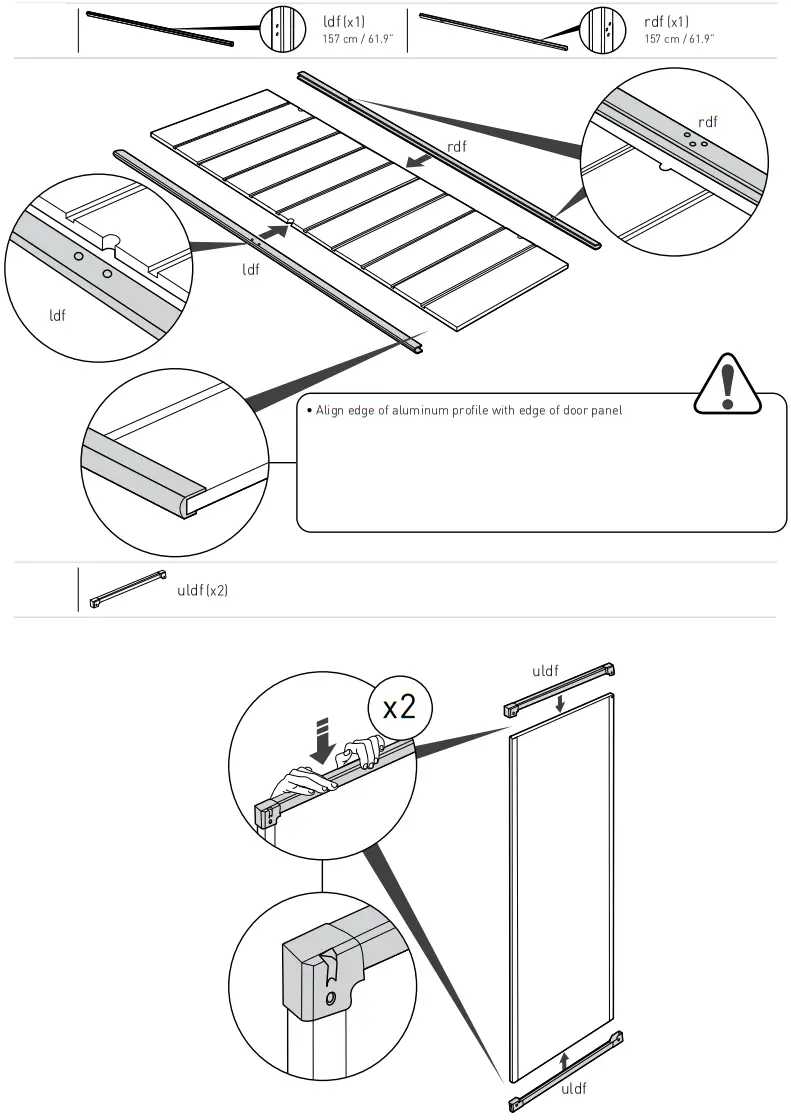
• Turn over the door panel 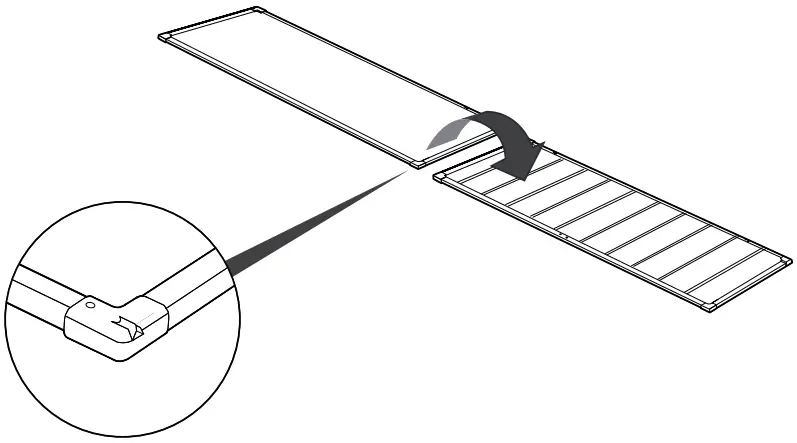
WINDOW ASSEMBLY
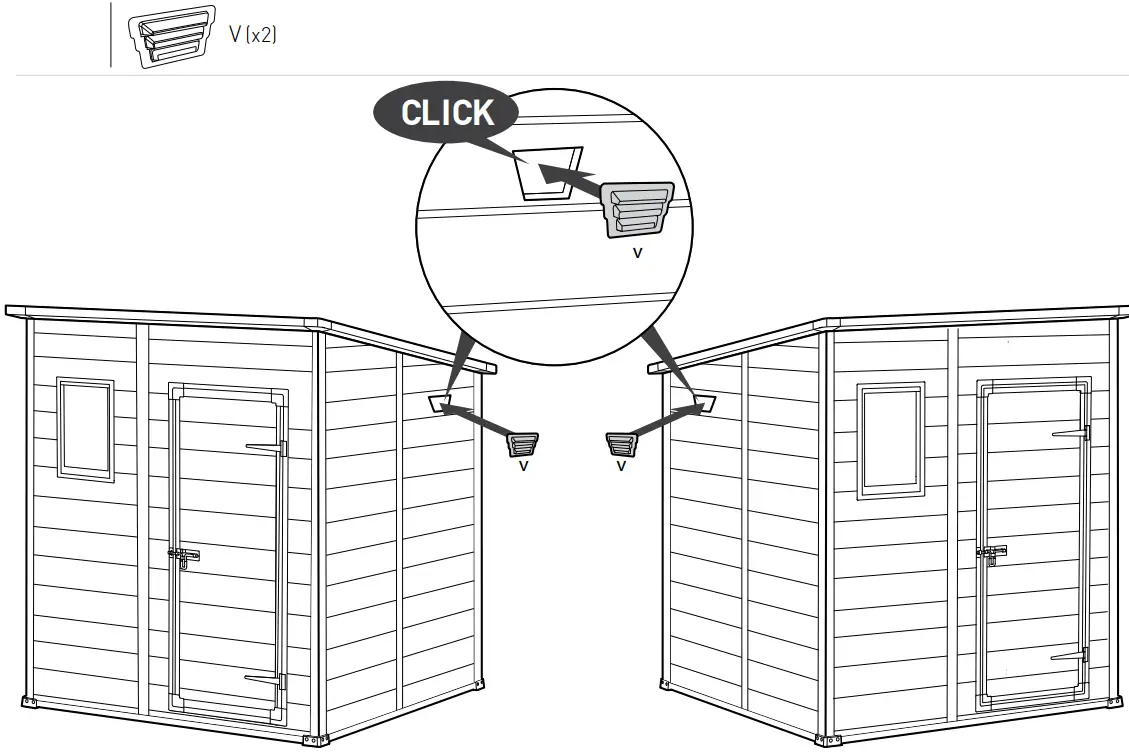
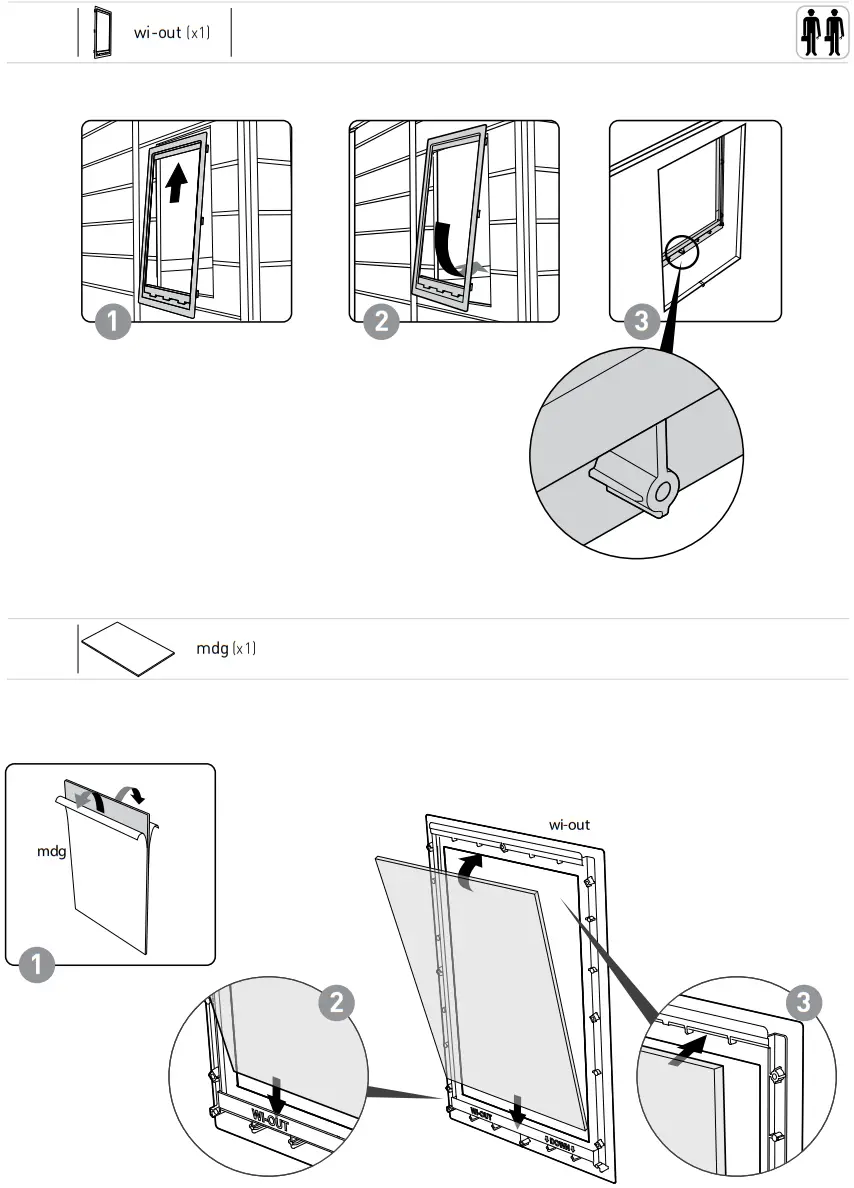
OPTION
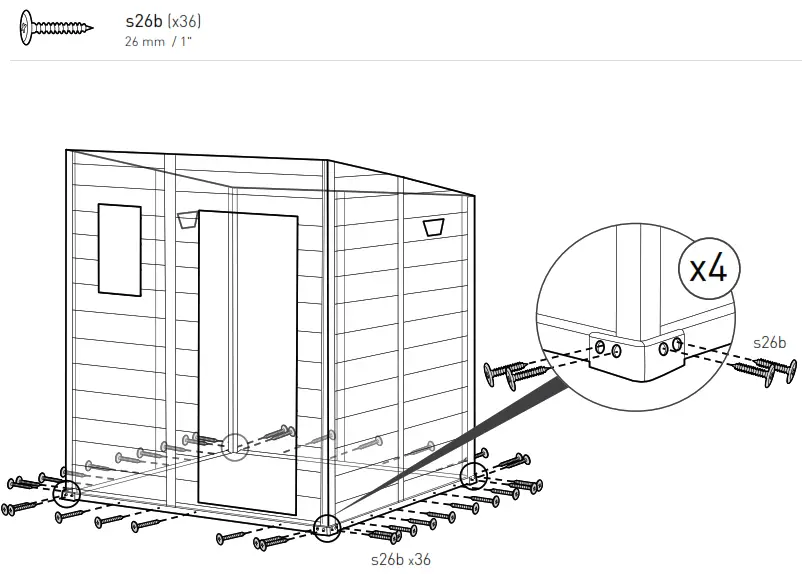
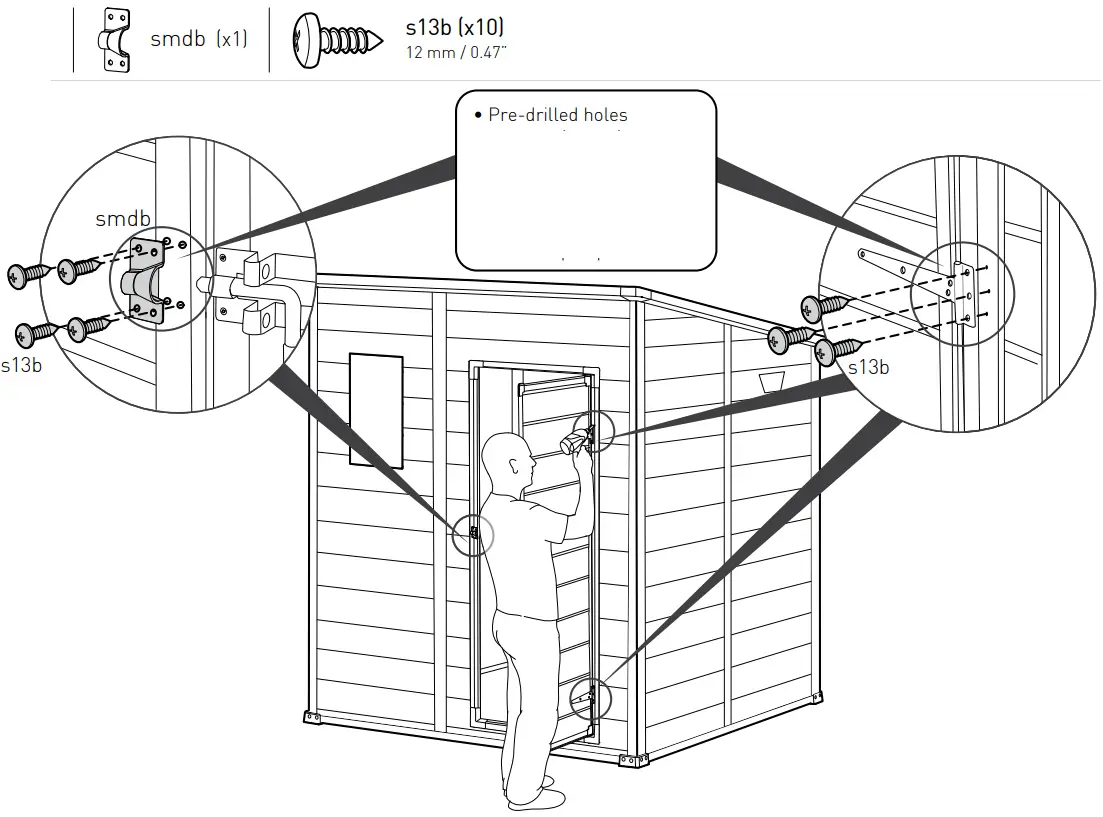
SECURING THE SHED TO A FOUNDATION
Affix the shed to the foundation by drilling holes in the shed floor at the pre-marked locations and screwing it into the foundation using appropriate screws (screws not included].
CARE AND SAFETY GUIDELINES
- The shed is intended for storage purposes only. It is not designed for habitation.
- It is strongly recommended to secure the shed to an immovable object or anchor to the ground by drilling holes in the shed floor (at the pre-marked locations) and inserting proper screws into the ground (screws are not included).
- Do not attempt assembly on windy or cold days.
- Periodically check the shed to ensure that it is stable and that the site is level.
- Be careful when handling parts with steel edges.
- When assembling or handling the shed, use only those tools listed in the user manual.
- Avoid using a lawnmower or mechanical scythe near the shed.
- Wear safety goggles and always follow the manufacturer’s instructions when using power tools.
- Wash the shed with a garden hose or a mild detergent solution. Do not use a stiff brush or abrasive cleaners, including degreasers and oil- or acetone-based cleaning materials, as these may stain or damage the shed.
- Do not store hot items, such as recently used grills and blowtorches, and volatile chemicals in the shed.
- Avoid placing heavy items against the walls, as this may cause distortion.
- Keep the roof clear of accumulated snow and leaves. Large amounts of snow on the roof can damage the shed, making it unsafe to enter.
- Wind direction is an important factor to consider when determining the location of the shed. Reduce exposure to the wind, in general, and of the door side in
particular. Keep doors closed and locked when the shed is not in use to prevent wind damage. - Do not stand on the roof.
- Consult your local authorities to check if permits are required to erect the shed.
10-YEAR LIMITED WARRANTY
Your Keter shed (“the Product”) was manufactured from high-quality, recyclable materials under rigorous control and supervision.
Should a problem occur with the Product, please address your claim to Keter customer service on our website (www.keter.com) or by phone.
This warranty covers product failure resulting from defects in manufacturing or materials for a period of 10 years from the date of original retail purchase. (The term “defects” is defined as imperfections that impair the use of the Product).
This warranty does not cover defects resulting from normal wear and tear, including, but not limited to, scuffing, scratches or fractures caused during use, discoloration or fading, rusting, unreasonable use, abuse, negligence, alterations, painting, moving, transporting or relocating the Product, “acts of Nature,” including, but not limited to, hail, any type of storm, flood and fire, and consequential or incidental damages.
Assembly and handling not in accordance with the recommendations, guidelines, and restrictions as described in the Product’s user manual, and used for commercial or public applications, will void this warranty.
Keter is not responsible for any damage incurred by third parties or damage to or loss of objects inside or near the shed.
Upon submitting proof of purchase and evidence of the claimed product failure, and subject to reporting the failure in a timely manner, Keter, at its sole discretion, will replace defective parts of the Product, or refund you a prorated portion of the purchase price on a straight line depreciated basis for the length of the warranty.
 IF THERE ARE MISSING OR BROKEN PARTS, PLEASE DO NOT RETURN THE PRODUCT TO THE STORE.
Please log onto our website, or contact Customer Service at:
WWW.KETER.COM
| US, Canada: Tel: +1877-638-7056 email: [email protected] Tel: +1-877-638-7056 Mon – Fri | 8am – 6pm ET Lundi-Vendredi 8h -18h Sat – Sun | 9am – 6pm ET Samedi-Dimanche 9h-18h | UK: Tel: +44-121-506-0008 email: [email protected] 2nd floor WESTPOINT, Mucklow office park, Halesowen, West Midlands, B62 8DY, United Kingdom Mon – Fri | 8:30am – 5pm | Australia: Tel: 03 9544 6999 Email: [email protected] 28 Buckland St, Clayton, Victoria 3168 Mon – Fri | 9am – 5pm |
| South Africa Tel: 0861-866-766 email: [email protected] Website: za.Keter.com | South Africa Tel: 0861-866-766 email: [email protected] Website: za.Keter.com | Other European Countries Tel: +31-1612-28300 email: [email protected] Mon – Fri | 8:30am – 5pm |
![]() A better world with Keter.
A better world with Keter.
From material innovation to manufacturing processes we encourage sustainable consumption.
Made in Israel by


