![]() Installation Manual
Installation Manual
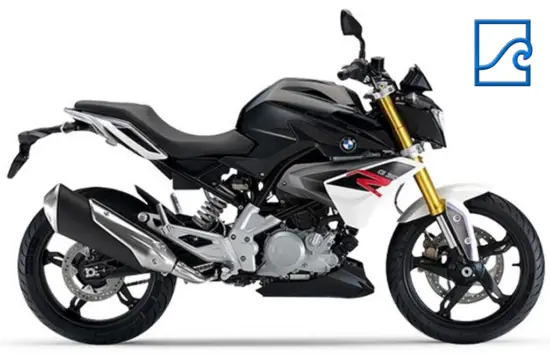
BMW G31OR
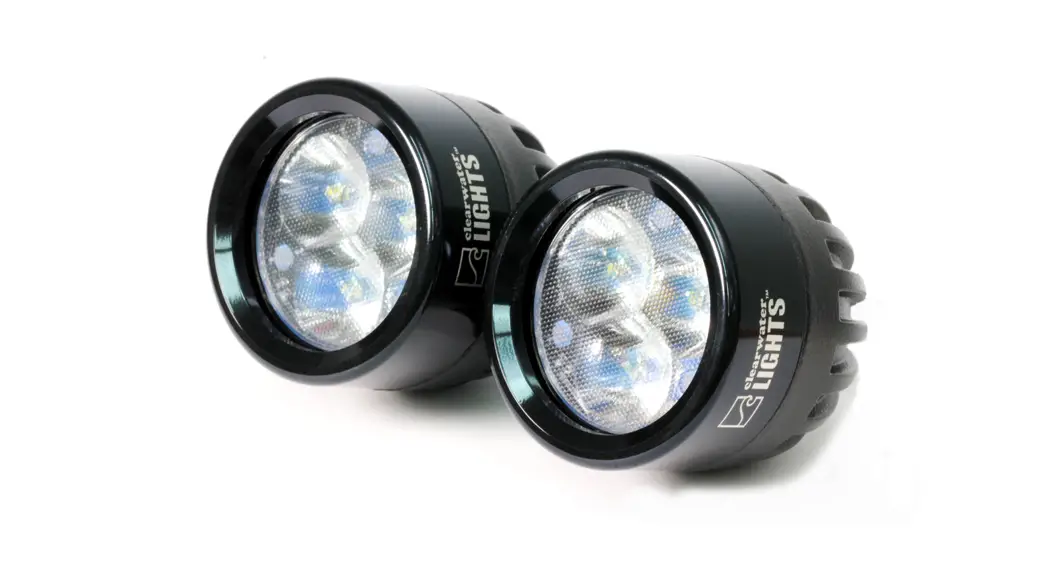
Darla LED Light Kit
Dimmable
Patent Pending
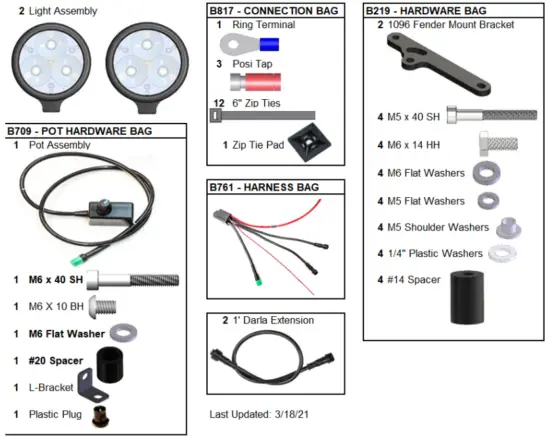
Parts List and Bike Preparation
Please be sure to read our instructions thoroughly before attempting installation.
Check the Parts list below with your kit to be sure all parts are handy. If something is missing, please call us at (916) 852-7029.
Disassembly
Bike Preparation:
First, park the motorcycle on hard pavement or concrete to insure the bike will be stable during the installation. If you can mount the bike on a stand with tie-down straps, this will help secure the motorcycle.
Follow the manufacturer’s guidelines for disconnecting the battery. This is important to prevent damage to the electrical system.
Remove the rear seat.
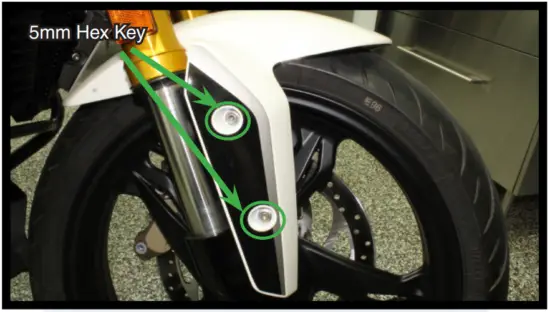
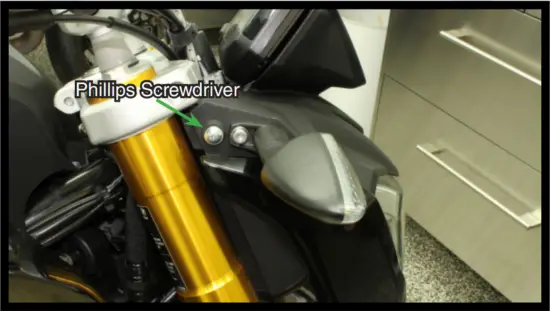 Remove the left and right side bolts pointed out above with a Phillips screwdriver.
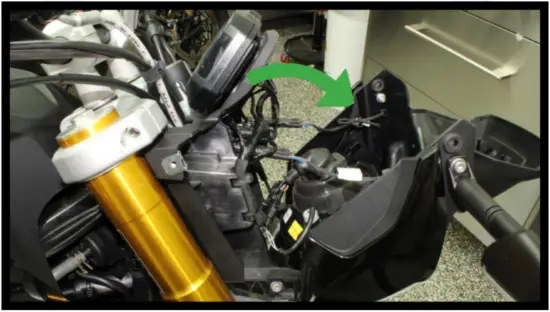 The headlight assembly will pivot downward, as shown above.
Mounting the Lights
 Remove the two M6 bolts as shown above on both sides of the bike. It is helpful to remove the bolts and install our bracket on one side at a time.
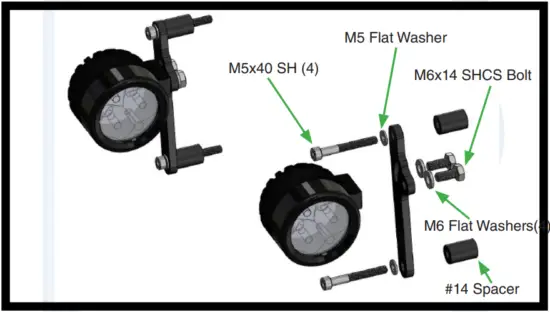
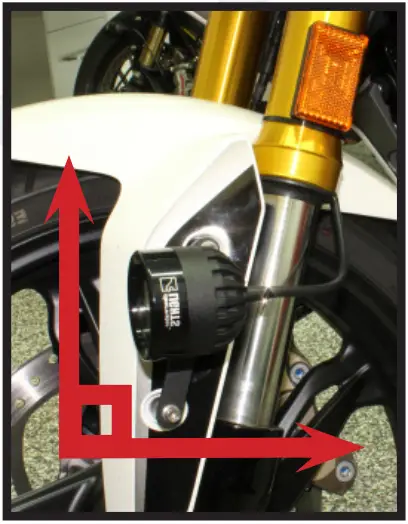
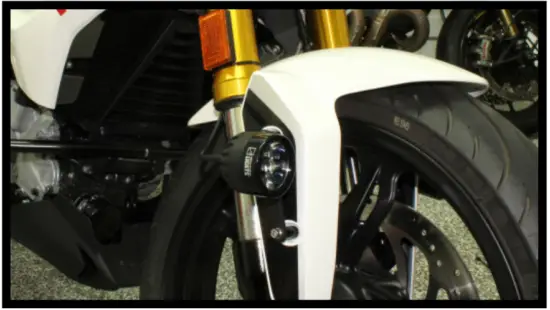 Mount the Darlas to the fender mount as shown above.
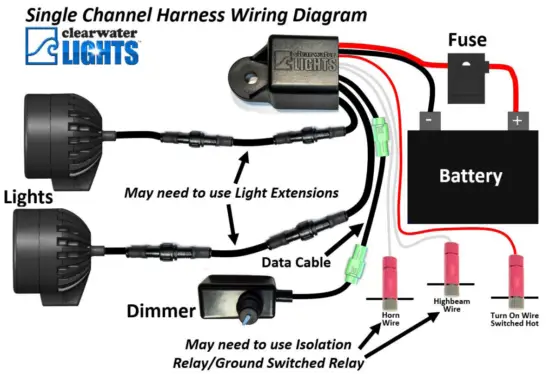
Wiring Diagram
NOTE: Before proceeding with wiring the lights, take a moment to review the wiring diagram. Keep the diagram handy throughout the installation.
Mounting the Dimmer
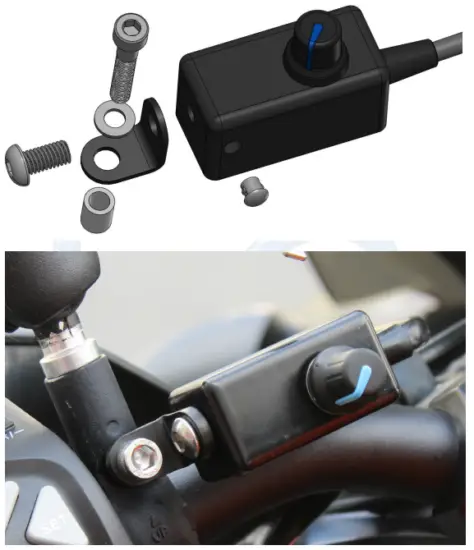 Mount the dimmer to the handlebar using the provided pot hardware. Follow the photos above for mounting details.
Route the dimmer wire along factory wires to the harness mounting location (behind the headlight assembly). Use zip ties to secure them in place.
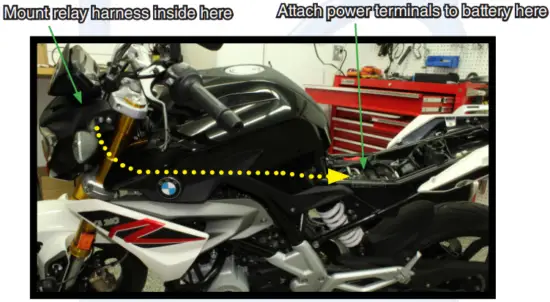
Mounting the Harness
Wire Routing:
Be sure to route wires so that they cannot become tangled or caught in either a suspension part or steering part. Check movement of both steering and suspension before riding the bike.
It is sometimes helpful to follow existing wire routing.
Using included zip ties, mount the wiring harness (small black box) to the area behind the headlight assembly. Reference photo below for harness mounting location and wiring path for power wires.
With the fuse holder removed, route the black and red power cables from the Clearwater Lights harness through the wiring trough. Using a pulling tool will make this easier.
Switched Hot, High Beam & Horn
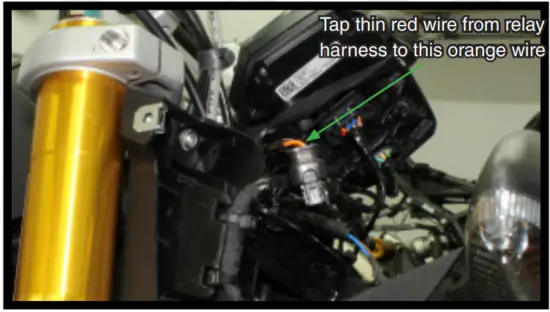
Switched Hot Wire: Locate the auxiliary plug and tap the thin RED wire from the harness to the ORANGE wire as shown below. This tells our harness when to turn on and off with the key.
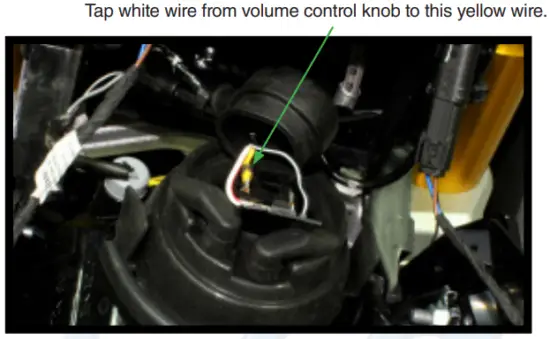
High Beam Wire: Remove the rubber boot from the headlight connector, exposing the 3-wire plug underneath. Using the included Posi-tap, connect the thin WHITE wire from the harness to the YELLOW wire at the headlight connector. This will tell our lights to go to 100% when the high beam is on.
 Horn Wire: Using a posi-tap, connect one of the white wires from the harness to the hot wire of the horn. This will tell our lights to go to 100% when the horn is pressed.
Ensure all wires are free from pinch points and direct heat. Connect the dimmer to the harness (green connectors).
Finishing the Install
Connect the RED power wire to the fuse included in your kit, then attach it to the positive terminal on the battery. Connect the BLACK power wire to the negative terminal on the battery.
Test your lights. The bike needs to be on, and the engine running for our system to work properly. Ensure the lights dim when in low beam, and go to 100% when the high beam or horn is pressed.
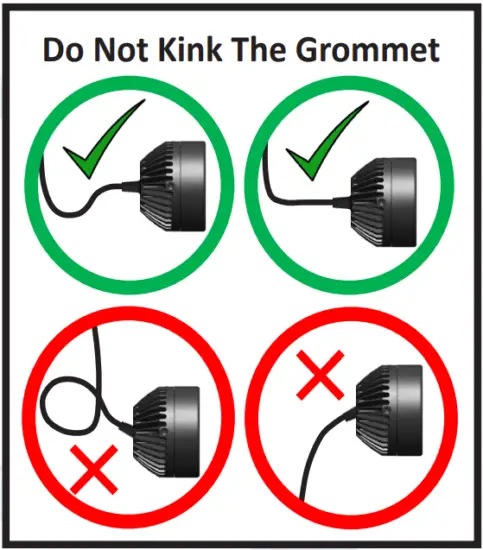
Do Not Kink The Grommet
To maintain the integrity of the water sealing grommet, do not kink, deform or put pressure on the grommet when dressing the wires during install of Clearwater Lights.
Aligning the Lights:
Ask an assistant to help you with this procedure. Make sure the bike is on level ground and have an assistant sit on the bike. Press a level against the face of the light, and adjust its angle.
The goal is to adjust the lights so that the light is level with the ground.
Passengers and luggage may alter the alignment of the light, so further adjustments may be needed. You may find that a slight downward angle (5 degrees) is helpful.
Notes
Thank you for purchasing your Clearwater Lights. We hope this product will help make you a safer rider. Please feel free to send us comments or suggestions at any time We learn from you. Visit our website for more exciting products to help you see better at night.
Ride safe!
Sincerely,
Glenn and the team at Clearwater.
![]()
The Clearwater Company – 11305 Sunrise Gold Circle, Suite D
Rancho Cordova, CA 95742
Phone: (916) 852-7029 I Fax: (916) 852-9410 I www.clearwaterlights.com
Revised 11/5/21


