![]() OPERATING INSTRUCTIONS:
OPERATING INSTRUCTIONS:
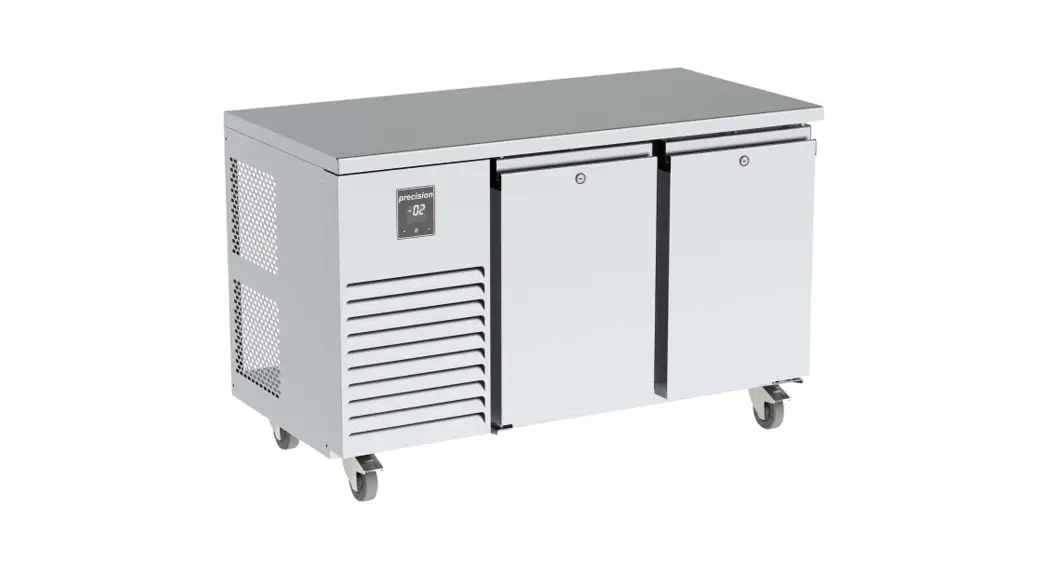
Professional Refrigeration and
Heated Cabinets
V1/2017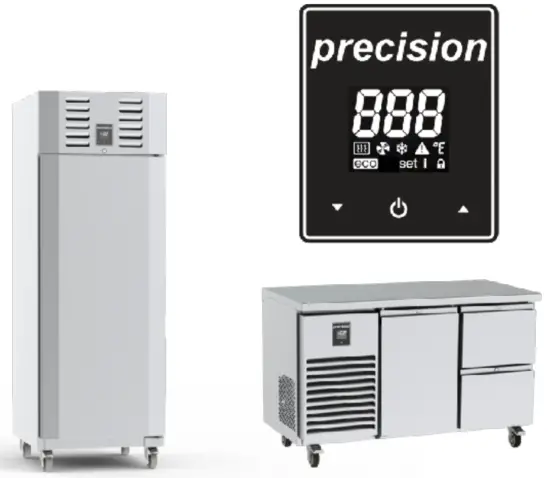
PRECISION REFRIGERATION LTD
Stephenson Way
Thetford, Norfolk, IP24 3RU, UK
+44 (0)1842 753994
www.precision-refrigeration.co.uk
This page is intentionally left blank
All information is subject to change without prior notice.
General Hazards
All moving parts of the refrigerator are suitably guarded and the moving parts can only be accessed by using tools that should only be attempted by a qualified person.
Electrical Connection
This product is supplied with a molded plug which needs a suitable socket. This cabinet should not be used outside and should be used in a dry environment. The plug needs to be accessible once the equipment is placed in its final position. Should the plug need changing, this must be done by a qualified person.

Unpacking

Leave all packaging in place until the refrigerator is in its final position to avoid damage. When the cabinet is in its final position, carefully remove all packaging and check for damage.
Any damage should be reported immediately to your dealer. All packaging should be carefully disposed of and recycled where possible.
Installation
The cabinet is very easy to move around as most precision products are supplied on castors. If for any reason the cabinet has to be laid down, it should always be laid on its back and not its side or front to avoid damage. When lowering or raising the cabinet extreme care should be taken as the casters can run away whilst lifting or lowering. A person should always be standing at the base of the cabinet whilst it is being lowered or raised. The cabinet should not be plugged in for at least 1 hour if it has been laid down or tipped during installation.
This product must be placed on a level floor to ensure the automatic door closing and correct draining of condensate. This is especially important with freezers.
Ventilation
Refrigeration equipment generates a lot of heat. A 2 door freezer cabinet for example gives off the same heat as a 3kW electric heater. Therefore, it is very important that the cabinet must be installed with sufficient space around it for ventilation and for maintenance access. Ventilation grills must not be blocked, or even partially blocked as this could affect the cabinet’s performance and life span.
Shelves / Pans / Slides
Cut the nylon ties holding the shelves in position for transportation. Fit the shelves in the correct position to suit the user.
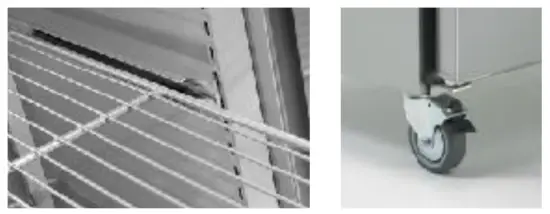
Castors / Adjustable Legs / Levelling Feet
Lock the two front castors once the cabinet is in its final position by pressing down the metal bar with your foot. This will stop the cabinet from moving when the door is opened and closed. The level on models fitted with castors can’t be adjusted so a level floor should be provided. Models fitted with adjustable legs or leveling feet can be leveled by screwing the legs/feet in or out to the desired height.
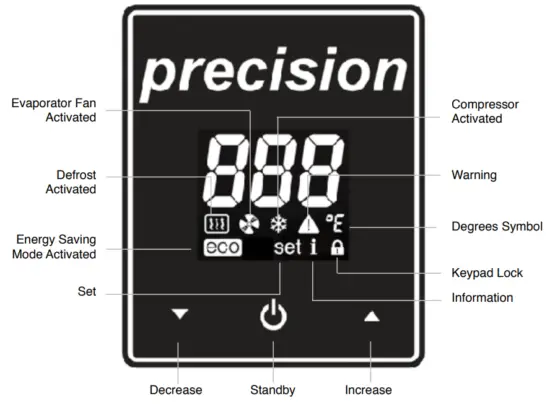
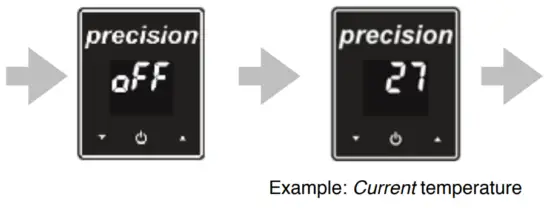
LAE Electronic Controller Display
Initial Start-Up
Plug the molded plug into a suitable socket. If necessary, push the ![]() button on the controller to start the unit. The cabinet air temperature will be displayed once the unit is
button on the controller to start the unit. The cabinet air temperature will be displayed once the unit is
running. To standby the unit when running, press and hold the button ![]() for 3 seconds.
for 3 seconds.
Checks
After initial start-up, after a 3-minute time delay, the cabinet should start to pull down to the preset temperature, check that the temperature is reducing, and listen inside and outside the cabinet to make sure the fans are turning freely to check there has been no movement in shipping. If time permits, stay with the cabinet until the preset temperature is reached and the condensing unit cuts out. The preset temperature can be checked by pressing the ![]() and
and ![]() button on the controller.
button on the controller.
Using Your New Piece Of Refrigeration Equipment
The cabinet must reach its preset operating temperature before loading any produce.
Ensure stored products are evenly distributed on shelves ensuring that no more than 40kg are placed on each shelf.
Cover all foods ensuring that cooked and raw foods are kept separate to avoid cross-contamination.
To ensure even product temperature, it is recommended that no food product is stored below the lowest shelf support.
Warm or hot food should never be stored inside the cabinet.
Foods containing acetic acids or yeast should be covered or ideally stored in airtight containers otherwise premature failure of the refrigeration system may occur.
Commissioning Instructions
Refrigerators +1 ºC to +4 ºC
Temperature Setting
Refrigerators are designed to operate between +1 ºC and +4 ºC depending on the model.
The control is preset at the factory for this temperature and should require no readjustment.
The temperature setting can be checked by pressing and holding the ![]() or
or ![]() buttons.
buttons.
This setting can then be changed to better meet site conditions by pressing the ![]() or
or ![]() arrows and then to
arrows and then to ![]() confirm. (Refrigerators have a maximum setting of +10 ºC and a minimum of +1 ºC.) The temperature setting is the cut-out (stopping) temperature, and the cut-in (starting) temperature is determined by the differential.
confirm. (Refrigerators have a maximum setting of +10 ºC and a minimum of +1 ºC.) The temperature setting is the cut-out (stopping) temperature, and the cut-in (starting) temperature is determined by the differential.
Defrosting
All Precision refrigerated cabinets are fitted with a fully automated defrost system that ensures the cooling system remains free from ice under normal conditions. If a manual defrost is required, this can be activated by simultaneously pressing and, which will terminate automatically once the pre-programmed temperature has been reached.
Meat Refrigerators -20C to +4°C
Temperature Setting
Precision’s Gastronorm Cabinets and Counter Refrigerators are designed to operate between -20C and +40C. The control is preset at the factory for this temperature and should require no readjustment.
The temperature setting can be checked by pressing and holding the ![]() or
or ![]() button. This setting can then be changed to better meet site conditions by pressing the
button. This setting can then be changed to better meet site conditions by pressing the ![]() or
or ![]() arrows. (Refrigerators have a maximum setting of 10°C and a minimum of -20C.) The temperature setting is the cut-out (stopping) temperature, and the cut-in (starting) temperature is determined by the differential.
arrows. (Refrigerators have a maximum setting of 10°C and a minimum of -20C.) The temperature setting is the cut-out (stopping) temperature, and the cut-in (starting) temperature is determined by the differential.
Defrosting
All Precision meat temperature refrigerated cabinets are fitted with a fully automated defrost system that ensures the cooling system remains free from ice under normal conditions. If a manual defrost is required, this can be activated by simultaneously pressing a and a, which will terminate automatically once the pre-programmed temperature has been reached.
Freezers -18°C to -22°C
Temperature Setting
Freezers are designed to operate between -18°C and -21°C. The control is preset at the factory for this temperature and should require no readjustment.
The temperature setting can be checked by pressing and holding the ![]() or
or ![]() buttons. This setting can then be changed to better meet site conditions by pressing the
buttons. This setting can then be changed to better meet site conditions by pressing the ![]() or
or ![]() arrows and then
arrows and then ![]() to confirm. (Freezers have a maximum setting of -18°C and a minimum of -22°C.) The temperature setting is the cut out (stopping) temperature, and the cut in (starting) temperature is determined by the differential.
to confirm. (Freezers have a maximum setting of -18°C and a minimum of -22°C.) The temperature setting is the cut out (stopping) temperature, and the cut in (starting) temperature is determined by the differential.
Defrosting
All Precision freezer cabinets are fitted with a fully automated defrost system that ensures the cooling system remains free from ice under normal conditions. If a manual defrost is required, this can be activated by simultaneously pressing ![]() and
and ![]() which will terminate automatically once the pre-programmed temperature has been reached.
which will terminate automatically once the pre-programmed temperature has been reached.
Heated Cabinets (No Defrosting)
Heated Cabinets are designed to operate between +78°C and +82°C. The control is preset at the factory for this temperature and should require no readjustment. The temperature setting can be checked by pressing and holding the ![]() or
or ![]() buttons. This setting can then be changed to better meet site conditions by pressing the
buttons. This setting can then be changed to better meet site conditions by pressing the ![]() or
or ![]() arrows and then
arrows and then ![]() to confirm. (Heated Cabinets have a maximum setting of +82°C and a minimum of +78°C.) The temperature setting is the cut-out (stopping) temperature, and the cut-in (starting) temperature is determined by the differential.
to confirm. (Heated Cabinets have a maximum setting of +82°C and a minimum of +78°C.) The temperature setting is the cut-out (stopping) temperature, and the cut-in (starting) temperature is determined by the differential.
Variable Temperature Models
These models can be used as a Refrigerator -2 /+4°C or a Freezer -181-22°C. Simply press ![]() or
or ![]() to change the temperature and then the
to change the temperature and then the ![]() button to confirm.
button to confirm.
Maintenance
The cabinet is fully automatic and apart from cleaning needs very little maintenance.
The Interior and exterior should be cleaned with soap and water and no abrasives should be used as they will scratch and spoil the stainless steel finish. Interior shelving and racking
can be removed on most models for easy cleaning. Counter drawer sets can be fully removed and the drawers can be washed in a dishwasher if needed.
Maintenance and Cleaning
Before cleaning and maintenance, the cabinet should be in standby mode and then unplugged from the power supply.
Door Gaskets should be cleaned with warm soapy water and inspected on a regular basis and if damaged they should be replaced. Cooking oils and harsh cleaning detergents will shorten the life of the gaskets and contact should be avoided.
Condenser Cleaning
All the heat removed from the cabinet is discharged into the room via the condenser which is similar to a car radiator. This must be kept clean so that the air can pass through it to remove the heat, if it becomes choked with dust the unit will overheat and this can lead to poor cooling performance, increased energy consumption, and premature mechanical failure. The condenser should be brushed with a soft brush to remove any dust deposited on the alloy fins. The frequency of this cleaning is determined by the amount of dust in the surrounding area but should be cleaned at least 4 times a year.
Gasket Replacement
Damaged gaskets can easily be replaced. Remove the old gasket by gently pulling it out of the gasket retainer and simply push in the new gasket leaving the corners until last.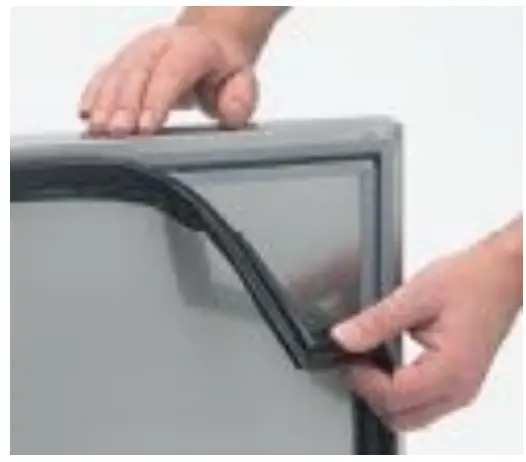
End of Life Disposable Requirements
Refrigerated cabinets have components that could be harmful to the environment. All end-of-life equipment must be disposed of in accordance with national laws and regulations.
Fault Finding
In the event of cabinet fault/failure, please check the following:
- The plug is in the socket and power to the socket can be proven by plugging another appliance into the same socket or swapping the problem cabinet to a socket that is known to work.
- The fuse located in the plug is intact.
- The condenser is clean and free from dust or debris.
- The door gasket is sealing and free from damage.
- Check if the evaporator is iced up, if found to be iced up press and hold
 and
and  together to activate a manual defrost cycle.
If this doesn’t solve the problem, please call a qualified technician.
When requesting a service call, please find the manufacturer’s data plate and provide the model, serial number, and details of any fault codes that are displayed.
Alarms
The controller is equipped with visual and audio alarms:
| Alarm Displayed | Description | Action Required |
| do | Door Open Alarm | Close door |
| he | Condenser High-Temperature Alarm | Check for blockage / clean |
| hp | High-Temperature Safety Stat | Call Engineer |
| hi | High-Temperature Alarm | Press a button to cancel/check |
| Lo | Low-Temperature Alarm | Press a button to cancel/check |
| El | Probe T1 Failure | Call Engineer |
| E2 | Probe T2 Failure | Call Engineer |
| E3 | Probe T3 Failure | Call Engineer |
| OFF | Cabinet In Standby | Press |
Notes:
![]()
Model: ……………………………………………………………………
Serial Number: ………………………………………………………
GWP Values for Refrigerants:
R1234Ze – ∼ 1
R290 – 3
R134a— 1300
R404a — 3943
These units contain fluorinated greenhouse gases covered by the F Gas directive
Declaration of Conformity References:
Low Voltage Directive 2006/95/EC
EC Machinery Directive 2006/42EC
Electromagnetic Compatibility Directive 2004/108/EC
Pressure Equipment Directive 97/23/EC
RoHS / WEE Directive 2002/95 EC