Z-Stick Gen5+ user guide
Modified on: Tue, 29 Sep, 2020 at 10:05 PM
Z-Stick Gen5+(https:/aeotec.com/z-wave-usb-stick/) offers compatibility with newer technologies than non +/plus, standard Z-Stick Gen5. This includes Raspberry Pi 4 compatibility, and native Z-Wave SmartStart and Z-Wave S2 compatibilities.
The technical specifications of Z-Stick Gen5+ can be viewed at that link.
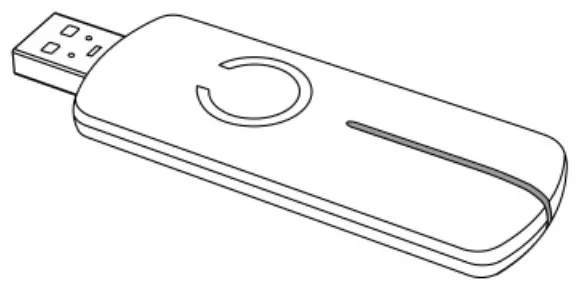
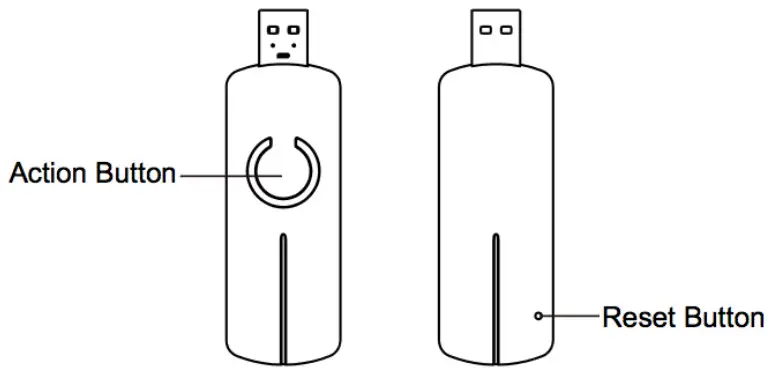
Get to Know your Z-Stick
`C` LED Indications
Important safety information
Please read this and other device guides carefully. Failure to follow the recommendations set forth by Aeotec Limited may be dangerous or cause a violation of the law. The manufacturer, importer, distributor, and/or reseller will not be held responsible for any loss or damage resulting from not following any instructions in this guide or in other materials.
Keep product and batteries away from open flames and extreme heat. Avoid direct sunlight or heat exposure. Improper battery use may damage the product.
Z-Stick GenS is intended for indoor use in dry locations only. Do not use in damp, moist, and/or wet locations.
Quick start
Z-Stick operates in 2 different modes: Network management, Serial connection. Network management is enabled when the Z-Stick Gen5+ is unplugged from USB. The serial connection allows you to interface the 2-Stick GenS+ to any third-party software allowing virtual connection via COM ports or CDC ACM connection.
To quickly get started, please follow our Z-Stick GenS Quick Start – Just the essentials article
We will go over the different potential functions of the Z-Stick GenS below.
Manually paid include Z-Wave devices
- Unplug the Z-StIck Gen5 from any USB connection, this will enable Network management mode.
- Tap the button once on 2-StIck GenS+. Its LED will blink blue slowly to indicate it is in pair mode.
- Follow the Instruction of the Z-Wave device that you want to pair. Typically the button press on the 2-Wave device Is a single tap. but some have special button presses (le. hold for 2 seconds and release. triple tap. double-tap. etc).
• Z-Stick Gen5+ LED will confirm if it paired something successfully by showing a solid blue LED for 2 seconds before returning to a slow blinking blue LED. - Repeat step 3 for any device you want to pair if you have multiple devices that you need to include.
- When done, tap the button once on Z-Slick GenS+ to bring it out of pair/include mode. The LED will de-activate.
Manually unpair/exclude Z-Wave devices
- Unplug the 2-Stick Gen5 from any USB connection, this will enable Network management mode.
- Press and hold the button on 2-Stick GenS+.
- Its LED will blink the button.
rapidly to Indicate it Is In unpair/exclude mode. Quickly release - Follow the Instruction of the 2-Wave device that you want to unpair. Typically the button press on the 2-Wave device Is a single tap, but some have special button presses (ie. hold for 2 seconds and release. triple tap, double-tap. etc).
• Z-Stick GenS+ LED will confirm if it paired something successfully by showing a solid blue LED for 2 seconds before returning to a fast blinking LED. - Repeat step 3 for any device you want to unpair if you have multiple devices that you need to exclude.
- When done, tap the button once on Z-Stick GenS+ to bring it out of unpair/exclude mode. The LED will de-activate.
Third-party software
In order to use the Z-Stick Gen5 and control your Z-Wave network, you must download third-party software to have full control over your software. You can find all known third party software in this link:
https://aeotec.Freshdesk.corn/solution/articles/60000420411-hoed-software
Free recommended software
We recommend free software Domoticz if you are just getting started as it is one of the easiest free software you can use. You can view this guide here:
Z-Stick Gen5 and how to get started with Domoticz.
Advanced
Backup Tool for Z-Stick GenS+
You are able to back up the Z-Stick Gen5 using our Z-Stick Gen5 Backup Software in any case you need to restore an older save of your network, or replace a failed Z-Stick Gen5. This way you will never have to re-do your network if there are catastrophic issues.
You can download the installation setup for Backup Software here: hliprehesleraeAmmisatignak-genEbadanawat
You can learn how to use Backup Software here to backup, and restore: https://notecireshdesk.comisolutioniartictes16000167023-how4o-use-ntickien5- backup-software-backup-and-restore-
This tool can also be used to transfer your old 2-Stick Gen5 network to a Z-Stick Gen5+, you can follow the steps here: thips://actotac.freshdesk.com/a/soltitions/artielas16000242397
Z-Stick Gen5+ as a secondary controller
This must be done through the host software which takes control of the Z-Stick USB adapter while Z-Stick is in SerialAPI-Mode. Please consult the instruction manual of the host software to add the Z-Stick to a pre-existing Z. Wave network (i.e. “Learn”, ‘Sync”, “Add as Secondary Controller, etc.). This function can only be performed via host software.
Steps (General):
- Connect your Z-Stick Gen5 to the software of your choice. 2. Enable ‘Learn” mode through software.\
- Enable Learn mode through software
Factory reset your Z-Stick Gen5+
At some stage, you may wish to reset all of your Z-Stick’s settings to their factory defaults and completely remove all connected Z-Wave devices.
Steps using the RESET button
- Unplug the Z-Stick Gen5+ from your PC.
- Press and hold the RESET Button (located on the back of the unit) for 20 seconds and then release it when no more LED activity is happening. (You can visually watch the ‘C’ LED) o The LED will blink red faster and faster over the course of 20 seconds. o At 20 seconds, the blue LED will appear
- Wait until the blue LED disappears before releasing its RESET button.
Using third-party software to factory reset
Z-Stick also can be reset to the factory defaults settings through third-party software (ie. Homeseer, Domoticz, Indigo, Axial, OpenHAB, Home Assistant, Jeedom, etc).
The third-party software must take control of the Z-Stick USB adapter while the Z-Stick is plugged into a PC USB port.
You’ll need to refer to your third-party software instructions if you are unsure where the function is located in the software. Find the “Reset Z-Wave controller” option in your third-party software and activate it.
Disable LED
You can disable the LED of the Z-Stick Gen5, there is only one requirement which is the use of a Windows OS to use Backup Tool.
Please follow the article here and follow through with the step by step instruction set to disable the LED of your Z-Stick Gen5:
https://aeotec.freshdesk.com/solution/articles/6000171881-how-to-disable-led-on-z-stick-gen5


