DentJet DJ-159 Water Flosser Cordless Portable Oral Irrigator

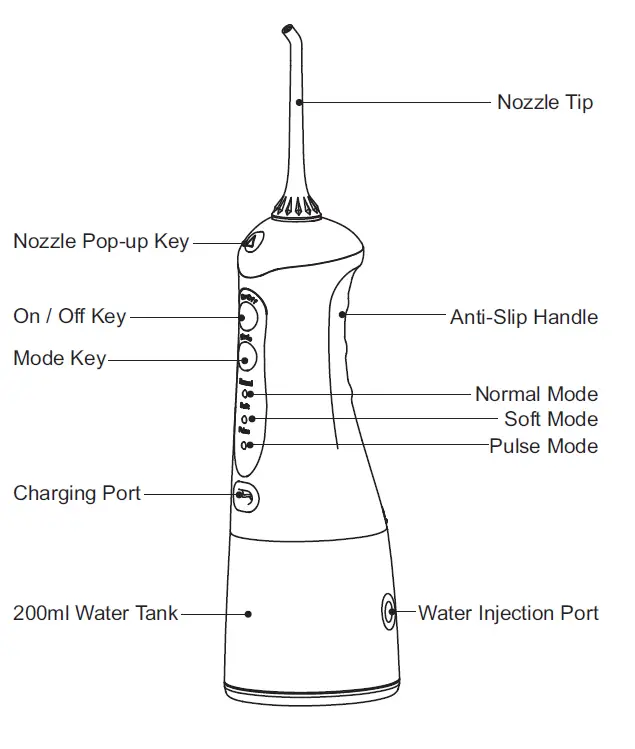
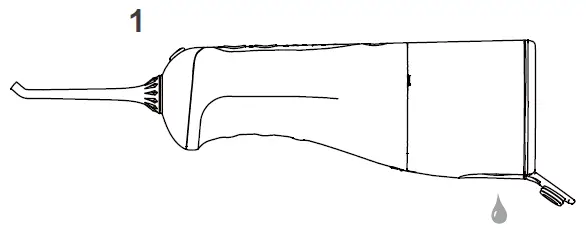
Product Description
Product Accessories
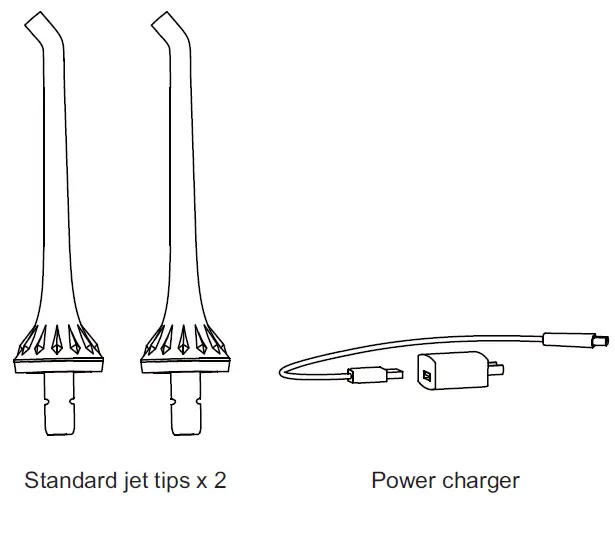
The jet tip and other components can be purchased at retail stores.
Get Started
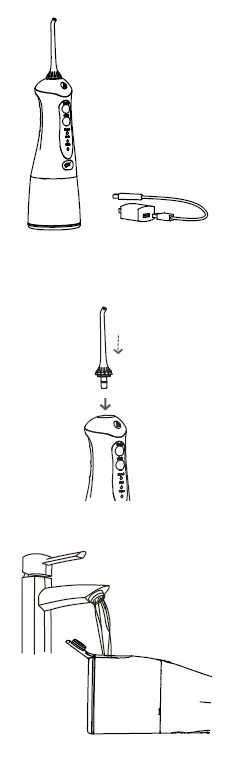 Preparation work.
Extremely important! Prior to using for the first time, please fully charge the device, and insert the USB plug into the power socket, as well as connect to a power supply. During power charging the product cannot be used.
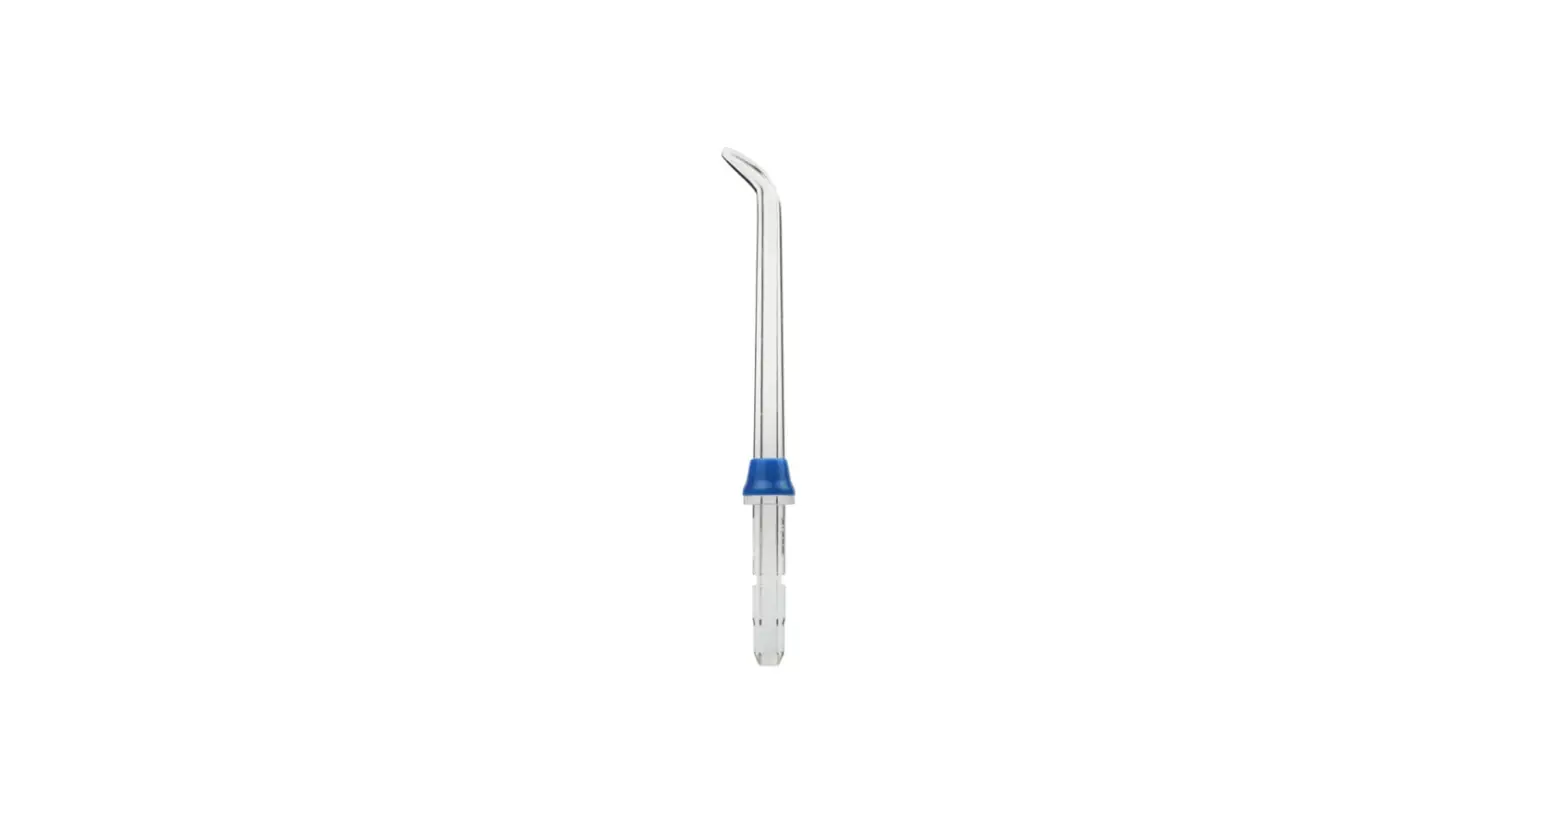
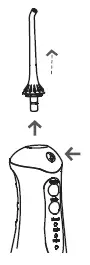
Installation and disassembly of jet tip
Insert thejet tip into the spray head hole by screwing it in, until you hear a clicking sound. open the water tank lid and pour water into the water tank;
Note: please ensure that when pouring water into the water tank, the device is switched off.
Instructions for Use
If changing or removing the jet tip, please press on the disassembly button on the jet tip handle before removing the jet tip.
- This product has a memory function, and after switching it back on the water pressure mode will be the same as when the device was switched off.
- The standard, gentle and massage modes may be switched whether the device is on or off.
- The modes may be changed when the device is switched off, and you can select the mode you like before switching the device back on.
- Irrespective of the mode, after operating for 120 seconds the product will automatically switch off.
- When the massage mode is used for more than 3 seconds, remaining battery power will be displayed.
- During recharge, the three display lights will flash. When all three display lights are constantly on, this indicates that the power is recharged.
- during usage, If all three display lights are flashing, this indicates that the product’s power is insufficient, and recharging is required.
- During recharge this product cannot be used.
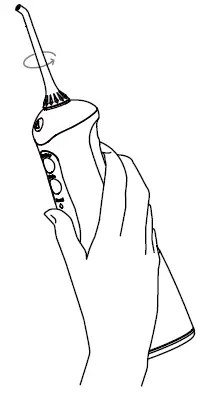
- Rotate the jet tip dial in order to adjust the direction of the water flow.
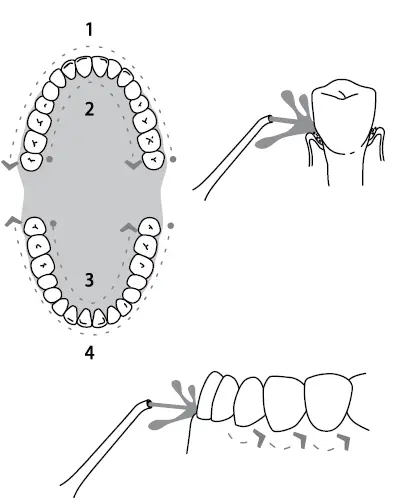
Recommended Technique
Holding the device at downward slant, position the jet tip in the mouth, and direct the jet tip at teeth before switching on the device.
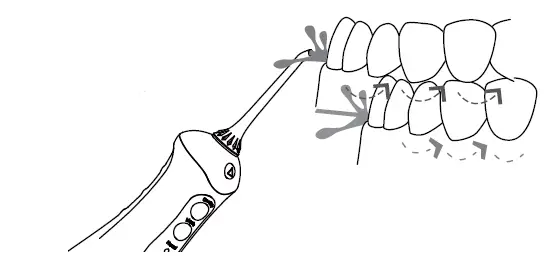
When the water flow and the gums are at a 90 degree angle, slightly close your mouth in order to avoid the water spraying out, and achieving the best results. Please first clench the teeth (rear teeth) and begin to apply to the incisors. Slide the water flow along the gums, as well as pause briefly between teeth, until the area around the gums and the spaces between the teeth are fully cleaned
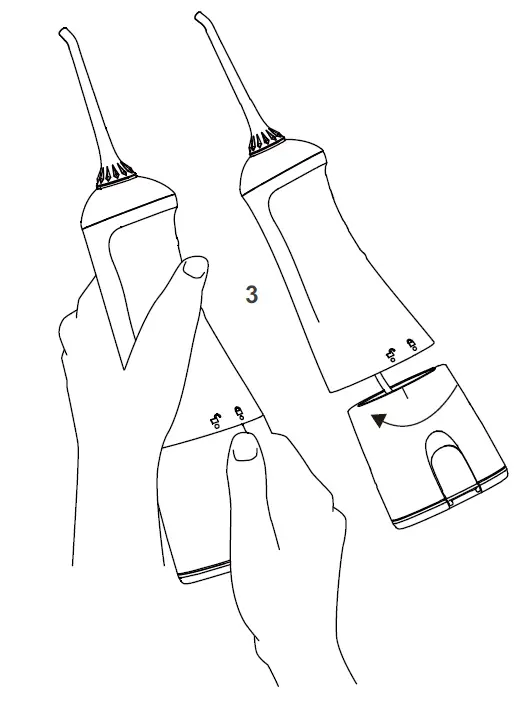
Remove and Clean Tank
Following Usage
Please switch off the power, as well as empty the water tank.
Using both hands as indicated in Diagram 2 -use your left hand to hold the product body, and your right hand to hold the water tank. At the same time rotate downwards in an
anti-clockwise direction, in order to remove the water tank.
Battery Maintenance and Disposal
Battery Maintenance
- Prior to initial usage the device must be fully charged, for approximately four hours;
- If to be stored for a long-period of time, please fully charge the device in advance.
- In order to maximize the usage life of the battery, please promptly recharge when power is insufficient.
Battery Handling
The device includes a lithium battery which cannot be changed. Towards the end of the battery life, please dispose in a local recycling centre.
Troubleshooting Guide
| Problems | Reason | Method of handling |
| Leakage of water between jet tip and screw part | The seal ring on the fixed socket for the jet tip is damaged, and the jet tip cannot be installed properly | Contact the retailer for repair, and install the jet tip properly |
| Water tank leaks water | Seal ring is loose | Re-install correctly |
| Inadequate pressure | Low voltage usage | Use after recharging |
| Device cannot be switched on | Low voltage usage | Use after recharging |
| Product is not discharging water | Filtration net is clogged | Clean the filtration net |
| Water tank sides are leaking water | Air entry hole is producing water | Standard phenomenon – high air pressure principle. |
If the above methods cannot resolve these problems, please consult with the retailer or proceed to the designated after-sales repair site for repairs.
GOMMLE Co., Ltd. Add.: YongXiang Rd., 7th Distrct, BanTian, Shenzhen, GuangDong, China Postal Code: 518000 Email: [email protected]


