thdstatic
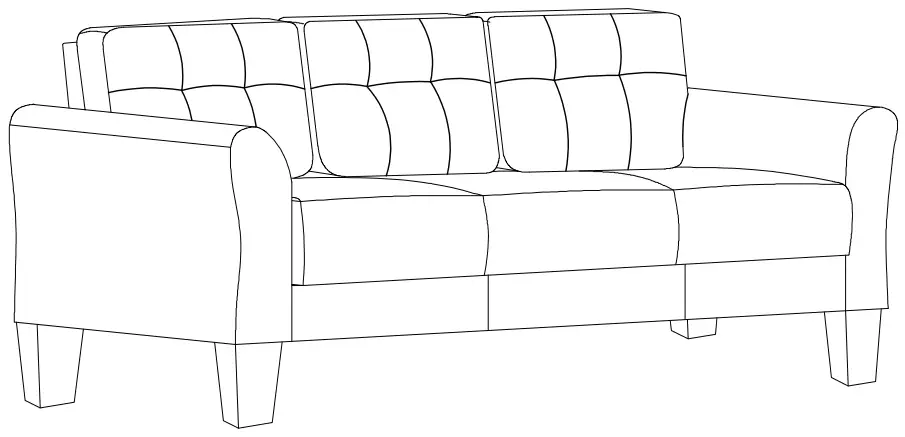
3-Piece Armchair in Light Gray
User Manual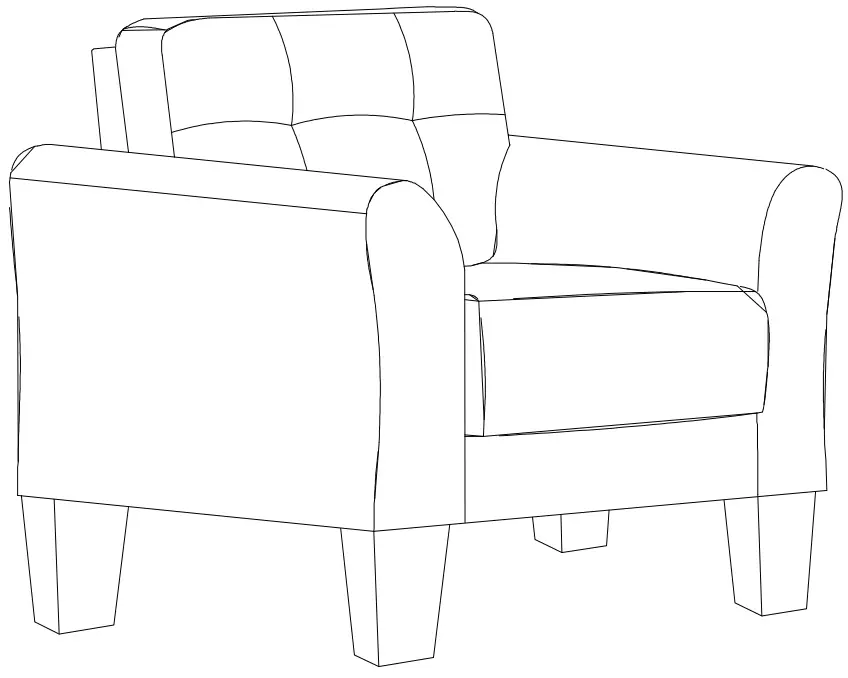
ASSEMBLY INSTRUCTIONS
If you have any questions about the product, please contact the email: [email protected]
WARNING
- This product has been designed for seating one (1) average adult. To prevent injury and damage to this unit, PROHIBIT jumping on it.
- This product is designed for home use and not intended for commercial use.
- Children under the age of 5, small infants, and babies should not sleep alone on this product for safety reasons.
- Recommended# of people needed for handling: 2 (however it is always better to have an extra hand.)
- THIS INSTRUCTION BOOKLET CONTAINS IMPORTANT SAFETY INFORMATION. PLEASE READ AND KEEP IT FOR FUTURE REFERENCE.
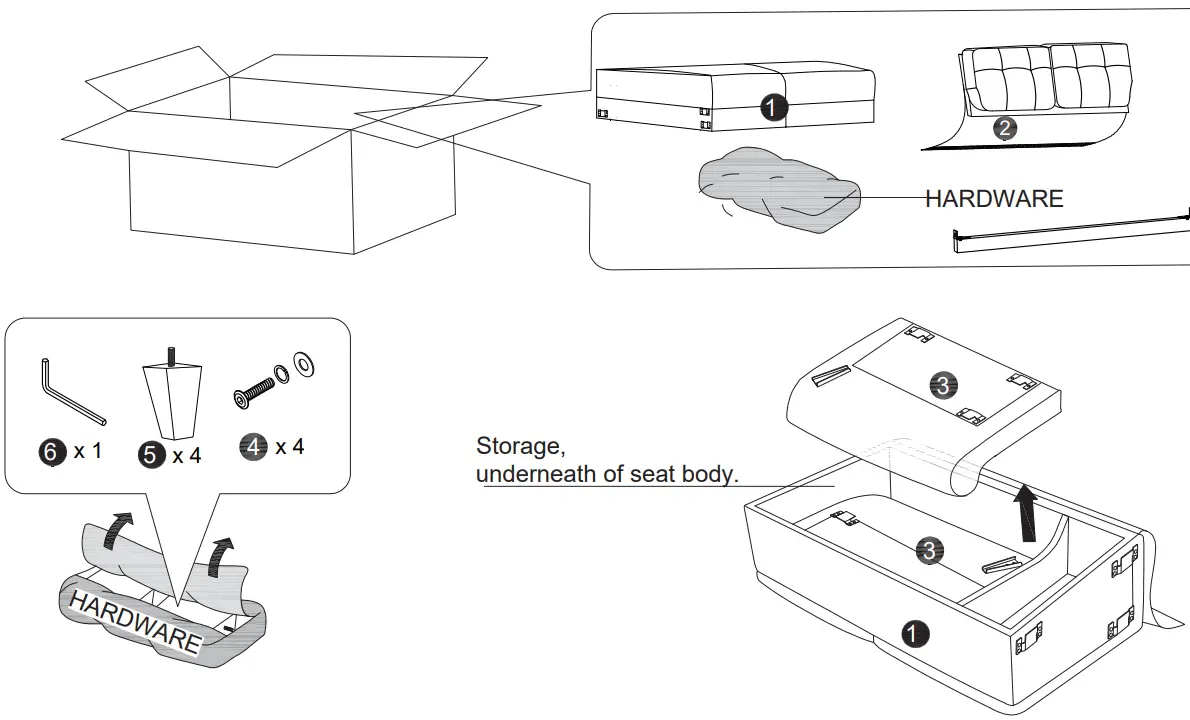
PARTS
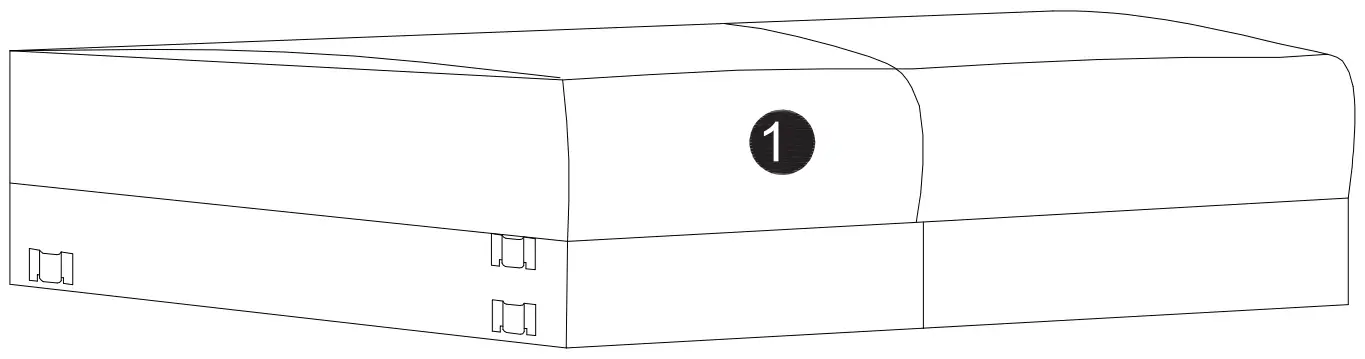
 | Seat Body QTY:1 |
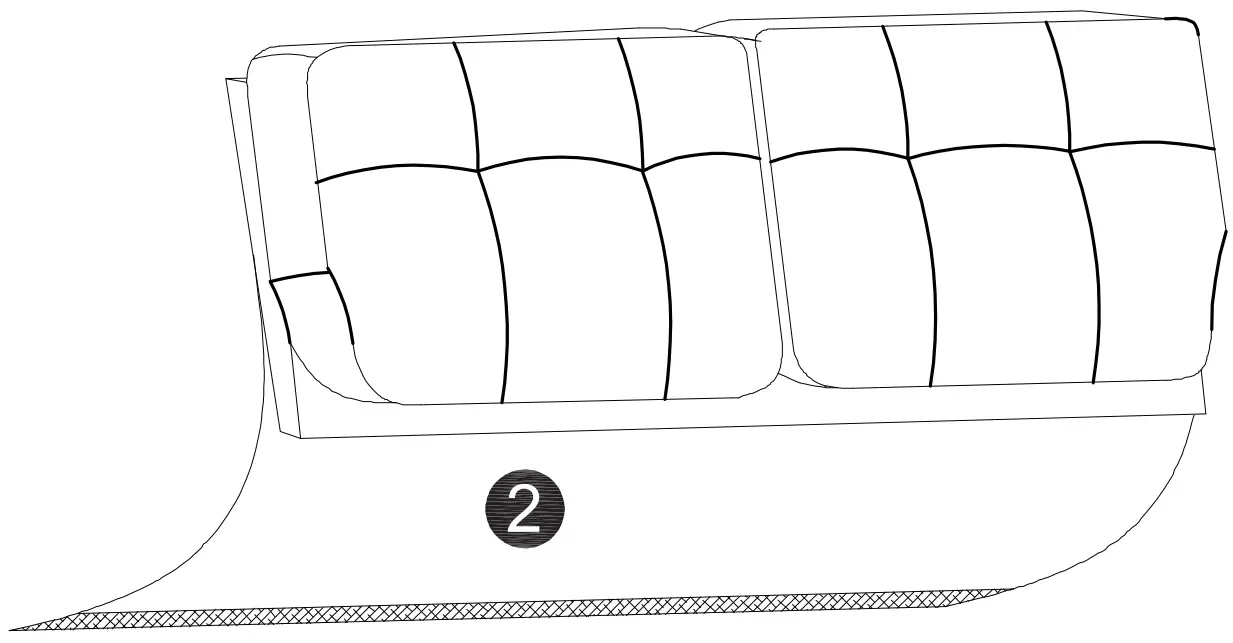
 | Backrest QTY:1 (In the storage underneath of seat body) |
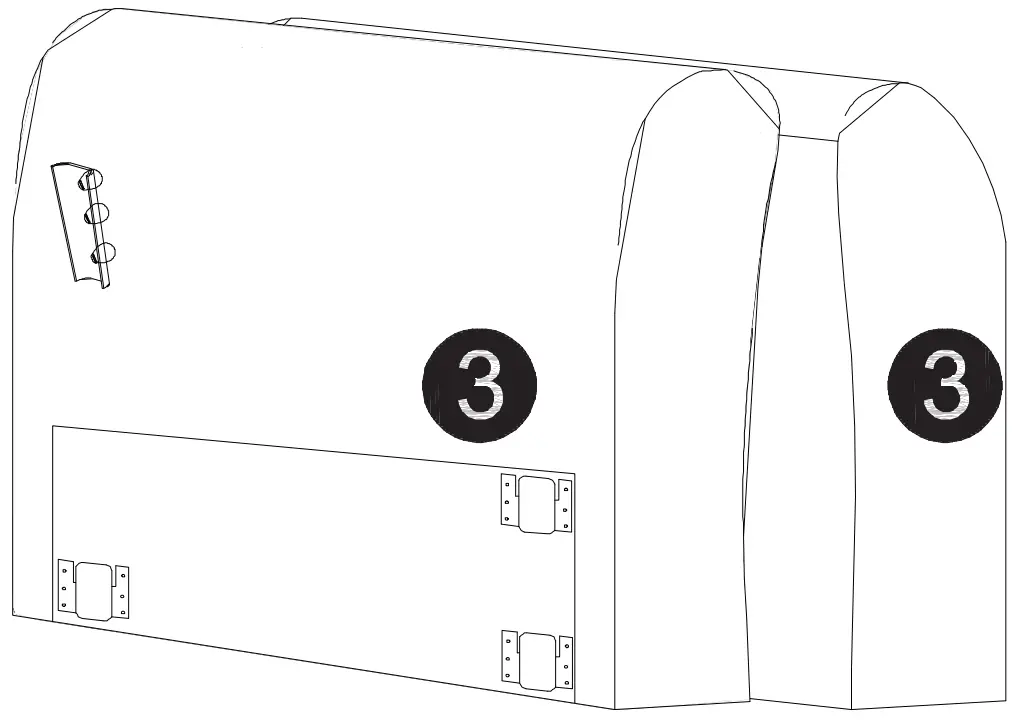 | Arm QTY:1 Pair |
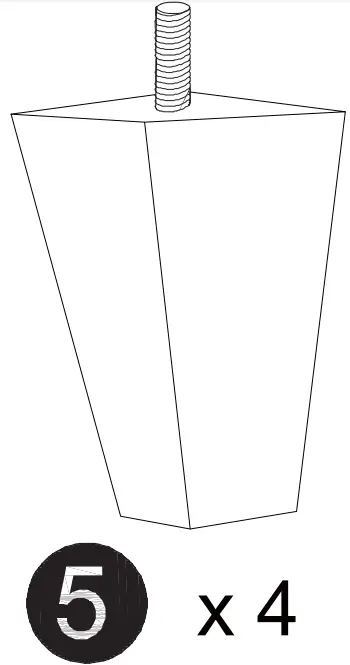
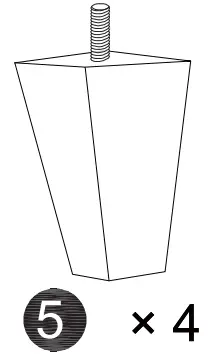
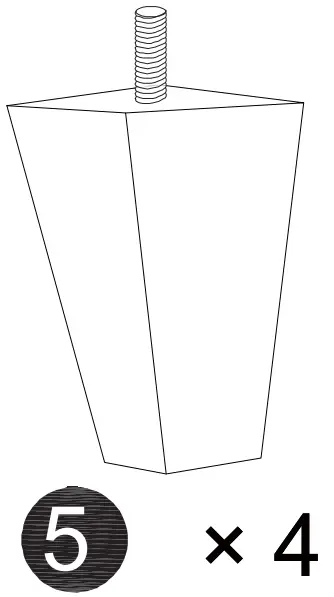
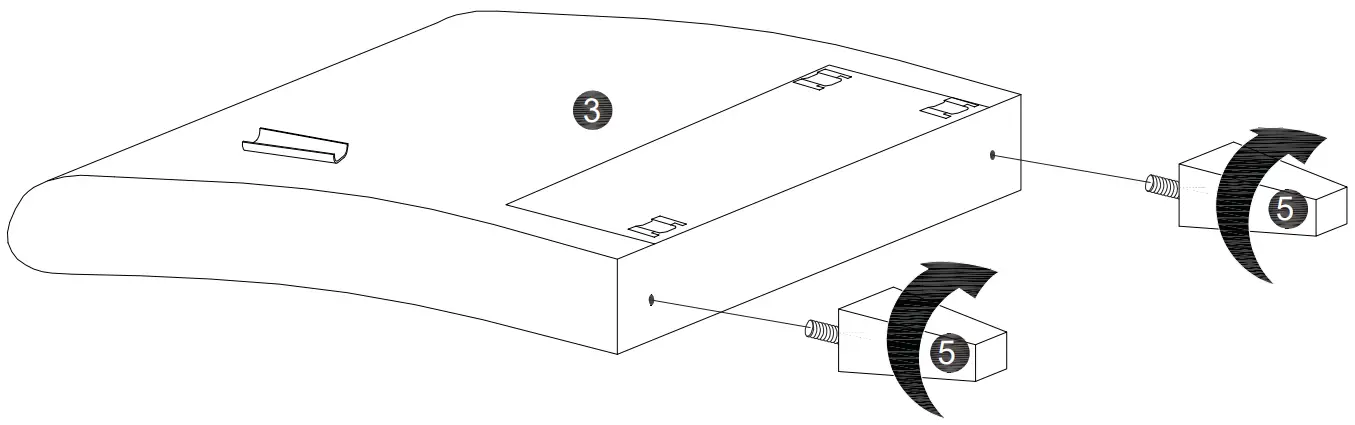
 | Leg QTY:4 |
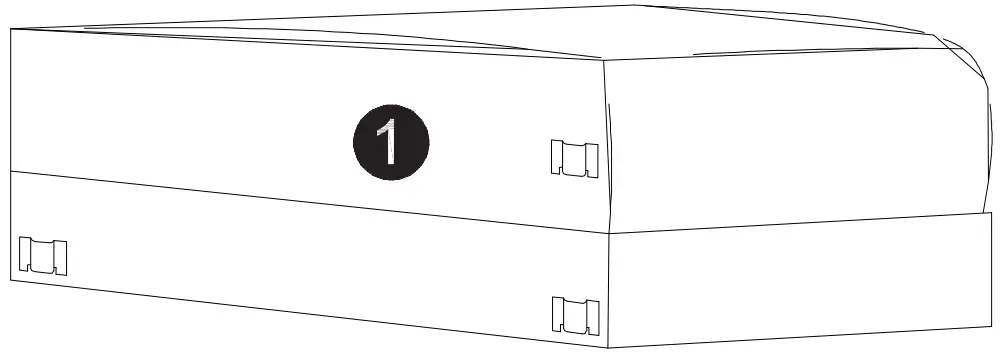
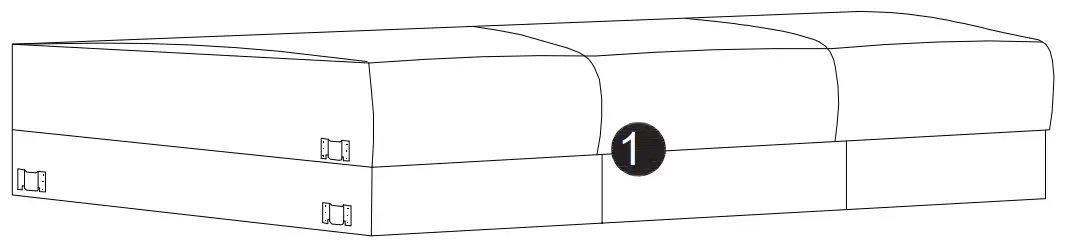
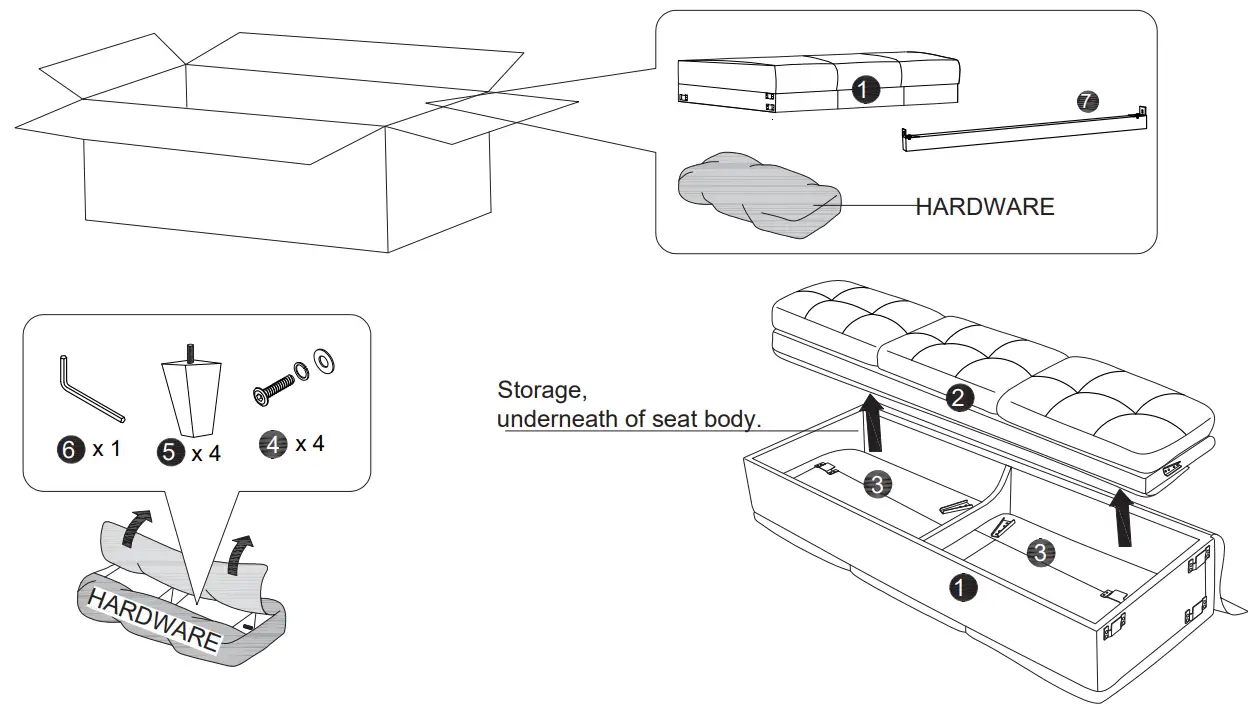
Step 1: Carefully unpack parts/hardware from the box and store of seat body, place on a clean flat surface.
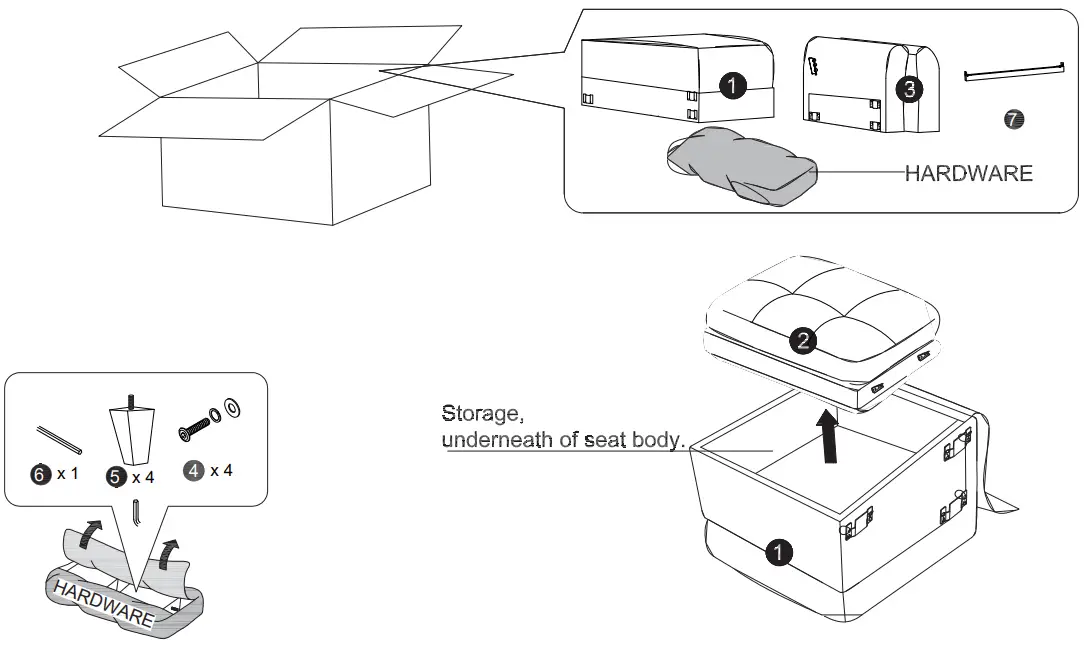
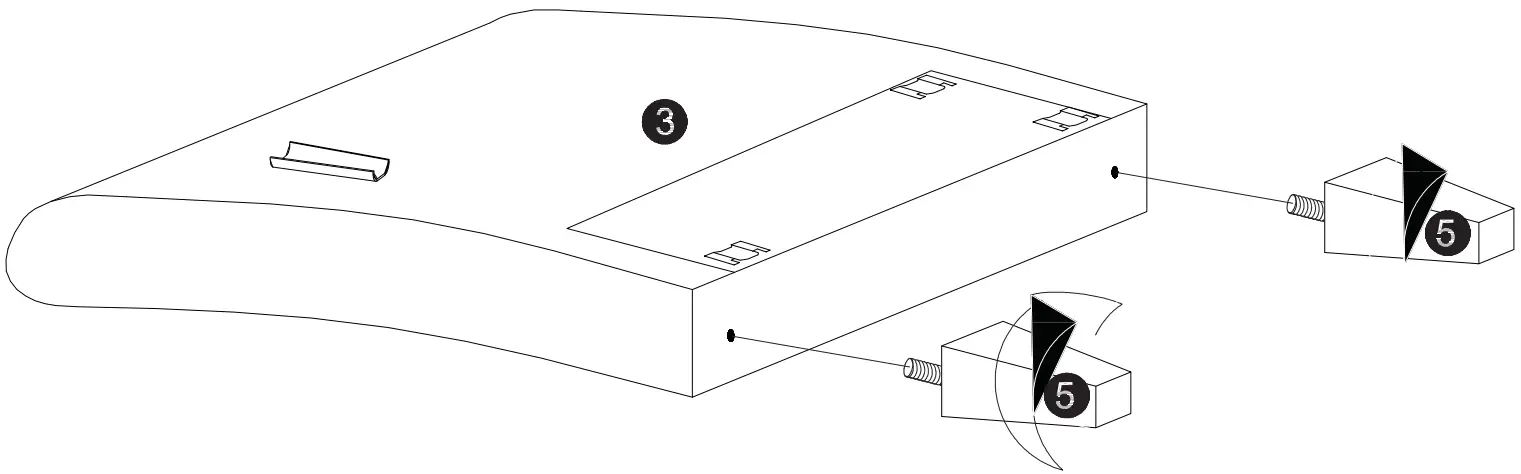
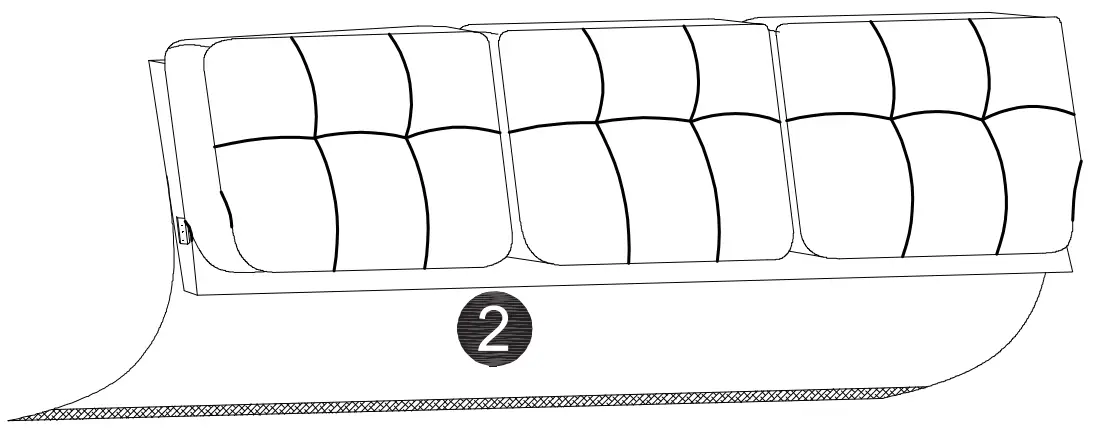
Step 2: Place both arms as shown below, and secure two legs into pre-drilled holes on the bottom of the arms. Please avoid overtightening.
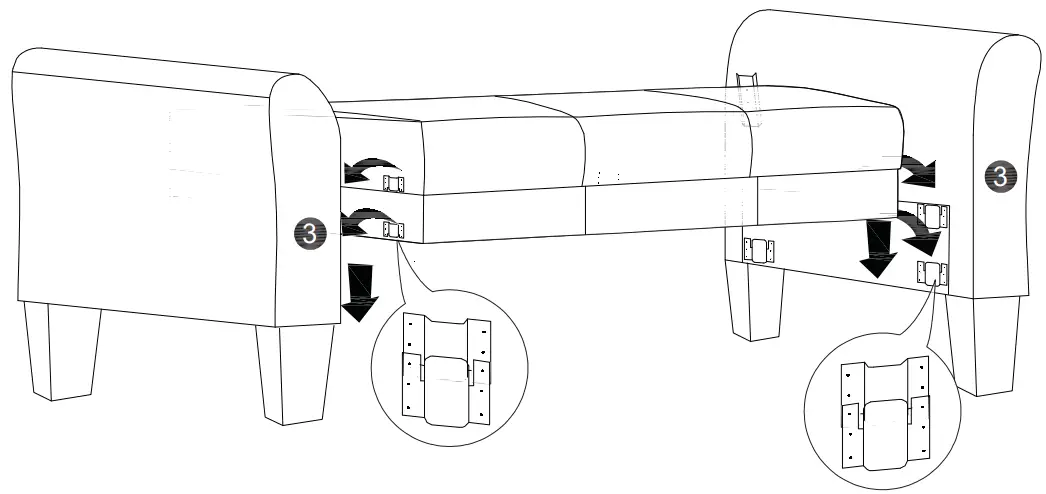
Step 3: Carefully lift and turn assembled arms onto their legs. Insert seat body metal plates to both arms as shown below. Ensure it is correctly in place.
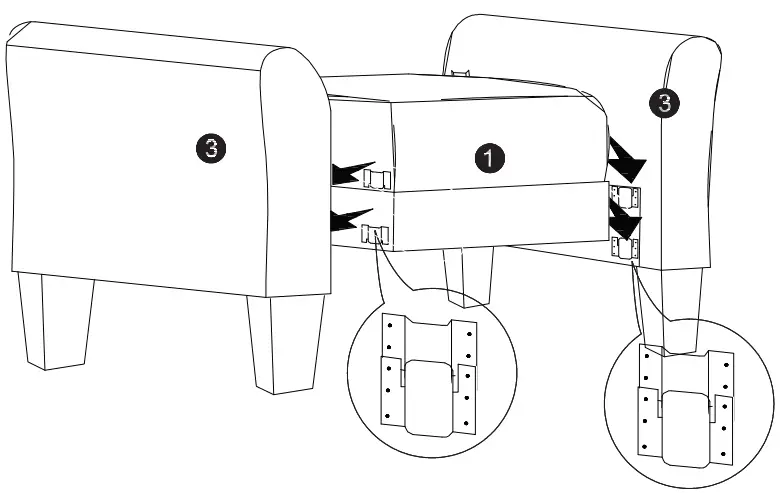
Step 4: Insert backrest with earpiece metal plates to both arms as shown below. Ensuring is correctly in place.
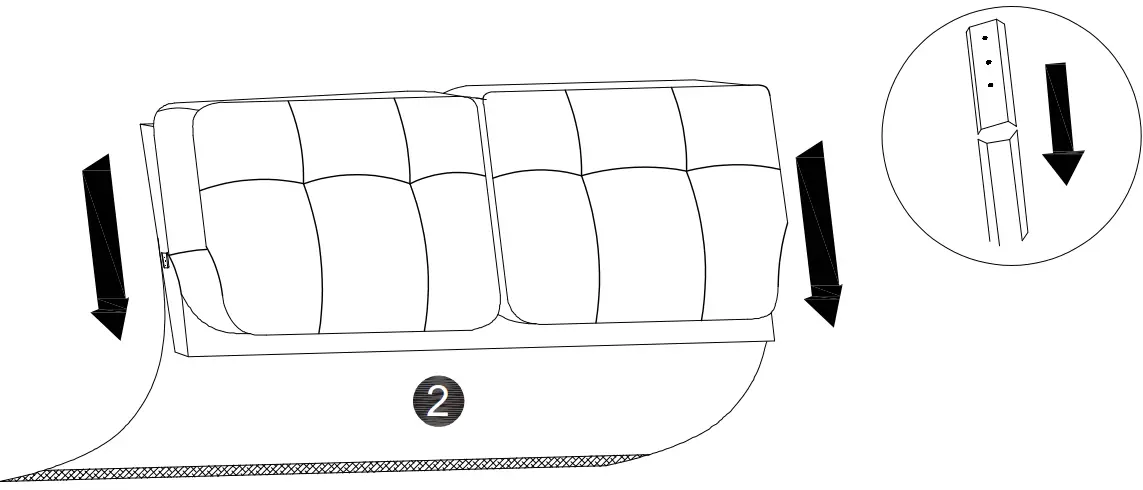
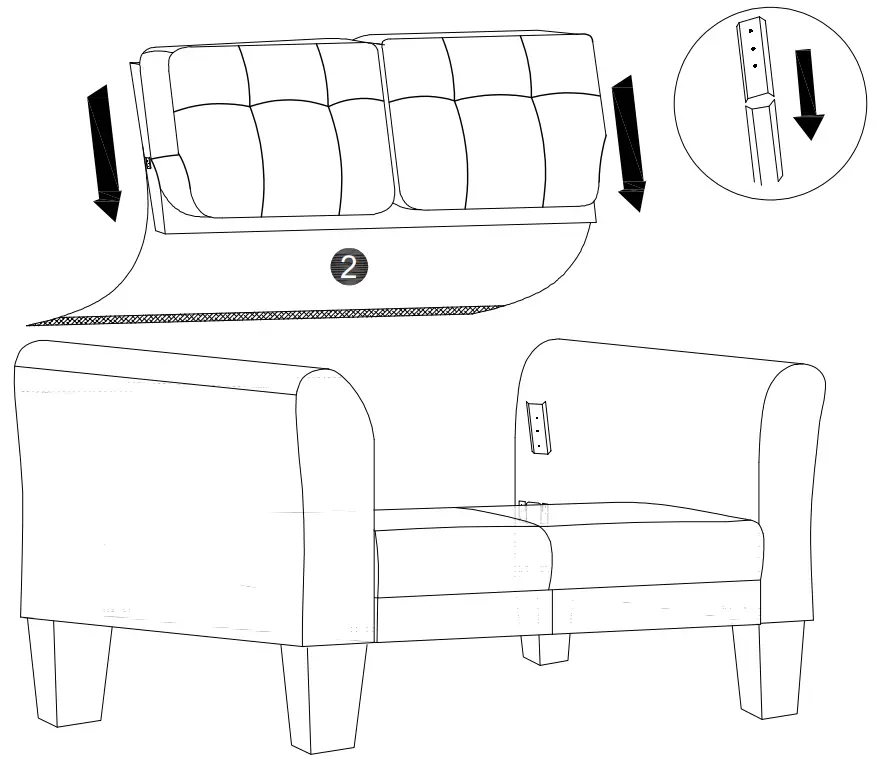
Step 5: Insert backrest metal plates to both arms as shown below. Ensuring it is correctly in place.

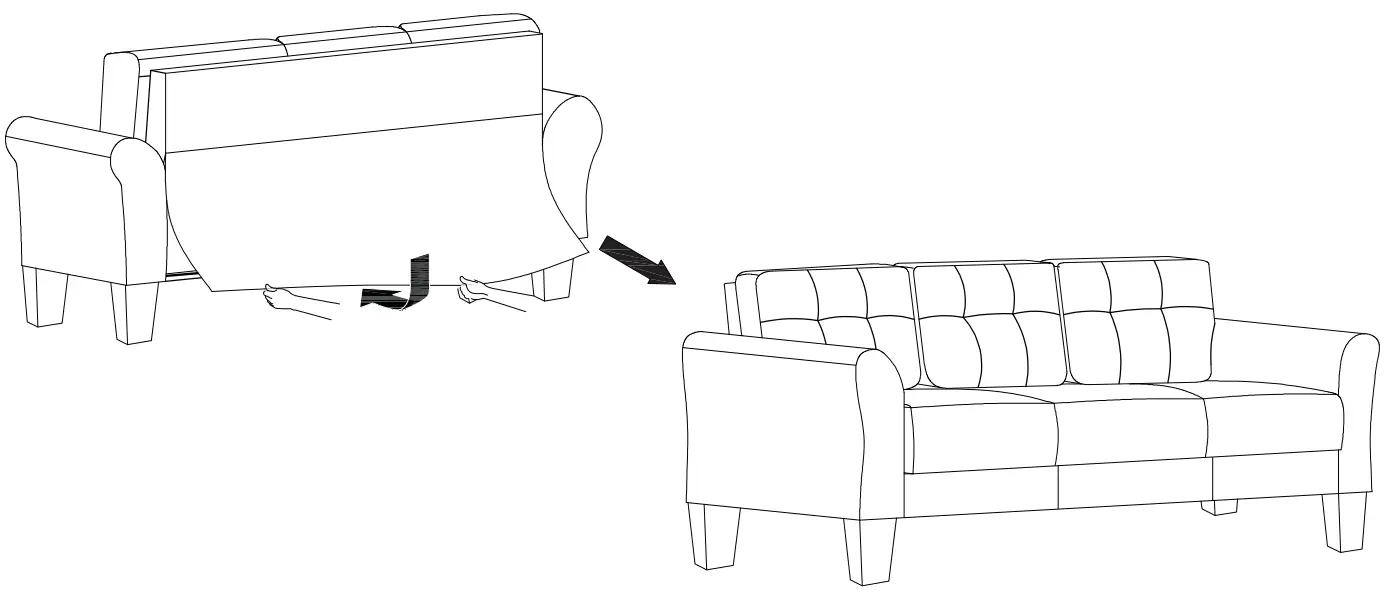
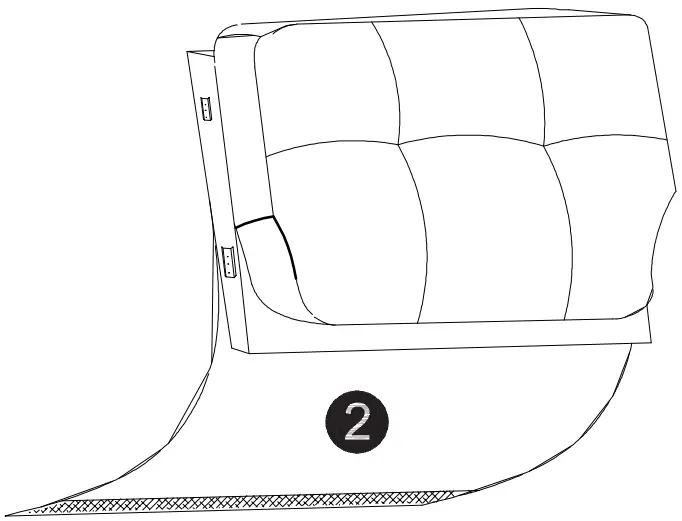
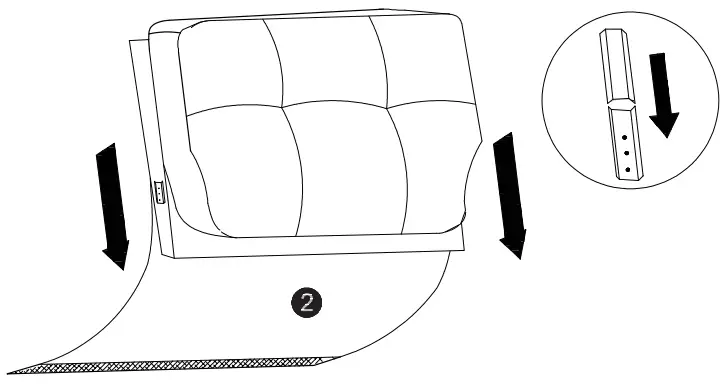
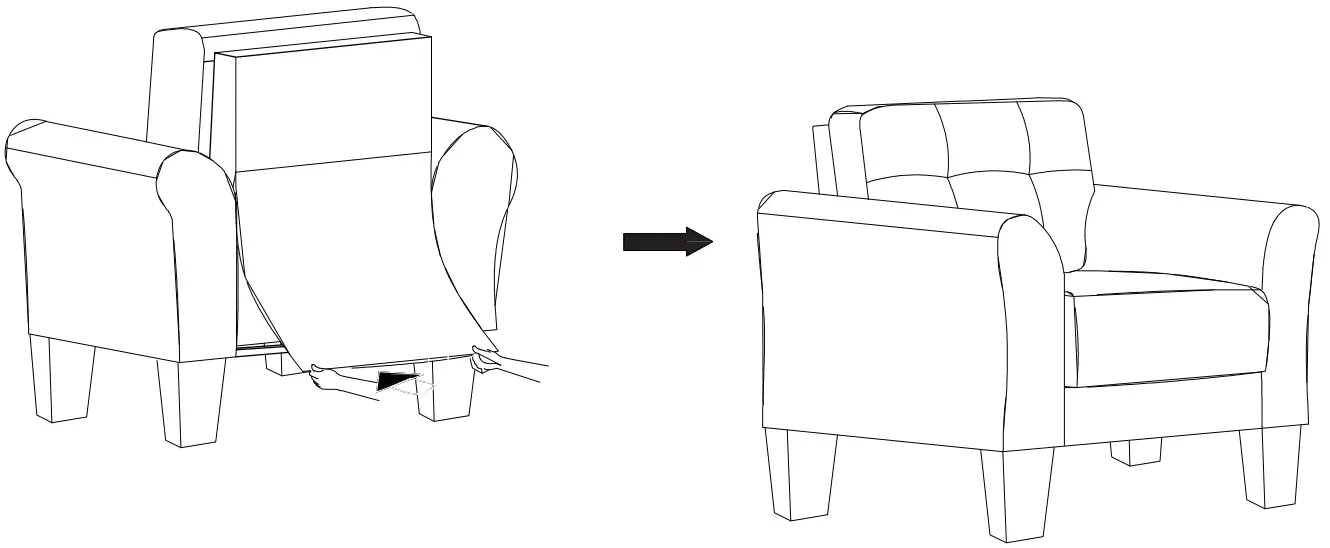
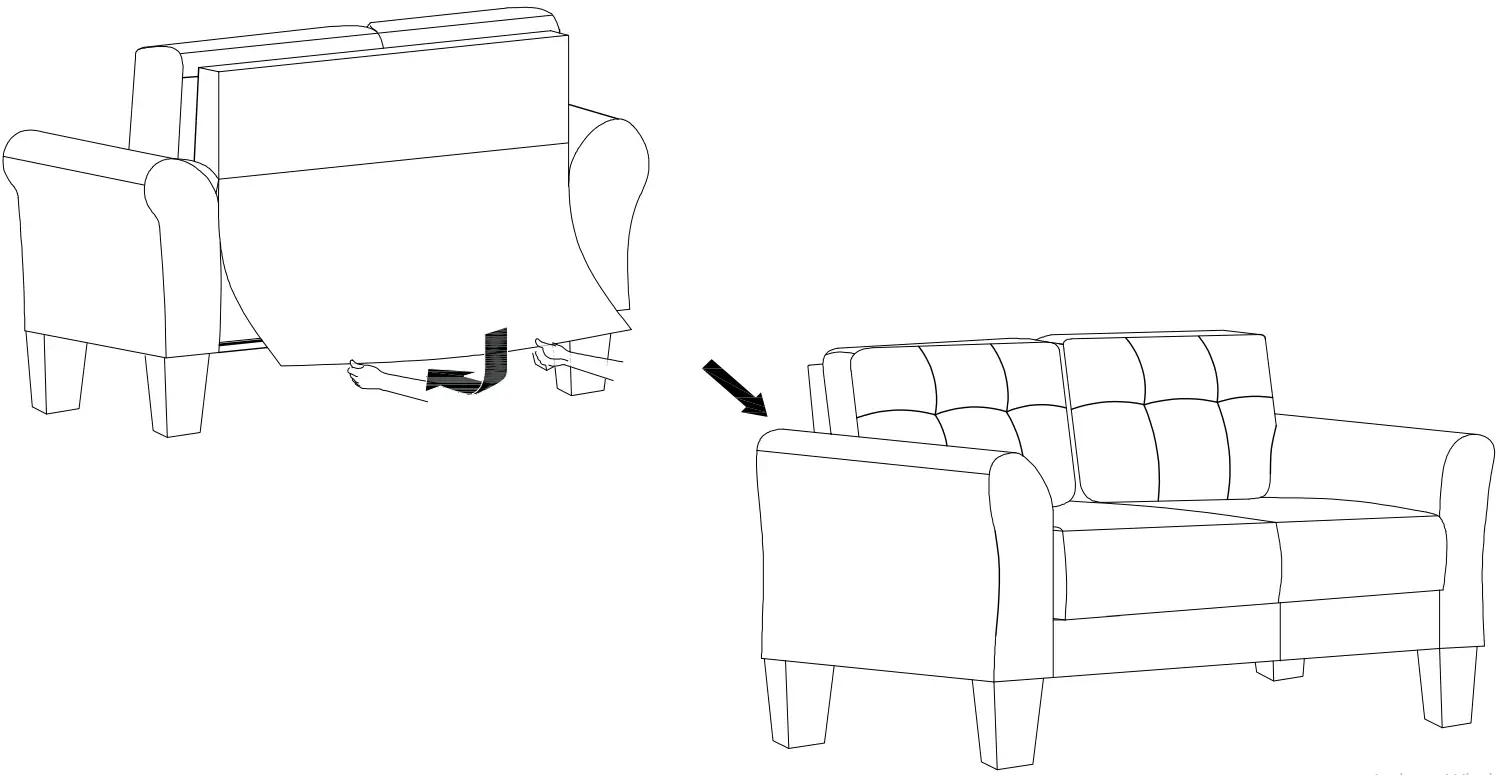
Step 6: Finally, stretch and pull down the rear cover evenly before securing the velcro strap to the seat base. Repeat if necessary for a better fit.
ASSEMBLY INSTRUCTIONS
WARNING
- This product has been designed for seating two (2) average adults. To prevent injury and damage to this unit, PROHIBIT jumping on it.
- This product is designed for home use and not intended for commercial use.
- Children under the age of 5, small infants, and babies should not sleep alone on this product for safety reasons.
- Recommended # of people needed for handling: 2 (however it is always better to have an extra hand.)
- THIS INSTRUCTION BOOKLET CONTAINS IMPORTANT SAFETY INFORMATION. PLEASE READ AND KEEP IT FOR FUTURE REFERENCE.
PARTS
 | Seat Body QTY:1 |
 | Backrest QTY:1 |
 | Arm QTY:1 Pair ( In the storage underneath of seat body) |
 | Leg QTY:4 |
Step 1: Carefully unpack parts/hardware from the box and store of seat body, place on a clean flat surface.
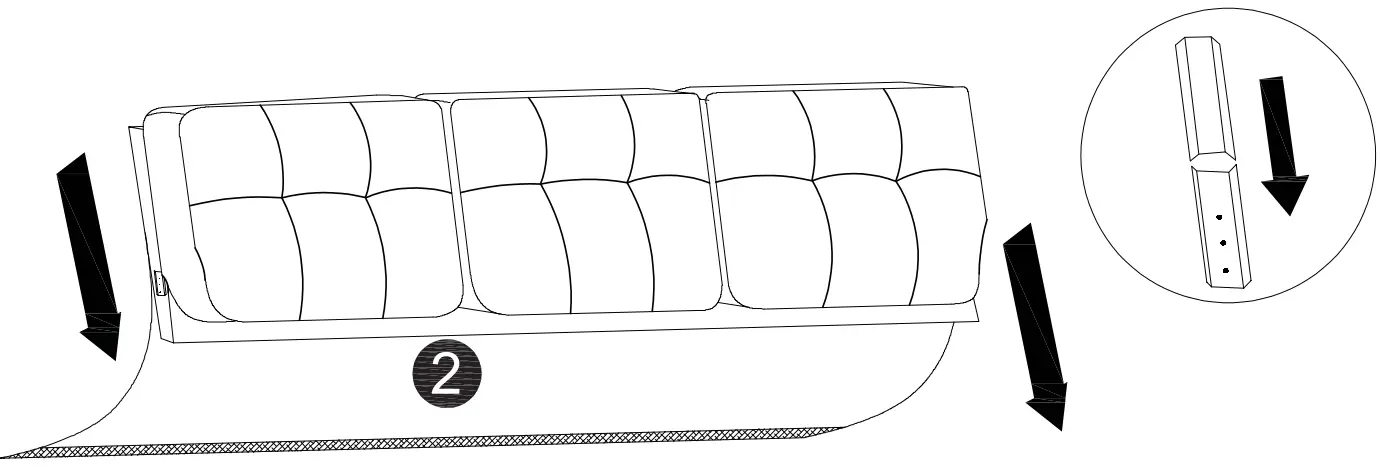
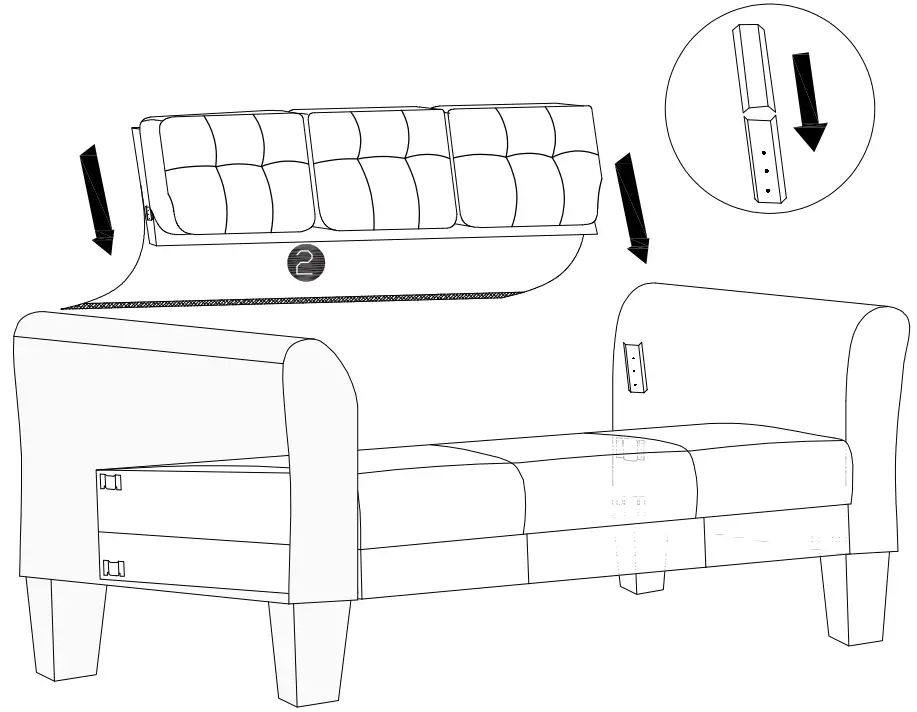
Step 2: Place both arms as shown below, and secure two legs into pre-drilled holes on the bottom of the arms. Please avoid overtightening.

Step 3: Carefully lift and turn assembled arms onto their legs. Insert seat body metal plates to both arms as shown below. Ensure it is correctly in place.
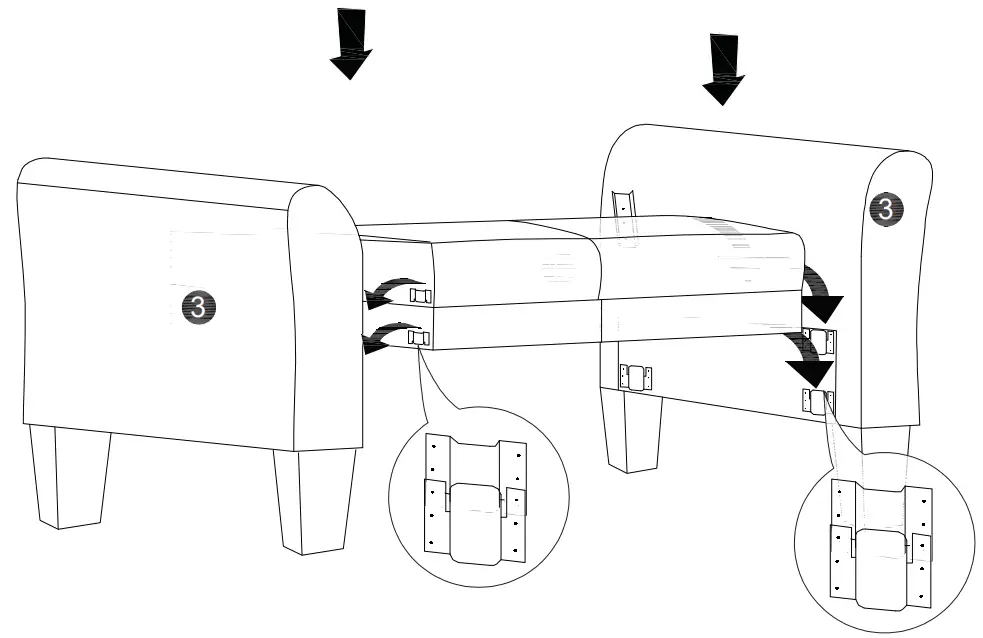
Step 4: Insert backrest with earpiece metal plates to both arms as shown below. Ensuring is correctly in place.
Step 5: Insert backrest metal plates to both arms as shown below. Ensuring it is correctly in place.
Step 6: Finally, stretch and pull down the rear cover evenly before securing the velcro strap to the seat base. Repeat if necessary for a better fit.
ASSEMBLY INSTRUCTIONS
WARNING
- This product has been designed for seating three (3) average adults. To prevent injury and damage to this unit, PROHIBIT jumping on it.
- This product is designed for home use and not intended for commercial use.
- Children under the age of 5, small infants, and babies should not sleep alone on this product for safety reasons.
- Recommended # of people needed for handling: 2 (however it is always better to have an extra hand.)
- THIS INSTRUCTION BOOKLET CONTAINS IMPORTANT SAFETY INFORMATION. PLEASE READ AND KEEP IT FOR FUTURE REFERENCE.
PARTS
 | Seat Body QTY:1 |
 | Backrest QTY:1 ( In the storage underneath of seat body) |
 | Arm QTY:1 Pair ( In the storage underneath of seat body) |
 | Leg QTY:4 |
Step 1: Carefully unpack parts/hardware from the box and store of seat body, place on a clean flat surface.
Step 2: Place both arms as shown below, and secure two legs into pre-drilled holes on the bottom of the arms. Please avoid overtightening.
Step 3: Carefully lift and turn assembled arms onto their legs. Insert seat body metal plates to both arms as shown below. Ensure it is correctly in place.
Step 4: Insert backrest with earpiece metal plates to both arms as shown below. Ensuring is correctly in place.
Step 5: Insert backrest metal plates to both arms as shown below. Ensuring it is correctly in place.
Step 6: Finally, stretch and pull down the rear cover evenly before securing the velcro strap to the seat base. Repeat if necessary for a better fit.