![]()
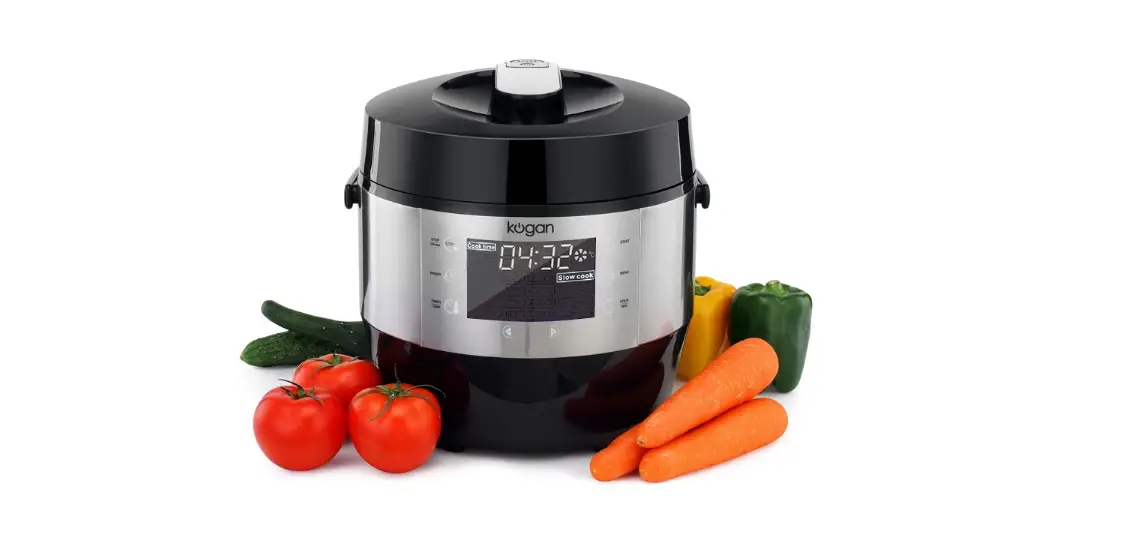
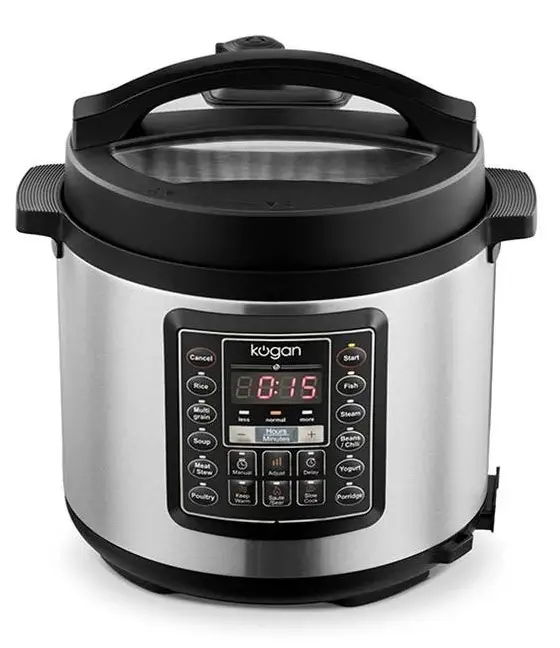
kogan KAPR14COOKA 14-In-1 6L Multifunction Pressure Cooker
SAFETY AND WARNINGS
- Read instructions before first
- Do not use the pressure cooker for a purpose other than the one for which it is This appliance is for household use only. Do not use outdoors.
- This appliance is not intended for use by persons with reduced physical, sensory or mental capabilities or lack of experience and knowledge, unless they have been given supervision or instruction concerning use of the appliance by a person responsible for their
- This appliance shall not be used by Keep the appliance and its power cord out of reach of children.
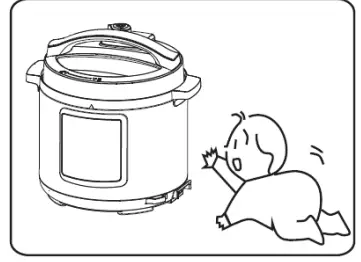
- Do not let children near the pressure cooker when in Children should be supervised to ensure that they do not play with the appliance.
- This appliance is intended to be used in household and similar applications such as:
- Staff kitchen areas in shops, office and other working environments;
- Farm houses;
- By clients in hotels, motels and other residential type environments;
- Bed and breakfast type
- If the supply cord is damaged, it must be replaced by the manufacturer, its service agent similarly qualified persons in order to avoid a hazard.
- Turn off and unplug the appliance before cleaning, maintenance or relocation and whenever it is not in
- Do not immerse any part of the appliance in water or other
- The pressure regulator allowing the escape of steam should be checked regularly to ensure that it is not
- The container must not be opened until the pressure has decreased
- The heating element surface is subject to residual heat after use: do not
- The appliance is not intended to be operated by means of an external timer or a separate remote-control
- Do not put the pressure cooker into a heated
- Use extreme care when moving the pressure cooker while it is Do not touch hot surfaces. Use the handles and knobs. If necessary, use protective clothing and gloves.
- Never force open the pressure cooker. Do not open before making sure that its internal pressure has completely dropped.
- Never use your pressure cooker without adding water or food or it can become severely damaged.
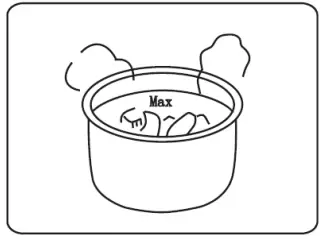
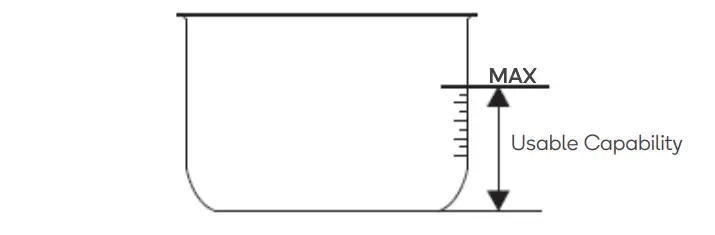
- Do not fill the cooker beyond 2/3 of its When cooking foodstuffs which expand during cooking, such as rice or dehydrated vegetables, do not fill the cooker to more than half of its capacity.
- Use the appropriate heat source(s) according to the instructions for
- After cooking meat with skin (e.g. ox tongue) which may swell under the effect of pressure, do not prick the meat in which the skin is swollen; you might be
- When cooking doughy food, gently shake the cooker before opening the lid to avoid food
- Never use the pressure cooker in its pressurised mode for deep or shallow frying of
- Do not tamper with any of the safety systems beyond the maintenance instructions specified in the instructions for
- Only use parts provided or recommended by kogan.com
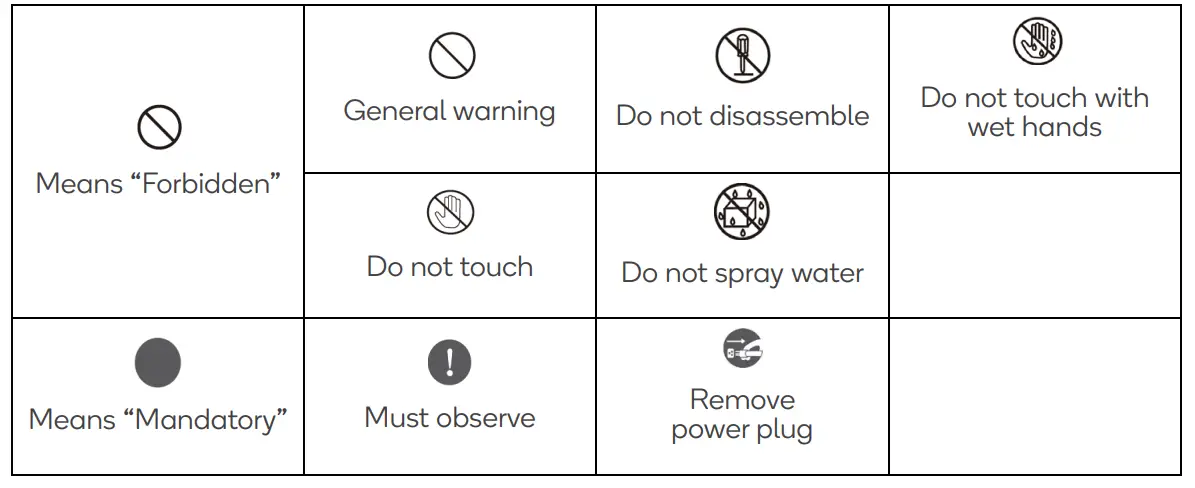
Safety Precautions
To avoid personal injury and property loss, be sure to observe the following safety precautions.
Meanings of the marks:
Note:
- Death or serious injury may result if the warning items are
- Physical injury or property damage may result if the caution items are
Warning
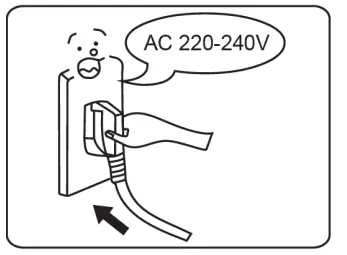
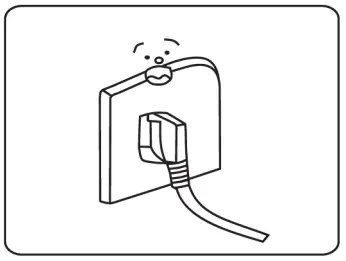
- Use 220-240V~ power outlet
- Failure to use AC 220-240V~ electricity can cause fire or electric shock.
- There exists a danger of fire if a faulty socket is used.

- Do not use this appliance with others connected to the same socket
- A socket of more than 10A rated current with grounding wire shall be used alone.
- If shared with other electrical appliances, the socket may cause abnormal heat and result in fire.

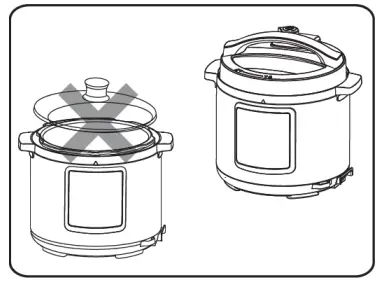
- It is strictly prohibited to use other lids
It is strictly prohibited to use other lid for heating and in the switching on process, the use of non-original lid is not allowed as this may cause electric shock or safety hazards.
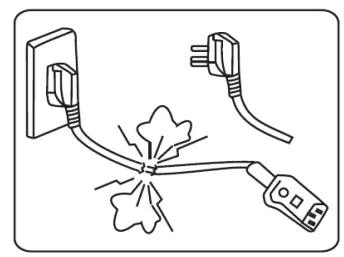
- Stop using if the power cord is damaged
If the power cord is damaged, stop using it and contact Kogan.com.
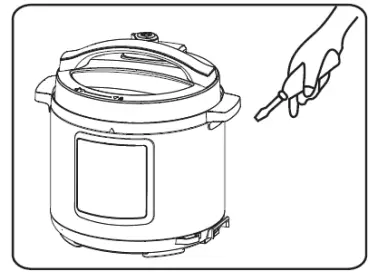
- Do not insert foreign objects
It is prohibited to insert metal shavings, needles and other foreign matter in the gap as this may cause electric shock or movement anomalies.
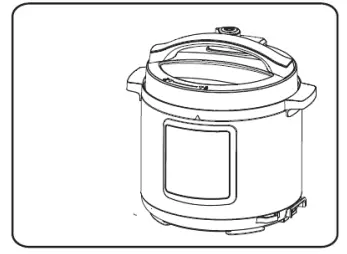
- Place the appliance in a location out of reach of infants
Place the appliance in a location out of reach of infants to avoid electric shock and scalding.
- Modification is prohibited
- Modification or repair by non-professionals is prohibited.
- Violation may cause a fire or electric shock.
- Repair or replacement of parts shall be made in a designated service centre.

- Products may not be immersed or sprinkled in water
Doing so, this could cause electric shock and electrical short circuits.
- Warning on Opening the lid
- When the electric pressure cooker is not operating, there is no pressure in the pot and the float valve is down.
- When the electric pressure cooker is operating, pressure in the cooker rises and the float valve rises: do not open the lid before the pressure has been completely released.
- If it is difficult to open the lid, do not force it open; otherwise, it may cause scalding or physical injury.
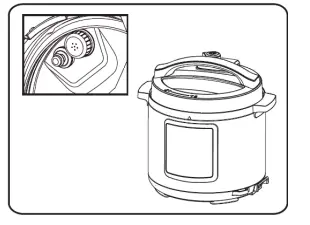
- Check periodically
- Be sure to check periodically the cover and exhaust valves to ensure that they are not blocked.
- Do not cover the exhaust valve with heavy object or replace it with other objects.

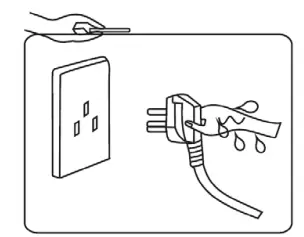
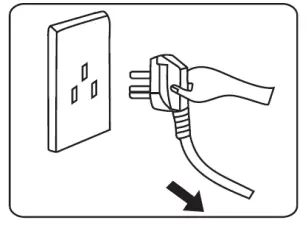
- Never pull the plug with a wet hand
Pull the power plug with a wet hand may cause electric shock.
- When pulling the plug, you must pinch the plug
- When pulling the plug, you must pinch the plug.
- Do not pull the power cord; otherwise, it will damage the cord, causing electric shock and short circuit.

- Unplugging when not in use
Otherwise, it may produce leakage, fire or failure.
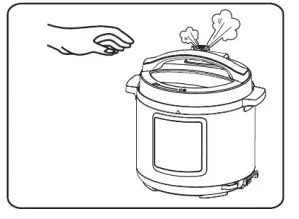
- During operation, never move your hands close to the exhaust port.
- While cooking, never move your hands too close to the exhaust port to avoid burns.
- During cooking, do not cover the vent with a cloth and other items.

- When the cooker is working, do not touch the lid
When the cooker is working, do not touch the lid as it will be very hot; otherwise, it may possibly cause scalding.
- Observe the maximum level indicator
Observe the maximum level indicator
- Only use the dedicated pot
When there is foreign object on the bottom of pot and heating plate surface, remove the foreign object before use; otherwise, it may cause overheating and work abnormalities etc.
- Do not put the inner pot on other appliance for heating
The inner pot may develop a deformation or fault if used with another heating appliance
- When moving the product, hold the handle of cooker body
When moving the product, do not directly hold the handle of the lid to avoid lid dropping.
- Do not use in the following locations.
- Do not use in unstable locations;
- Do not use in locations near water and fire;
- Do not use near walls and furniture;
- Do not use in locations exposed to direct sunlight and oil splatter;
- Do not approach the stove to avoid fire.


OVERVIEW
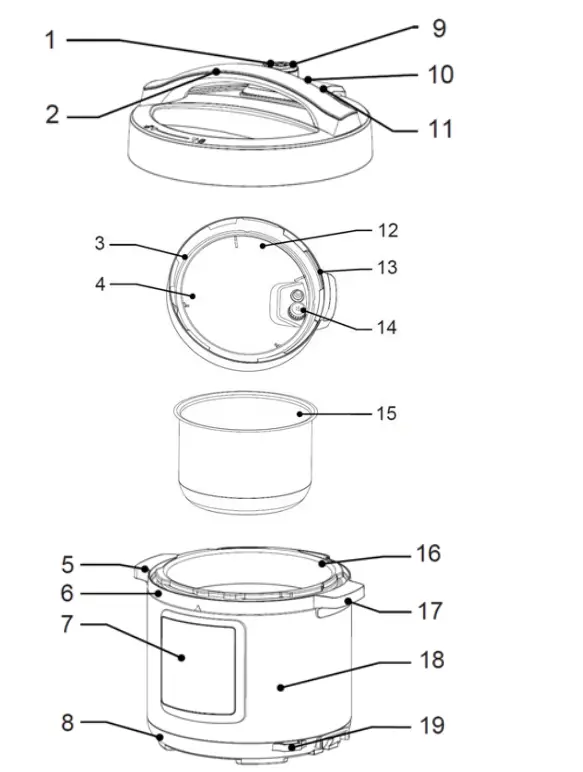
| No | Description | No | Description |
| 1 | Exhaust valve handle | 11 | Exhaust valve (note) |
| 2 | Upper cover handle | 12 | Seal ring bracket |
| 3 | Seal ring | 13 | Seal gate (note) |
| 4 | Internal side of lid | 14 | Block proof cover |
| 5 | Water box (note) | 15 | Inner pot |
| 6 | Housing cover | 16 | Outer pot |
| 7 | Control box | 17 | Cooker body handle |
| 8 | Base | 18 | Cooker body |
| 9 | Exhaust opening | 19 | Power cord socket |
| 10 | Float valve |
OPERATION
Before Use
Before first use, remove all accessories from the cooker body and read all instructions and warnings fully.
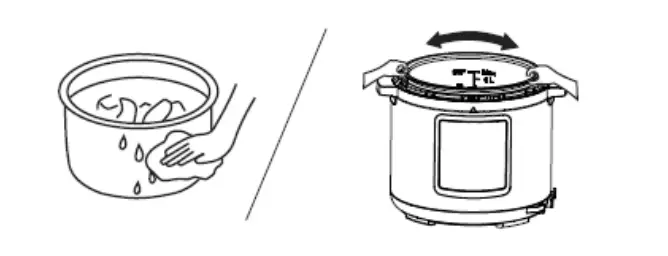
Clean the inner pot before every use and ensure the ventilation is clear.
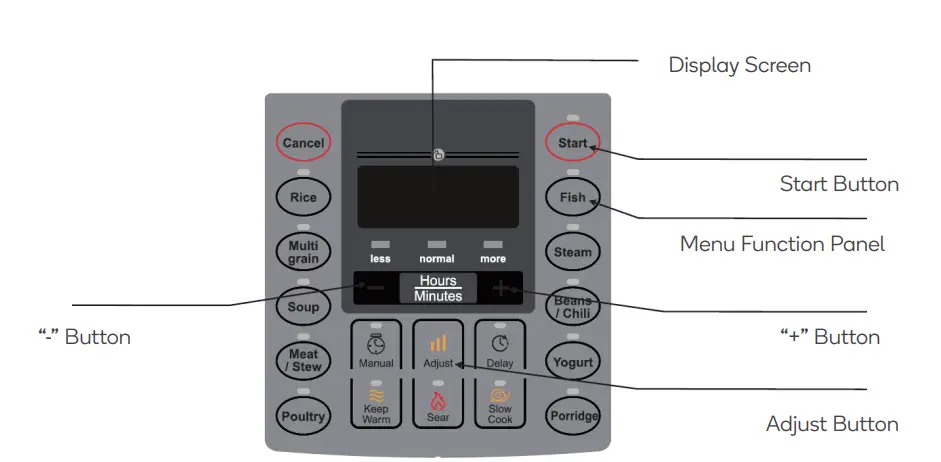
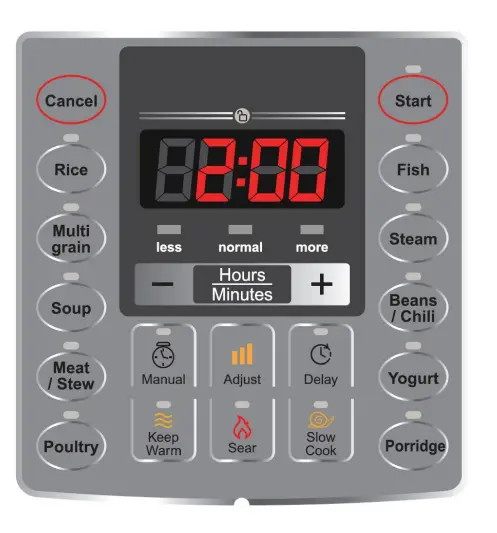
Control Panel
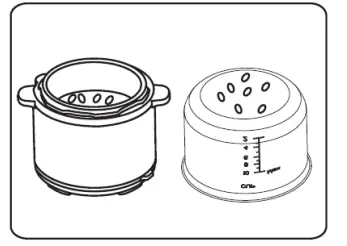
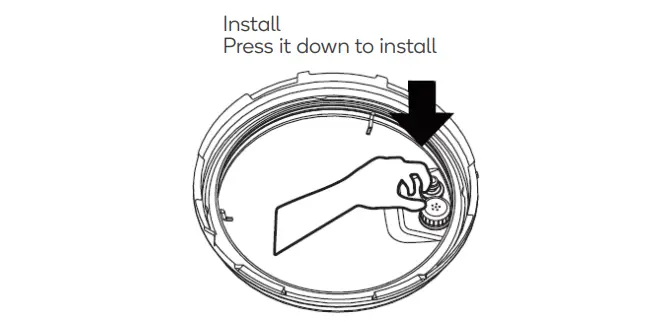
Disassembly and Installation of Block-Proof Cover
- Check if the seal ring and block proof cover are correctly installed in the upper cover before every use.

- After use, please clean the seal ring and around of block proof cover for avoiding jamming the cover, keep it clean to avoid bad odour.


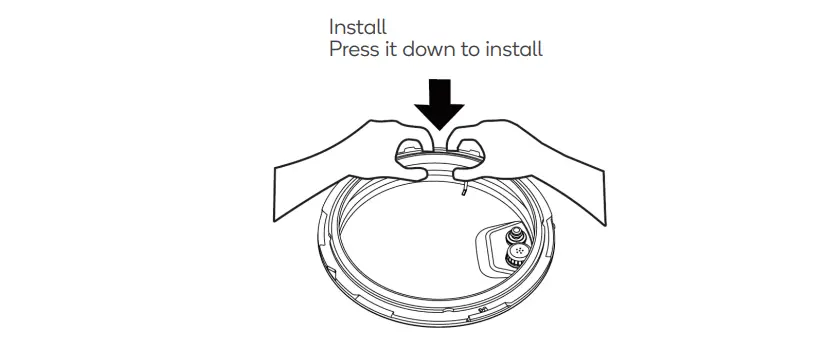
Disassembly and Installation of Seal Ring
- Do not pull the seal ring, otherwise, the distorted seal ring may influence the seal and pressure effect.

- Do not use if damaged: instead contact Kogan.com to arrange a repair.


Cooking Preparation
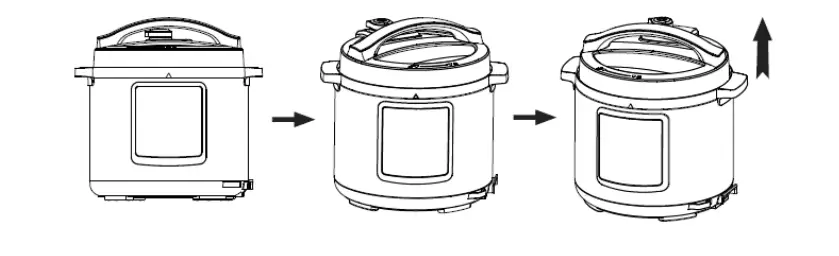
- Open the lid correctly
Holding the handle of upper cover, turn anticlockwise about 30°C to align the arrow marks on the lid and body and lift.
- Ensure the parts and accessories of lid are installed securely
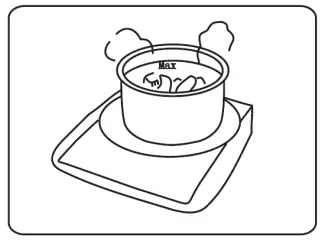
Ensure the floater valve and exhaust valve are clear and confirm the sealing ring and block proof cover are installed securely. - Remove the inner pot and add food and water
• Observe the MAX indicator marked on the inner pot
- Insert the inner pot into the cooker
• Wipe to clean the external surface of inner pot.
• Turn the inner pot to ensure good contact with the heating plate.
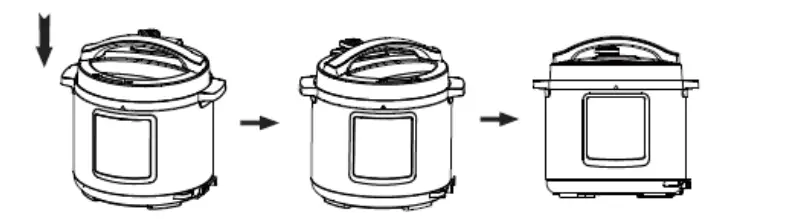
- Safely close the lid
• Before closing the lid, ensure the sealing ring is secure.
• Holding the handle of upper cover, turn clockwise about 30°C to align the arrow marks on the body with the lock symbol on the lid.
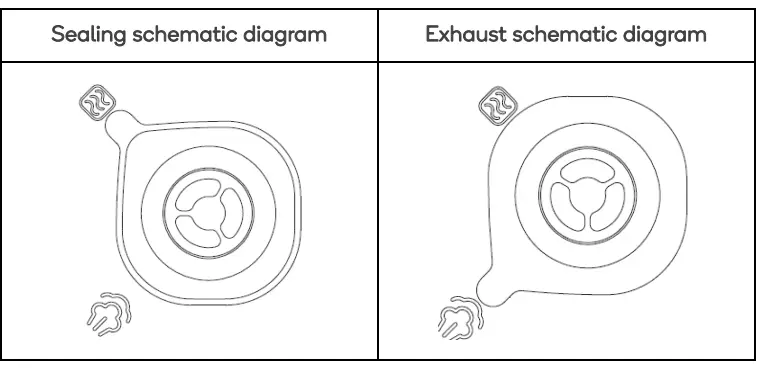
- Seal the exhaust valve
• Turn the exhaust valve closed to create pressure. For manual exhaust, turn it to the exhaust positinon.
• Ensure the floater valve drops down before turning on.
Function Selection
- Turn on. If the buttons are inoperable, check the lid is closed properly.
- Select the required function: press the function button to select function and press the “+”/“-” button to adjust the cooking time.
- Press one function button, 10 seconds later or press the “Start” button, the electric pressure cooker starts to select the program of corresponding function. 10 seconds after selecting the function, the electric pressure cooker starts working.
- After cooking, the cooker may automatically enter into the keep warm state. After cooking, the indicator of corresponding function lights off, the keep warm indicator lights on, the cooker makes sound and enters into the keep warm state. Under the standby state, press the “Keep Warm” button, 10 seconds later or press the “Start” button, the keep warm and start indicator lights on, the cooker makes sound and enters into the keep warm state.
Tips:
- Under any state, press the “Cancel” button to cancel the current operation state and return to standby state.
- A low clunking sound is normal during operation
- When cooking a small amount of food, the inner pot may be lifted when opening the lid: shake it gently to detach.
Opening the Lid
Turn off or remove power plug. Then, to Quickly open the lid (solid food only): Turn the exhaust valve to the exhaust position until the float valve drops down.
Turn the exhaust valve to the exhaust position until the float valve drops down.
Allow the electric pressure cooker to cool until the float valve drops down.
Functions
| Function | Operation Guidelines |
| Cancel | Under any state, press “Cancel” button to cancel the current work state and return to standby state. |
| Warm | Under standby state, press “Warm” button to enter into keep warm state. “Warm” indicator light is on and the digital screen shows “OH”. 1 hour later the screen will show “1H” and 2 hours later it will show “2H”. |
| Sear | Under standby state, press “Sear” button, the indicator light is on and the digital screen shows default working time. 10 seconds later if no buttons is pressed or press “Start” button, the product automatically starts countdown and enters to standby state when it finishes working. |
|
Slow Cook | Under standby state, press “Slow Cook” button, the indicator light is on and the digital screen shows default working time. Press “+” or “-” button to adjust the working time. 10 seconds later if no button is pressed or press “Start” button, the product automatically starts cooking. The digital screen starts countdown and the unit enters to keep warm state when it finishes working. |
|
Manual | 1. Under standby state, press “Manual” button, the indicator light is on and the digital screen shows default working time. Press “+” or “-” button to adjust the pressure working time. 10 seconds later if no button is pressed or press “Start” button, the product automatically starts cooking. The digital screen starts countdown as soon as the pressure rise to working pressure. Enters into warm when it finishes working. 2. Preset cooking: Before the program starts, press “Delay” button. The screen shows the preset beginning time. Press “+” or “-” to adjust the delay time. Then press “Hours/minutes” button to change hour and minute. 10 seconds after setting or press “Start” button, the unit starts delay time countdown. When the countdown reaches to the end, the program starts working. |
|
Rice | 1. Under standby state, press “Rice” button, the indicator lights on and the digital screen shows default working time. Press “+” or “-” button to adjust the working time. 10s later if no button is pressed or press “Start” button, the product automatically starts cooking. The digital screen starts countdown as soon as the pressure rise to working pressure. Enters into warm when it finishes working. 2. Preset cooking: Before the program starts, press “Delay” button. The screen shows the preset beginning time. Press “+” or “-” to adjust the delay time. Then press “Hours/minutes” button to change Hour and minute. 10 seconds after setting or press “Start” button, the unit |
| starts delay time countdown. When the countdown reaches to the end, the program starts working. | |
|
Multigrain | 1. Under standby state, press “Multigrain” button, the indicator lights on and the digital screen shows default working time. Press “+” or “-” button to adjust the working time. 10 seconds later if no button is pressed or press “Start” button, the product automatically starts cooking. The digital screen starts countdown as soon as the pressure rise to working pressure. Enters into warm when it finishes working. 2. Preset cooking: Before the program starts, press “Delay” button. The screen shows the preset beginning time. Press “+” or “-” to adjust the delay time. Then press “Hours/minutes” button to change Hour and minute. 10 seconds after setting or press “Start” button, the unit starts delay time countdown. When the countdown reaches to the end, the program starts working. 3. Adjust: Before the program start, you can press “Adjust” button to change the food flavour for “Less” or “normal” or “more”. |
|
Soup | 1. Under standby state, press “Soup” button, the indicator lights on and the digital screen shows default working time. Press “+” or “-” button to adjust the working time. 10 seconds later if no button is pressed or press “Start” button, the product automatically starts cooking. The digital screen starts countdown as soon as the pressure rise to working pressure. Enters into warm when it finishes working. 2. Preset cooking: Before the program starts, press “Delay” button. The screen shows the preset beginning time. Press “+” or “-” to adjust the delay time. Then press “Hours/minutes” button to change Hour and minute. 10 seconds after setting or press “Start” button, the unit starts delay time countdown. When the countdown reaches to the end, the program starts working. 3. Adjust: Before the program starts, you can press “Adjust” button to change the food flavour for “Less” or “normal” or “more”. |
|
Meat/Stew | 1. Under standby state, press “Meat/Stew” button, the indicator lights on and the digital screen shows default working time. Press “+” or “-” button to adjust the working time. 10 seconds later if no button is pressed or press “Start” button, the product automatically starts cooking. The digital screen starts countdown as soon as the pressure rises to working pressure. Enters into warm when it finishes working. 2. Preset cooking: Before the program starts, press “Delay” button. The screen shows the preset beginning time. Press “+” or “-” to adjust the delay time. Then press “Hours/minutes” button to change Hour and minute. 10 seconds after setting or press “Start” button, the unit starts delay time countdown. When the countdown reaches to the end, the program starts working. |
| 3. Adjust: Before the program starts, you can press “Adjust” button to change the food flavour for “Less” or “normal” or “more”. | |
|
Poultry | 1. Under standby state, press “Poultry” button, the indicator lights on and the digital screen shows default working time. Press “+” or “-” button to adjust the working time. 10 seconds later if no button is pressed or press “Start” button, the product automatically starts cooking. The digital screen starts countdown as soon as the pressure rises to working pressure. Enters into keep warm when it finishes working. 2. Preset cooking: Before the program starts, press “Delay” button. The screen shows the preset beginning time. Press “+” or “-” to adjust the delay time. Then press “Hours/minutes” button to change Hour and minute. 10 seconds after setting or press “Start” button, the unit starts delay time countdown. When the countdown reaches to the end, the program starts working. 3. Adjust: Before the program starts, you can press “Adjust” button to Change the food flavour for “Less” or “normal” or “more”. |
|
Fish | 1. Under standby state, press “Fish” button, the indicator lights on and the digital screen shows default working time. Press “+” or “-” button to adjust the working time. 10 seconds later if no button is pressed or press “Start” button, the product automatically starts cooking. The digital screen starts countdown as soon as the pressure rises to working pressure. Enters into keep warm when it finishes working. 2. Preset cooking: Before the program starts, press “Delay” button. The screen shows the preset beginning time. Press “+” or “-” to adjust the delay time. Then press “Hours/minutes” button to change Hour and minute. 10 seconds after setting or press “Start” button, the unit starts delay time countdown. When the countdown reaches to the end, the program starts working. 3. Adjust: Before the program starts, you can press “Adjust” button to change the food flavour for “Less” or “normal” or “more”. |
|
Steam | 1. Under standby state, press “Steam” button, the indicator light is on and the digital screen shows default working time. Press “+” or “-” button to adjust the working time. 10 seconds later if no button is pressed or press “Start” button, the product automatically starts cooking. The digital screen starts countdown as soon as the pressure rises to working pressure. Enters into warm when it finishes working. 2. Preset cooking: Before the program starts, press “Delay” button. The screen shows the preset beginning time. Press “+” or “-” to adjust the delay time. Then press “Hours/minutes” button to change Hour and minute. 10 seconds after setting or press “Start” button, the unit starts delay time countdown. When the countdown reaches to the end, the program starts working. |
| 3. Adjust: Before the program starts, you can press “Adjust” button to change the food flavour for “Less” or “normal” or “more”. | |
|
Beans/Chilli | 1. Under standby state, press “Beans/Chilli” button, the indicator light is on and the digital screen shows default working time. Press “+” or “-” button to adjust the working time. 10 seconds later if no button is pressed or press “Start” button, the product automatically starts cooking. The digital screen starts countdown as soon as the pressure rise to working pressure. Enters into warm when it finishes working. 2. Preset cooking: Before the program starts, press “Delay” button. The screen shows the preset beginning time. Press “+” or “-” to adjust the delay time. Then press “Hours/minutes” button to change Hour and minute. 10 seconds after setting or press “Start” button, the unit starts delay time countdown. When the countdown reaches to the end, the program starts working. 3. Adjust: Before the program starts, you can press “Adjust” button to change the food flavour for “Less” or “normal” or “more”. |
|
Yogurt | 1. Under standby state, press “Yogurt” button, the indicator lights on and the digital screen shows default working time. Press “+” or “-” button to adjust the working time. 10 seconds later if no button is pressed or press “Start” button, the product automatically starts cooking. “Yogurt” and “Start” indicator lights are on. The digital screen starts countdown and the unit enters to standby state when it finishes working. |
|
Porridge | 1. Under standby state, press “Porridge” button, the indicator lights on and the digital screen shows default working time. Press “+” or “-” button to adjust the working time. 10 seconds later if no button is pressed or press “Start” button, the product automatically starts cooking. The digital screen starts countdown as soon as the pressure rises to working pressure. Enters into warm when it finishes working. 2. Preset cooking: Before the program starts, press “Delay” button. The screen shows the preset beginning time. Press “+” or “-” to adjust the delay time. Then press “Hours/minutes” button to change Hour and minute. 10 seconds after setting or press “Start” button, the unit starts delay time countdown. When the countdown reaches to the end, the program starts working. 3. Adjust: Before the program starts, you can press “Adjust” button to change the food flavour for “Less” or “normal” or “more”. |
Keep Warm Function
- After cooking, the electric pressure cooker automatically enters into the keep warm state; Under keep warm state, keep warm indicator lights on;
- Under standby state, you may also press the “Keep Warm” button to enter keep warm function;
- Keep warm temperature is 60°C – 80°C.

CLEANING & CARE
Environment
- Periodically clean the cooker and remove oil and dirt if it is stored on the table.
- Put the electric pressure cooker at least 30cm away from other kitchen appliances.
Clean After Use
- Clean after each use.
- Before cleaning and maintenance, unplug the power cord until the product cools.
- Remove the lid and inner pot, clean with detergent first, then rinse well with water and wipe dry with a soft cloth.
- Clean the internal side of the lid with water, the seal ring, block proof cover, exhaust valve core and float valve can be removed for washing, timely and correctly install them after washing and then dry the internal side of lid with cloth.
- Wipe and clean the cooker body with a rag do not soak the cooker body in water or spray water to it.
Note:
- Exhaust valve: Pull out the exhaust valve from the lid. Clean the internal side of the exhaust valve and float valve of the lid with brush and cloth at least once a month.
- Sealing gate: Please remove oil and dirt from the sealing gate with detergent and brush. The remained oil and dirt in it may appear in yellowish. After washing, it may recover to the original colour as stainless steel. It is suggested to clean the sealing gate once in every 2 months.
- Water box: After cooking, the steam may stay in the water box of the external pot as water. Water in the box should be removed for avoiding bad odours, please clean it with clean cloth.
Stainless inner pot
Do not use it to store acidic or preserved foods for a long period. Do not keep warm for longer than 2 hours.
4. Do not use a metal shovel or other hard tool; otherwise it will damage the inner surface of pot.
Note: The inner pot’s finish may discolour after sustained use or scrubbing. This is normal and won’t influence the function of the product.
SPECIFICATIONS
| Capacity | 5.7L |
| Power Supply | ~220-240V |
| Rated Power | 1000W |
| Size of Inner Pot | 8.66″ |
| Working Pressure | 80kPa |
TROUBLESHOOTING
| Issue | Possible Cause | Steps to Resolve |
| Difficult to close the lid | Sealing ring not installed properly | Position the sealing ring well |
| The floater valve clamps the push rod | Lightly push the push rod | |
| Difficult to open the lid | Float valve is in the popped-up position | Press the float valve lightly with a chopstick. |
| Pressure exists inside the cooker | Open the lid after the pressure is completely released. | |
| Steam leaks from the lid | Sealing ring installed improperly | Install the sealing ring as required |
| Food debris attached to the sealing ring | Clean the sealing ring | |
| Sealing ring damaged | Replace the sealing ring | |
| The lid is not closed correctly | Close the lid correctly |
| Steam leaks from float valve | Food debris on the float valve gasket | Clean the float valve gasket | |
| Float valve gasket worn-out | Replace the float valve gasket | ||
| Float valve unable to rise | Too little food and water in inner pot | Add water and food according to the recipe | |
| Steam leaks from the lid or exhaust valve | Contact Kogan.com | ||
| Steam comes out from exhaust valve | Exhaust valve not in sealing position | Turn the exhaust valve to the sealing position | |
| Pressure control fails | Contact Kogan.com | ||
| Power indicator doesn’t light on | Power socket has bad contact | Check the power socket | |
| All indicators flash | Display screen displays E1 | Bottom sensor fault | Send to the service centre for repair |
| Display screen displays E2 | High temperature since there isn’t water in the inner pot | Add water according to the requirement | |
| Display screen displays C1 | High temperature since there isn’t water in the inner pot | Put the inner pot correctly | |
| Display screen displays E8 | Pressure switch fault | Contact Kogan.com | |
| Rice half cooked or too hard | Too little water | Add water accordingly | |
| Lid opened prematurely | After cooking cycle completes, leave the lid on for 5 more minutes. | ||
| Rice is too soft | Too much water | Reduce water accordingly | |
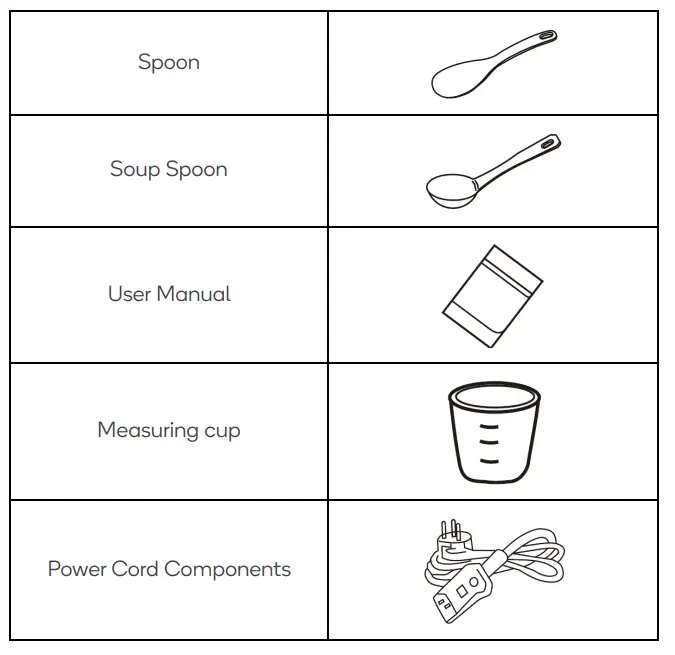
IN THE BOX
Disposal
This marking indicates that this appliance should not be disposed with other house-hold wastes. To prevent possible harm to the environment or human health from uncontrolled waste disposal, recycle it responsibly to promote the sustainable reuse of material resources.


