
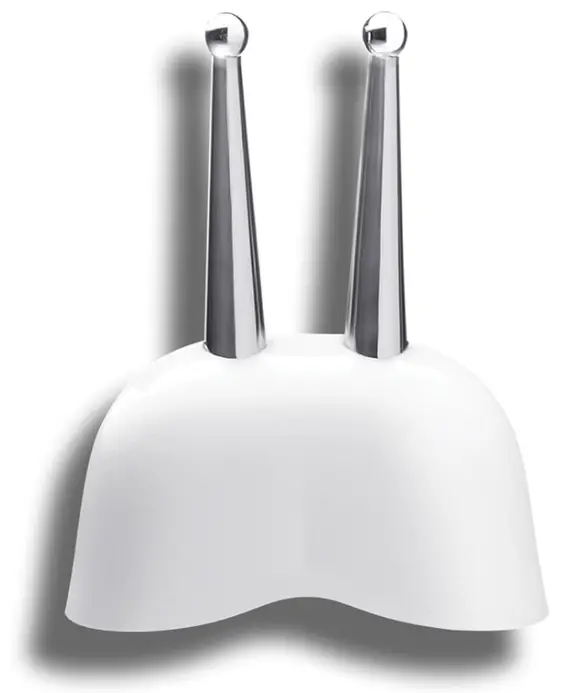
NuFACE Trinity ELE Attachment Smile Lines Eye Wrinkles
Get personal with those more delicate areas by firming and smoothing the skin around the eyes and lips to create picture-perfect pout and brow-wow.
SUPPLIES NEEDED
- NuFACE Prep-N-Glow® Facial Towelette or Oil-free Cleanser
- NuFACE® Ionized Super Booster
- NuFACE® Clean Sweep Applicator Brush NuFACE® Microcurrent Activator
- NuFACE Trinity® Device
- NuFACE Trinity® Effective Lip & Eye Attachment
MICROCURRENT CONTRAINDICATIONS
- Epilepsy or subject to seizures
- Recent surgery or other surgical procedure
- Pacemaker or electrical implanted device Active cancer
- Pregnancy
- Under the age of 18
STEPS TO FOLLOW
- CLEANSE
Remove makeup, cleanse with an oil-free cleanser or use the smooth side of the NuFACE Facial Towelette. - BOOST
Apply 3-5 drops for full-face coverage of appropriate NuFACE Booster onto fingertips and massage into clean dry skin until fully absorbed. - ACTIVATE 1 minute
Apply a mask-like layer of appropriate NuFACE Activator using NuFACE Applicator Brush in sections as you treat. - LIFT 5 minutes
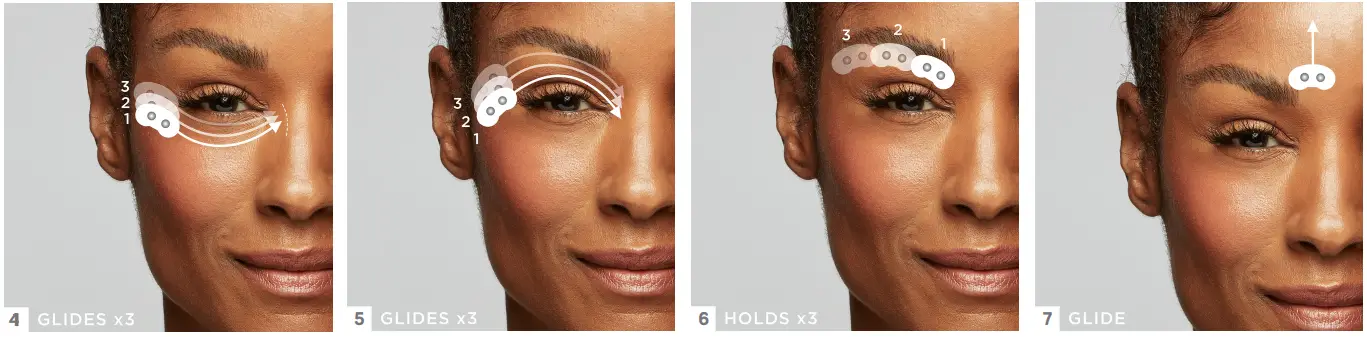
Using the NuFACE Trinity Device with Effective Lip & Eye Attachment, perform glides/holds around the eyes, lips and nasolabial folds.
TRINITY EFFECTIVE LIP & EYE ATTACHMENT

GLIDES
Glide spheres in the direction of the arrows until the beep sounds. Complete steps 1-2-3 sequence 3 times for each area. HOLDS – Lift and hold each position for 1-2 beeps. No repeating.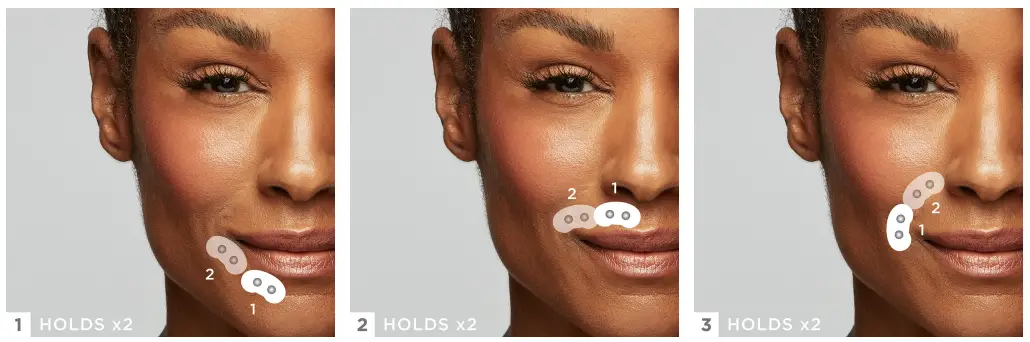
- HOLD 1 Place both wands horizontally under your lower lip avoid the midline, lift and hold.
HOLD 2 Place both wands towards the outer corner of your mouth, lift and hold. - HOLD 1 Place both wands above your upper lip avoid the midline, lift and hold.
HOLD 2 Place both wands towards the outer corner of your mouth, lift and hold. - HOLD 1 Place both wands horizontally along nasolabial fold near the outer corner of your mouth, lift and hold.
HOLD 2 Move up along the nasolabial fold, stopping just left of your nose, lift and hold. - GLIDE 1 Place both wands horizontally, begin at the outer corner of the eye. Glide along the orbital bone towards the bridge of the nose.
GLIDE 2 Begin at the outer corner of the eye. Position the wands closer to the under-eye. Glide under your eye towards the bridge of the nose.
GLIDE 3 Begin at the outer corner of the eye. Position the wands closer to the under-eye. Glide under your eye towards the bridge of the nose. - GLIDE 1 Place both wands horizontally, begin at the outer corner of the eye. Glide following the crease of the eyelid towards the bridge of the nose.
GLIDE 2 Begin at the outer corner of the eye. Glide above the crease of the eyelid towards the bridge of the nose.
GLIDE 3 Begin at the outer corner of the eye. Glide under the eyebrow towards the bridge of the nose. - HOLD 1 Place both wands horizontally under the thick of your eyebrow, lift and hold.
HOLD 2 Place both wands under the arch of your eyebrow, lift and hold.
HOLD 3 Place both wands under the tail of your eyebrow, lift and hold. - GLIDE 1 Center the thick of the brow between the two wands and glide towards the center of the forehead. Repeat this glide two more times.


