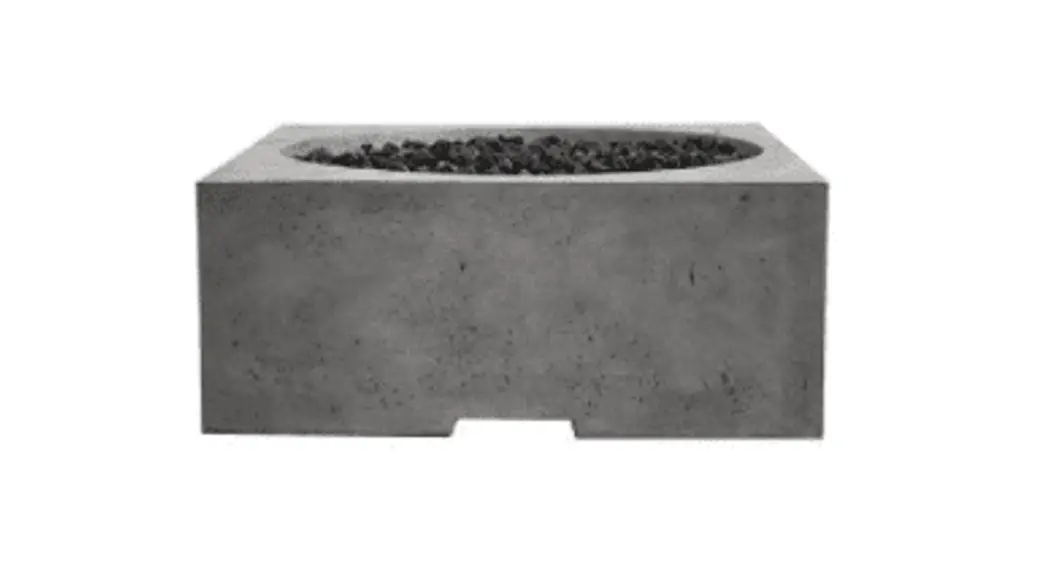
![]() Piazza
Piazza
Fire Table
Installation, Operation & Maintenance Manual
WARNING: THIS APPLIANCE IS FOR OUTDOOR USE ONLY! This manual should remain with the parties responsible for the operation.
DO NOT DISCARD INSTRUCTIONS
Section 1 General Description
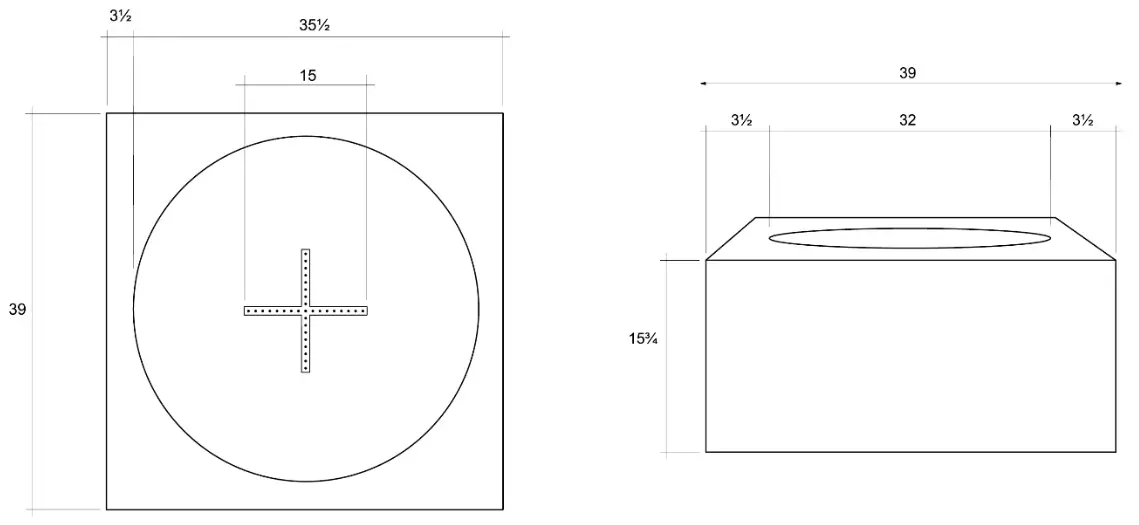
1.1 Product Dimensions
| Overall Length | 39″ |
| Overall Width | 39″ |
| Overall Height | 15 3/4″ |
| Surface | 3 1/2″ |
| Burner | 15”/65,000 BTUs |
| Weight | 360 lbs. |
Note: Enclosure should be located a minimum of 3-4ft. away from the fire feature. Ensure the enclosure is not placed directly on/over the propane hose that could otherwise kink, pinch, or cut off the gas supply.
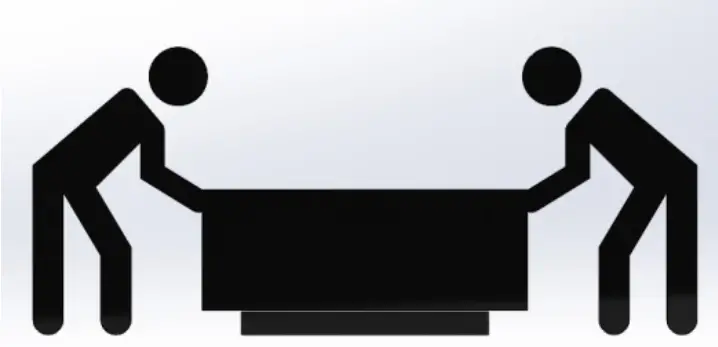
1.2 Safely Moving Fire Feature
- NEVER ATTEMPT TO MOVE YOUR FIRE FEATURE BY YOURSELF
- WRAP FURNITURE BLANKET AROUND THE ENTIRE BODY OF THE UNIT
- PLACE A PIECE OF ¾” PLYWOOD BETWEEN DOLLY AND THE FIRE FEATURE FOR INCREASED STABILITY WHILE MOVING
- USE DOLLY TO NAVIGATE THE UNIT TO THE FINAL POSITION
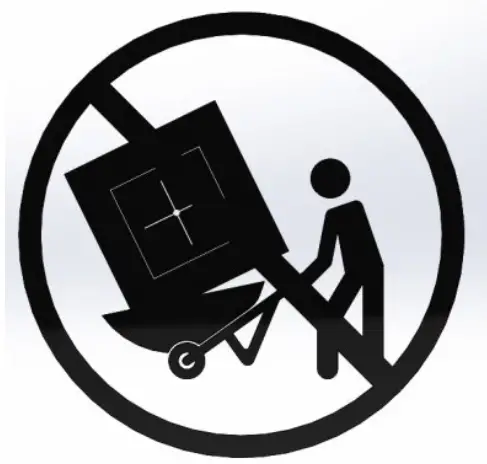
DO NOT USE A WHEELBARROW OR OTHER UNBALANCED EQUIPMENT TO MOVE UNIT

CAREFULLY REMOVE UNIT FROM CRATE AND PLACE ONTO MOVING DOLLY
 PLACE FIRE FEATURE WITH BASE DOWN TO MOVE
OR

PLACE FIRE FEATURE ON SIDE TO MOVE
*SECURE PAN/BURNER PRIOR TO TILT*
(ONLY FOR SQUARE OR RECTANGLE UNITS)
GENTLY PLACE FIRE FEATURE
INTO FINAL POSITION
Safety Instructions
![]() CALIFORNIA PROPOSITION 65
CALIFORNIA PROPOSITION 65
This product can expose you to Chromium, which is known in the state of California to cause cancer, birth defects, or other reproductive harm.
(for more information, go to: www.p65warnings.ca.gov)
Prior to installation, read and follow all warning notices and instructions provided with this product.
Failure to do so may result in property damage, personal injury, and/or death. Improper installation and/or operation may result in exposure to carbon monoxide and flue gases which can cause serious injury, property damage, and/or death. For installations in the vicinity of occupied/living areas, Prism Hardscapes strongly recommends the installation of carbon monoxide detectors within reach of this appliance and in any adjacent occupied spaces. Improper installation and/or operation will void the warranty.
THIS APPLIANCE IS FOR USE WITH PROPANE GAS ONLY. AT NO TIME ARE SOLID OR ALTERNATIVE FUELS TO BE USED WITH THIS APPLIANCE.
Do not store or use gasoline or other flammable vapors and liquids within the vicinity of this or any other appliance.
Prism Hardscapes strongly recommends the installation of Carbon Monoxide detectors within reach of this appliance and in any adjacent occupied spaces.
![]() WARNING
WARNING
Before installing this product, read and follow all warning notices and instructions provided. Failure to do so may result in serious injury, property damage, and/or death. For additional product references and copies of these instructions, visit our website at prismhardsacapes.com
![]() WARNING
WARNING
This appliance may produce carbon monoxide which has no odor. Using this appliance in an enclosed space such as a motorhome, camper, car or home may result in death.
The appliance should be serviced annually, and any parts that require replacement should be replaced only by a certified service professional using parts recommended by the manufacturer.
Do not alter any component or design of this unit as it may alter the operation and result in injury, property damage, and/or death. The altering unit will also automatically void the warranty.
This fire feature is not intended for cooking. Do not place anything on or in the fire feature.
Never use the fire feature in windy conditions.
Do not touch hot surfaces, hot media (rocks/glass/etc.), or open flames.
Do not reach, jump, or walk across the unit, media, or open flames.
Section 3 Installation Details
3.1 Gas Requirements
The fire feature should be placed on a flat and level surface. It will arrive with the burner and burner plate set inside the unit. Burner hardware has been installed at the factory but will need to be checked for proper tightness after transportation. Refer to the corresponding section below for set-up on your unit. All units must have clearance to the combustible surface of 4ft on all sides & 6ft from the top.
3.1.1 Propane Gas
Gas Pressure: 11 inches water column
Gas Input Flow: 65,000 BTUs/HR
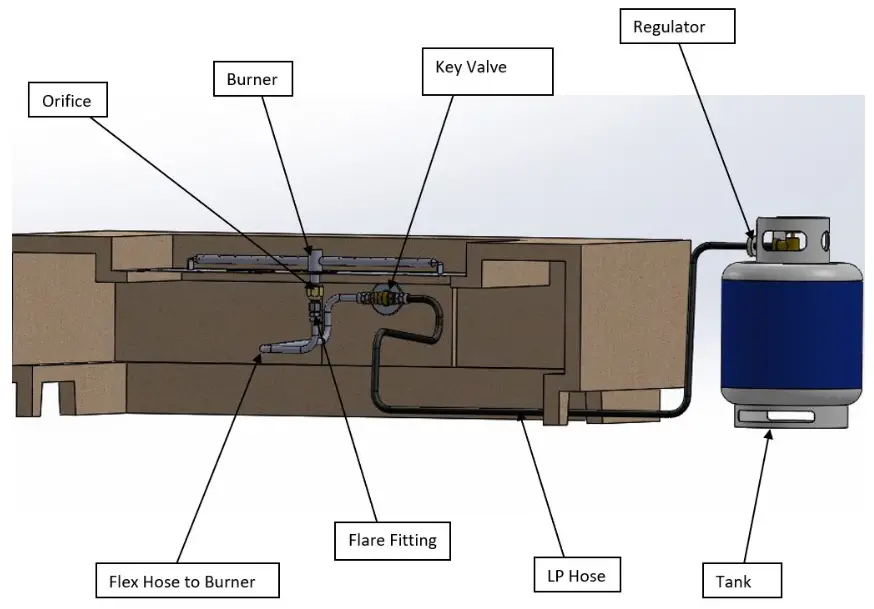
Make sure the foundation is flat and level prior to placement. Units that use liquid propane will come with a burner, orifice, flex hose, and regulator that will attach to the propane tank. This gas hose will need to go from the tank to the burner. The hose should connect from the key valve within the unit, through a vent underneath, and to the propane tank. Make sure all fittings are tightened properly with a wrench, do not hand tighten! An additional flex hose will be attached to the other end of the key valve to the flare fitting at the bottom of the burner. The arrow on the key valve should be pointing in the direction of the gas flow (towards the burner plate on your fire feature). Fire features do not include a propane cylinder; you will need to provide one. The liquid propane supply cylinder must be constructed and marked in accordance with the specifications for propane gas cylinders as required by the U.S. Department of Transportation (DOT).
3.2 Internal View of Components
3.3 Propane Gas Quick Connection
The fire feature is equipped with a quick connect brass connection. Coupled with the brass connection on the propane hose to quickly and conveniently provide proper pressure to operate the fire feature as well as a sealed connection to the tank.
To Connect:
- Pull the sleeve back on the hose connection.
- While the sleeve is in the back position push onto the connection on the fire feature receiver.
- Release sleeve. (sleeve will automatically slide into place)
- Gently tug/pull on the hose to ensure a connection has been made.
To Disconnect:
- Push inwards on the connection, then pull back on the sleeve.
- While the sleeve is in the back position pull away the connection on the fire feature receiver.
- Release sleeve. (sleeve will automatically slide into place)
Section 4 Operation
4.1 Ignition
An initial burner test should be done prior to filling the pan with media (rocks/glass/etc.)
Battery Ignition
Find the panel on the side of your unit, the knob should be at the 12:00 position. This type of ignition takes one AA battery (not included). To insert the battery, turn the black battery receptacle to the left of the knob counter-clockwise until it unscrews and comes off. Insert the battery and carefully place the receptacle knob back in position and screw it back on. You may need to apply light pressure but do not overtighten as it may damage the knob and threads.
To ignite the unit, ensure the knob is in the 12:00 position to start. Push the knob inward and turn clockwise to the 6:00 position. You should hear the igniter sparking and the gas should ignite. Continue to push the knob inward until the burner lights, wait a few seconds, and release the knob. If the flame does not stay lit, push the knob back in and allow the spark to reignite. If you do not hear the igniter sparking, your battery may be drained and will require replacement.
Regulate the flame by turning the knob clockwise until it is to your liking. The knob will not go past the 9:00 position. If the flames are still too low or too high, have the pressure regulator checked for proper operation. Push the knob inward and turn counterclockwise all the way back to the 12:00 starting position. If the knob does not turn the system off, contact your gas professional to replace the gas valve. Only use factory-approved parts for replacement. Once the burner lights, immediately remove your hand and allow the burner to operate for a few minutes before turning the knob all the way back to the 12:00/off position.
You are now ready to place the fire media onto the burner pan. Slowly pour media onto the pan and spread evenly. Fire media should be sparsely spread out enough to cover the pan. Only use the recommended amount of media in your unit (the amount provided), overfilling may result in smaller flame and gas buildup which may cause an explosion. Fresh air must be able to pass through the unit. Do not block or obstruct any vents on the lower and upper parts of the fire feature. These are designed to ensure proper combustion and ensure no buildup of residual gases within the unit.
4.2 Adjustment
Allow the fire feature and media to cool down before moving or adjusting. This may take from 30 minutes to 1 hour depending on the size of the fire feature. Any shifting of fire media or features should be done after the entire unit has cooled. Also prior to movement, ensure that all gas valves are completely closed and disconnected.
Refer to Section 1.2 for instructions on how to safely move your unit.
Section 5 Troubleshooting
Refer to the section below according to issue and gas source.
THE BURNER WILL NOT LIGHT
| Possible Cause | How to Fix |
| Air in Gas Line | If newly installed, it may take several attempts to purge air from the line. |
| Debris in Gas Line | Confirm gas line is clear and free of obstruction (insulation, dirt, excess pipe sealer, water, etc.). Clearing a line of debris may require help from a professional. |
| Improper Gas Pressure | Check if the tank is low or empty, and may need to refill or replace. |
BURNER WILL NOT STAY LIT
| Possible Cause | How to Fix |
| Improper Gas Pressure | Check if the tank is low or empty, may need to be refilled or replaced. |
| Improperly Applied Fire Media | Media may be too dense; media will need to be reduced and evenly spread. |
NOISE
Note: Only use propane gas hose supplied by the manufacturer as they have been tested for noise.
| Possible Cause | How to Fix |
| Gas Hose Restrictions | Remove any tight bends or kinks in the gas supply hose. |
| Excessive Gas Flow | Check gas regulator and reset if not within factory recommendations (Refer to the subsection for your gas type in Section 3). |
UNIT IS SMOKING
| Possible Cause | How to Fix |
| Poor Fuel Quality | Propane Gas Units: Inspect propane tank and hose, one or both may need to be refilled or replaced. |
| Excessive Flame Blockage | Separate and spread media (rocks or glass) evenly to allow flames to spread and pass-through media more evenly. |
| Improper Air/Fuel Mixture | Remove any foreign items or other combustible materials from the unit & check for proper orifice sizing. |
BURNER FLAME IS TOO HIGH OR TOO LOW
| Possible Cause | How to Fix |
| Incorrect Gas Supply Pressure | Propane Gas Units: Inspect propane tank and hose, one or both may need to be refilled or replaced. |
| Blocked burner ports or burner orifice | Clear burner ports and orifice of foreign particles or debris and wipe clean. |
| Improper Orifice Size | Verify burner orifice is the proper size for the fuel being used. Consult with the factory by emailing [email protected]. |
UNIT PRODUCING UNWANTED ODORS
| Possible Cause | How to Fix |
| Gas Leak | DO NOT OPERATE -but leave the gas source on/open (the gas should be flowing through the hose up to the igniter valve). Inspect hose(s), and check for any leaks at all connections and fittings by using soapy water, and checking for bubbles. If the leak is found, turn off gas immediately and contact support for replacement component(s). If no leak is found, inspect the propane tank for damage or defect; the tank may need to be replaced. |
BATTERY IGNITION
| Possible Cause | How to Fix |
| Dead Battery | If you do not hear the igniter sparking or producing a spark test/change the required AA battery. |
| Not Lighting | Igniter: check the battery. Igniter: check igniter probe wire connection behind battery housing. (if faulty call support, at 951-600-1123) Fuel: check fuel source/hose. |
COLOR FADING
| Possible Cause | How to Fix |
| Exposure | Concrete Units: Purchase cement sealer at your local brick and mortar retailer and apply a coat to concrete areas every year. |
Section 6 Warranty
Prism Hardscapes LLC offers a 1-year limited warranty against manufacturer defects. Prism Hardscapes will repair or replace product which has been proven to be defective in workmanship and/or material. If the unit is confirmed defective and is not repairable by a qualified Prism Hardscapes representative, the unit will be replaced FOB PRISM HARDSCAPES facility. The buyer must provide proof of purchase along with the date of delivery to the end user and arrange to ship associated with the replacement of the unit. Prism Hardscapes will not be responsible for any defects resulting from misuse, user error, installation error, abuse, repair, or alteration. The use of wood or fuels other than those specified for use with this unit by Prism Hardscapes will void the warranty immediately. Under no circumstances will Prism Hardscapes be liable for incidentals or consequential damage resulting from defective products. This warranty is Prism Hardscapes’ sole warranty, all others expressed or implied whether of merchantability, the fitness of purpose, or otherwise, are therefore disclaimed by Prism Hardscapes. Prism Hardscapes is not responsible for any injury or mishap related to misuse, abuse, or lack of judgment in choosing fire display locations.
[email protected] ![]() We create visionary designs coupled with handcrafted processes.
We create visionary designs coupled with handcrafted processes.
11150 Business Circle, Cerritos, Ca 90703
www.prismhardscapes.com
• Phone: (951) 600-1123
• Fax: (951) 600-1109


