
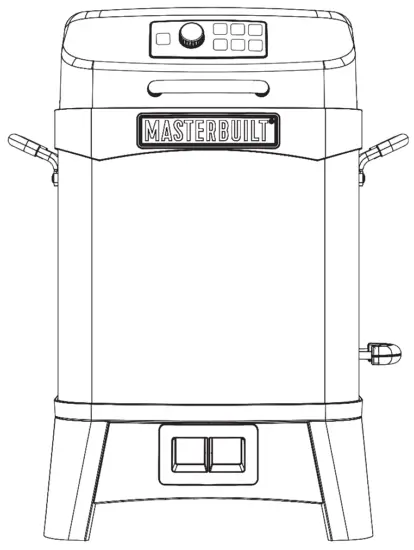
Masterbuilt EF13G1D 6-in-1 Outdoor Air Fryer
MB20013020
Your model number__________________________________________________.
Mfg. Date – Serial Number_____________________________________________.
These numbers are located on the back of the appliance.
FOR OUTDOOR HOUSEHOLD USE ONLY

Manual Code: 9801200005 201013-GH
|
|
|
|
WOOD CHIPS DO NOT COME WITH THIS PRODUCT.
READ ALL INSTRUCTIONS
SAVE THESE INSTRUCTIONS |
Structural Proximity and Safe Usage Recommendations
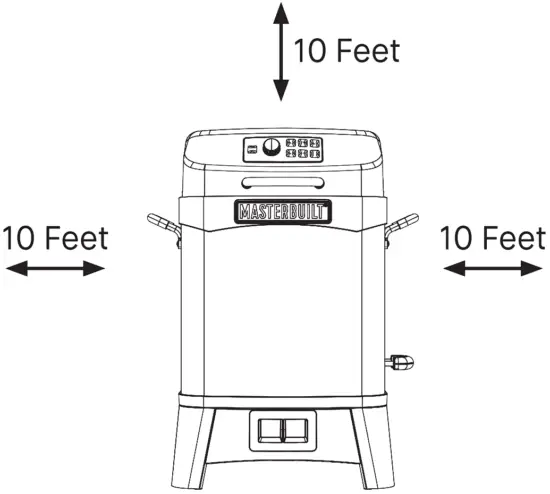
REMINDER: Maintain a minimum distance of 10 feet from rear, sides and top of air fryer to overhead construction, walls, rails or other combustible construction. This clearance provides adequate space for proper combustion, air circulation and venting.
|
Electric power cord is a trip hazard. |
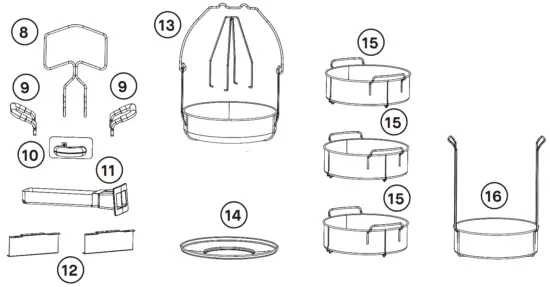
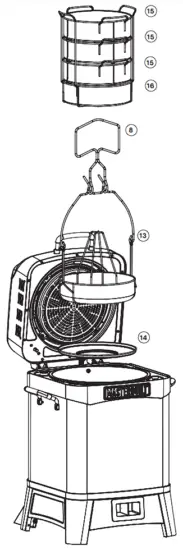
Parts List
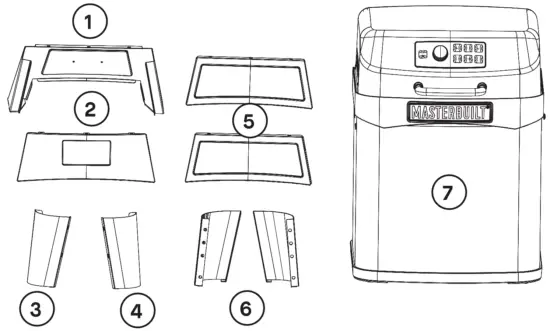
NO. | QTY/CANT. | DESCRIPTION |
1 | 1 | Rear Brace |
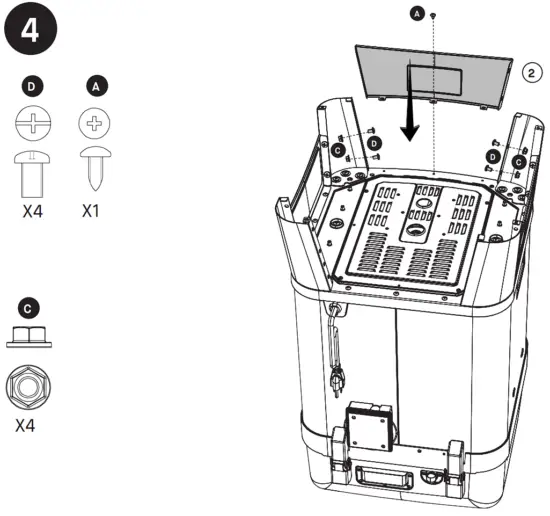
2 | 1 | Front Brace |
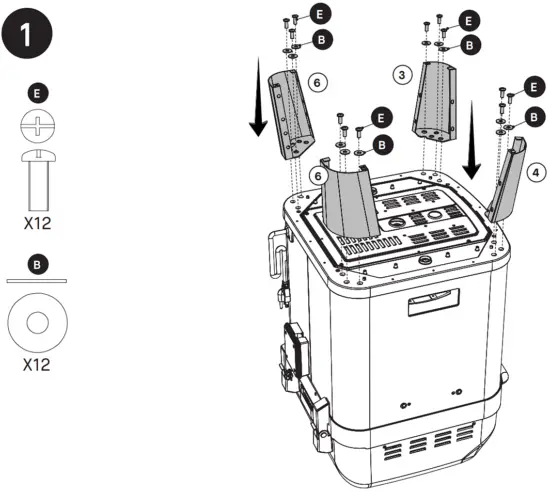
3 | 1 | Front Right Leg |
4 | 1 | Front Left Leg |
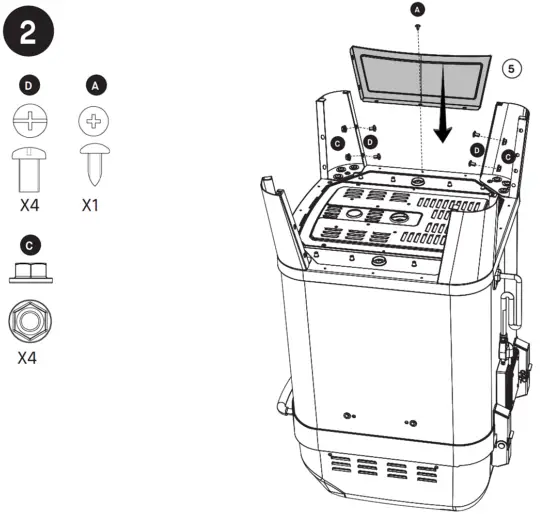
5 | 2 | Side Brace |
6 | 2 | Rear Leg |
7 | 1 | Fryer Body |
8 | 1 | Lifting Hook |
9 | 2 | Lift Handle |
10 | 1 | Smoke Box |
11 | 1 | Grease Tray |
12 | 2 | Grease Tray Bracket |
13 | 1 | Poultry Basket w/Stand |
14 | 1 | Heat Deflector |
15 | 3 | Stacking Baskets |
16 | 1 | Bottom Stacking Basket |
Hardware List
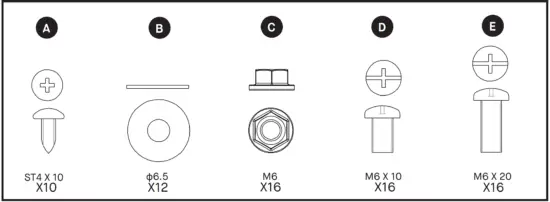
 DO NOT RETURN TO RETAILER for assembly assistance, missing or damaged parts. Please contact MASTERBUILT customer service at www.masterbuilt.com/pages/support. Please have the model number and serial number available. These numbers are located on the silver rating label on the appliance.
- BEFORE ASSEMBLY READ ALL INSTRUCTIONS CAREFULLY.
- Assemble on a clean flat surface.
- Tools needed: Phillips head screwdriver
- Approximate assembly time: 20 minutes
- Actual product may differ from picture shown.
- It is possible that some assembly steps have been completed in the factory.
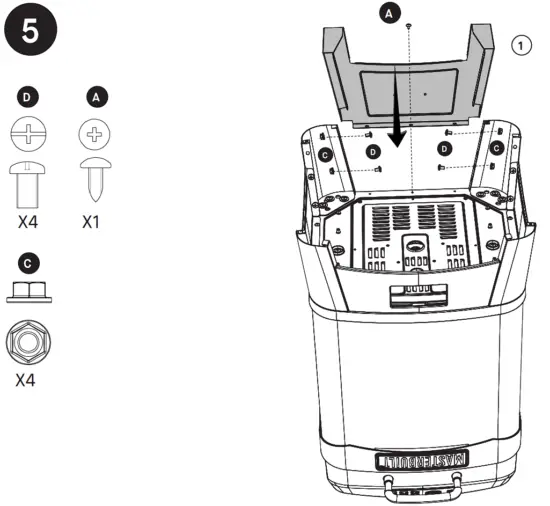
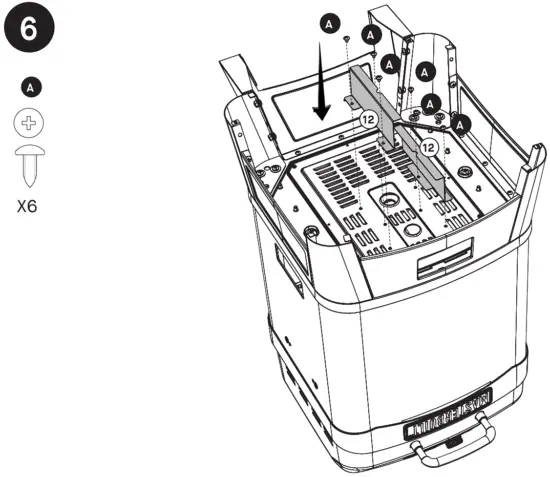
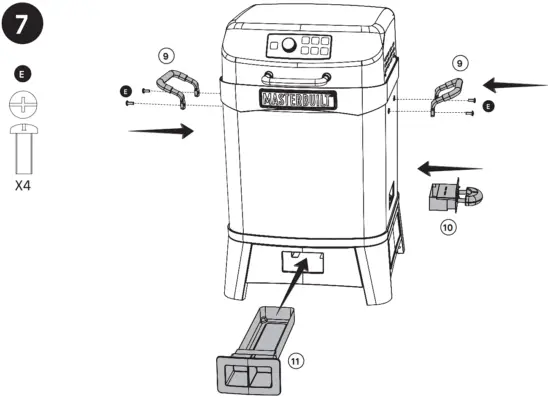
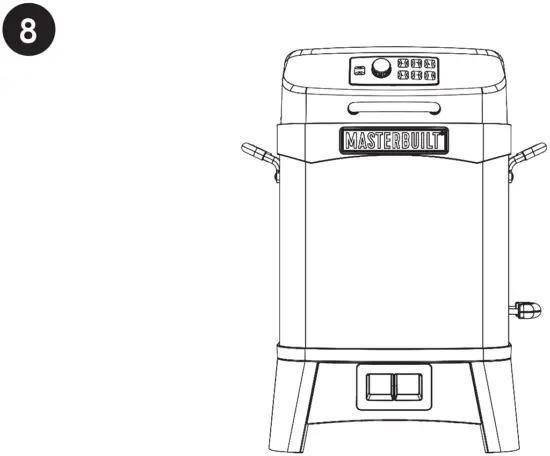
Assembly

Operating Instructions
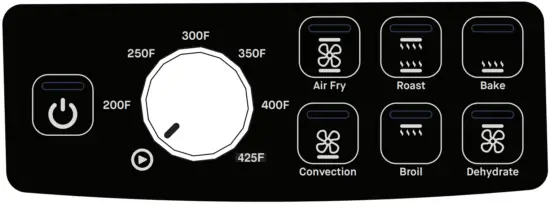
CONTROL PANEL
QUICK START GUIDE
Step 1 - Plug it in
Step 2 - Press the power button (turn it on)
Step 3 - Press the cook function you wish to use
Step 4 - Select your temperature with the control knob
Step 5 - Wait 10 minutes to allow the unit to preheat
COOKING OVERVIEW

- Air Fry:
A. Preset 400F
B. Function does smoke at preset temperature - Roast:
A. Preset 400F
B. Function does smoke at preset temperature - Bake:
A. Preset 400F
B. Function does smoke at preset temperature - Convection:
A. Preset 400F
B. Function does smoke at preset temperature - Broil
A. Preset 425F
B. Function does not smoke at preset temperature - Dehydrate
A. Preset 140F
B. Function does not smoke at preset temperature
WOOD CHIP TRAY
- Before starting unit, place wood chips in wood chip tray.
- Wood chips should stay well below the top rim of wood chip tray. DO NOT use wood chunks.
- Check wood chip tray periodically to see if wood has burned down. Add more chips as needed.
Note: Wood chip tray is hot during use. - Wood chip tray MUST be in place when using outdoor air fryer.
- Do not leave old wood ashes in the wood chip tray. Once ashes are cold, empty tray. Tray should be cleaned out prior to and after each use to prevent ash buildup.
- Should wood chips flare up, immediately close lid, wait for wood chips to burn down. Do not spray with water.
CLEANING AND STORAGE
- Clean unit prior to use.
- After use, turn appliance off, unplug and let cool before cleaning or storing.
- Remove grease tray and wipe thoroughly using mild detergent.
- Clean lid, cooking rack, turkey stand, and basket with a damp cloth or sponge using a mild detergent.
- Clean outer shell, inner lining, cord, and control panel with a damp cloth or sponge using a mild detergent.
Dry thoroughly. - Baskets, stands, heat deflector, grease tray, smoke box, and lifting hook may be cleaned in the dishwasher.
ALWAYS MAKE SURE UNIT IS UNPLUGGED AND COOL TO THE TOUCH BEFORE CLEANING AND STORING.
Shutdown Instructions
Step 1:
Remove food from the air fryer.
Step 2:
Close the lid and press the power button to power the unit down.
Step 3:
Leave the lid closed and the unit plugged in for 5 minutes.
Step 4:
Once the unit has cooled completely, unplug, clean, and store.
Troubleshooting
| SYMPTOM | CAUSE | POSSIBLE SOLUTION |
| Power light won’t come on | Not plugged into outlet | Check outlet connection |
| House breaker tripped | Make sure other appliances are not operating on the same electrical circuit. Check household breakers. | |
| Controller malfunctioning | Contact Masterbuilt at www.masterbuilt.com/pages/support | |
| Fryer takes excessive amount of time to heat up or does not heat at all | Fryer plugged into the wrong type of extension cord | Use the properly rated extension cord or set fryer so extension cord does not have to be used. |
| Lid must be closed for operation | Close lid to retain heat in fryer | |
| Controller malfunctioning | Contact Masterbuilt at www.masterbuilt.com/pages/support | |
| Controller does not adjust temperature | Not plugged into outlet | Check outlet connection |
| Controller malfunctioning | Contact Masterbuilt at www.masterbuilt.com/pages/support | |
| Fryer reaches extremely high temperatures | Temperature setting too high | Adjust controller to lower setting |
| Controller/element malfunctioning | Contact Masterbuilt at www.masterbuilt.com/pages/support | |
| Power light is on, fryer isn’t heating | Faulty element | Contact Masterbuilt at www.masterbuilt.com/pages/support |
| Controller malfunctioning | Contact Masterbuilt at www.masterbuilt.com/pages/support | |
| Fryer is beeping continuously, power button and cook function button flashing. | Fryer is in cool down mode | Press any button to cancel alarm. Inspect fryer and eliminate cause for overheating. Check for grease fires by slowly opening the lid. If there is no fire, close the lid and press any button to cancel alarm. The fryer will resume the normal cooking cycle when it reaches the set temperature. If fire occurs, close lid and, press any button to cancel alarm. Unplug the fryer. |
If your air fryer is beeping (10 beeps per minute), and the lights are flashing, you have a TC error. Contact Masterbuilt at www.masterbuilt.com/pages/support.
If symptom is not listed here, please contact Masterbuilt at www.masterbuilt.com/pages/support.
Wood Chips Smoking Guide

To ensure that it is safe to eat, food must be cooked to the minimum internal temperatures listed in the table below.
USDA* Safe Minimum Internal Temperatures | |
| Fish | 145°F (63°C) |
| Pork | 160°F (71°C) |
| Egg Dishes | 160°F (71°C) |
| Steaks and Roasts of Beef, Veal or Lamb | 145°F (63°C) |
| Ground Beef, Veal or Lamb | 160°F (71°C) |
| Whole Poultry (Turkey, Chicken, Duck, etc.) | 165°F (74°C) |
| Ground or Pieces of Poultry (Chicken Breast, etc.) | 165°F (74°C) |
* United States Department of Agriculture


 Personal Air Fryer Instruction Manual")


