VENTRAY DW55AD Portable Countertop Dishwasher with Air-Dry Function User Guide
Thank you for purchasing Ventray Portable Dishwasher. In this guide, we will show you how to install and operate your new dishwasher for the first time.
![]() To avoid injury, read and understand the important safety information included before using this appliance.
To avoid injury, read and understand the important safety information included before using this appliance.
PRODUCT OVERVIEW
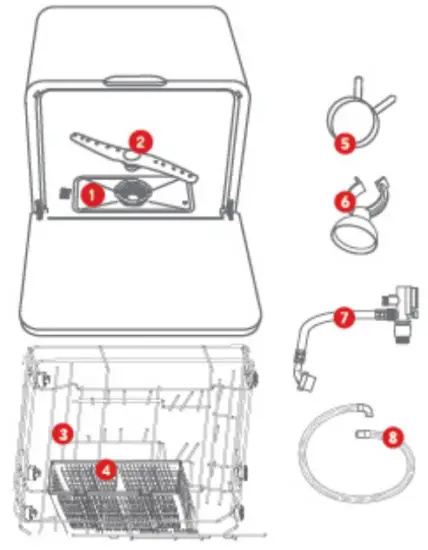
- Filter assembly
- Lower spray arm
- Main rack
- Cutlery basket
- Drain hose clamp
- Suction cup for drain hose
- Inlet hose
- Drain hose
![]() Pictures are for illustration purposes only. The actual product may be different.
Pictures are for illustration purposes only. The actual product may be different.
 WARNING
Electrical Shock Hazard.
- The dishwasher MUST be grounded.
- DO NOT use an adapter or extension cord_
- DO NOT touch the power cord with wet hands.
INSTALLATION
![]() Water must be fed by an inlet valve.
Water must be fed by an inlet valve.![]() Place the dishwasher on a flat level surface close to a water outlet and a drain.
Place the dishwasher on a flat level surface close to a water outlet and a drain.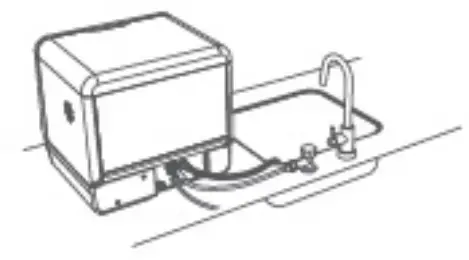
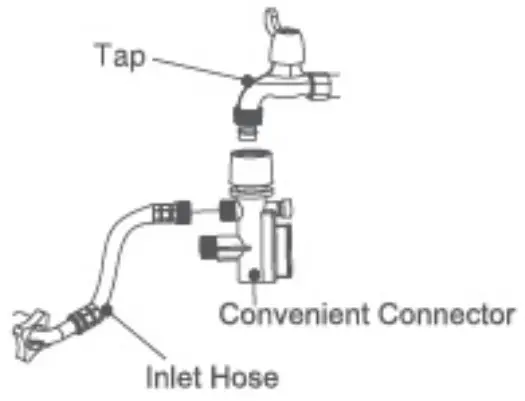
INSTALLATION OF INLET HOSE
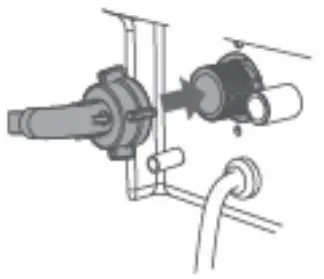
- Connect the inlet hose to the in et valve.

 Dishwasher may leak if not connected properly
 - Connect the narrower end of the nose to the convenient connector. Attach the convenient connector to a standard water tap or hose.
 The convenient connector may not fit all faucets. you may reed to twist the tip off or add an adapter to fit properly.
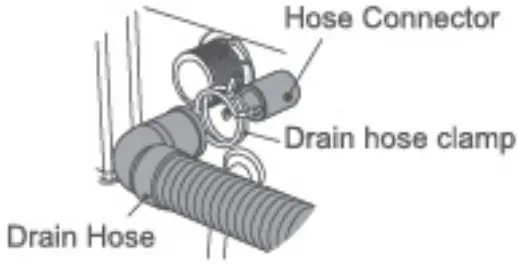
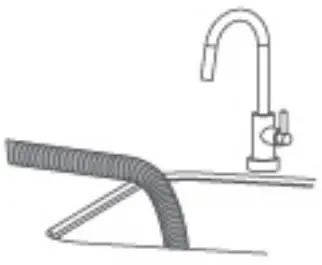
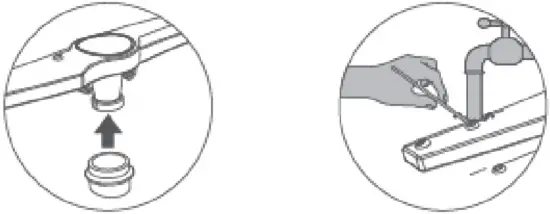
INSTALLATIONS OF DRAIN HOSE - Connect the drain hose to the hose connector by fixing the hose clamp.

See illustration below for a securely connected drain hose.
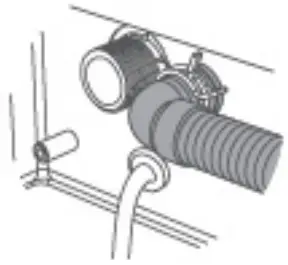
- Put the free end of the drain hose into the sink or drainage Use the suction cup to mount the drain hose.
 Do not raise the drain hose to more than 15 inches, or water may not be drained properly.
OPERATION
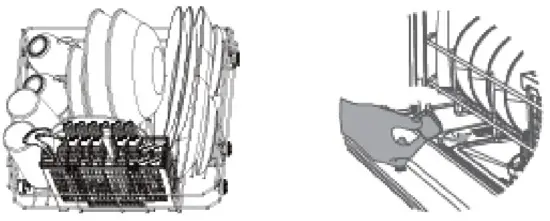
- Load the dishwasher. Remove large residues from tableware before placing them on to the dishwasher rack. Lean tableware against the racking. Do not pile up. Place utensils in the basket provided, with sharp ends facing downwards.

- Add one tablespoon of dishwasher detergent powder or a small tablet below the cutlery rack. Do not add too much detergent. Excess foam may cause overflow_
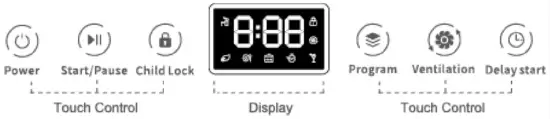
- Press the
 button to power on the dishwasher.
 - Press the button to select a washing program.
- Press the button to start washing immediately.
- Press the button to start the child lock function while washing.
To cancel the child lock, press the button again. - Press the button to start the ventilation function. If the ventilation is on standby, it will automatically run to prevent bacteria from growing after washing – once three hours. To cancel the ventilation, press the button again.
- Press the button to delay the washing program.Washed dishes may be hot. Allow washed dishes to cool down for at least 30 minutes before removing from the dishwasher.
 button to power on the dishwasher.
 button to select a washing program.
 button to start washing immediately.
 button to start the child lock function while washing.
 button to start the ventilation function. If the ventilation is on standby, it will automatically run to prevent bacteria from growing after washing – once three hours. To cancel the ventilation, press the button again.
 button to delay the washing program.
MAINTENANCE
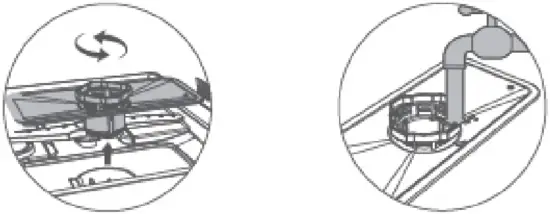
- Unplug the dishwasher from power outlet. Turn counter-clockwise and lift the filter assembly. Rinse it under tap water and install it back.

- Clean the sprayer regularly to prevent clogging. Pull out to remove the lower spray arm Rinse the spray arm under running water. Use a thin wire to unclog the nozzles when necessary.
Register your product today for easy warranty services and technical support.
For advanced product features, tips, troubleshooting and more detailed instructions, please visit www.ventray.com
SCAN ME