wrozgxaig
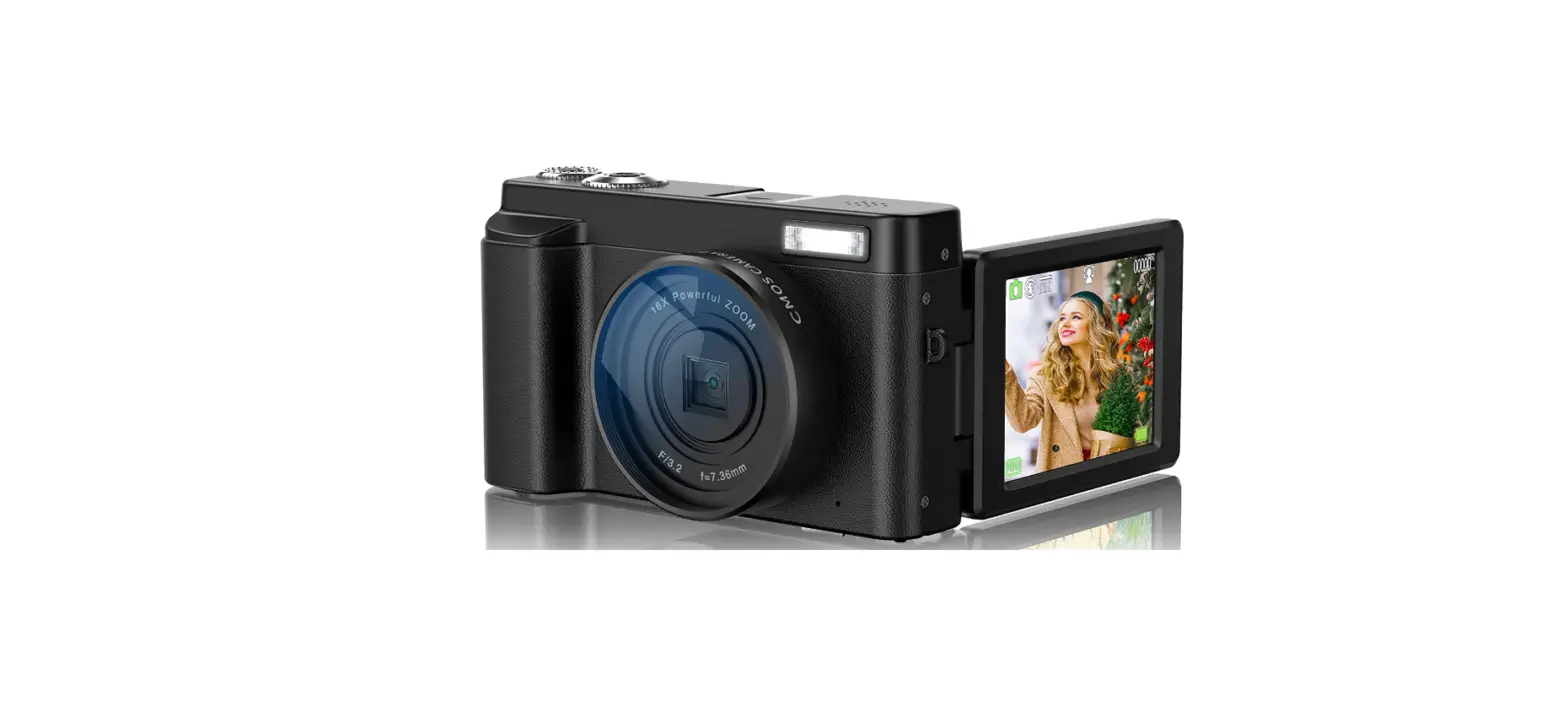
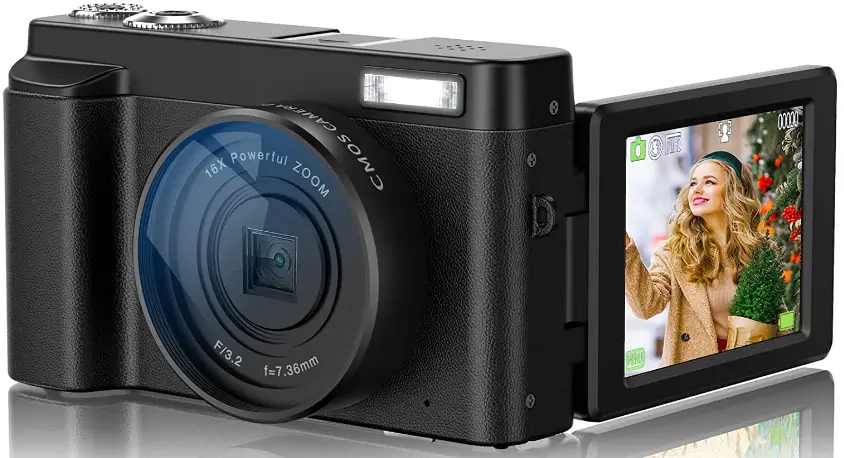
wrozgxaig 48MP Digital Camera Rechargeable Batteries
Intruduction of Camera Parts
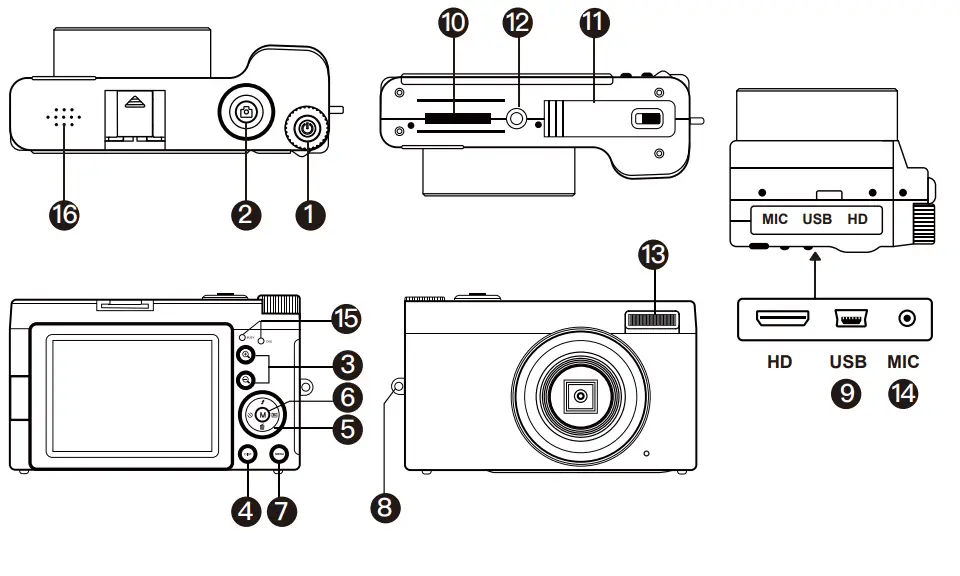
| 1 | Power Button | Power the camera on/ off |
|
2 |
Shutter Button | In still image mode: Half press to focus, full press to take photo
In video mode:Start/end recording In playback mode:Playing video file |
|
3 |  | Electronic zoom On/enlarge photo/increase video playback volume |
 | Electronic zoom Off/zoom out photo/
decrease video playback volume | |
|
4 |
Mode Button | Switching camera modes: Still image mode/ video recording mode/ playback mode/ camera system setup) |
| 5 | Up/Down/ Left/Right | Up key: turn on or off fill light / menu selection
Down key: shortcut delete key/ menu selection Left button: timer selfie button (in still image mode, press it to set the timer photo countdown time 2s, 5s or 10s) / menu selection Right key: In still image mode, continuous shooting button (press this button to take 3 photos in a row) / menu selection. |
|
6 | OK Button | Confirm selection button/ pause or resume
recording (video recording mode) |
| 7 | Menu Button | Enter or exit menu settings. |
| 8 | Hook | Attachable camera strap. |
| 9 | USB | Mini USB |
| 10 | SD Card slot | Install SD card |
| 11 | Battery Cover | Install battery |
| 12 | Tripod mount | Standard screw port-Connecting the tripod |
| 13 | LED FIll light | LED fill light |
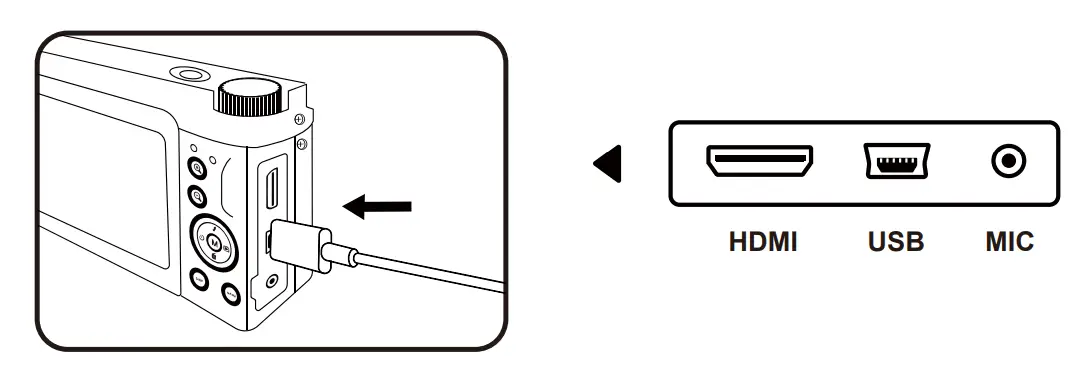
| 14 | MIC Port | Recording Voice-Connect the microphone cable |
|
15 | Indicator Light | The blue light indicates that the camera is working
The red indicator light indicates that the camera is charging The red light goes out when fully charged |
| 16 | Speaker | Play sound |
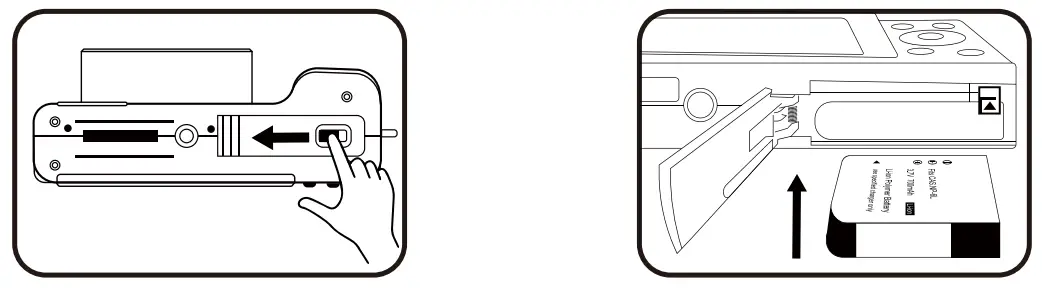
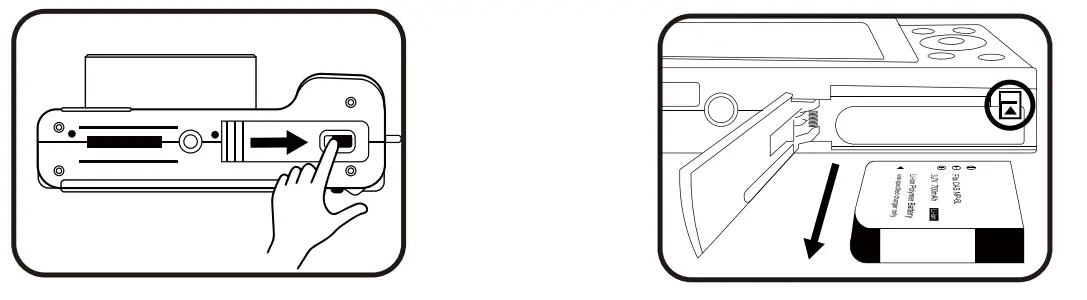
How to insert and remove the battery
- Open the battery cover

- Insert the battery and keep pressing until the battery is locked by the battery lock.
- Close the battery cover

- If you want to remove the battery please push the battery lock lever and remove the battery.
How to charge the camera
- Please use the Mini USB cable and charger included in the package to charge the camera

- When the camera indicator light is red, it means the camera is charging.
- When the camera light goes out, it means the camera is fully charged.
- If the red light flashes quickly while charging, the camera has no battery installed or the battery is not in place.
- Please note: For the first time, please use the camera after fully charged.
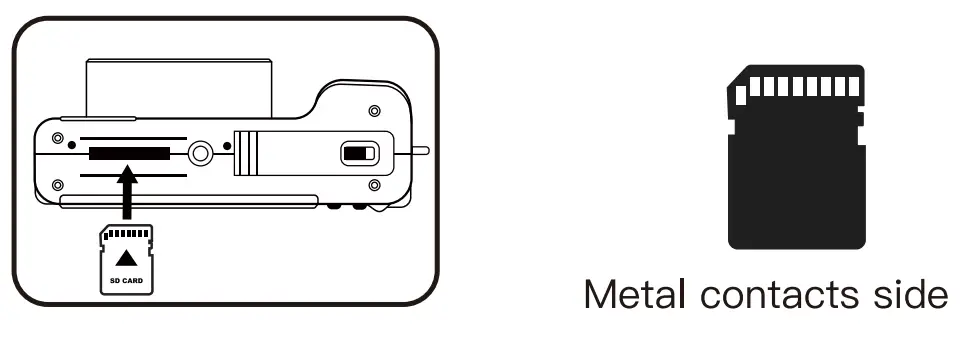
How to Insert and remove SD card
- As shown by the illustration, Please insert the card, keep pressing until the SD card is locked, you will hear a “click” sound.

- Please caution: The camera supports 4-128Gb Micro SD card,n Class10 is recommended, we do not recommend using U3 level card.
- When the Micro SD card is used for the first time, please format it in the camera.
- Please insert the SD card when the camera turned off then turn it on.
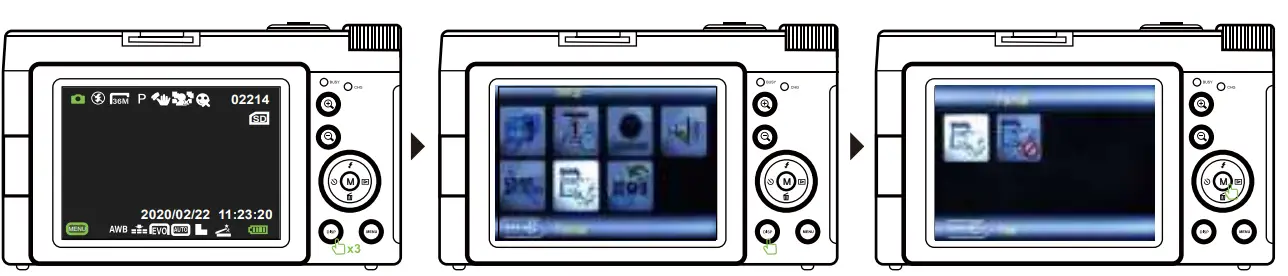
How to format the SD card
- In the still image mode, press the “Mode” button 3 times to enter the system setting interface and select the “Format” option.
- Press “OK” button to confirm formatting.
- Press the mode button again to exit the system settings page.
 Introduction of still image mode
 Introduction of still image mode
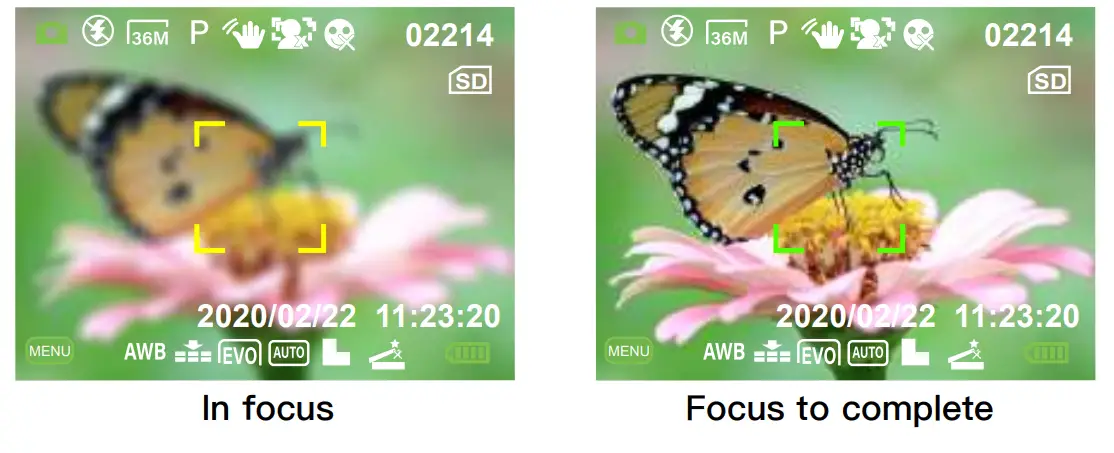
How to take a still image
- Please make sure the camera is in still image mode ( The camera defaults to still image mode when turned on).
- Press the shutter button halfway down to focus,the focus frame is yellow at this time; When the image is in focus,The focus frame in the screen will turn green.
- Press the shutter button fully down to shoot an image.

How to play back and delete still image that have been taken
- Press the mode button 2 times in the still image mode to enter the playback mode.
- Select an image by pressing Left and right keys.
- If you want to delete the photo, please press MENU button to delete when you are playing back the picture.
- After viewing the photos, please press the mode button twice to exit the playback mode.
Introduction to video recording mode
How to shoot video
- Please make sure the camera is in video recording mode (After turn on camera please press the mode button once to enter video recording mode).
- Press the shutter button to start/end video recording.
- Press OK button to pause/resume video recording.
How to play back and delete recorded videos
- Please press the MODE button once to enter playback mode. (when the camera is in video recording mode)
- Select an video by pressing Left and right keys.
- If you want to delete the video, please press MENU button to delete when you are playing back the video.
- After viewing the video, please press the MODE button twice to exit the playback mode.
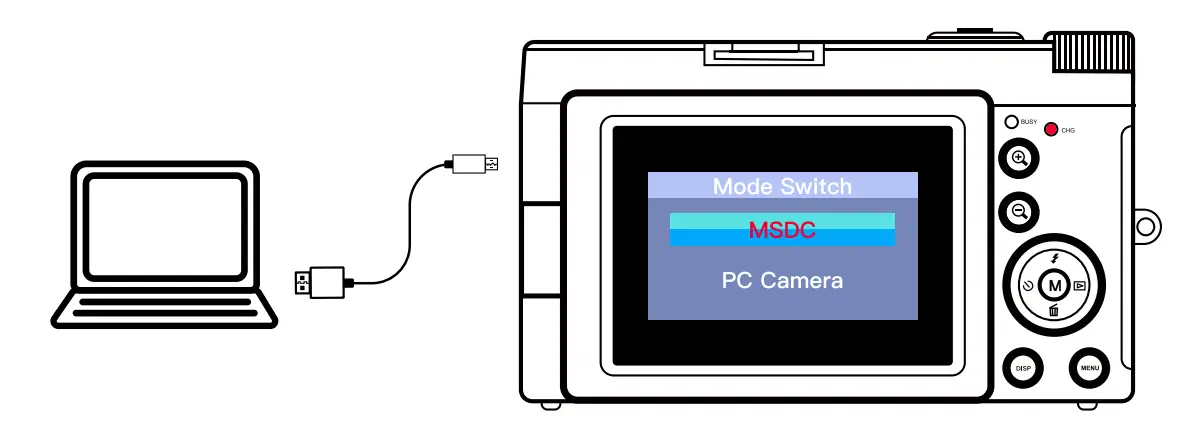
How to download still image/video files to computer
- Please use the Mini USB cable (in the package) to connect the computer, when camera is on.
- After the connection is completed, a dialog box will pop up randomly on the camera screen.
- Please select MSDC, then you can download the files from the camera to your computer.
- After downloading, please remove the cable and the camera will exit MSDC mode.
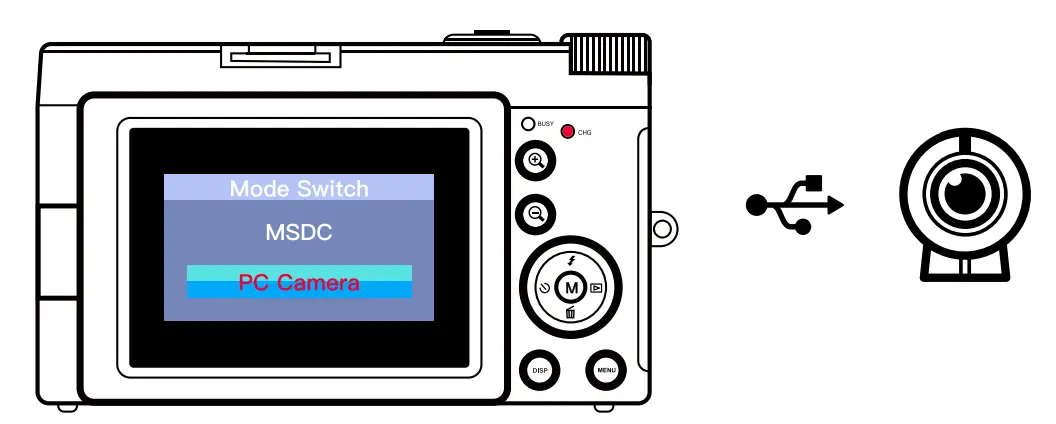
How to use camera as webcam
- Please use the Mini USB cable (in the package) to connect the computer.
- After the connection is completed, a dialog box will pop up randomly on the camera screen.
- Please select “PC camera”, then you can use the camera as a webcam on the computer.
- After using, please remove the cable and the camera will exit webcam mode

- Press the “menu” button in still image mode to enter the image menu settings.
- After the setting is completed, please press the “menu” button to exit the image menu setting

| Option | Introduction | |
|
1 | Mode Set | 9 shooting scenes for you to choose, the auto mode is the default |
| 2 | Resolution | 48MP/ 44MP/ 36MP/ 24MP/ 20MP/
16MP/ 12MP/ 10MP/ etc. |
| 3 | Beauty Face | On/ Off Default is off |
| 4 | Self Timer | Set the timer Selfie countdown time to 2s, 5s or 10 s Default is off |
|
5 | White Balance | Auto mode is recommended Default is Auto |
| 6 | Anti-Shake | 1.On/ Off
2.Default is on |
| 7 | Effect | Photography special effects |
- Press the MENU button in video recording mode to enter the video menu settings.
- After the setting is completed, please press the MENU button to exit the video menu setting.

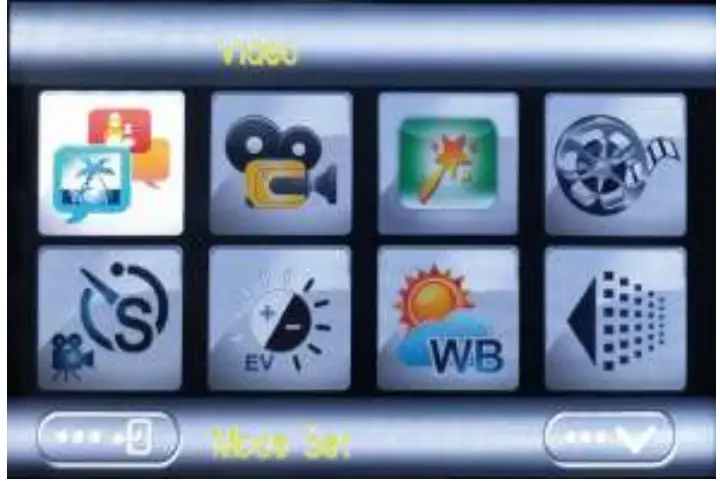
| Option | Introduction | |
|
1 | Mode Set | 9 shooting scenes for you to choose,
the auto mode is the default |
| 2 | Movie Size | 2.7K/ Full HD 1080P/ HD 720P/
VGA 480P etc. |
|
3 | Beauty Face | On/ Off Default is off |
| 4 | Exposure | Default is 0 |
| 5 | White Balance | Auto mode is recommended Default is Auto |
|
6 | Effect | There are 20 shooting effects for you to choose from
Normal effect is default |
| 7 | ISO | 1.AUTO/ 100/ 200/ 400
2.Default is AUTO |
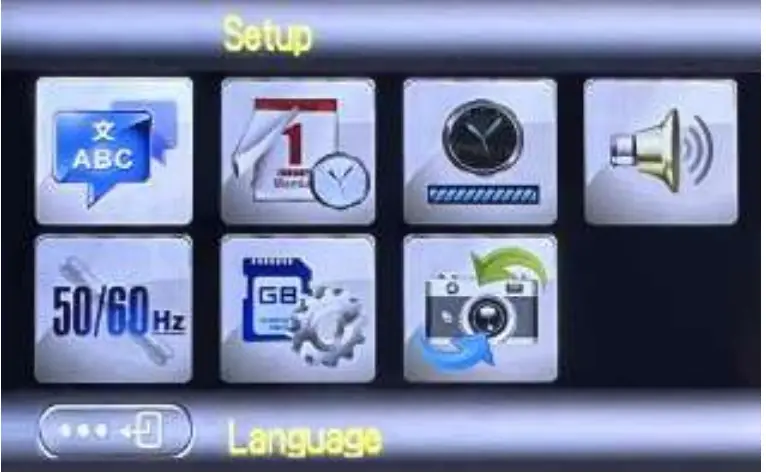
Introduction to camera system settings
- Press the mode button 3 times in the still image mode to enter the camera system settings.
- After the setting is completed, please press the mode button to exit the system setting.
 Product Specifications
 Product Specifications
| Video resolution | 2.7K/ 1080P FULL HD/ 720P HD/ 480P VGA |
| Image Resolution | 48M/ 44M/ 36M/ 24M/ 20M/ 16M/ 12M/ 10M/
7M-Wide/ 5M/ 3M/ 2M-Wide |
| Memory Card | Support Micro SD card
(4GB to 128GB Class10 is recommended) |
| File Format | JPG, AVI |
| Taking Photos | Single/ Continuous shooting/ 2s timer/ 5s timer/ 10s timer |
| Electronic zoom | 16X |
| Mini USB Port | Mini USB |
| Display | 2.9inch Screen |
| Battery | Rechargeable Li-Ion Battery |
| Language | support multi-languauge |
| Focal Length | f=7.36mm |
| Aperture | F/3.2 |
| Power Save | Auto power off in 3Min/5Min/10Min |
| Operating system
requirements | Windows XP, Windows Vista, Windows 7, Windows 8, Windows 10, Mac 10.2 |
Important Battery Safety Tips
For a better experience with this product, please pay attention to the following safety tips If the battery pack is mishandled, the battery pack can burst, cause a fire or even chemical burns. Observe the following cautions.
Do not disassemble.
- Do not crush and do not expose the battery pack to any shock or force such as hammering, dropping or stepping on it.
- Do not short circuit and do not allow metal objects to come into contact with the battery terminals.
- Do not expose to high temperature above 60°C (140°F) such as in direct sunlight or in a car parked in the sun.
- Do not incinerate or dispose of in fire.
- Do not handle damaged or leaking lithium ion batteries.
- Be sure to charge the battery pack using a genuine battery charger or a device that can charge the battery pack.
- Keep the battery pack out of the reach of small children.
- Keep the battery pack dry.
- Replace only with the same or equivalent type recommended by seller.
- Dispose of used battery packs promptly as described in the instructions.
FAQS
the shutter lag problem, our digital camera has fast autofocus, and it also has 3 continuous shooting, and you can shoot in 1S! Hope you
will pay more attention to our camera
You can put the battery in the camera and plug it into the camera with the mini USB cable we provided to charge it! You can use any 5V standard DC charging head. We also have a charging head in our products.
The camera lens is fixed
The camera comes with 2 batteries and a charger included.
It is equipped with cable and charging head. The mini USB cable and any standard DC 5V charging head (power bank, computer) can be charged!
4.53, 2.75, 1.57
The camera has a mini USB cable for download pictures to PC/ laptop
This camera is fixed lens
Yes, you can timer 2/3/5s
This digital camera has 48 megapixels, and it also has autofocus and anti-shake functions, which can greatly improve the clarity of photos when taking pictures! Compared with other normal digital cameras,
Put battery into camera. Plug in the USB cable one end and non-HDI into camera. Red light comes on and when it goes out the battery is charged. If you turn on the camera thena blue light will come on signifing it is ready to take pictures.
1. The pixel of this camera is 48 megapixels, most of the iPhone is 12 megapixels, it is easier to produce pictures in terms of the clarity of photos!
2. Our camera has 2.7K high-definition video capture. When you shoot video and process it with PR, or upload it to social media accounts such as YouTube, I believe its advantages will be even greater!
3. Our camera also has auto focus and anti-shake functions, as well as filters and natural beauty functions, you can refer to many aspects!
4. This camera weighs only 0.59 pounds, and will be given a wrist strap for easy portability!
It is equipped with cable and a charging head. The mini USB cable and any standard DC 5V charging head (power bank, computer) can be charged!


