iblock FAN VT-1944 Air Cooler
FAN VT-1944
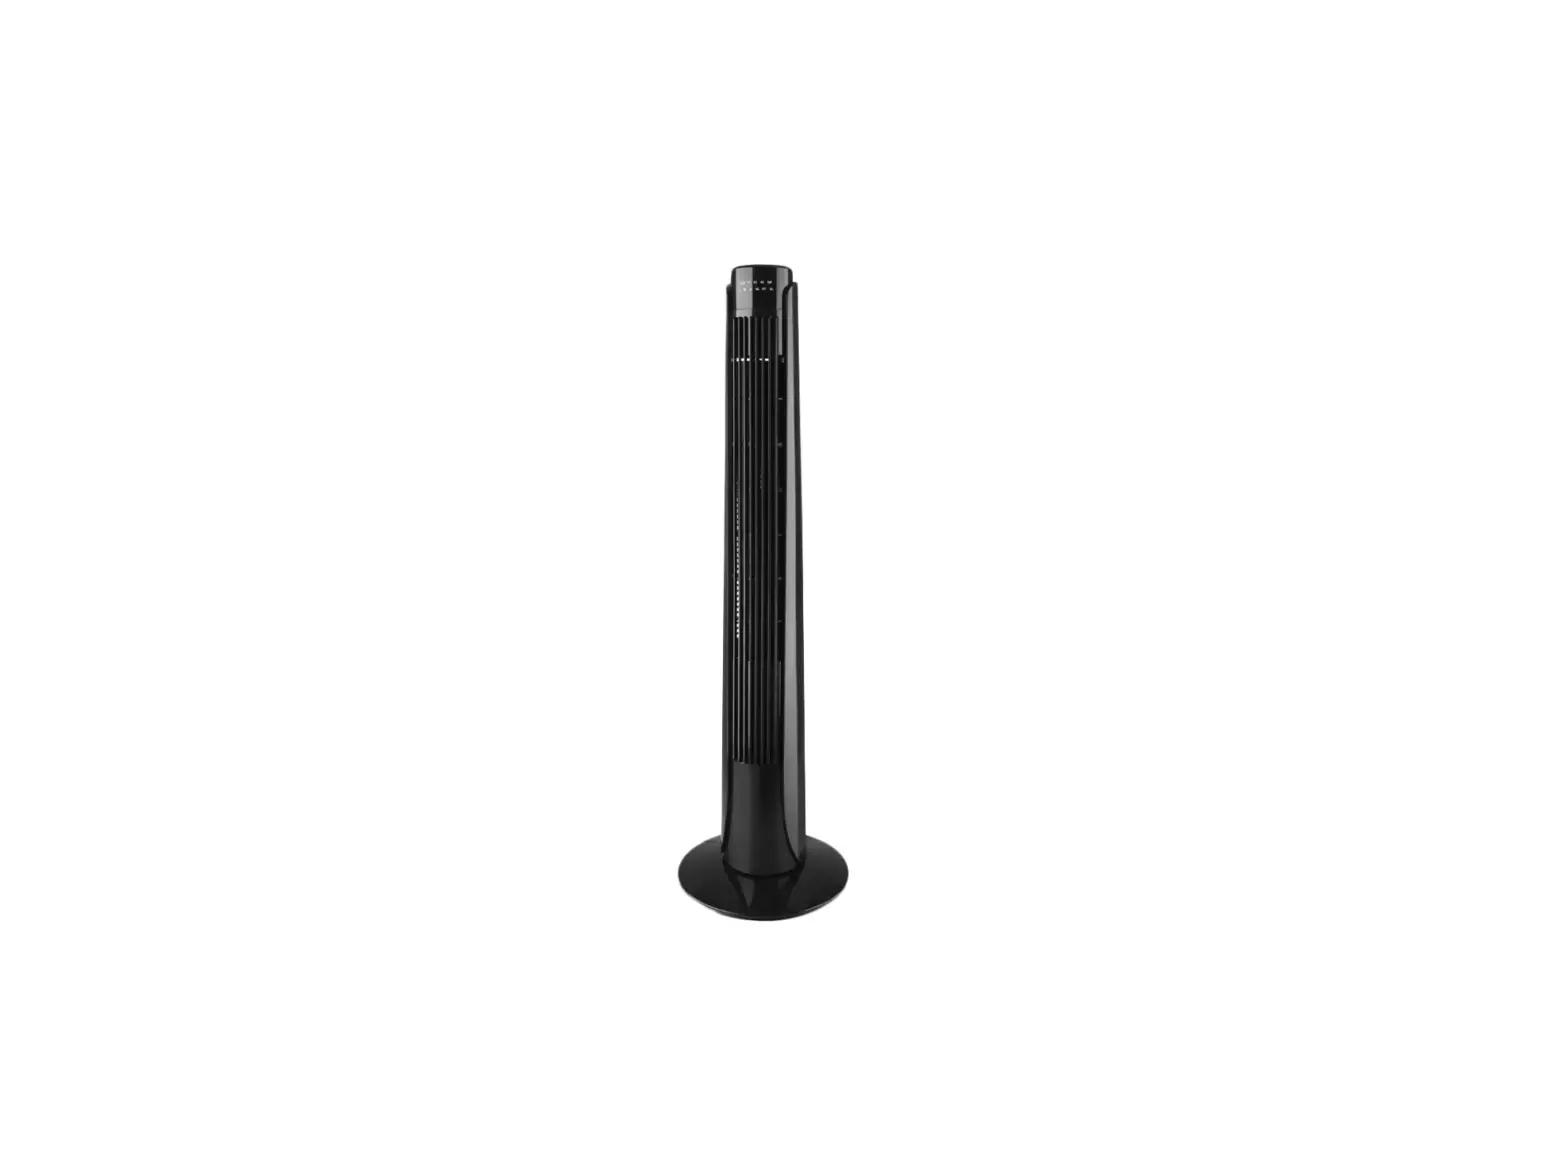
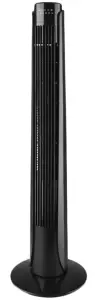
The fan is intended for artificial ventilation of rooms.
DESCRIPTION
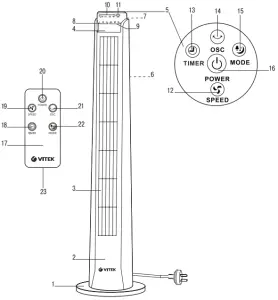
- Base
- Body
- Air outlet grid
- Indication panel
- Control panel
- Air inlet grid
- Carrying handle
Indication panel (4)
- «L, M, H» air flow speed indicators
- «NL, NT, SL» air flow mode indicators
- «0,5H-1H-2H-4H» timer operation time indicators
- «OSC» fan body oscillation mode indicator
Control panel (5)
- «SPEED» air flow speed selection button
- «TIMER» timer setting button
- «OSC» oscillation mode ON/OFF button
- «MODE» air flow mode selection button
- «POWER» on/off button
- Remote control
Remote control (17)
- «TIMER» timer setting button
- «SPEED» on/off/air flow speed selection button
- «POWER» on/off button
- «OSC» oscillation mode on/off button
- «MODE» air flow mode selection button
- Battery holder
SAFETY MEASURES
Before using the electrical appliance read this manual carefully and keep it for further reference. Use the unit for its intended purpose only as specified in this manual. Mishandling the unit can lead to its breakage and cause harm to the user or damage to his/her property.
- Before switching the unit on for the first time make sure that your home mains voltage corresponds to the unit operating voltage
- Before using the unit examine the power cord closely and make sure that it is not damaged. If you find that the power cord is damaged, do not use the unit.
- Do not use the fan outdoors.
- Place the unit on a flat, dry and steady surface away from sources of heat or open flame.
- Do not use the unit near containers filled with water, next to a kitchen sink, in wet basements or near a swimming pool.
- Do not immerse the fan, power cord and power plug into water or any other liquids.
- Do not touch the unit body and the power plug with wet hands.
- If the fan falls into water, unplug it before touching it and only then you may take the fan out of water. Apply to the nearest authorized service center for testing or repairing the unit at the contact addresses given in the warranty certificate and on the website www.vitek.ru.
- Make sure that the power cord does not contact with hot surfaces and sharp furniture edges.
- Do not switch the unassembled fan on.
- Do not insert any foreign objects into the openings of the fan protective grids to avoid injuries or unit damage.
- Do not place the fan near curtains or house plants.
- It is not recommended to stay under the air flow coming from the fan for a long time (especially for children and elderly people).
- Never leave the operating unit unattended
- Unplug the fan before cleaning and when you do not use the unit or before moving it to a new place.
- When unplugging the fan pull the plug but not the cord
- Clean the unit regularly.
- Do not leave children unattended to prevent using the unit as a toy.
- For children safety reasons do not leave polyethylene bags used as packaging unattended.
Attention! Do not allow children to play with polyethylene bags or packaging film. Danger of suffocation! - Do not allow children to touch the unit body and the power cord during the unit operation.
- The unit is not intended for usage by physically or mentally disabled persons (including children) or by persons lacking experience or knowledge if they are not under supervision of a person who is responsible for their safety or if they have not been instructed by this person on the usage of the unit.
- Do not use the fan if the power cord or power plug are damaged, if the fan works improperly, after it has fallen or has been damaged in some other way.
- Do not attempt to repair the unit by yourself. Do not disassemble the unit by yourself, if any malfunction is detected or after it has fallen, unplug the unit and apply to any authorized service center at the contact addresses given in the warranty certificate and on the website www.vitek.ru.
- Transport the unit in the original package.
- Keep the unit in a dry cool place out of reach of chil- dren and disabled persons.
THE UNIT IS INTENDED FOR HOUSEHOLD USE ONLY, ITS COMMERCIAL USAGE AND USAGE IN PRODUCTION AREAS AND WORK SPACES IS PROHIBITED.
BEFORE THE FIRST USE
After unit transportation or storage at low temperature keep it for at least three hours at room temperature before switching on.
FAN ASSEMBLING
- The fan is supplied disassembled. Do not connect theunit to the mains, if it is not completely assembled.
- Unpack the unit and remove any stickers that can pre- vent its operation.
- Check the unit for damages, do not use it in case of damages.
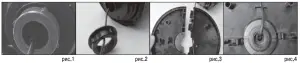
- Remove the fastening nut from the lower part of the fan body (2) (Fig. 1, 2).
- Pass the power cord between the halves of the floor support (1) (Fig. 3).
- Match the ledges on one half of the support (1) with the openings on the other half of the support (1) and connect the support (1) halves till the latches actuate (Fig. 3).
- Place the assembled support (1) on the lower part of the fan body (2), make sure that the ledges on the fan body (2) match the openings on the support (1) and after that tighten the fastening nut clockwise (Fig. 4).
- Fix the power cord in the channel of the support (1) (Fig. 4).
USAGE
Before using the unit for the first time, make sure that the voltage in your mains corresponds to the unit operating voltage.
- Insert the power plug into the socket, you will hear a sound signal.
Notes: – the operation mode buttons on the control panel (5) are sensory, you just need to touch the button to switch the necessary operation mode on.
- Touch/press the «POWER» ON/OFF button (16) on the control panel (5) or button (20) on the remote control (17), the fan will start operating, «L» air flow speed light indicators (8) and «NL» air flow mode indicators (9) will light up.
- Select the air flow speed by pressing repeatedly the «SPEED» button (12) on the control panel (5) or the «SPEED» button (19) on the remote control (17), the «L, M, H» indicators (8) inform about the selected air flow speed.
«L» low air flow speed,
«M» medium air flow speed,
«H» high air flow speed. - Switch the oscillation mode on by pressing the «OSC» button (14) on the control panel (5) or the «OSC» button (21) on the remote control (17), the OSC» light indicator (11) will light up, to switch the oscillation mode off press the button (14, 21) again, the light indicator (11) will go out.
- Set the automatic switch-off timer operation time by pressing the «TIMER» button (13) on the control panel (5) or the «TIMER» button (18) on the remote control (17), the light indicators (10) will inform about the set operation time. You can set the fan operation time from 0.5 hours to 7.5 hours with 0.5 hour setting step. To switch the timer off press the «TIMER» button (13, 18) repeatedly until all the indicators (10) on the indication panel (4) go out.
- To select the air flow mode consequently press the «MODE» button (15) on the control panel (5) or the «MODE» button (22) on the remote control (17). You may choose three operation modes, the operation modes are indicated with light indicators (9) on the indication panel (4):
– «NL»– simple ventilation, the air flow speed depends on the mode selected with the button (12, 19) and is indicated with the «L, M, H» light indicators (8) on the indication panel (4).
– «NT»– «natural wind«. The natural wind imitation mode, the air flow speed is chaotically changing: from soft breeze to strong gusts of wind.
– «SL» – calming wind; the air flow speed is changing in cycles constantly increasing and decreasing.
- To switch the fan off touch the «POWER» button (16) on the control panel (5) or press the button (20) on the remote control (17).
- Unplug the unit.
- Before moving the fan to another place switch it off, unplug the unit, use the handle (7) for carrying the fan.
Using the remote control (17):
- Press on the lock of the battery holder (23) and remove it from the remote control (17)
- Insert the SR2025 battery into the holder (23) strictly following the polarity.
- Insert the battery holder (23) into the remote con- trol (17).
Note: If there is an isolation insert in the battery compartment, remove the insert. - If you do not use the unit for a long time, remove the batteries from the battery compartment of the remote control (17).
Note: Replace the battery in the remote control (17) in time.
Attention! Functions of the buttons on the remote control (17) fully correspond to the buttons on the control panel (5).
CLEANING THE FAN
- Before cleaning the fan switch it off and remove the plug of the power cord from the socket.
- Wipe the fan body (2) with a soft, slightly damp cloth and then wipe it dry.
- Do not use solvents or abrasives for cleaning the unit body (2).
- Do not immerse the fan body (2), the power cord and the plug into water or any other liquids; provide that water does not get into the fan body (2) to avoid electric shock or damaging the unit.
- To clean the grids (3 and 6) you can use a vacuum cleaner with a corresponding attachment.
STORAGE
- Make sure that the power cord does not touch sharp objects or furniture edges.
- Before taking the fan for long storage clean it, disassemble the floor support (1), remove the battery from the battery compartment of the remote control (17), pack the fan into its packaging and put it to a dry cool place away from children and disabled people for storage.
- Before switching the fan on next time assemble it, check its workability and integrity of the power cord isolation.
- Keep the unit in a dry cool place out of reach of children and disabled persons.
DELIVERY SET
Fan body 1 pc.
Base 1 pc. (consists of two pieces)
Remote control 1 pc.
SR2025 battery 1 pc.
Manual 1 pc.
TECHNICAL SPECIFICATIONS
Fan
Power supply: 220-240 V ~ 50 Hz
Rated input power: 45 W
Remote control
Power supply: 3 V (SR-2025 battery)
RECYCLING
For environment protection do not throw out the unit and the batteries (if included), do not discard the unit and the batteries with usual household waste after the service life expiration; apply to specialized centers for further recycling. The waste generated during the disposal of the unit is subject to mandatory collection and consequent disposal in the prescribed manner. For further information about recycling of this product apply to a local municipal administration, a disposal service or to the shop where you purchased this product.
The manufacturer preserves the right to change design, structure and specifications not affecting general principles of the unit operation without a preliminary notification due to which insignificant differences between the manual and product may be observed. If the user reveals such differences, please report them via e-mail [email protected] for receipt of an updated manual.
Unit operating life is 3 years
Guarantee
Details regarding guarantee conditions can be obtained from the dealer from whom the appliance was purchased. The bill of sale or receipt must be produced when making any claim under the terms of this guarantee.
A production date of the item is indicated in the serial number on the technical data plate. A serial number is an eleven-unit number, with the first four figures indicating the production date. For example, serial number 0606ххххххх means that the item was manufactured in June (the sixth month) 2006.