![]()
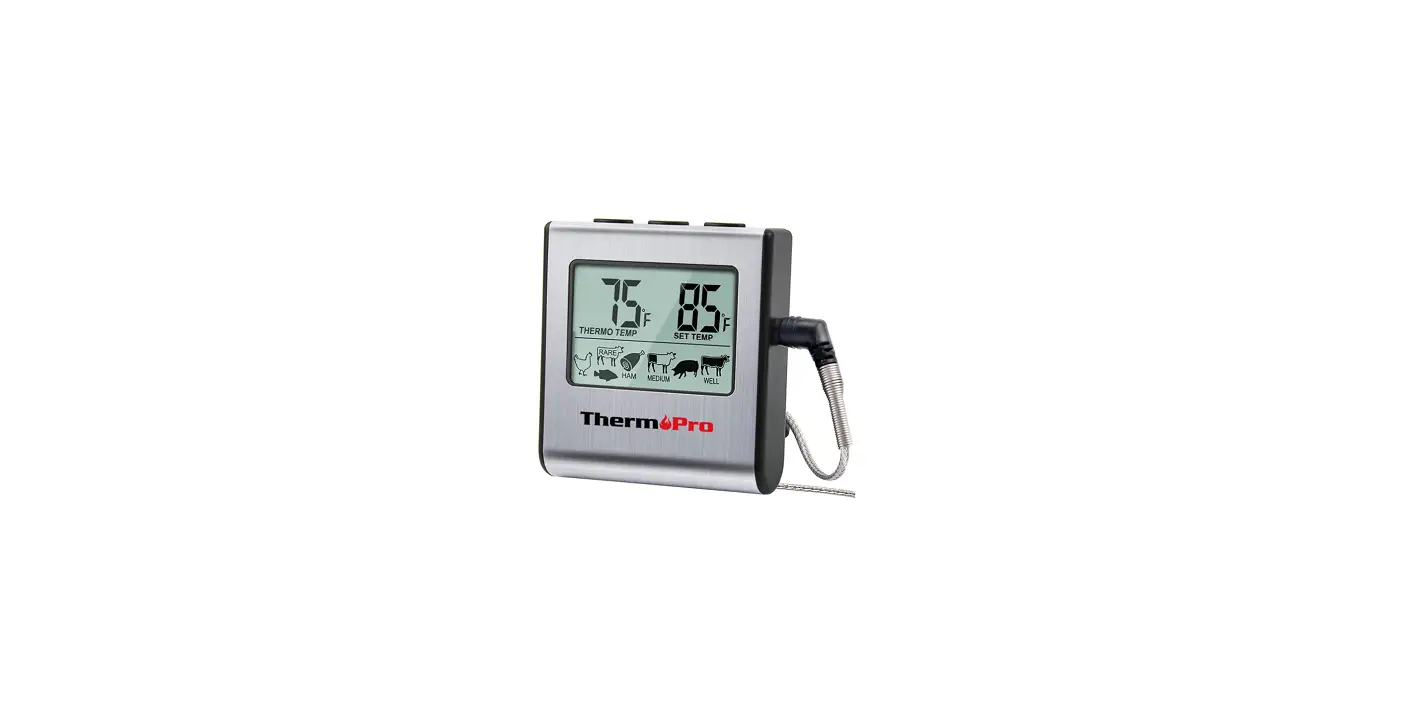
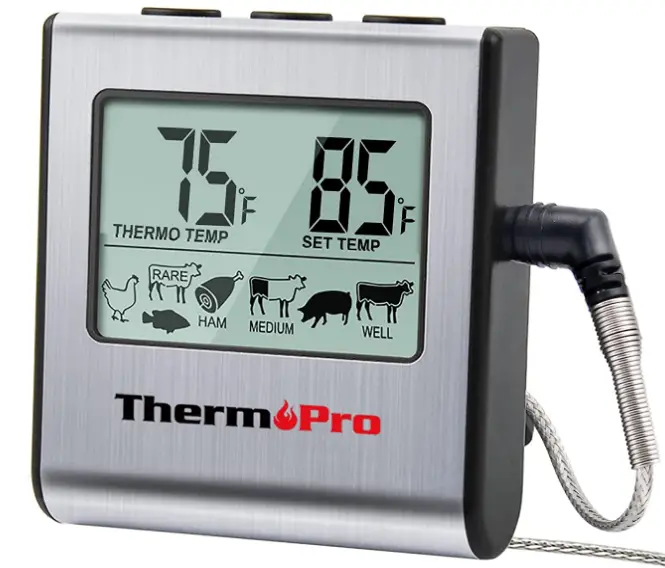
ThermoPro TP-16 Digital Cooking Food Meat Smoker Oven
Key Definition
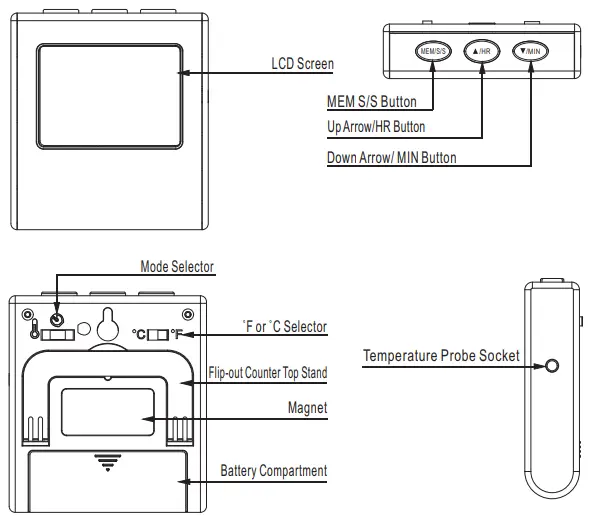
- Temperature Probe Socket: Insert temperature probe into this socket to measure meat temperature.
- LCD Screen: Displays meat temperature and set temperature while in cook mode. Displays countdown when in timer mode.
- MEM|S/S Button: In Cook mode, press the MEM button mode to enable the option to adjust quick temperature settings. Press again to save selection. In Timer mode, press the S/S button to begin the count-down or count-up timer. Press the S/S button to pause or restart the timer. When the countdown timer hits 0:00 press the S/S button to silence the unit.
- Up Arrow/HR Button: Press the up arrow to select food types while in quick temperature setting. Press the up arrow to set your desired cooking temperature while in manual temperature setting. Press the HR button to set hours while in timer mode. To clear time, press the HR and MIN buttons at the same time.
- Down Arrow/ MIN Button: Press the down arrow to select food types while in quick temperature setting. Press the down arrow to set your desired cooking temperature while in the manual temperature setting. Press the MIN button to set minutes while in timer mode. To clear time, press the HR and MIN buttons at the same time.
- ˚F or ˚C Selector: Move the switch towards ˚F or ˚C, depending on how you would like your temperature displayed.
- Mode Selector: Move the position of the selector to select cook mode, timer mode or power off the device.
- Flip-out Counter Taop Stand: Allows user to place device on counter for easy viewing.
- Magnet: Allows user to stick device to a metal surface. For example, a refrigerator.
- Battery Compartment: Remove battery cover to insert 1 AAA battery.
Note: This unit is designed to remotely monitor cooking progress. Do not remove the probe during cooking. The internal temperature will be displayed on the remote unit outside of the oven.
FEATURES AND SPECIFICATIONS
- Programmable alert with preset temperatures for specific
- 99-hour, 59-minute countdown timer and countup timer
- Stainless steel temperature probe with steel mesh cable
- Temperature range of probe*: 32˚F to 572˚F (0˚C to 300˚C).
- Temperature tolerance of internal food reading**: +/-1.8˚F (+/-1.0˚C).
- Temperature readings in ˚F or ˚C
- Flip-out counter top stand and magnet.
- Uses one AAA battery (included).
- The probe is not designed to perform as an oven thermometer. If probe is not inserted into food, the temperature reading of oven heat above 200˚F (93˚C) will be accurate to within 1˚F to 5˚F (0.5˚C to 2.7˚C).
- The internal food reading temperature range is: 0˚F to 185˚F (63˚C to 85˚C).
BATTERY INSTALLATION/SETUP
- Slide open the battery compartment door at the back of the unit.
- Insert one (1) AAA battery according to the polarity markings. Replace the battery compartment door.
- Remove the printed vinyl label from the LCD screen.
IMPORTANT NOTES/WARNING
- This product is not for use in microwave ovens.
- Keep out of reach of children.
- Do not touch hot probe or wire with bare hands or just after cooking. Always wear a heat-resistant glove.
- Do not expose probe directly to flame. Doing so will cause wire to deteriorate.
- When not in use, slide the mode selector switch to the off position O to conserve the battery.
- Be sure to use a good quality alkaline battery and replace it A weak battery will cause the unit to lose accuracy. Always dispose of exhausted batteries safely.
- A food thermometer can assist in the proper preparation of However, use of this electronic device does not guard against unsafe food handling practices. Always follow proper food preparation techniques to limit the risk of food borne illness.
- The stainless steel wire probe should not be exposed to oven temperatures exceeding 716˚F (380˚C).
- Do not let probe or cable come into direct contact with the oven elements, as this will result in faulty readings and/or damage.
- If the temperature exceeds or falls below the measurable ranges, the LCD screen will display the following letters: HHH for temperatures above range and L L L for temperatures below range.
OPERATING INSTRUCTIONS
Using the Cooking Thermometer
- Clean the stainless temperature probe with hot water and soap and rinse clean. Do not submerge the probe and cable in water. The probe /cable connection is not waterproof.
- Plug the temperature probe into the socket on the right side of the main unit.
- Make sure the probe cable is free of knots. Make sure the sensor plug on the end of the cord is plugged into the base unit. (Note: if the probe is not plugged in properly or is crimped, the display will show LLL.)
- Slide the switch on the back of the base unit to display the temperature in ˚F or ˚C.
- Slide the mode selector switch to the cook position “ ”.
- You will see two temperatures on the LCD display. On the left is the actual temperature reading as measured by the temperature probe and on the right is the set temperature. The default reading is 212˚F
- Set your desired cooking temperature by choosing Quick Temperature Setting or Manual Temperature Setting. (see Section Quick Temperature Setting and Manual Temperature Setting)
- Insert the tip of the temperature probe at least 5 cm/2” into the thickest part of the meat, but not near bone or gristle.
- Place food into the oven. Before closing the oven door, make sure there is enough slack in the steel mesh cable to prevent the probe from being pulled out of the food when the oven door is closed. The base unit must be positioned outside of the oven on a stable surface and must be firmly connected to the temperature probe.
- To prevent damage to the base unit, it should not be placed on a hot surface.
- When the internal temperature of your food reaches the temperature you have set, an audible alert will sound. To stop the alert, either slide the mode selector switch to O or disconnect the temperature probe from the base unit and the alarm will stop within 30 seconds.
- Before removing the food from the oven, disconnect the steel mesh cable from the base unit. Do not touch hot probe or wire with bare hands during or just after cooking. Always wear a heat-resistant glove.
Manual Temperature Setting
- For manual setting, press “
 ” or “
  ” to set your desired cooking temperature.
 - Refer to the ‘Preset Temperature Cooking Chart’ for recommended internal temperatures.
COUNTDOWN TIMER
- Your countdown timer can be used whether the thermometer is in operation or not.
- Slide the mode selector switch on the back of the base unit to the timer position
 .
. - Press HR to set the hours and MIN to set the minutes.
- Press S/S (start/stop) to start the countdown timer. The colon between hours and minutes will flash.
- When the timer gets to 0:00, the alarm will sound. Press S/S to silence the alarm. This unit has a timing memory and will automatically display he original timer setting when S/S is pressed to silence the alarm.
- To clear the time, press the HR and MIN buttons at the same time. You can pause the timer while it is running by pressing S/S. Press S/S again to restart the timer.
- If you are using the timer and thermometer at the same time, you may slide the selector switch back to the cook position during the timing session to view the cooking temperatures. The timer will continue the countdown.
 .
.COUNTUP TIMER
- In Timer mode, when it displays 00:00, press MEM/S/S button to start count up timer. Press it again to pause the timer. The timer will stop when it is reaching 99 Hour:59 Minute.
Quick Temperature Setting
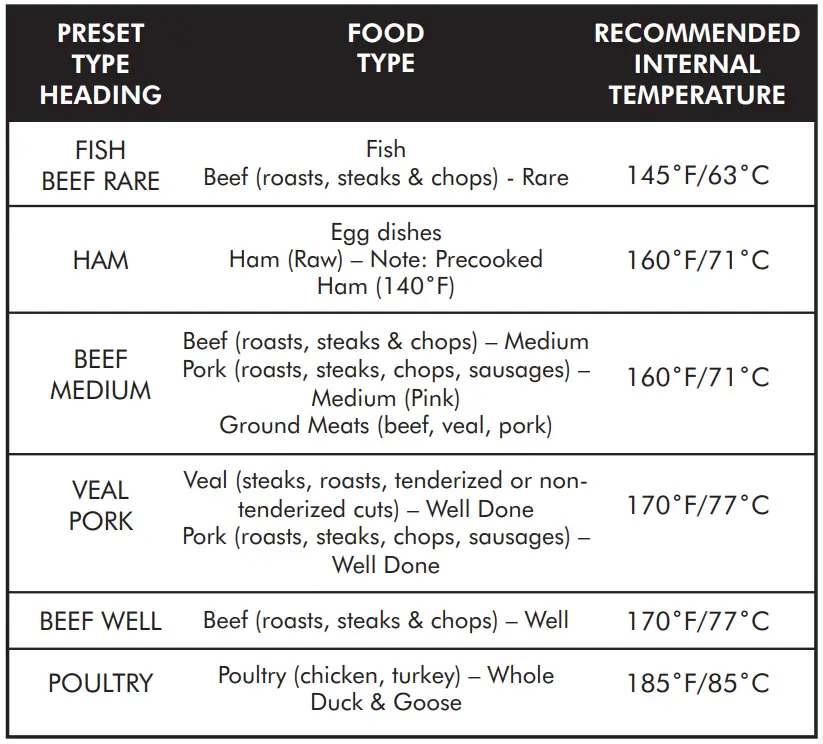
Your digital cooking thermometer is programmed with preset temperatures for various cooking levels; poultry (185˚F), beef well (170˚F), veal/pork (170˚F), beef medium (160˚F), ham (160˚F) and beef rare/fish (145˚F).
Follow these steps
Press the MEM button
Press “ ![]() ” or “
” or “ ![]() ” to select your food type. Press MEM to confirm and lock in the setting.
” to select your food type. Press MEM to confirm and lock in the setting.
NOTE
You can make manual adjustments to the preset temperatures by pressing “ ![]() ” or “
” or “ ![]() ”. Press and hold the button for fast setting.
”. Press and hold the button for fast setting.
PRESET TEMPERATURE COOKING CHART
CLEANING AND CARE
- Unit is not waterproof. Do not expose plug of probe or plug-in hole to any liquid, which will result in a bad connection and faulty readings.
- The probe and cable are not dishwasher safe. They must be hand washed using hot water and soap. Make sure to rinse and dry the probe thoroughly before storing.
- Do not submerge the base unit in water or expose to any corrosive cleaning materials. Wipe with damp cloth.
LIMITED 90 DAYS WARRANTY
Thermopro warrants this product to be free of defects in parts, materials and workmanship for a period of 90 days, from date of purchase.
Should any repairs or servicing under this warranty be required, contact Customer Service by phone or email for instructions on how to pack and ship the product to Thermopro.
This warranty gives you specific legal rights and you may also have other rights which vary from state to state.
CUSTOMER SERVICE
Telephone: 1-877-515-7797 (USA & Canada only)
Email: [email protected]
Hours: Weekdays 9:00 AM- 5:00 PM EST
Frequently Asked Questions
To obtain a precise reading for thinner meals, such as burgers and pork chops, put the stem through the side of the flesh cut. In 15 to 20 seconds, the thermometer will record the temperature. It is not advisable to leave this kind of meat thermometer in food that is cooking.
The thermometer probe should be inserted through the thickest section of the meat, away from any bones, fat, or gristle, to determine the temperature of a large piece of meat. To allow the temperature to rise, leave the thermometer in the meat for around 10 seconds.
Insert stem into thickest part of food at least 1/2 inch deep, keeping it away from bone or fat. In five seconds, the temperature will be recorded. Perfect for thin chicken breasts, pork chops, hamburgers, etc
Ice should be added to a tall glass before cold water. Without touching the bottom or edges of the glass, place the thermometer in the ice water and hold it there for 30 seconds. When the thermometer registers 32°F, it is accurate and ready for use.
Yes, the majority of meat thermometers may be used during the cooking process in the oven. They are made to operate in an oven’s high temperatures safely.
Examining a thermometer’s label will reveal whether it is safe to use in an oven. An oven-safe thermometer will typically be listed on the product’s packaging by the manufacturer. This will make it crystal evident that using the thermometer inside the oven is safe.
The typical recommended distance for using an infrared thermometer and accurately monitoring the temperature is 6 inches. The range, however, can change based on the thermometer you’re using.
Because they are precise, rapid, and simple to use, digital thermometers have taken over as the standard kitchen instrument.
So we can confirm that, yes, even if you follow all the rules, a thermometer might give you a false reading. Just keep an eye out for the obvious warning signs. Additionally, Lipschitz and Lumsden advise changing your thermometer around every few years.
You can use digital thermometers to take readings from your mouth, armpits, or rectum. The least accurate thermometers are found in the armpits.
If the food is evenly thick throughout, place the probe thermometer’s stem in the centre of the thickest section of the food. Before inserting the thermometer and taking a reading, mix any liquid food (such as stew or soup) to ensure that the heat has been dispersed evenly.
Additional Good Housekeeping When it comes to inserting a thermometer during cooking, Papantoniou advises “it should be toward the conclusion of cooking.” When following a recipe, begin checking around 10 minutes before the allotted cooking time has passed.


