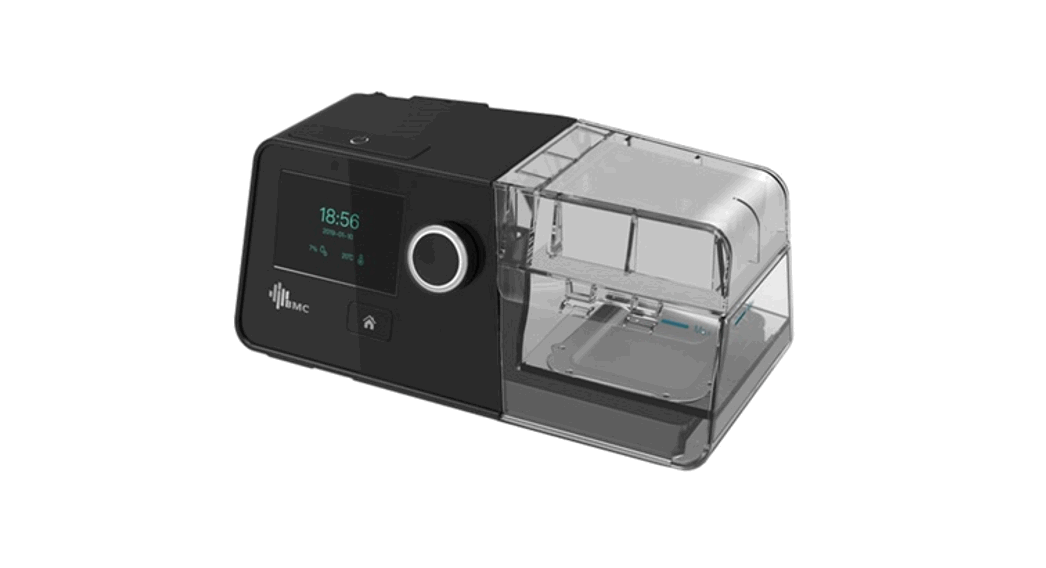
![]() G3 A20/G3 C20 Quick Operation Manual
G3 A20/G3 C20 Quick Operation Manual
Instruction Manual
![]() Home Button: Return to the previous menu or main interface.
Home Button: Return to the previous menu or main interface.![]() Knob: Adjust device settings.
Knob: Adjust device settings.![]() Start / Stop Button: Start / Stop delivering air.
Start / Stop Button: Start / Stop delivering air.
Setting up the Device
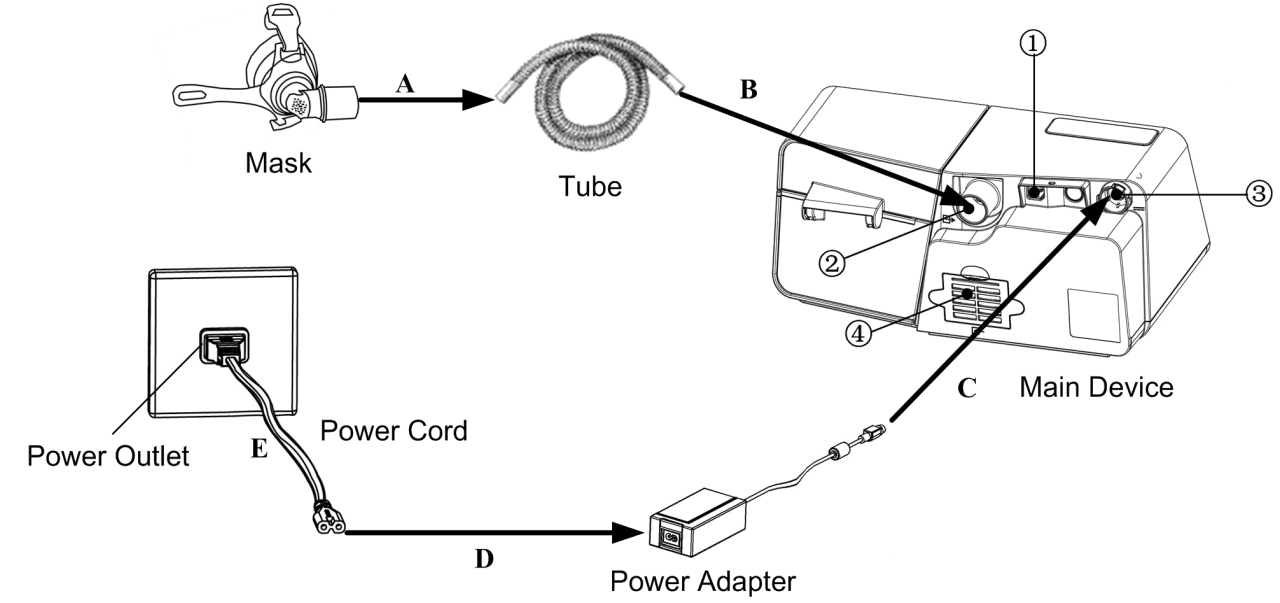
- Heated Tubing Port
- Air Outlet
- DC Inlet
- Filter Cap (Air Inlet)
A. Connect one end of the tube to the assembled mask.
B. Connect one end of the tube to the air outlet of the device, as shown in the figure above. Or Connect the heated tubing joint to the air outlet of the device, and then insert the power plug of the heated tubing into the heated tubing port on the back of the device.
C. Connect the power adapter to the DC inlet of the main device.
D. Connect the power cord to the power adapter.
E. Plug the power cord into the power outlet.
Adjusting Device Settings
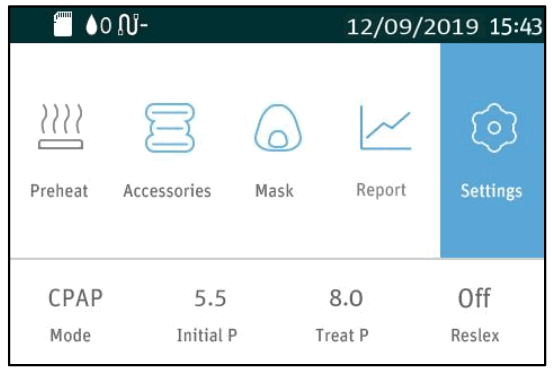
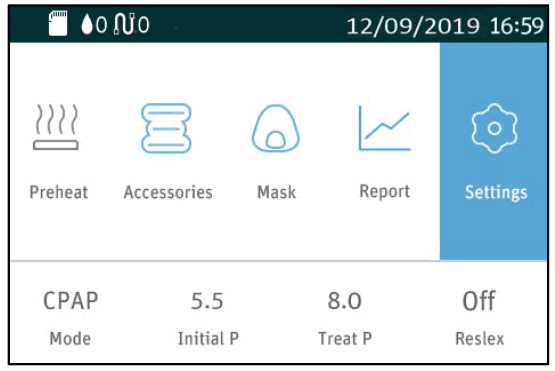
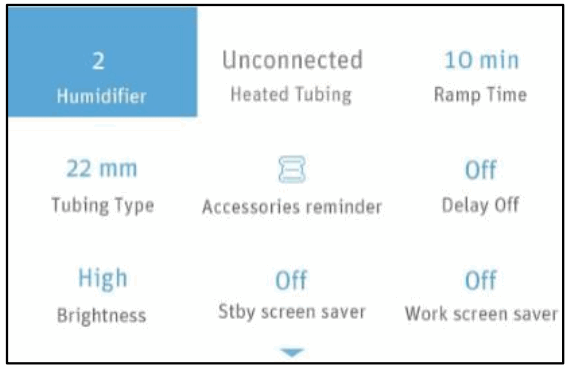
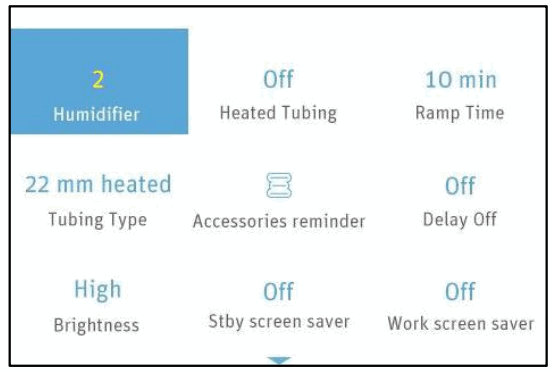
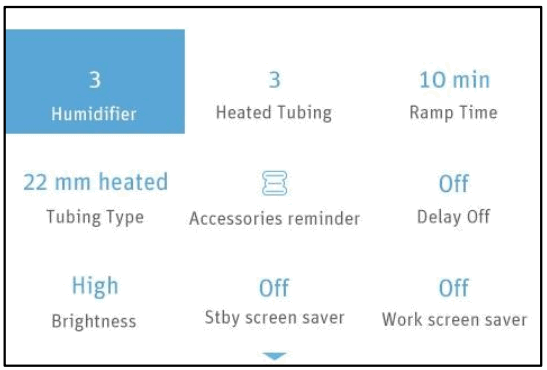
A. When the device is powered on, the display screen will display the Main Interface, as shown in the left figure below. If the heated tube is connected correctly, the icon ![]() will become a number
will become a number ![]() in the Main Interface on the screen of the device, as shown in the right figure below.
in the Main Interface on the screen of the device, as shown in the right figure below.
 |  |
| B. Press the Knob | C. Press the Knob |
 |  |
| D. Turn the Knob | E. Press the Knob |
 |  |
| F. The cursor switches among the options as you turn the Knob |  |
Starting Treatment
After you finish adjusting device settings and return to the Main Interface, press the Start / Stop Button ![]() to start treatment.
to start treatment.
Usage score of G3 A20 / G3 C20
After each treatment, G3 A20 / G3 C20 will provide a Usage Score (for CPAP and AutoCPAP mode only) and Usage Summary on the screen for the user to get a quick understanding of the usage for the recent one day (from 12:00 noon of previous day to 12:00 noon of the day).
The total score is 100 points, with the below breakdown:
| Total score | Status | Display |
| ≥ 75 | Good | 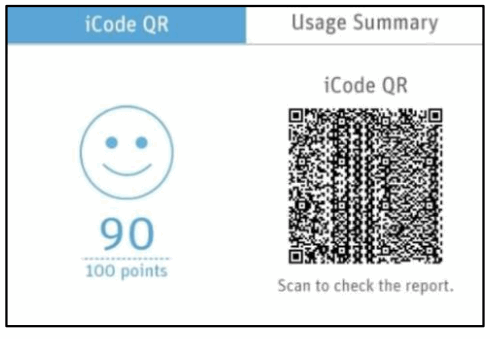 |
| 55 – 74 | Acceptable | 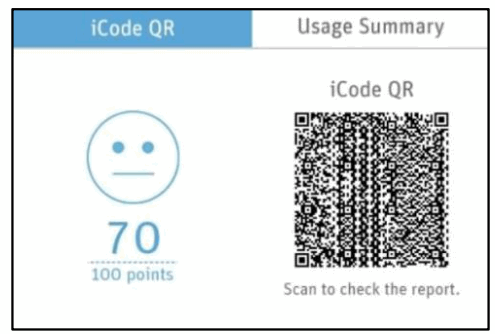 |
| ≤ 54 | Needs improvement | 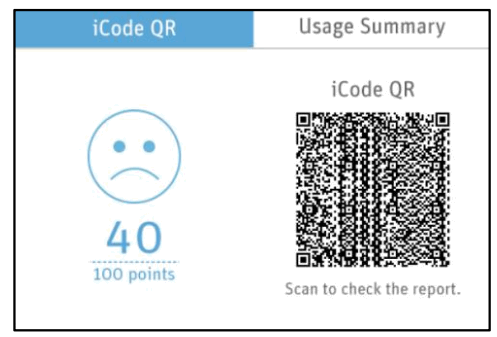 |
Used time (60 points)
The more time of treatment the user received, the more points the user scores. If the device is used for 30 minutes, get 5 points, or for 1 hour, get 10 points. The user can score up to 60 points.
| Used time (min) | ≥360 | 330-359 | 300-329 | … | 60-89 | 30-59 | 0-29 |
| Score | 60 | 55 | 50 | … | 10 | 5 | 0 |
Mask seal (20 points)
If the user is wearing the mask well without extra leakage during treatment, then the user can score up to 20 points. If the average leakage is less than 10 L/min, it scores 20 points, and 5 points will be deducted for every 5 L/min increase in leakage.
| Leak (L/min) | <10 | 14-Oct | 15-19 | 20-24 | ≥25 |
| Score | 20 | 15 | 10 | 5 | 0 |
Respiratory events (10 points)
The fewer the respiratory events (apneas and hypopneas), the higher the score.
If AHI is less than 5, it scores 10 points, when AHI ≥ 5 and for every 5 increase in AHI, 2 points is deducted.
| AHI | <5 | 9-May | 14-Oct | 15-19 | 20-24 | ≥25 |
| Score | 10 | 8 | 6 | 4 | 2 | 0 |


