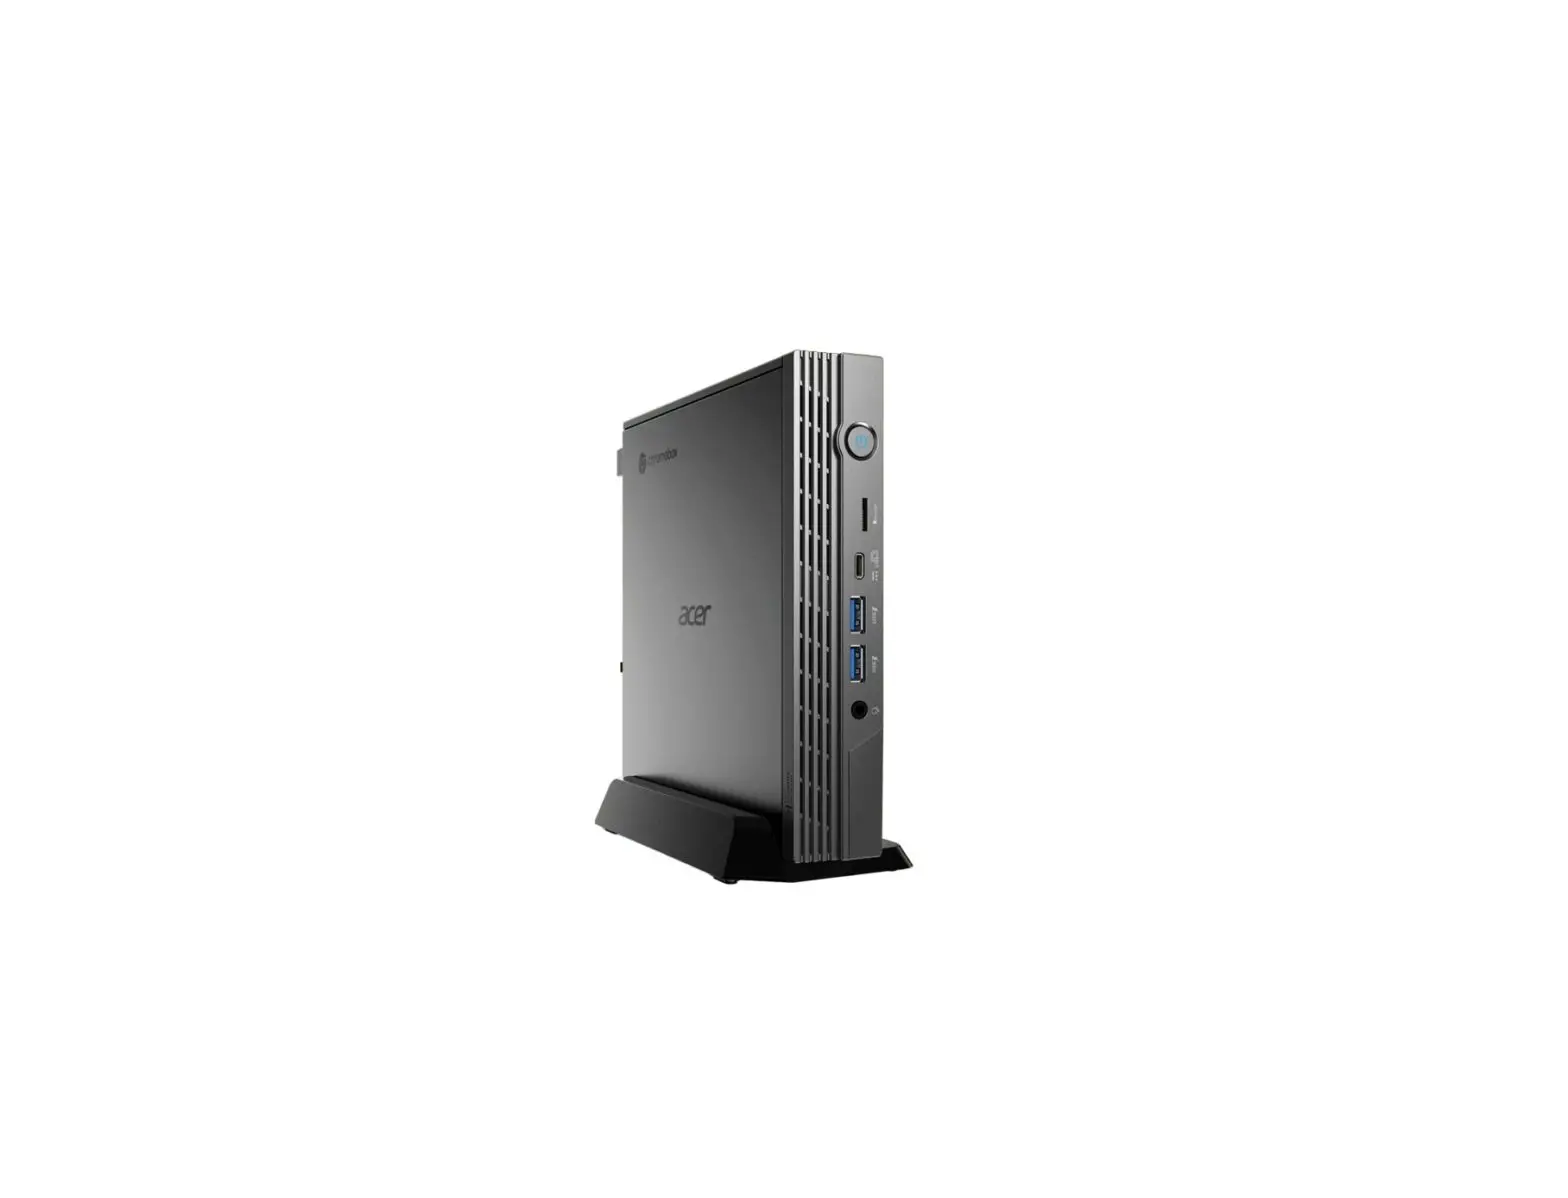
acer CXI5 Chromebox 24-Inch Add-In-One Monitor
![]() Important
Important
This manual contains proprietary information that is protected by copyright laws. The information contained in this manual is subject to change without notice. Images provided herein are for reference only and may contain information or features that do not apply to your computer. Acer Group shall not be liable for technical or editorial errors or omissions contained in this manual.
Register your Acer product
Go to www.acer.com/register-product, and sign in or sign up your Acer ID to register your product.
Once it is done, you can review it under “My Products” page.
Model number: _________________________________
Serial number: __________________________________
Date of purchase: _______________________________
Place of purchase: ______________________________
Google and Google Play are trademarks of Google LLC
 The Adopted Trademarks HDMI, HDMI High-Definition Multimedia Interface, and the HDMI Logo are trademarks or registered trademarks of HDMI Licensing Administrator, Inc. in the United States and other countries.
GETTING STARTED
Turn on your Chromebox
On the Chromebox, press the power button. A “Welcome” screen will appear when the Chromebox first boots up.
Select your language settings
Use the “Language” drop-down list to choose your default language setting. If there is more than one way to type in your language, you may be prompted to select a keyboard input method as well.
Connect to a network
Select a network from the “Connect to network” list to connect to the Internet. If network access is protected, you will need an access password to connect to it.
Accept the Terms of Service
Once connected to a network, accept the Terms of Service. Your Chromebox will then download any available system updates, so you automatically get the latest ChromeOS features.
First-time sign-in
Create a new Google Account
You can create a new Google Account if you don’t already have one. Select Create a Google Account to set up a new account. A Google Account gives you access to useful web services developed by Google, such as Gmail, Google Drive, and Google Calendar.
Browse as a guest
You can also use the Chromebox without a Google Account by selecting Browse as a Guest.
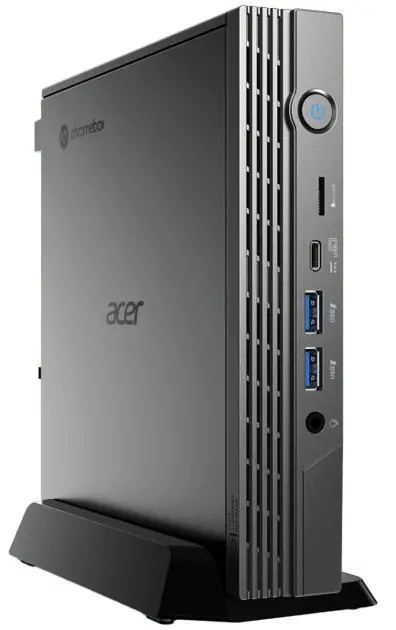
YOUR ACER CHROMEBOX TOUR
Front view
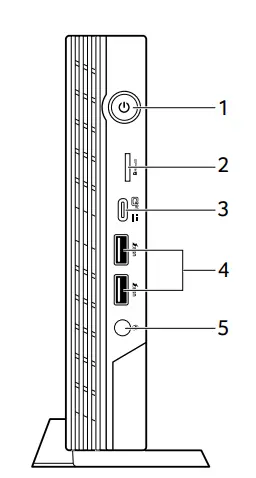
| # | Icon | Item | Description |
| 1 |  | Power button | Turns the computer on and off. |
| 2 |  | MicroSD card slot | Insert a microSD card into this slot |
| 3 |  | USB Type-C port | Connects to USB devices with a USB Type-C connector. Supports USB 4 Type-C, Gen 3 with transfer speeds up to 20 Gb/s. Supports Power Delivery/DisplayPort™ over USB-C™ |
| 4 |  | USB port with power-on/sleep charging | Connects to USB devices. |
| 5 |  | Headset/speaker jack | Connects to audio devices (e.g., speakers, headphones) or a headset with microphone. |
Rear view
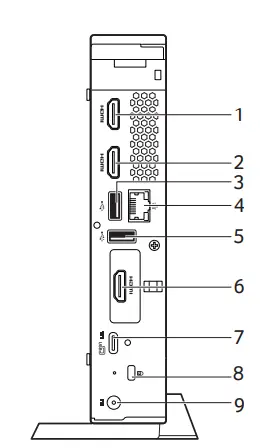
| # | Icon | Item | Description |
| 1 |  | HDMI port | Supports high-definition digital video connections. |
| 2 | | HDMI port | Supports high-definition digital video connections. |
| 3 |  | USB port | Connects to USB devices |
| 4 |  | Ethernet (RJ-45) port | Connects to an Ethernet 10/100/ 1000Mbps/2.5Gbps-based network. (Specifications vary depending on configurations.) |
| 5 |  | USB port | Connects to USB devices. |
| 6 | | HDMI port (optional) | Supports high-definition digital video connections. (Specifications vary depending on configurations.) |
DP | DisplayPort (optional) | Connects to a display device using the high-definition DisplayPort interface. (Specifications vary depending on configurations.) | |
| 7 |  | USB Type-C port | Connects to USB devices with a USB Type-C connector. Supports USB 4 Type-C, Gen 3 with transfer speeds up to 20 Gb/s. Supports Power Delivery / DisplayPort™ over USB-C™. |
| 8 |  | Kensington lock slot | Connects to a Kensington-compatible security lock. |
| 9 |  | DC-in jack | Connects to an AC adapter. |
ASSEMBLING THE VESA MOUNT
Your Chromebox can be fitted with a VESA-compatible mount that allows you to mount it behind a compatible monitor or TV.
![]() Note
Note
If a stand is currently installed to the VESA mounting holes on your monitor or TV, you will not be able to attach your Chromebox to the monitor or TV.
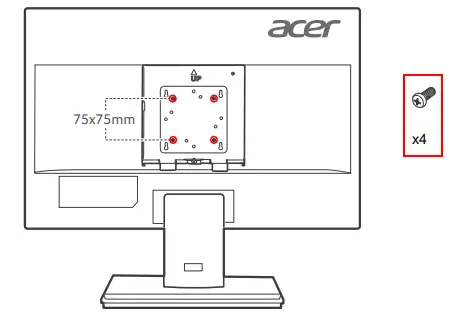
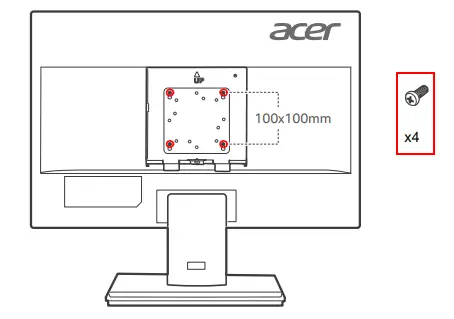
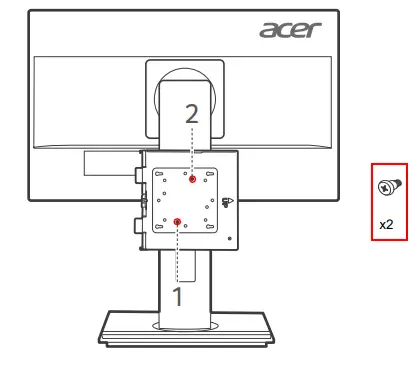
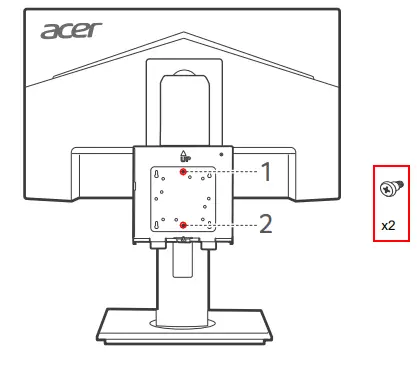
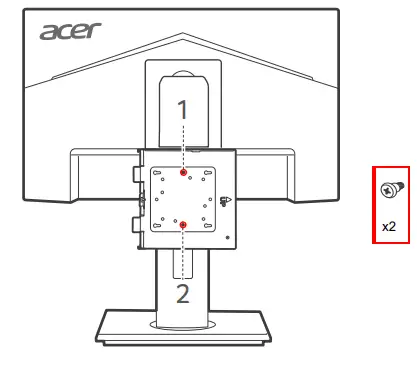
- Attach the mounting bracket to the back of your display using the supplied screws as illustrated.
• Acer monitor wth 75×75 mm or 100×100 mm square hole pattern.
OR
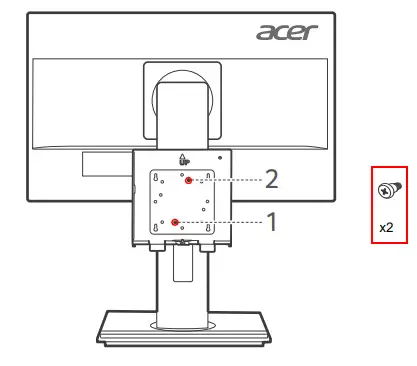
• Acer B6 series monitor
or
• Acer B7 series monitor
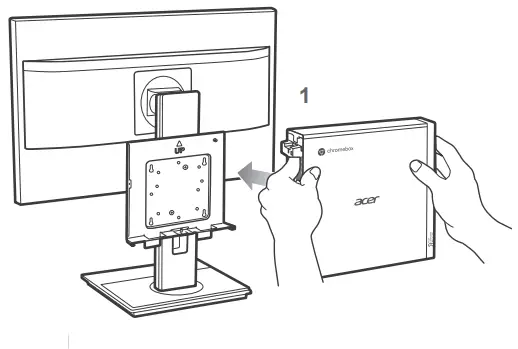
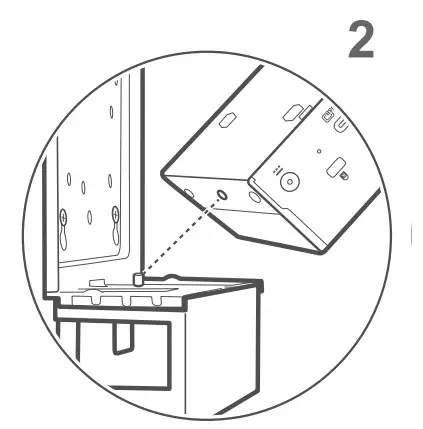
or - Orient the Chromebox as shown in image below (1).

- Align the Chromebox mounting hole with the mounting pin on the mounting bracket (2).

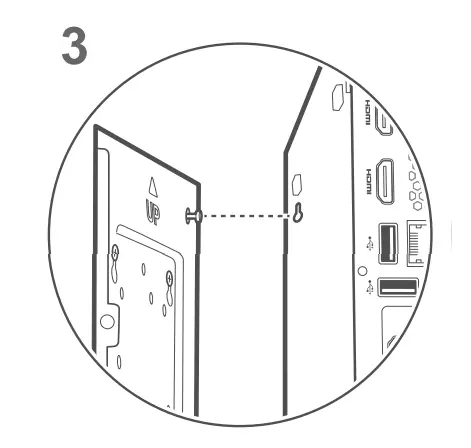
- Align and insert the screw on the VESA mounting bracket into the holes on the Chromebox (3).

- Push down the Chromebox to secure in place.
- Attach a screw into the screw hole on the mounting bracket and Chromebox.


![]() Note
Note
Depending on the package contents, you can use a hexagon or pan head screw to secure the Chromebox to the mounting bracket.
FREQUENTLY ASKED QUESTIONS
| Question | Answer |
| What software works on a Chromebox? | Chromeboxes use apps from the Google Play Store and on the web. There are apps to be productive, get creative, enjoy movies and shows, play games and more. |
| How do I get more apps? | You can get more apps from the Google Play Store or |
| Can I use Microsoft Office software? | Chromeboxes work with Microsoft® Office. Whether it’s Word, Excel® or PowerPoint®, you can easily find the apps on the web. |
| Where can I find my files? | All your files are stored in the Files app |
| How do I transfer my local files? | Transfer your local files using a compatible storage device. Your Chromebox works with most external storage devices (e.g.: USB thumb drives, removable hard drives). You can also upload your files, photos, and videos to Google Drive. After setting up your Chromebox with your Google Account, you’ll be able to access your files on Drive. |
| Why does my Chromebox need my Google Account information? | You’ll use your Google Account to sign in to your Chromebox. It is the same account you use for Google services such as Gmail and Drive. Your Chromebox uses your account information to automatically sign you into apps and services. |
| How do I set this up for my child? | If you want to set up parental controls for your child, it’s important that you sign in using your child’s personal Google Account. If they don’t already have one, you can create one during the sign-in process on your Chromebox. You will be able to add your child’s school account after you complete device onboarding. |
Get help or more information
| For information on: | Refer to: |
| Chromebox Help | Open the Explore app on |
| ChromeOS | google.com/support/chromebox/ |