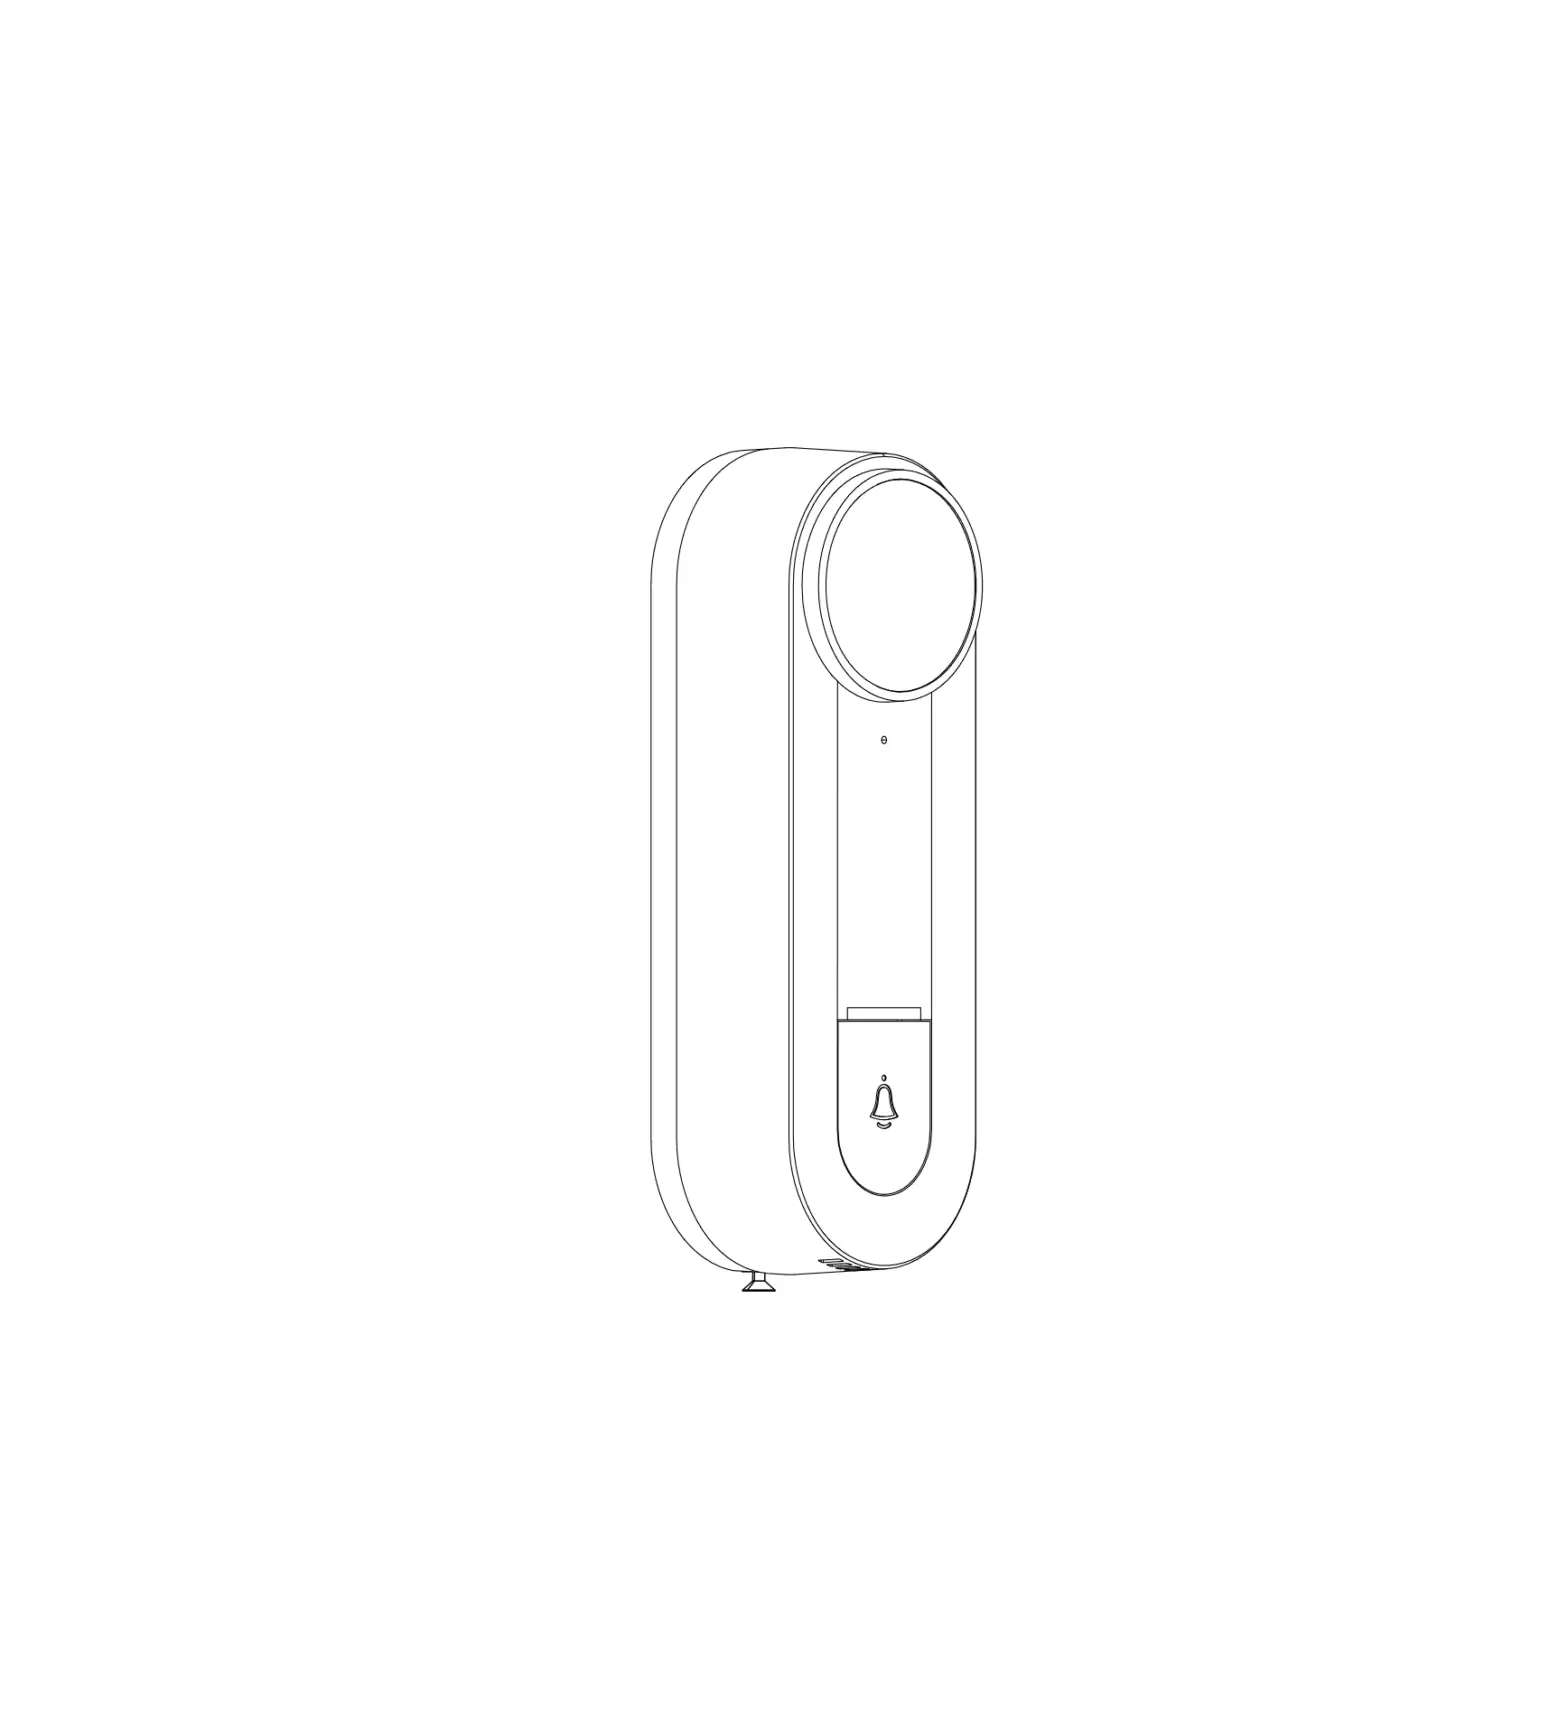
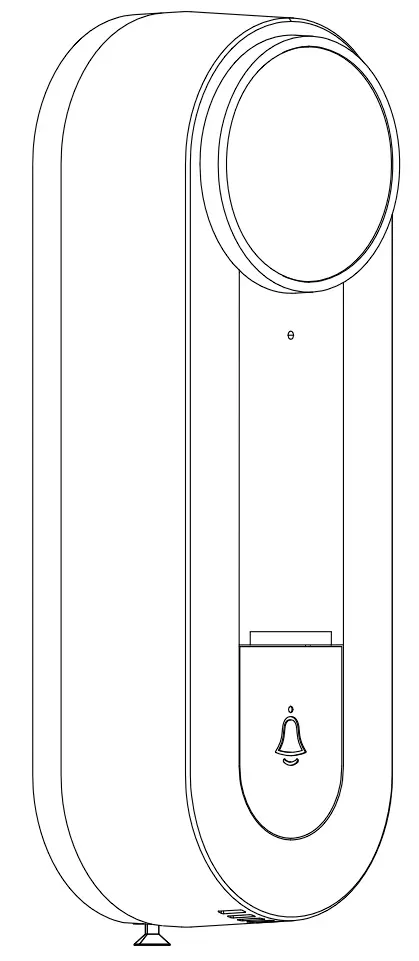
Hangzhou Meari Technology BELL22 Door Bell
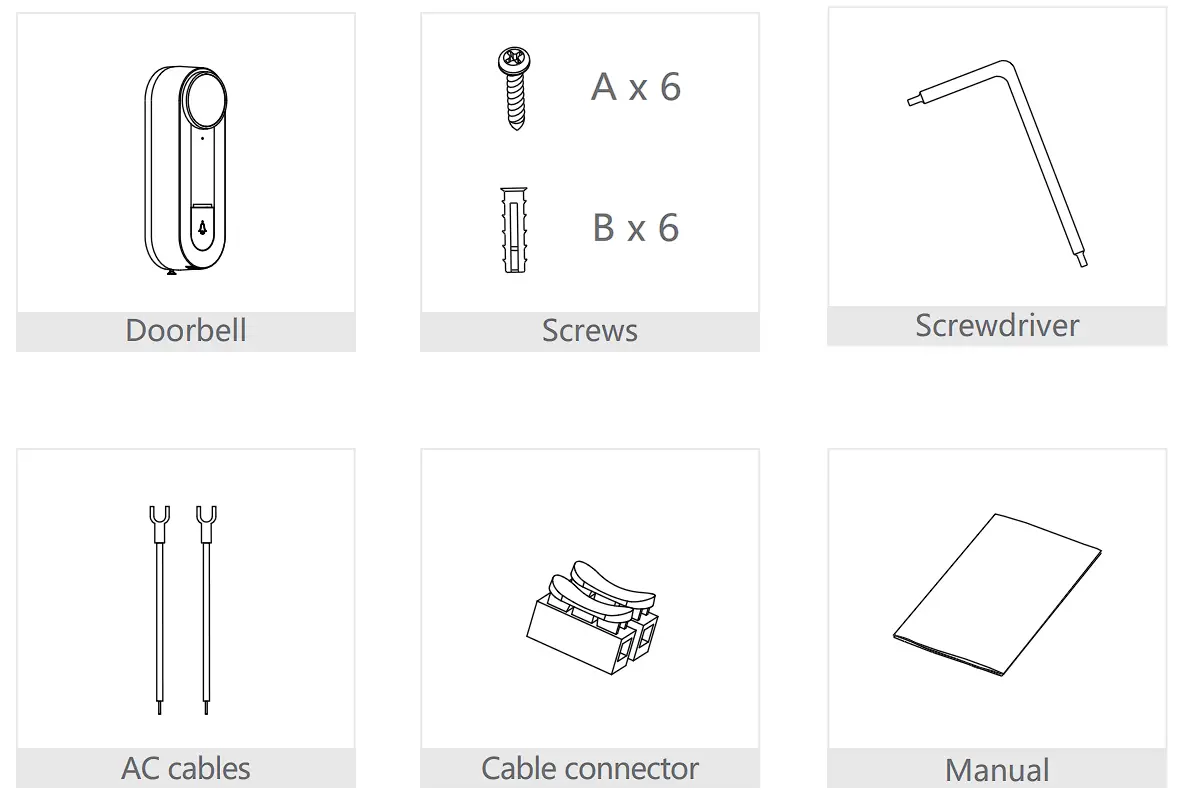
What’s in the box
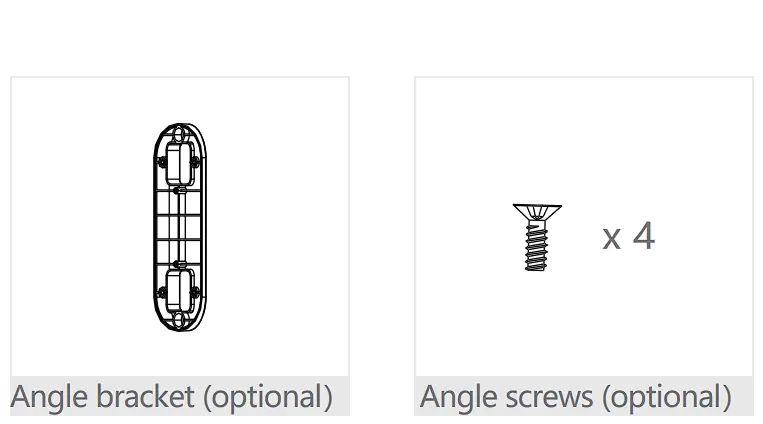
Please consult this checklist for all parts.
Discription
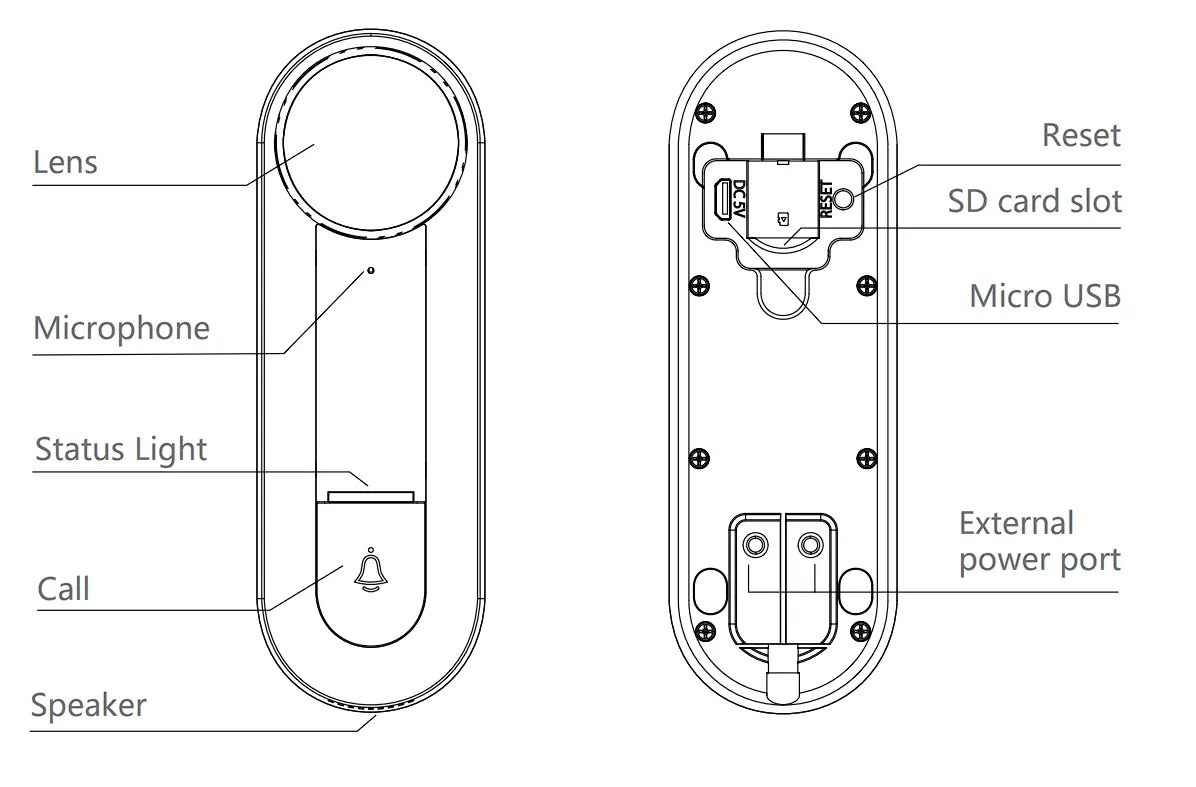
| Power Port | AC/DC 12~24V; DC 5V/1A |
| Call button | Press the button to activate the doorbell |
| Status light |
|
| Microphone | Capture sound for your video |
| SD card slot | Support local SD Card storage (Max.128G) |
| Reset | Press and hold on for 5 seconds with pin to reset the doorbell |
Installation
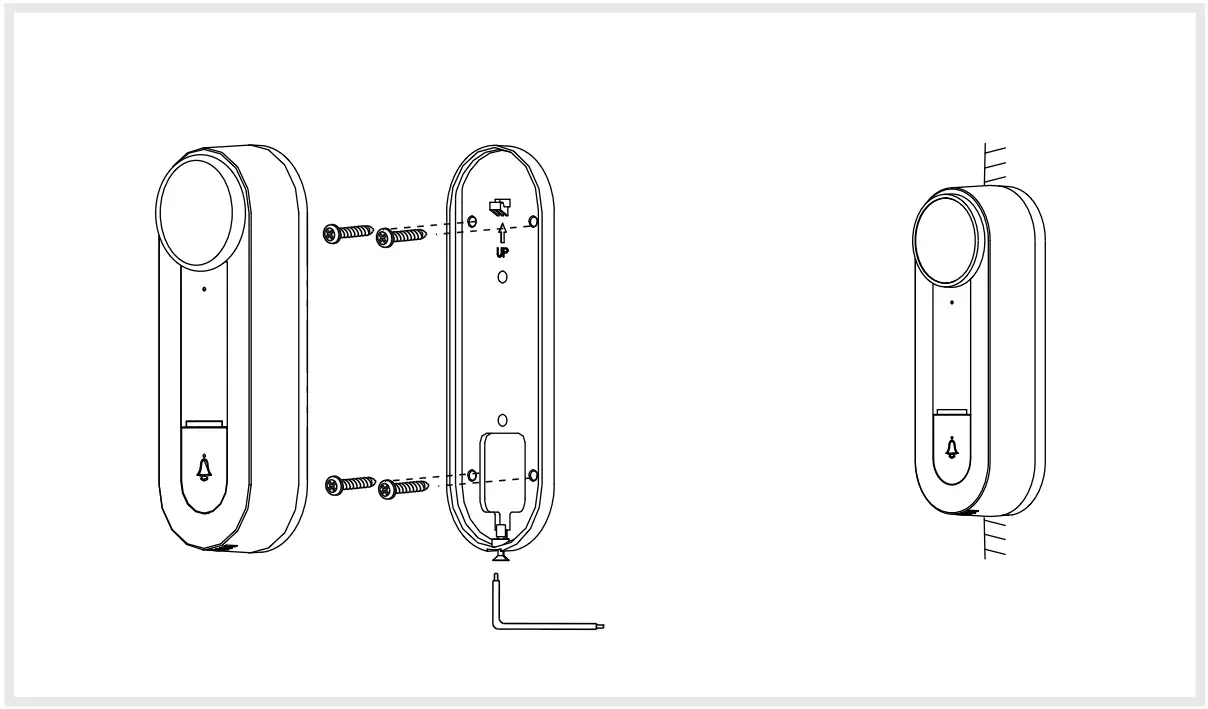
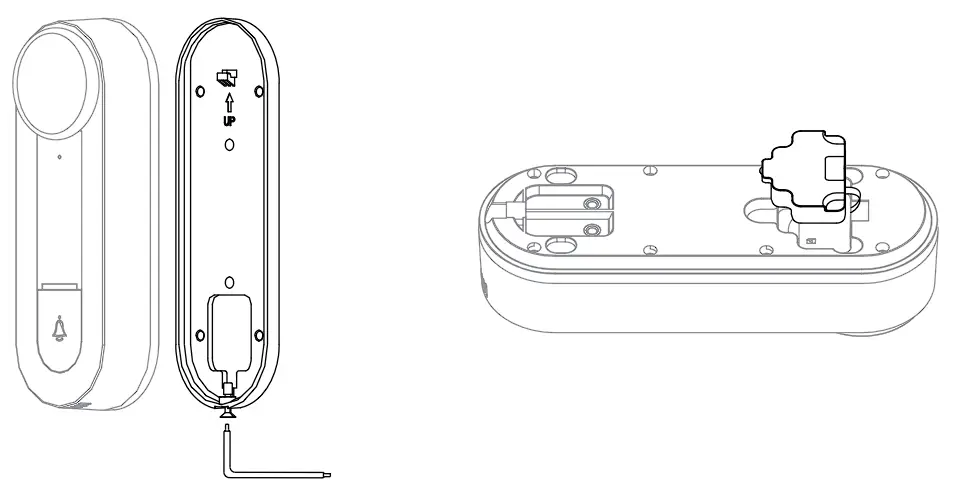
Mode 1 Bracket + Doorbell Installation
- Fix the bracket to the wall with the mounting screws
- Install the camera in the bracket and lock it with the screw

Mode 2 Angle Bracket+ Bracket + Doorbell Installation
- Fix the angle wall mount to the wall
- Fix the mounting bracket into the angle wall mount
- Install the camera in the bracket and lock it with the screw


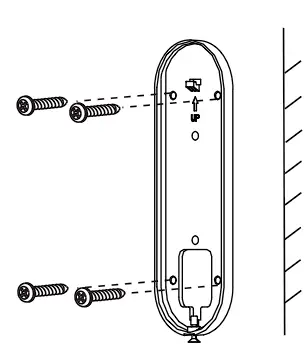
Mode 3 AC supply
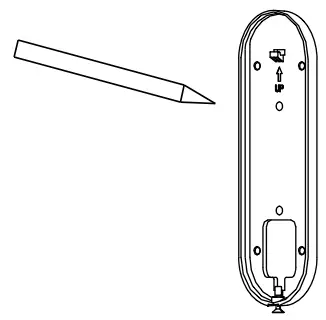
- Mark screws position\ with bracket

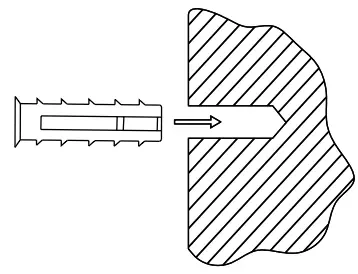
- Install expansion screws

- Fix bracket

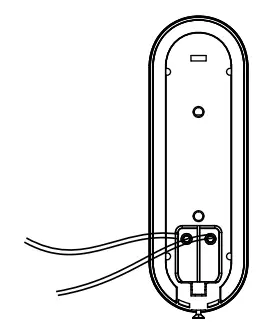
- Connect the AC supply to the external power port of camera

- Install the camera in the bracket and lock it with the screw
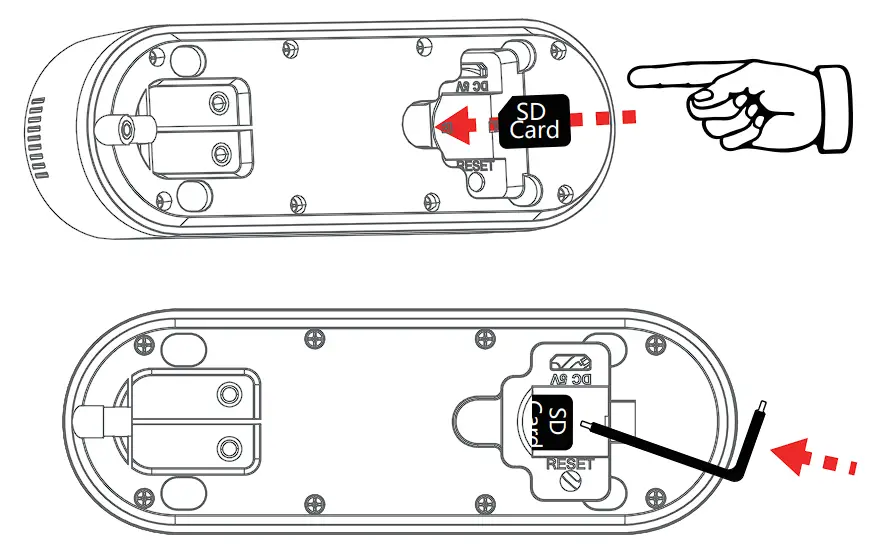
SD Card Installation
- Take apart the bracket with screwdriver, and then remove the silicone plug on the back of the bell. The SD card slot is on the back of the bell.

- Insert the SD card into the card slot and push it until it is stuck.
* When you want to change the SD card, push it again and then take it out. Then repeat the above steps to install a new SD card.
Connection
Download
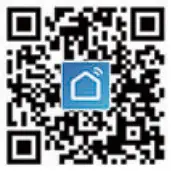
Smartlife or Tuya Smart is available for both iOS and Android operation system. Search the name “Smartlifern or “Tuya Smart” in App Store or Google Play, or scan the QR Code to download the App.
You can select the App according to needs.
Support

Download App (iOS & Android)
Set up router
Please note that the device supports the 2.4GHz WiFi (doesn’t support the 5GHz).
Please set the parameters of the router before connecting the WiFi network, and record the SSID and password of your WiFi.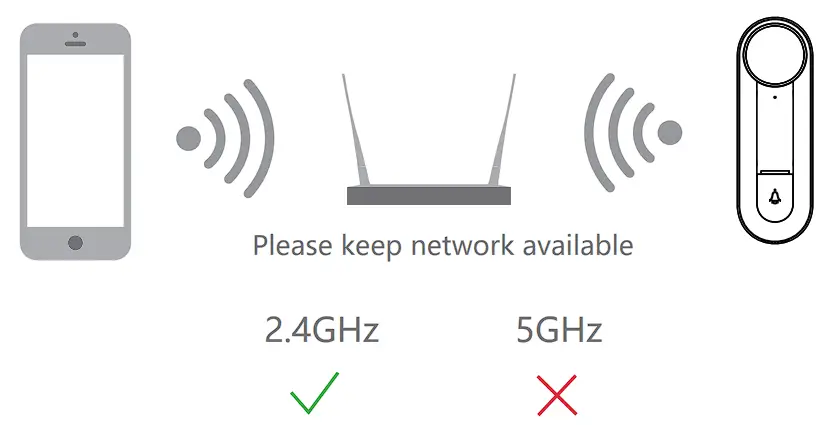
Registration
Registration process
Step 1 Open the App, click “Sign Up” to register.
If you already have an account, click “Log In” to log in.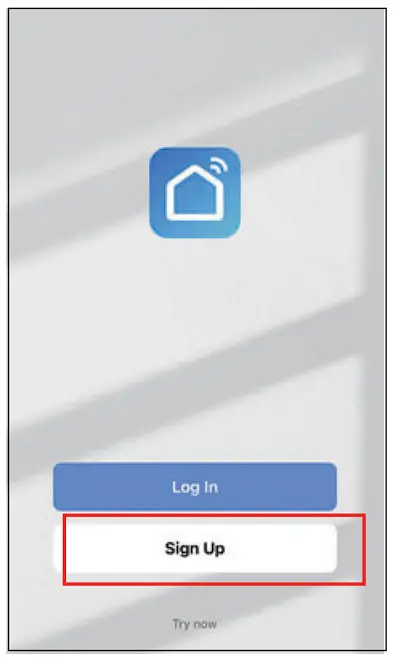
Step 2 Input a legal Email address and check the privacy agreement.
Then enter the verification code finish registration.
Registration
Step 3 Click “Me” “Home Management” “Create a home”, and you can customize the home name and related settings.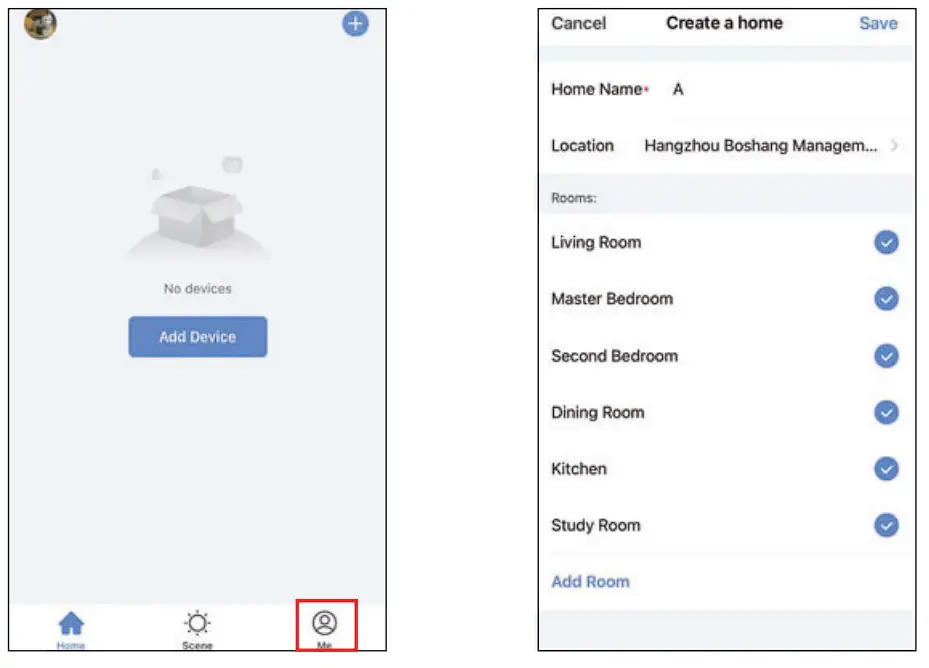
Device Adding
Step 4 Click “Add Device” and then select the corresponding device icon to add.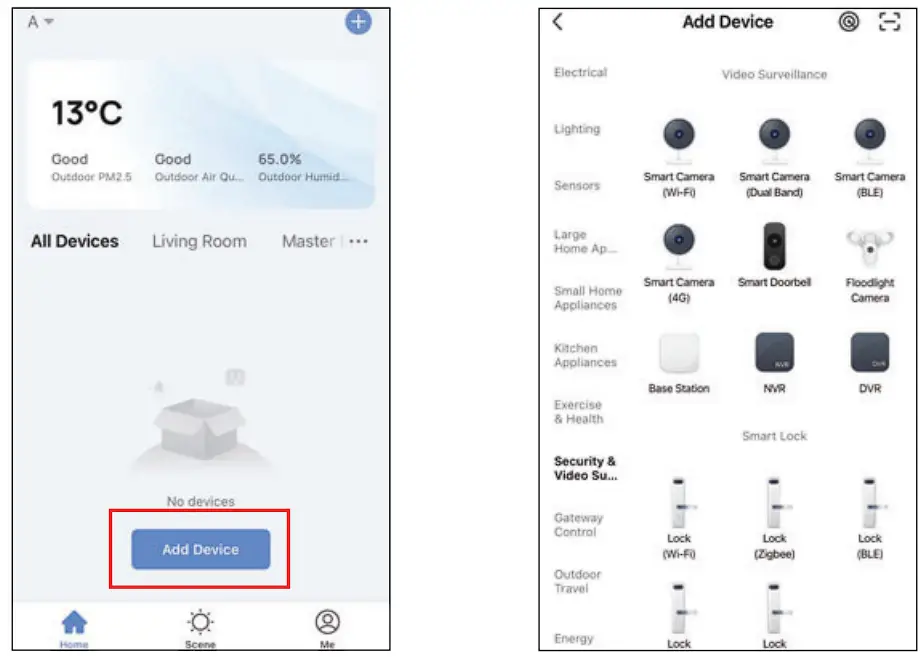
Step 5 Power on the device.
And then reset the camera and click “Next” on App.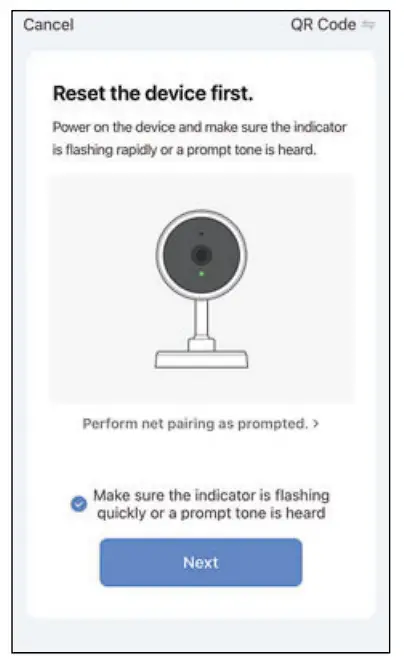
Step 6 Select the WiFi network and input the password, and then click “Next”. Make sure that your phone has connected to a fluent and steady WiFi already.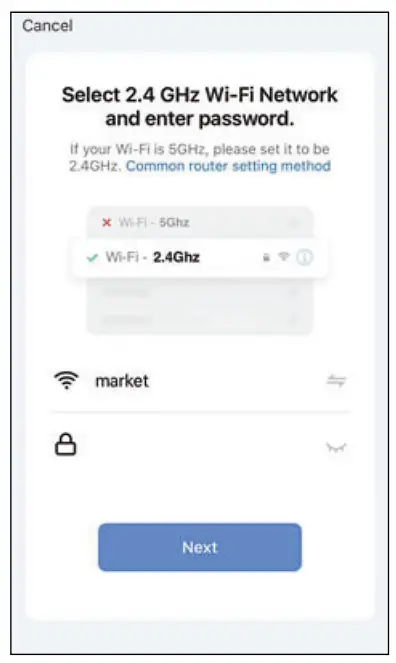
Note:
1) Camera only supports 2.4GHz WiFi network.
2) The number of bits in the SSID and passwords of the router should not exceed 24 digits.
Step 7 Scan the QR code in your phone with the camera and click “Next” when the camera comes out “dong dong dong”. And you can complete the configuration about 30s.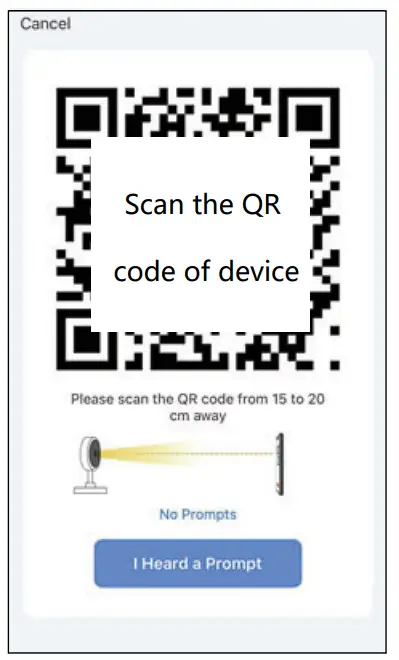
Step 8 When connecting, you should make sure your router, mobile and camera are as close as possible. And you can DIV device’s name and assign the room.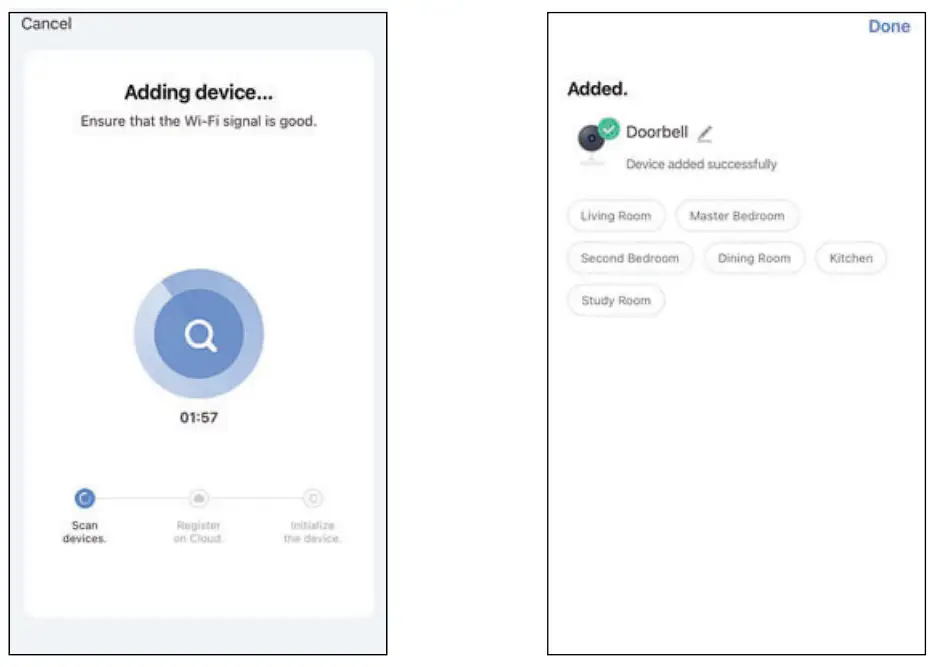
Step 9 In live view interface, click ” … “, and then you can set up the device common functions.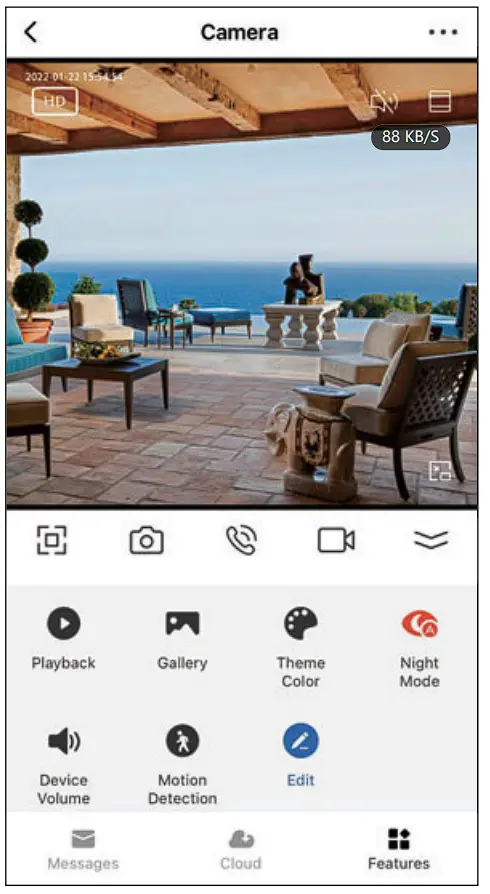
Functions
Full-duplex audio
When the visitor push the doorbell button, you will get a call. You can see and hear the visitor in your App from the doorbell if you answer.
Voice changer
Support to change the voice to a fake gender if you want to protect your privacy or safety.
Ultra-wide view
The doorbell support a wide viewing angle which can capture everything in details, and you can see people from head to toe and packages on theground when you enable the 1 :1 aspect ration function.
Motion detection
When the doorbell detects someone paying a visit, it sends an alarm message. And you can set up an area when you want to detect somewhere specified.
Shared device
The doorbell device can be shared with friends, and friends can also preview online. There is no limit to the number of sharing devices, but only 6 accounts are supported for online preview at the same time.
Record
Record every moment using high capacity SD card storage.
Daytime & Night
Powerful night vision means no interruptions, even in complete darkness.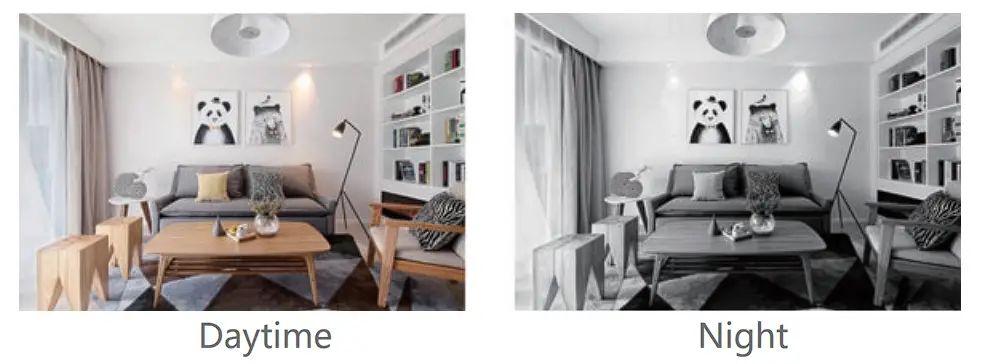
FCC Statement
Note:
This equipment has been tested and found to comply with the limits for a Class B digital device, pursuant to part 15 of the FCC Rules. These limits are designed to provide reasonable protection against harmful interference in a residential installation. This equipment generates, uses and can radiate radio frequency energy and, if not installed and used in accordance with the instructions, may cause harmful interference to radio communications. However, there is no guarantee that interference will not occur in a particular installation. If this equipment does cause harmful interference to radio or television reception, which can be determined by turning the equipment off and on, the user is encouraged to try to correct the interference by one or more of the following measures:
- Reorient or relocate the receiving antenna.
- Increase the separation between the equipment and receiver.
- Connect the equipment into an outlet on a circuit different from that to which the receiver is connected.
- Consult the dealer or an experienced radio/TV technician for help.
FCC Radiation Exposure Statement
This device complies with FCC radiation exposure limits set forth for an uncontrolled environment and it also complies with Part 15 of the FCC RF Rules. This equipment must be installed and operated in accordance with provided instructions and the antenna(s) used for this transmitter must be installed to provide a separation distance of at least 20 cm from all persons and must not be co-located or operating in conjunction with any other antenna or transmitter. End-users and installers must be provide with antenna installation instructions and consider removing the nocollocation statement.
FCC Statement
This device complies with Part 15 of the FCC Rules. Operation is subject to the following two conditions: (1) this device may not cause harmful interference, and (2) this device must accept any interference received, including interference that may cause undesired operation.
Caution!
Any changes or modifications not expressly approved by the party responsible for compliance could void the user’s authority to operate the equipment.
FAQ
A: This camera only supports 2.4GHz WiFi router, please make sure you are using a 2.4GHz WiFi router. And confirm the WiFi password again.
A: After adding a failure, it is recommended to restart the device or power off, and then try to add again.
A: Check whether the network is normal, you can place the camera close to the router, and if not, it is recommended to reset the device and add it again.
A: First remove and reset the device on the App and then configure the device again by the App.
A: Please confirm that the App has been running on the phone, and the relevant reminder function has been opened;Message notification and authority confirmation in the mobile phone system have been opened.
A: It is recommended to plug in SD card after power cut. Confirm whether the SD card is normally available and the format is FAT32. And the TF card can’t be identified when the Internet environment is not good.