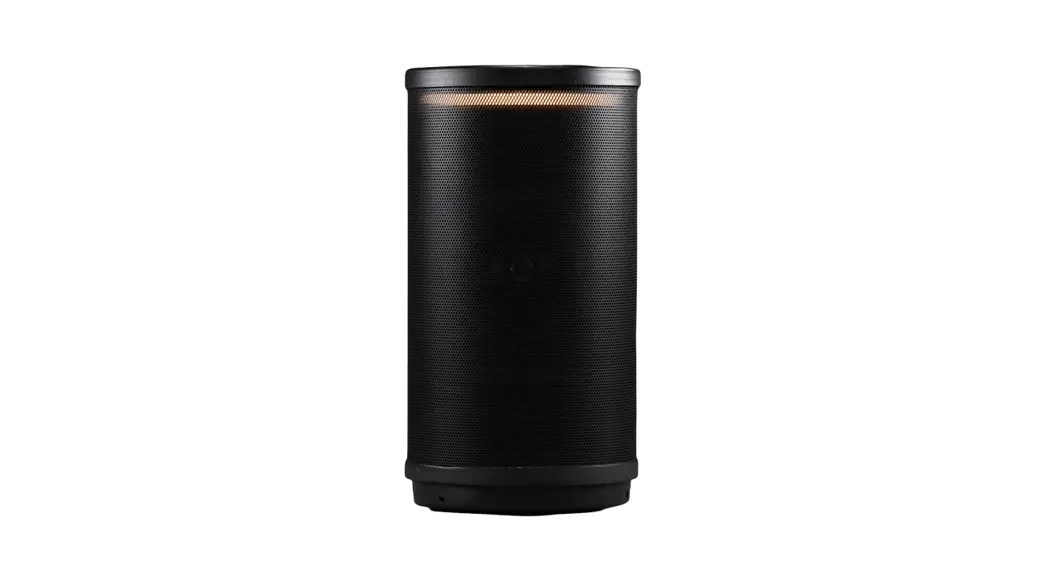
![]() TERRA LS50
TERRA LS50
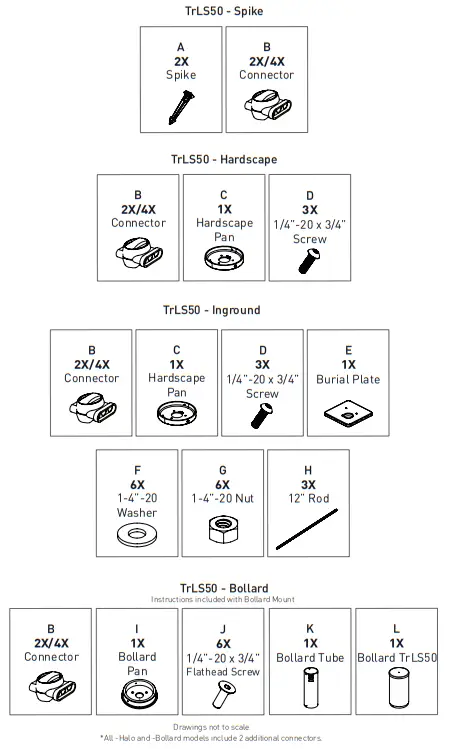
TrLS50-Spike / TrLS50-Hardscape
TrLS50-Inground / TrLS50-Bollard
INCLUDED HARDWARE
INSTALLATION TIPS
Choose an installation location free of physical obstructions behind or within the wall.
Working near electrical equipment and wires poses an electrocution hazard. Turn off nearby electrical circuits from the breaker. Use a non-contact voltage tester to confirm that the installation location is free of live electrical wires and equipment prior to cutting or drilling into the wall. Contact a qualified electrician before making any modifications to electrical wiring.
Determine the potential hazards of working with hand or power tools and take the appropriate safety precautions. Use personal protective equipment (PPE) as appropriate,
including, but not limited to: vision, hearing, and respiratory protection. Consult local building and/or electrical codes prior to installation of speakers, cabling, or electrical equipment. Cleaning- use a soft brush such as one for auto or boat care to brush off any materials (dirt or grass). Grille care – Please be careful and avoid contact with the grille during lawn care such as mowing or weed whacking to prevent damage to the grille.
Fig. A
Cable Routing
To utilize the provided waterproof connectors, strip each conductor ½”. Insert each bare wire into a hole of the connector. Press down on the top ‘button’ until a click is heard and the wires are secure.
Fig. B
Setting the 70v Transformer
Set the 70v transformer tap wattage prior to installation. The tap switch is located on the bottom of the speaker and can be turned with a small flathead screwdriver.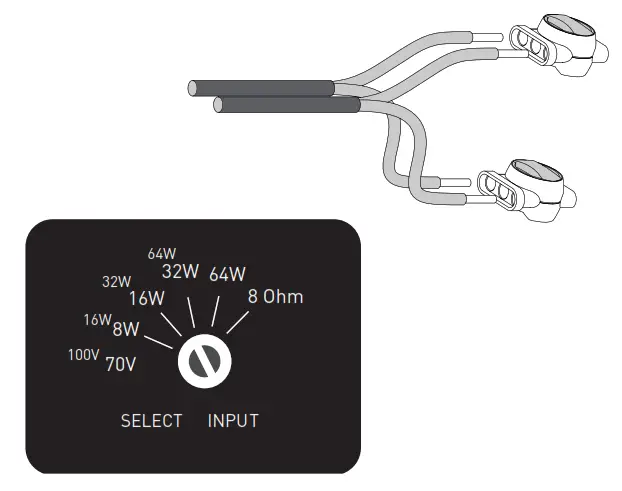
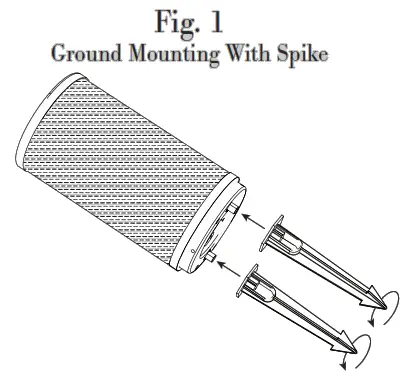
For ground mounting with TrLS50-Spike, screw spikes A into the bottom of the TrLS50. Proceed to figure 4.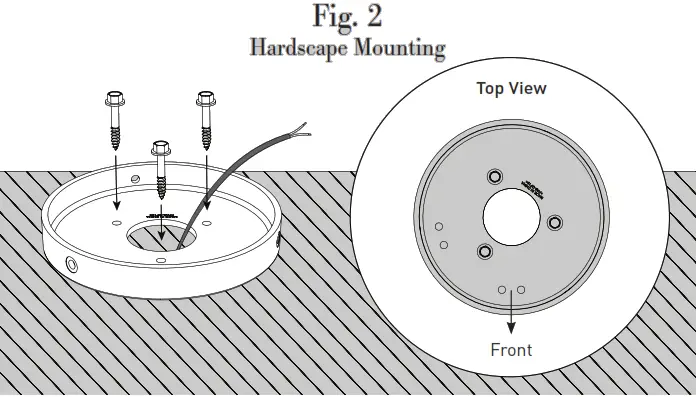
For hard surface mounting with TrLS50-Hardscape, install the hardscape pan C with appropriate anchors for the substrate. Speaker wires must be pulled through the center hole prior to installation. Any of the three mounting holes can be designated as the front of the speaker. Proceed to figure 4.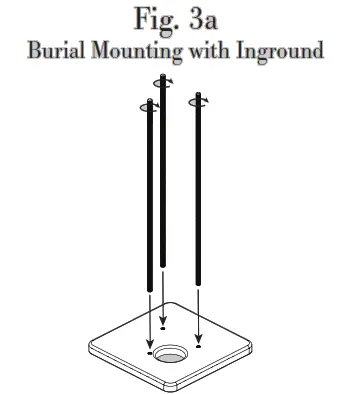 For burial mounting with TrLS50-Inground, begin by assembling the burial hardware. Screw the three threaded rods H into the burial plate E.
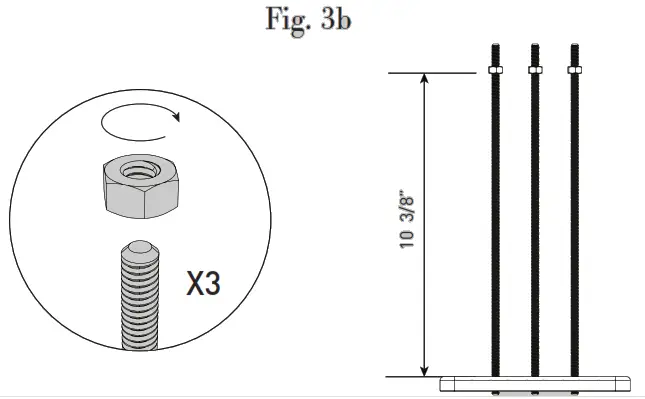
Thread one nut G onto each threaded rod until the distance between the nuts and the burial plate is 10 3/8”.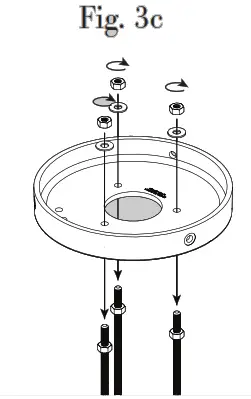 Place the hardscape pan C onto the threaded rods and secure it with three nuts G and three washers F . Tighten hardware.
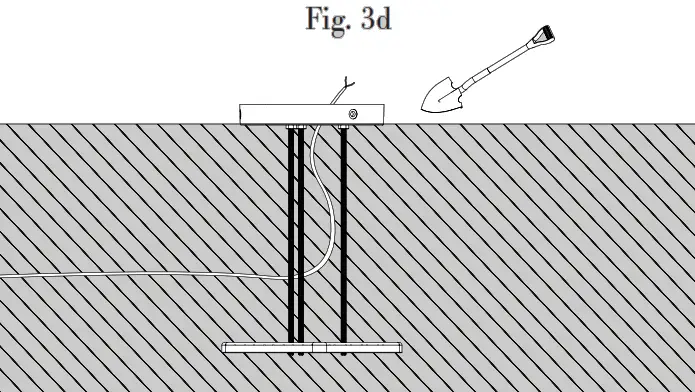 Pull any wiring through the center hole of the hardscape pan and bury the unit in the ground, backfilling with the material until only the hardscape pan is above the surface.
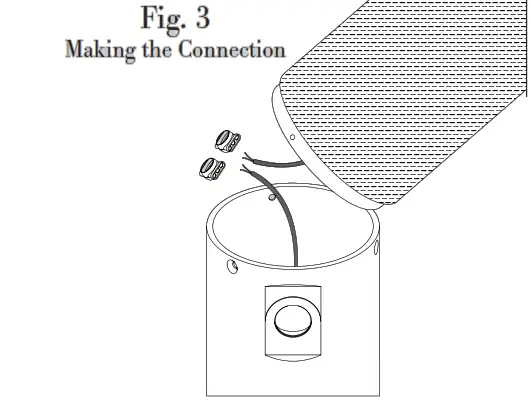
If necessary, trim excess cable both on the speaker and input side. Strip the individual wires and use the waterproof connectors B to connect the speaker and lighting (if a -Halo model), and daisy chain to the next speaker (if applicable).
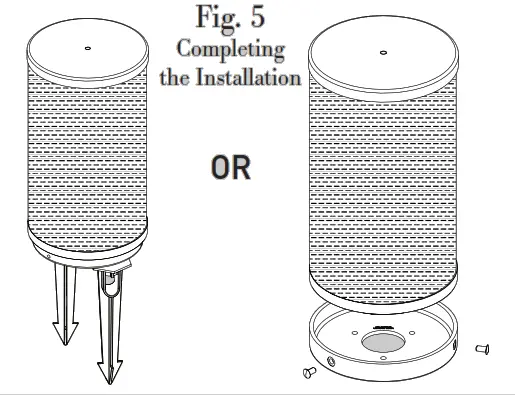
For TrLS50-Spike, hide the connectors under the speaker and press the spikes into the ground. For TrLS50-Hardscape or -Inground, tuck the connectors between the speaker and hardscape pan and attach the speaker using three button head screws D. 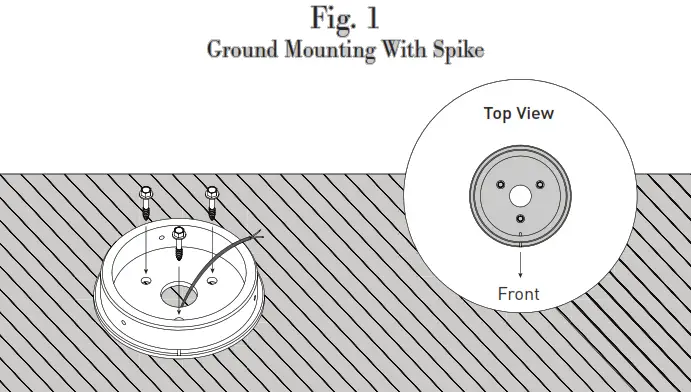
Screw the bollard panI to your hard surface with appropriate anchors for the substrate. Speaker wires must be pulled through the center hole prior to installation.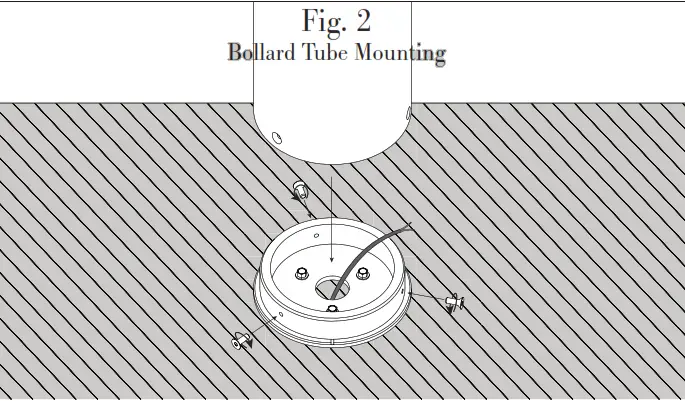
Fasten the bollard tube K to the bollard pan I using 3 of the provided 1/4-20 flathead screws J. Allow speaker wires to rest in the tube for now.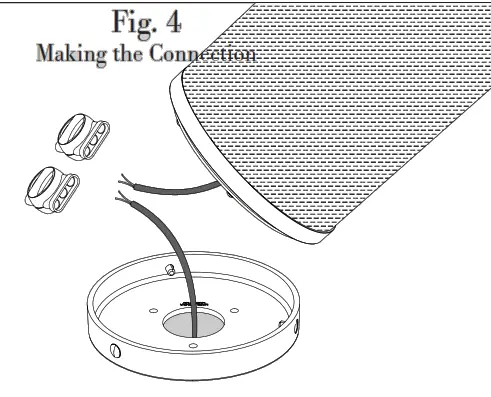 If necessary, trim excess cable both on the speaker and input side. Strip the individual wires and use the waterproof connector B to connect the speaker and halo lighting. Use an additional connector for path lighting (if applicable). Daisy chains to the next speaker (if applicable). Test your connection now.
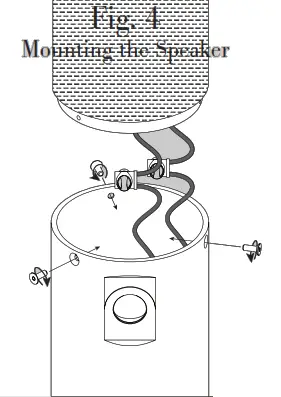
Position the TrLS50 speaker L on top of the bollard tube K and mount the speaker to the bollard tube using the remaining 1/4-20 flathead screws J.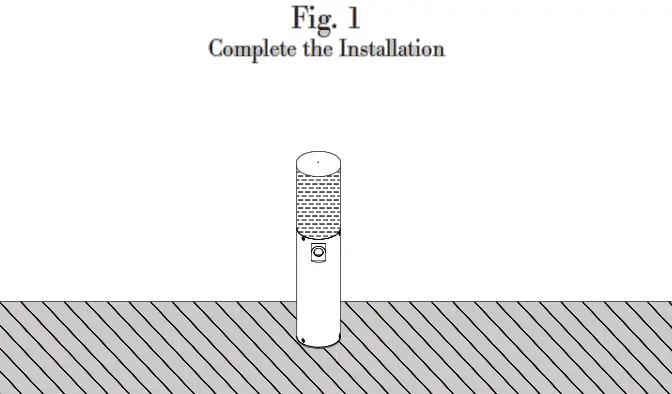
Now you’re ready to enjoy your favorite music outdoors.
For assistance call (888) 213-5015 or visit www.leonspeakers.com


