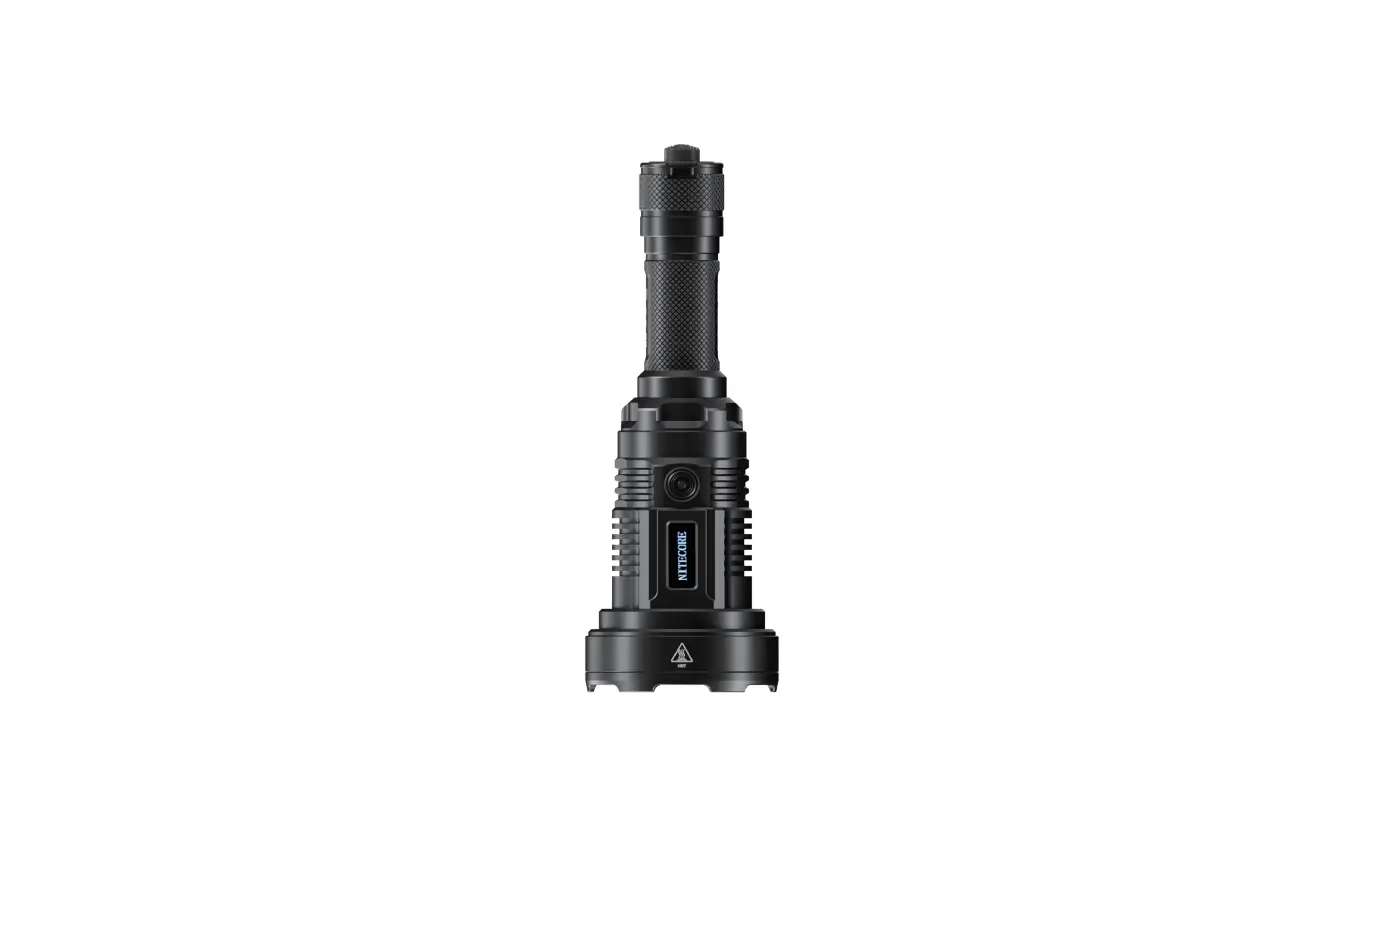
NITECORE P35i Ultra Long Distance Dual Beam Flashlight User Guide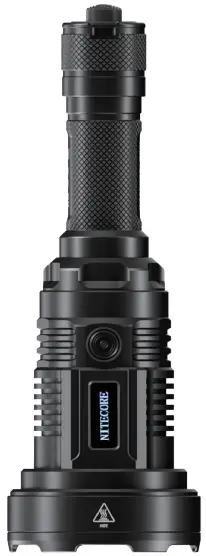
Features
- Ultra long distance dual beam LEP flashlight
- Equipped with the spotlight and floodlight with a dual-lens system to provide a max output of 3,000 lumens
- The spotlight uses a Class 1 LEP light with a max output of 410 lumens
- The floodlight uses 6 x CREE XP-G3 LEDs with a max output of 3,000 lumens
- Max peak beam intensity of 678,000cd and max throw of 1,650 meters
- Powered by a 21700 i Series Battery while compatible with CR123 batteries, to provide a runtime up to 60 hours
- Multifunctional OLED real-time display for brightness, throw distance, battery voltage, runtime, etc.
- Intelligent Li-ion battery charging circuit with a USB-C charging port
- Highly efficient constant current circuit
- Incorporated Advanced Temperature Regulation (ATR) module (Patent No. ZL201510534543.6)
- NITECORE 21700i Li-ion battery (NL2150HPi 5,000mAh) and Remote Switch RSW2i (Cable Part) included
- Optical lenses with double-sided scratch resistant coating
- Constructed from aero grade aluminum alloy
- HA III military grade hard-anodized finish
- Rating in accordance with IP68 (2 meters submersible)
- 1 meter impact resistance
Specifications
Length: 186.9mm (7.36″)
Head Diameter: 65mm (2.56″)
Tube Diameter: 25.4mm (1″)
Tail Diameter: 28mm (1.10″)
Weight: 296.6g (10.46 oz)
Accessories
NITECORE 21700i Rechargeable Li-ion Battery (NL2150HPi
5,000mAh), Remote Switch RSW2i (Cable Part), USB-C Charging
Cable, CR123 Battery Magazine, Spare O-ring, Holster
Battery Options
The P35i is only compatible with NITECORE 21700 i Series
batteries with an output over 15A and CR123/RCR123 batteries.
Note:
- DO NOT attempt to use the P35i to charge CR123/RCR123 batteries.
- The P35i is NOT compatible with conventional 21700 batteries.
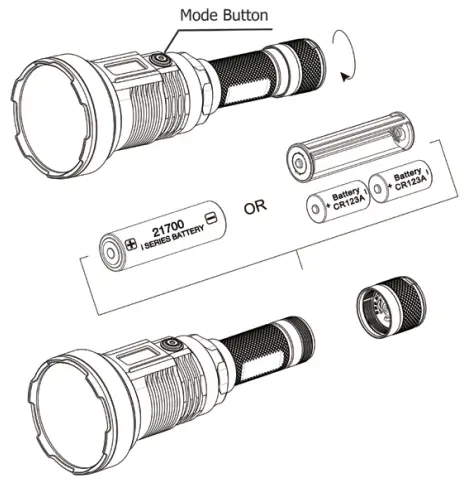
Battery Installation / Removal
Charging Function
Remote Switch
Technical Data
Max Output: <0.39mW @440~455nm wavelength
| FL1 STANDARD | Flood Mode | Spot Mode | Mix Mode | ||||||||||
| TURBO | HIGH | MID | LOW | ULTRALOW | TURBO | HIGH | MID | LOW | ULTRALOW | HIGH | MID | LOW | |
| *3,000 Lumens | 1,000 Lumens | 300 Lumens | 70 Lumens | 10 Lumens | 410 Lumens | 200 Lumens | 130 Lumens | 65 Lumens | 25 Lumens | 3,000 Lumens | 420 Lumens | 130 Lumens | |
| 45min | 2h | 6h 45min | 28h | 60h | 2h 15min | 3h | 4h 30min | 8h | 12h | 45min | 2h 45min | 6h | |
| 200m | 120m | 70m | 35m | 10m | 1,650m | 1,200m | 900m | 650m | 350m | 1,650m | 900m | 640m | |
| 10,000cd | 3,600cd | 1,200cd | 270cd | 40cd | 678,000cd | 370,000cd | 202,000cd | 107,000cd | 30,200cd | 678,000cd | 202,000cd | 103,000cd | |
| 1m (Impact Resistance) | |||||||||||||
| IP68, 2m (Waterproof and Submersible) | |||||||||||||
Note: The stated data is measured in accordance with the international flashlight testing standards ANSI/PLATO FL1-2019, using 1 x 21700 Li-ion battery (5,000mAh) under laboratory conditions. The data may vary in real world use due to different battery usage or environmental conditions.
- The runtime of TURBO is tested without the temperature regulation.
- TURBO Availability: The TURBO level of 3,000 lumens is only accessible when using a 21700 i Series battery with an output over 15A. The TURBO levels and the HIGH level of Mix Mode are inaccessible when using CR123/RCR123 batteries.
Operating Instructions
Battery Installation / Removal
As illustrated, after unscrewing the battery cap, insert / remove the battery(s) and screw to tighten the battery cap.
Warnings:
- Ensure the battery(s) is/are inserted with the positive end towards the head. The product will not work if the battery(s) is/are incorrectly inserted.
- CAUTION! Possible dangerous radiation! Don’t look into the light! May be dangerous for your eyes.
- When the power level is low, please stop using the product and replace or recharge the battery to prevent damage to the battery.
- When the product is kept in a backpack or left unused for prolonged time, please remove all batteries to prevent accidental activation or battery leakage.
- DO NOT submerge the light into any liquid when it is hot. Doing so may cause irreparable damage to the light due to the difference of air pressure inside and outside of the tube.
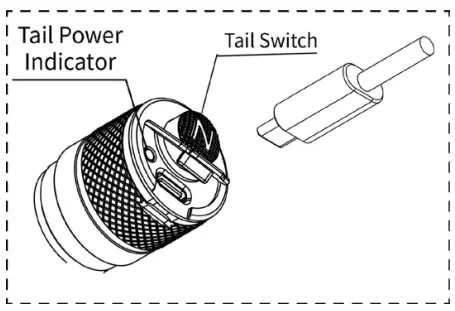
Charging Function
The P35i is equipped with an intelligent charging system. As illustrated, after inserting the battery and tightening the tail cap, use the USB cable to connect an external power supply (e.g. a USB adapter or other USB charging devices) to the charging port to begin the charging process.
- During the charging process, the tail power indicator will flash slowly to inform the user and the screen will show the battery charging status.
- When the battery is fully charged, the P35i will cease the charging process and the tail power indicator will become steadily turned on to inform the user. The screen will show that the process bar is full.
- When the charging status is abnormal (e.g. the battery is broken/inserted incorrectly), the P35i will cease the charging process and the tail power indicator will flash quickly to inform the user.
- The charging time for a 21700 Li-ion battery (5,000mAh) is approx. 4 hours. (Charged via the 5V/2A adapter)
Tactical Momentary Illumination
Half press and hold the Tail Switch to turn on the light momentarily. Release to turn it off.
On / Off
On: When the light is off, press the Tail Switch until a click sound is heard to turn it on.
Off: When the light is on, press the Tail Switch until a click sound is heard to turn it off.
Direct Access to TURBO
When the light is on, long press the Mode Button to access TURBO directly. Short press the Mode Button to return to the previous brightness level, or it will automatically return to the previous brightness level if there is no operation in 30 seconds.
User Mode Selection
- The P35i provides 3 user modes: Flood Mode, Spot Mode and Mix Mode.
- When the light is off, click the Tail Switch while holding the Mode Button to cycle through the following modes: Spot Mode – Flood Mode – Mix Mode. Release to select the desireduser mode.
Note: The P35i has a memory function. When reactivated, it will automatically access the previous memorized brightness level.
Flood Mode / Spot Mode
Brightness Levels
When the light is on, short press the Mode Button to cycle through the following brightness levels: ULTRALOW – LOW – MID – HIGH – TURBO.
Mix Mode
Brightness Levels
When the light is on, short press the Mode Button to cycle through the following brightness levels: LOW – MID – HIGH – PRESET.
PRESET Level Setting
When the light is off, long press the Mode Button for 5 seconds to access the PRESET level setting mode.
- Beam Distance Setting: Short press the Mode Button to cycle in the following order: 350m – 650m – 900m – 1200m – 1650m. Long press the Mode Button to select the desired beam distance and switch to the brightness setting.
- Brightness Setting: Short press the Mode Button to cycle in the following order: 10 Lumens – 70 Lumens – 300 Lumens
– 1000 Lumens. Long press the Mode Button to select the desired brightness and exit the setting mode.
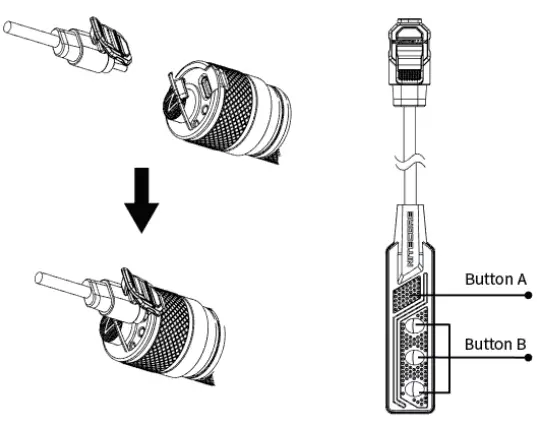
Remote Switch
As Illustrated, plug in the cable part of the RSW2i to the USB port and clip to fasten the cable on the tail cap.
Tactical Momentary Illumination
When the light is off, press and hold Button B to turn it on momentarily. Release to turn it off.
On / Off
On: When the light is off, short press Button A to turn it on.
Off: When the light is on, short press Button A to turn it off.
Brightness Levels
When the light is on, short press Button B to cycle through the brightness levels.
STROBE READY™
- When the light is off, press and hold Button A to access the STROBE Mode. Release to turn it off.
- When the light is on, press and hold Button A to access the STROBE Mode. Release to return to the previous status.
OLED Real-time Display
The multifunctional OLED display can show the brightness, throw distance, battery voltage, runtime and more in real time.
The screen will automatically go off if there is no operation in 30 seconds. After the screen goes off, short pressing the Mode Button can reactivate the screen.
ATR
(Advanced Temperature Regulation)
The integrated ATR technology regulates the output of the P35i according to the working condition and ambient environment to maintain the optimal performance.
Changing Batteries
The batteries should be replaced or recharged when the output appears to be dim or the flashlight becomes unresponsive due to low power.
Maintenance
Every 6 months, threads should be wiped with a clean cloth followed by a thin coating of silicon-based lubricant.
Warnings
- CAUTION! Possible dangerous radiation! Don’t look into the light! May be dangerous for your eyes.
- Please keep the product out of reach of children. Use of the product by kids must be under supervision.
- DO NOT shine the product on the skin for a long time to avoid skin burns.
- DO NOT look directly into the central hotspot at a close distance to avoid damage to your eyes.
RISK GROUP 3
CAUTION Possibly hazardous optical radiation emitted from this product. Do not stare at operating lamp. May be harmful to the eyes.


