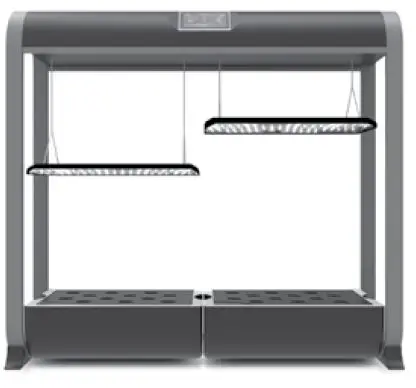
AeroGarden Farm 24Basic Salad Bar Seed Pod Kit
Assembly Guide
Simple Steps to Get Your Farm Up and Growing
Farm 24Basic | Farm 24Plus | Farm 24XL
All required hardware is included. Save this document for future reference.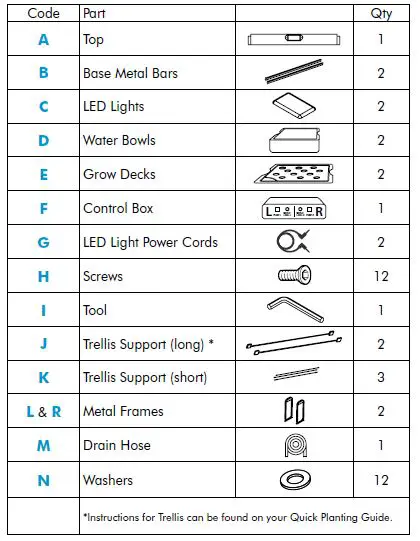
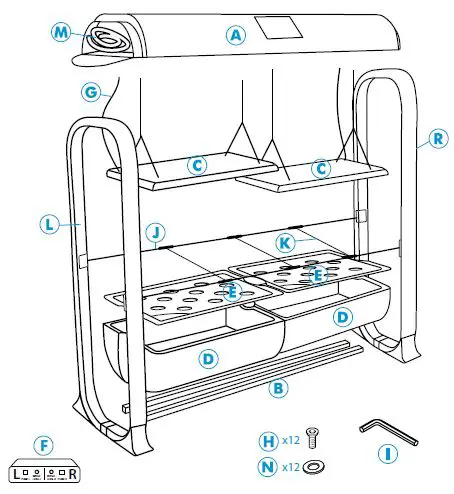
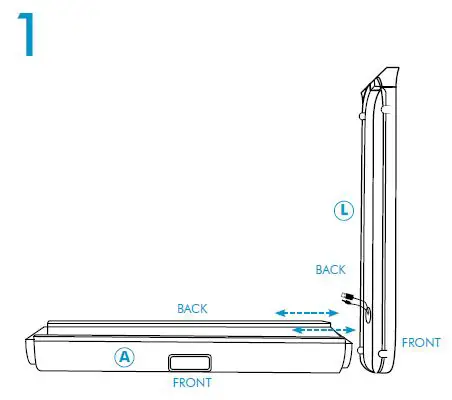
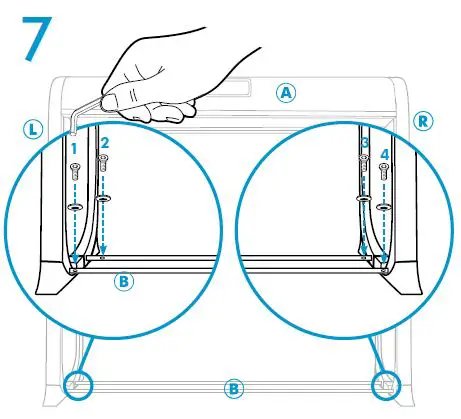
- With Top A upside down and laid over a towel or cloth, to prevent scratching, insert Metal Frame L into notches.
Note: Touchscreen is the front and cords from Metal Frame L should be facing toward the back of the Top A.
CAUTION: DO NOT let Top fall over before securing screws in Metal Frame.
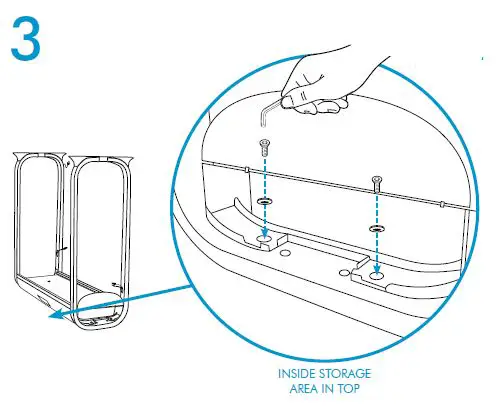
- Secure underneath of Top A to Metal Frame L using Tool I to tighten two (2) Washers N and two (2) Screws H.
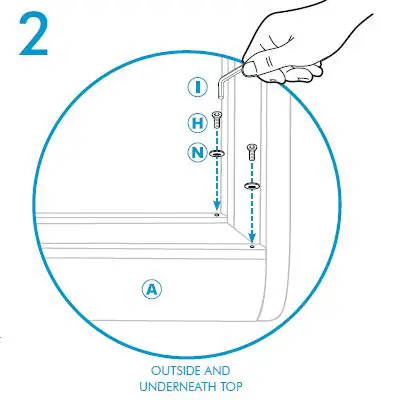
- Then, secure Top A from inside the storage compartment to Metal Frame L using Tool I to tighten, two (2) Washers N and two (2) Screws H.

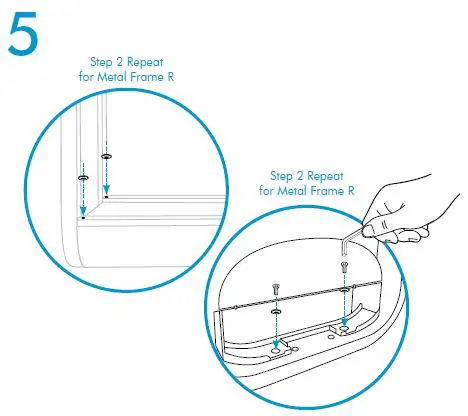
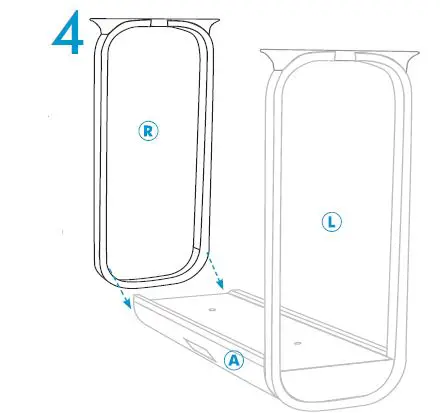
- Carefully insert Metal Frame R into Top A notches.
CAUTION: DO NOT let Top fall over before securing screws in Metal Frame.
- Repeat Steps 2 & 3 for Metal Frame R.
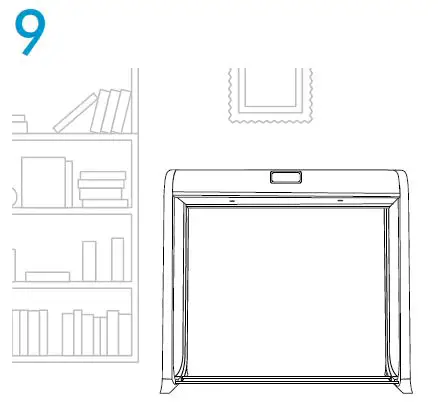
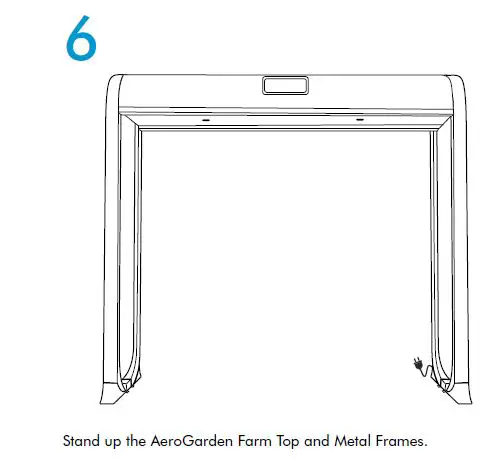
- Stand up the AeroGarden Farm Top and Metal Frames.

- Attach the two Base Metal Bars B at the bottom and in between Metal Frames L and R. Use Tool I to tighten four (4) Washers N and four (4) Screws H.
Note: You may need to pull frames closer in order to fit the bars. Hand tighten all screws on Top A and Metal Frames L and R after you finish installing the Base Metal Bars B.
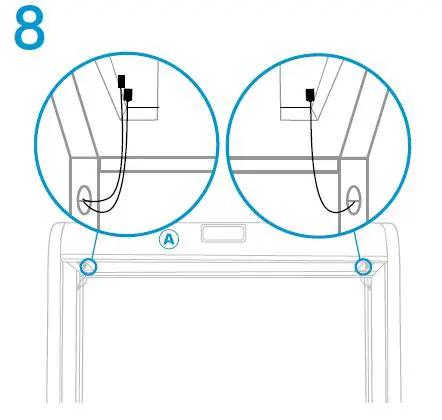
- Connect the Power Cords from Metal Frames L & R into the corresponding outlets inside Top A.

- Move AeroGarden Farm to its final location before continuing.
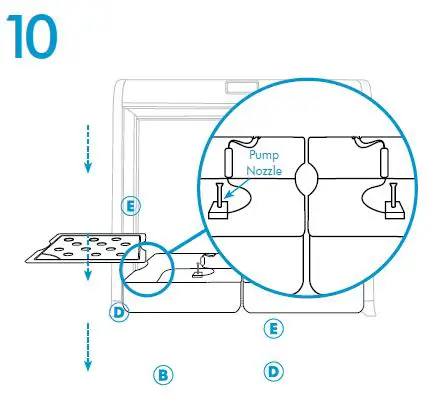
- Place Water Bowls D over Base Metal Bars B and place Grow Deck E over each Water Bowl D (as shown above).
Make sure the 2 cords (pump and water indicator) coming from inside Water Bowls D are properly positioned out of the back side in the Water Bowl notches. Make sure each Grow Deck E is sitting securely over the long pump nozzle.
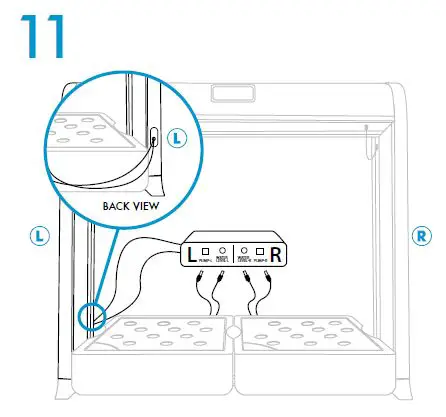
- With the Control Box F facing toward you, connect the Power Cords coming from Metal Frame L to the left side of the Control Box F. Connect both the left pump and water indicator to the Left half of the Control Box. Repeat for the right. Once all cords are plugged in, let the Control Box F Position behind Water Bowl when done.

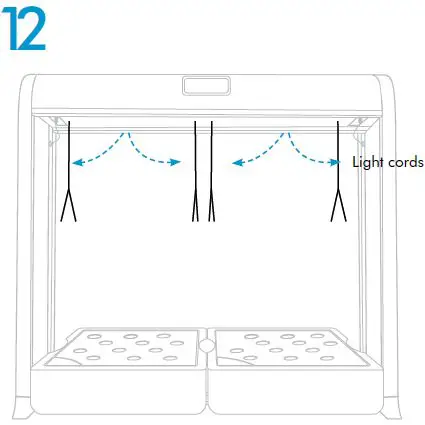
- Release Light hanging cords from underneath Top A.

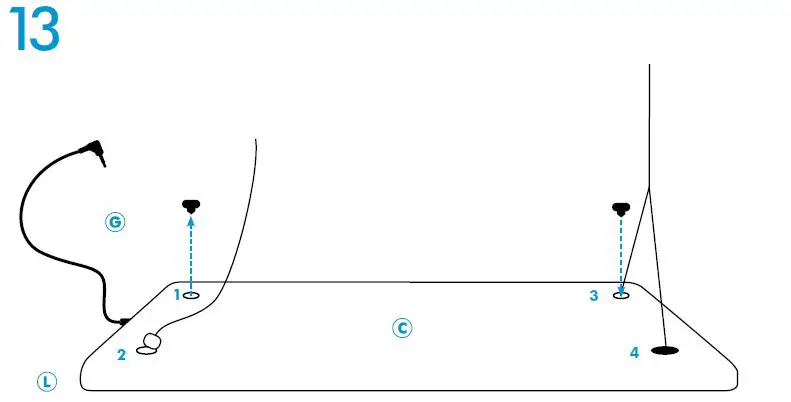
- (1) With the LED Light C facing down and Power Plug facing out towards the Metal Frame, remove rubber plugs from each top corner one at the time.
(2) Insert one of the small metal endings from the Light hanging cords into the small opening.
(3) Place the rubber plug back into its hole, holding hanging cord in place.
(4) Repeat for all 4 holes. Repeat on the other LED Light C.
Remember: Power plugs need to be facing out towards the closest Metal Frame.
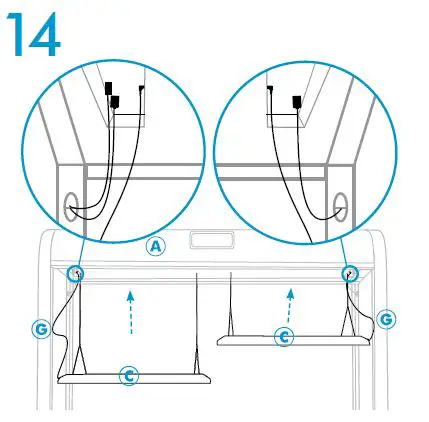
- Plug your LED Lights C into Top A using the two (2) Power Cords G provided. They connect from the outside of the LED light to a plug underneath Top A.

- Optional Trellis Installation Instructions:
Attach the magnetic hooks of the large Trellis cords to the INNER side of each of the posts of the metal frames of your AeroGarden Farm. Pinching the clips at the ends of the small Trellis cords, attach them to the long Trellis cords at any desired intervals.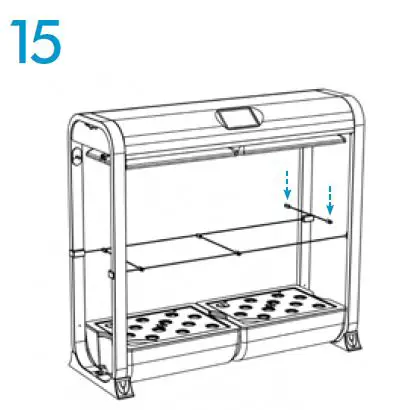
- Once all parts are in place, plug your AeroGarden Farm into a standard 110V-120V outlet and follow the instructions on the Touch Screen or your AeroGarden Farm’s Quick Planting Guide.
You are now ready to plant!
CONGRATULATIONS!
Your Farm is ready to grow.
See enclosed Quick Planting Guide to plant your Farm
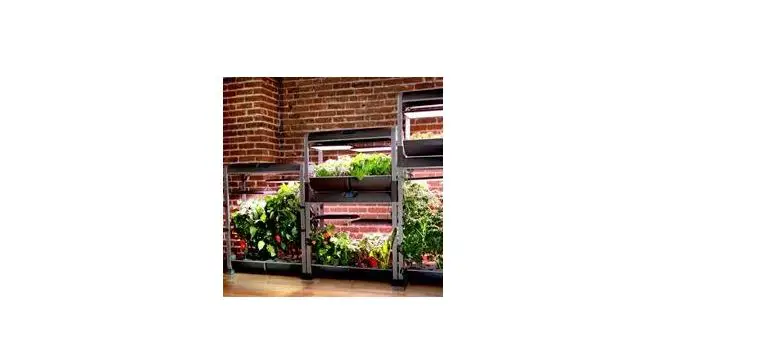
Create a vertical ‘Wall of Growth’ with AeroGarden Farm 24s
Now grow all of your herbs and vegetables indoors— always homegrown … fresh & safe!
All AeroGarden Farm 24s can be stacked to create a ‘Wall of Growth’ to produce food for your entire family.
Farm Stacking Kits (sold separately) are available at AeroGarden.com
For more detailed information about growing in your AeroGarden, please visit: www.aerogarden.com/product-guides
1-800-476-9669 USA | 1-800-611-9058 – CANADA
www.aerogarden.com/contact-support
NEED SUPPLIES, ACCESSORIES OR INFORMATION? Visit Our Website: www.AeroGarden.com
FACEBOOK We also have an active Facebook Community that loves to answer questions at facebook.com/aerogarden. “Like” us for special offers and community fun!
AeroGrow International, Inc., P.O. Box 18450, Boulder, CO 80308-1450 ©2021 AeroGrow International, Inc. 030221 AA Made In China


