![]() 021202 Horse Cattle Clipper
021202 Horse Cattle Clipper
Instruction Manual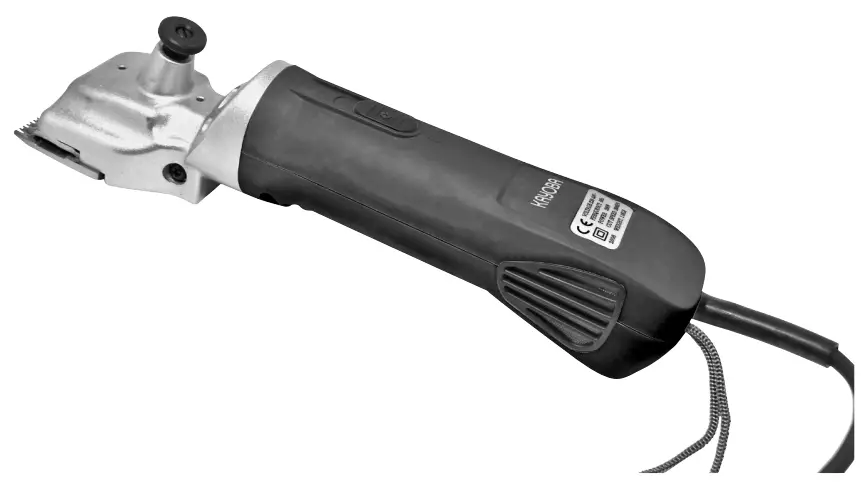
![]() 021202
021202
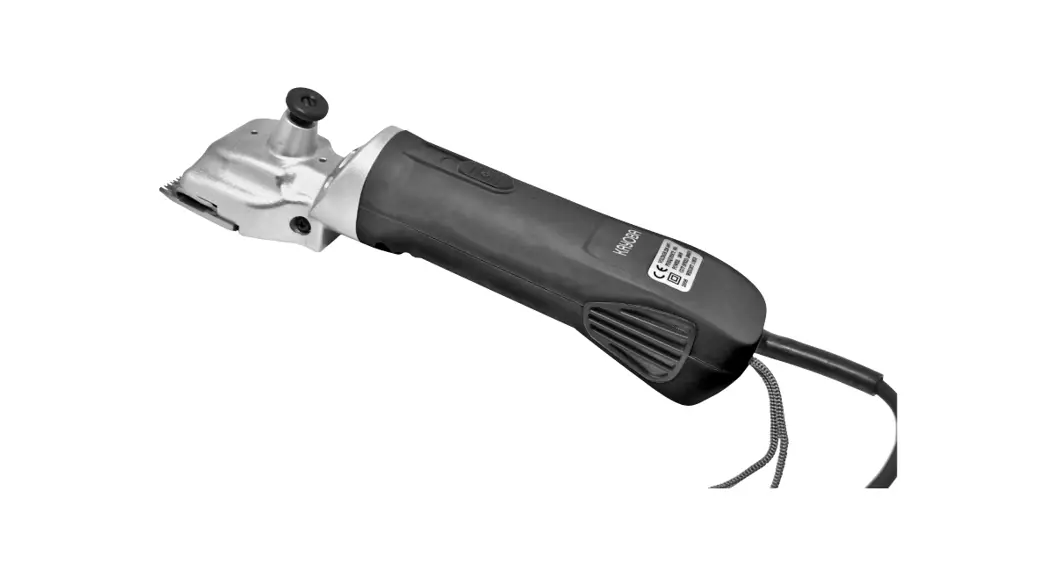
HORSE/CATTLE CLIPPER
021202 Horse Cattle Clipper
HORSE/CATTLE CLIPPER
OPERATING INSTRUCTIONS
Jula AB reserves the right to make changes to the product. Jula AB claims copyright on this documentation. It is not allowed to modify or alter this documentation in any way and the manual shall be printed and used as it is in relation to the product. For the latest version of operating instructions, refer to the Jula website
WWW.JULA.COM
OJULA AB 2022-07-13
JULA AB
BOX 363, 532 24 SKARA, SWEDEN 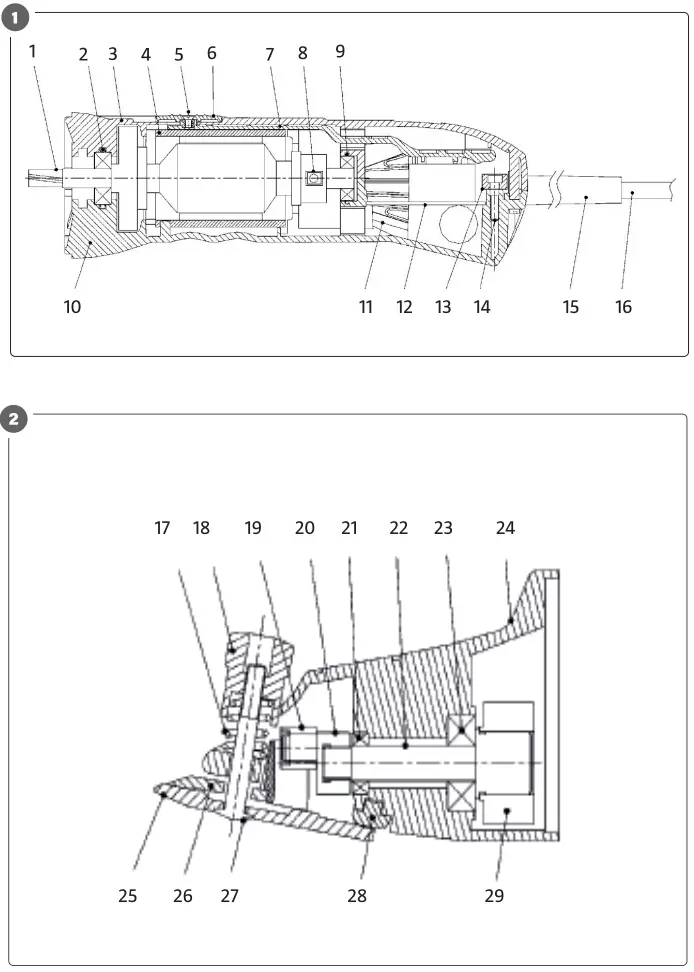

SAFETY INSTRUCTIONS
- Never leave the appliance unattended when children are present.
- Do not allow children to use the appliance
- When the appliance is in use the user should wear ear protection and safety glasses.
- Do not use the appliance on wet or damp hair.
- Check that the mains voltage corresponds with the rated voltage on the appliance.
- Never use the appliance if it shows signs of damage.
- Do not tie knots in the power cord.
- Always check that the power cord is in good condition. Risk of fatal electric shock
- Never use the appliance if it has been dropped on the floor or is damaged, or if the power cord or plug are damaged.
- The appliance is only intended for temporary use.
- Do not immerse any part of the appliance in liquid. Risk of electric shock.
- Never use the appliance in environments with explosive or flammable vapour or gas
- Always unplug the power cord from the power point before cleaning or other maintenance.
- The power cord must only be replaced by the supplier.
- Repairs must only be carried out by the supplier.
SYMBOLS
| Read the instructions. | |
 | Approved in accordance with the relevant directives. |
 | Safety class II. |
 | Recycle discarded product in accordance with local regulations. |
TECHNICAL DATA
| Rated voltage | 230V 50 Hz |
| Output | 200W |
DESCRIPTION
MOTOR UNIT
| 1 Rotor 2 0-ring 3. Top cover 4. Stator 5 Retaining screw for power switch 6. Power switch 7 Tension rod for power switch 8 Corban brush | 9 0ring 10. Bottom cover 11 Inlet guard 12. Circuit board 13. Locking block for cord 14. Locking screw for locking block for cord 15. Cord sleeve 16. Power cord FIG. 1 |
CUTTER UNIT FOR HORSE
| 17 Blade pressure spring 18. Adjuster knob for blade pressure 19. Roller 20. Eccentric 21. Bearing 22. Axle 23. Bearing | 24. Aluminium frame 25 Fixed blade 26. Flexible blade 27 Adjuster screw 28. Washer 29 Gear FIG. 2 |
CUTTER UNIT FOR SHEEP
| 30. Locking spring to adjust pressure 31 Fixed sleeve 32 Flexible sleeve 33 Adjuster knob for blade pressure 34 Aluminium frame 35. Flexible blade 36. Presser foot 37 Cross arm 38. Plastic casing for aluminium frame | 39 Foxed blade 40. Blade screw 41. Eccentric rocker arm 42 Eccentric ball joint 43 Eccentric axle 44. Pressure unit 45 Guide pin for pressure unit 46. Nut 47 Gear FIG. 3 |
PACKAGE CONTENTS
- Horse/animal shears, 1
- Blade, 7
- Cleaning brush, 1
- Lubricant, 1 bottle
- Storage case, 7
ASSEMBLY
INSTALLATION OF BLADES
- The blade set consists of one fixed and one flexible blade.
- Check that the blades are correctly turned towards each other on installation.
Installation of blades on cutter unit for horse
- Check that the blades are clean and sharp.
- Fit the flexible blade on the eccentric axle so that the fasteners run in the guide slots in the aluminium frame.
- Align the two round holes on the fixed blade to the taps on the cutter head.
- Screw in the adjuster screw.
- Fit the blade pressure spring and the adjuster knob for blade pressure.
- Tighten the adjuster knob so that the cutting surface slides with slight resistance against the cutting surface of the fixed blade.
Installation of blades on cutter unit for sheep
- Put the flexible blade on the presser foot cones and align the holes to each other.
- Fit the flexible blade to the loose screw and tighten the screw until the flexible blade can be moved by hand with some resistance.
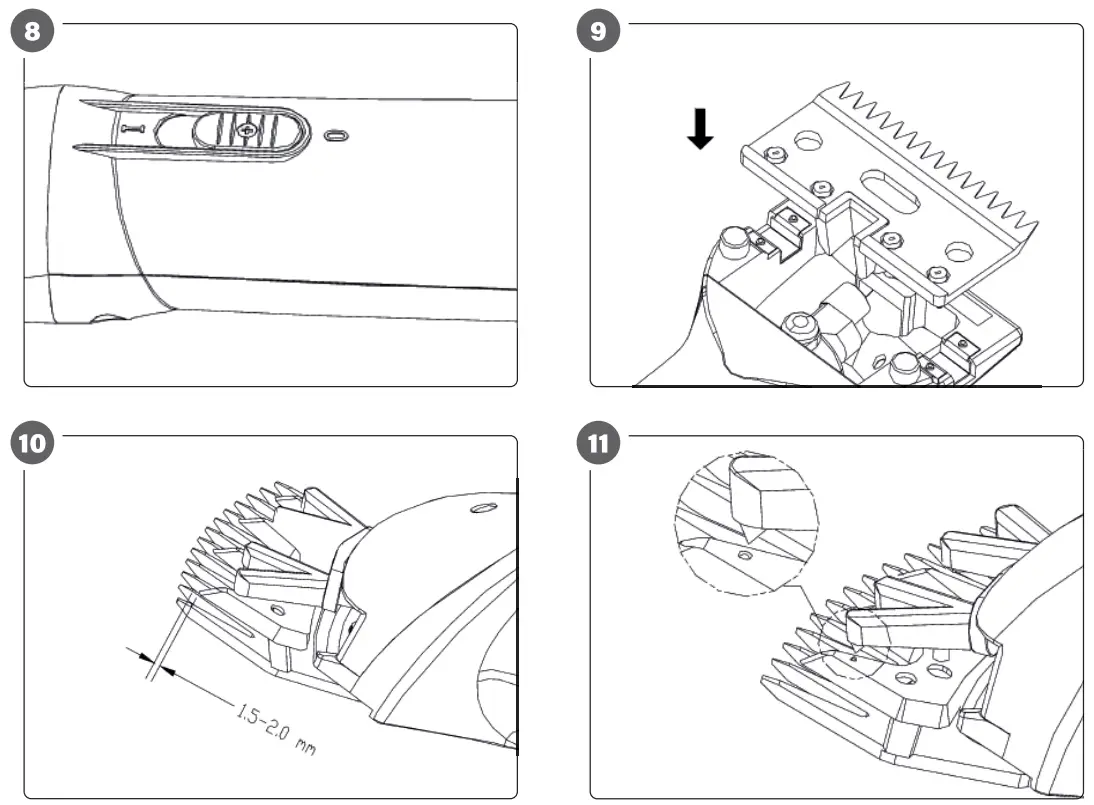
- Turn the product so that the adjuster knob IS Up.
- Centre the flexible blade over the fixed blade, so that the gap between the tips on the fixed blade teeth and the tips on the flexible blade teeth is about 1.5-2.0 mm. FIG. 4
- When the blades are correctly adjusted, lock the fixed blade by tightening the blade screw on the back of the fixed blade.
- Check that the blades are correctly installed and fixed in place. The cones on the presser feet should be aligned to the round holes in the flexible blade (figure 11)
- Tighten the adjuster knob so that the cutting surface on the flexible blade slides with slight resistance against the cutting surface of the fixed blade and the presser feet cones engage in the round holes in the flexible blade.
USE
APPLICATIONS
The cutter unit for horses is used for shearing horses, and cattle etc.
The cutter unit for sheep is used for shearing sheep and goats, and for camels and alpacas.
IMPORTANT:
Never use the product for other purposes, especially not for cutting persons.
PREPARATIONS
WARNING!
- Do not touch the blades when the product is in use.
- Switch off the product and pull out the plug before touching the blades, and before fitting/removing the blades or cutter unit.
- Do not expose the product to water or any other liquid.
- Never cut wet coats – risk of electric shock .
- Handle the power cord with care, so that there is no risk of it being pinched or trod on.
- Lay out the power cord before working. Avoid loops or twisting.
- The noise the product makes can frighten the animal, which can result in the user being kicked, trampled, or pressed. Tie up the animal and approach it from in front. Start the product where the animal can see you.
- Never use the product near explosive or flammable substances.
IMPORTANT:
- Check that there are no other persons in the vicinity.
- Only use blades recommended by the manufacturer. Never use blunt or damaged blades.
- Wear suitable clothing. Do not wear loose-fitting clothing, jewellery or a watch that can get caught in moving parts. Tie up long hair.
- Adjust the blade pressure before use .
- Check that the mains voltage corresponds to the rated voltage on the type plate.
- Always check before use that the power cord and plug are undamaged.
- Check that there is nothing in the coat of the animal, such as shavings or fluff.
BEFORE CUTTING
- Check that the flexible and fixed blades are correctly and firmly installed.
- Tighten the adjuster knob for blade pressure to achieve a slight pressure.
WARNING!
The blades can fly off and cause personal injury if the adjuster knob is not sufficiently tight.
ADJUSTING THE CORRECT BLADE PRESSURE
Do not adjust the blade pressure too tight
– hair can accumulate in the blades.
If this happens, switch off the product, pull out the plug and remove the blades. Clean and lubricate the blades and fit them again in accordance with the instructions.
Tighten the adjuster knob for the blade pressure relatively tight, otherwise cutting will be difficult
If the adjuster knob is overtightened the blade pressure can result in noise, overheating of the blades and excessive wear.
If this happens, slowly unscrew the adjuster knob until the noise level is normal and the cutting improves.
LUBRICATION
Lubrication before and after cutting horse
- Lubricate the flexible and fixed blades with a little oil. This is very important for optimum cutting results and to ensure that the product lasts as long as possible.
FIG. 5 - Other moving parts on the cutter unit should also be lubricated when necessary Pour a little oil into the lubrication hole on the cutter unit.
FIG. 6
Lubrication before and after cutting sheep
- Lubricate the flexible and fixed blades with a little oil. Other moving parts on the cutter unit should also be lubricated when necessary
FIG. 7 - Pour a little oil into the lubrication hole on the cutter unit.
FIG. 8
Use special oil or paraffin oil that complies with IS0-VG15. Such oil is not toxic and does not cause side-effects or damage to skin or mucous membrane.
NOTE:
Paraffin oil loses 20% of its effect if stored for more than 21 days. Oil contributes to better cutting and makes the blades last longer. Blades that are not sufficiently oiled get hot when in use, which wears them out quicker. It is therefore important to regularly lubricate the blades and cutter unit Lubrication should be carried out every five minutes when in use.
SWITCHING ON/OFF
The power switch has two positions.
– Position 1: Switch on
– Position O: Switch off
NOTE:
Check that the power switch is switched off before plugging in the plug.FIG. 9
MAINTENANCE
IMPORTANT:
Switch off the product and pull out the plug before maintenance, adjustment, cleaning and/or any other intervention on the cutter unit.
CLEANING
After cutting
- Remove oil from the blades with a dry cloth and clean the cutter unit and blades with a dry brush.
- Apply a little oil to provide protection from corrosion.
WARNING!
Even slight corrosion on the blades can affect the cutting and reduce their efficiency. Make sure to protect the blades from corrosion.
SHARPENING THE BLADES
Only use sharp blades in good condition. Replace blades that are blunt or missing teeth.
Sharpening should be carried out by qualified personnel using special tools for this purpose.
REPLACINGTHE CUTTER UNIT
- Undo the two screws holding the cutter unit in place.
- Remove the cutter unit.
- Fit the new cutter unit and tighten the screws.
- Lubricate the new cutter unit.
STORAGE
- Store the product in a dry and cool place.
- Do not use the product if it has been exposed to water, or any other liquid – risk of electric shock.
- Take the product to an authorised service centre to have it checked, and if necessary repaired.
- Clean and lubricate the product, and relieve the blade pressure before putting into storage
TROUBLESHOOTING
CUTTER UNIT FOR HORSE
| Problem | Cause | Action |
| The flexible blade does not move. | The gear is damaged. | Replace the gear. |
| It is not possible to adjust the blade pressure. | The blade pressure spring is damaged. | Replace the blade pressure spring. |
| Imperfect cutting. | The blades are blunt. | Use sharp blades. |
| Blade pressure too low. | Increase the blade pressure with the adjuster knob. | |
| The cutter unit overheats. | Blade pressure too tight. | Reduce the blade pressure. Sharpen the blades, if necessary. |
| Not enough oil on the blades. | Apply lubricating oil. | |
| Not enough oil in the guide slot in the cutter unit. | Pour oil into the lubrication hole in the cutter unit. | |
| The product does not start. | No power. | Check the connection. |
| The power cord or plug is damaged. | A damaged power cord or plug must be replaced by an authorised service centre, or other qualified personnel, to ensure safe use. | |
| The power switch and/or motor is defective. | Contact the retailer. | |
| The motor overheats. | The air filter is blocked. | Clean the filter with a brush. |
| Blade pressure too tight. | Do not overtighten the adjuster knob for the blade pressure. If it is not possible to adjust the blade pressure so that the product functions correctly, sharpen or replace the blades. |
CUTTER UNIT FOR SHEEP
| Problem | Cause | Action |
| The flexible blade is not in contact with the fixed blade. | The pressure unit is damaged. | Replace the pressure unit. |
| The flexible blade does not move. | The gear is damaged. | Replace the gear |
| The pressure unit is damaged. | Replace the pressure unit. | |
| The adjuster knob unsaews itself. | The harking spring to adjust pressure IS (Isamu or damaged. | Replace the II:cling spring. |
| The fixed sleeve s loose. | lock with a thread locking fluid. | |
| It is not possible to adjust the blade pressure. | The pressure unit is damaged. | Replace the pressure unit. |
| The flotle sleeve is missing or damaged. | Replace the flexible deem | |
| The eccentric rocker arm sworn. | Replace the eccentric rocker arm. | |
| The presser trot is worn. | Replace the presser foot. | |
| Impededrutting. | The blades are blunt. | Orgy use sharp blades. |
| Blade pressure too lax | linaease the blade pressure with the adjuster knob. | |
| It 6 not possible to cut. | The faed blade is not installed. | fit the fixed blade so that the gap between the tips on the fixed blade teeth and the tips on the flexible blade teeth is about 1.5-20mm. |
| The eccentric ball joint is missing. | Install an eccentric ball joint | |
| The gear is damaged. | Replace the gear. | |
| The cutter unit iwom. | Replace the cutter unit. | |
| The cutter task overheats. | Blade pressure too right. | Reduce the blade pressure. Sharpen the blades, if necessary. |
| Not enough al on the eccerark ball joint. | Pour oil kilo the lubrication hole tithe cutter unit | |
| Too little oil and grease in the fleet* sleeve. | Apply oi and grease in the fledak sleeve. | |
| The product does not start. | No power. | Check the connection. |
| The power cad or plug is damaged. | A damaged power cord or plug must be replaced by an authorised senice centre, or other qualified personnel, to ensure safe use. | |
| The power nit:hand/a motet is defective. | Contact the retailer. | |
| Themotor overheats. | The air filter is blocked. | Clean the filter with a brush. |
| Blade pressure too tight. | Ease the adjuster blob for blade pressure. I it is not possible to edited an optimum blade pressure, sharpen or replace the blades. |
![]()


