TMI POLAR PRO 60Inch Wide x 96Inch High Swinging Doors Instruction Manual


TMI POLAR PRO 60Inch Wide x 96Inch High Swinging Doors
Thank you for choosing a Curtron quality product.
Your POLAR-PRO™ Swinging Door was manufactured to your specific cooler or freezer doorway width and height. Although installation is not complicated, you will need a helper.
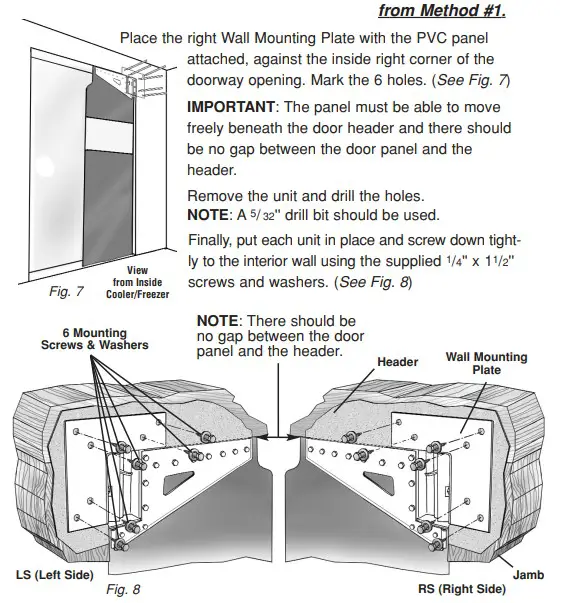
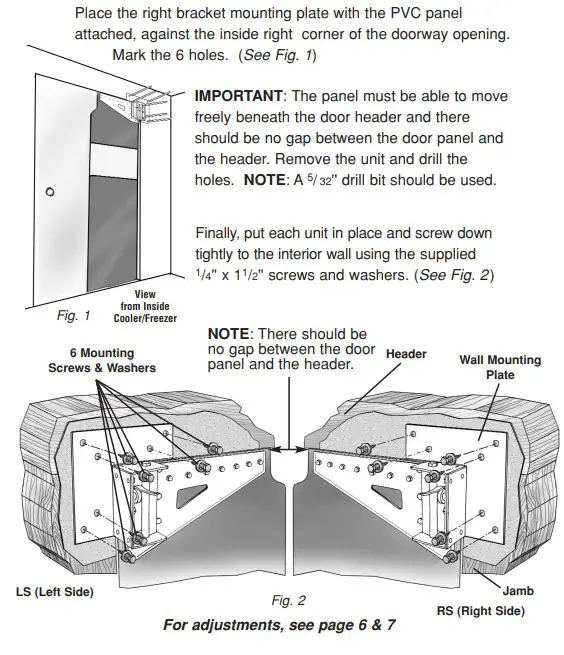
Do not use nails to attach the door panel brackets. 1/4” x 11/ 2” screws(6) and washers(6) are included.
CHECK YOUR ORDER
The thickness of your door jamb will determine which mounting method to use. While standing inside the cooler or freezer, measure from the back of
the closed door to the inside wall surface. (See drawings below.)
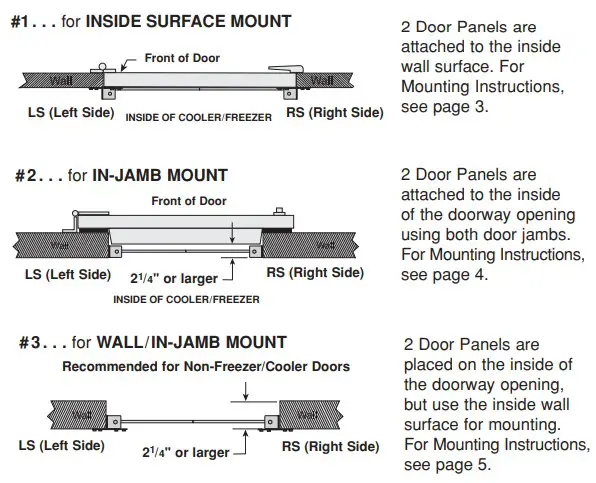
INSIDE SURFACE MOUNTING
CAUTION: Make sure that the door jamb is strong enough to support the weight and force of the door. If questionable, check with cooler/freezer manufacturer.
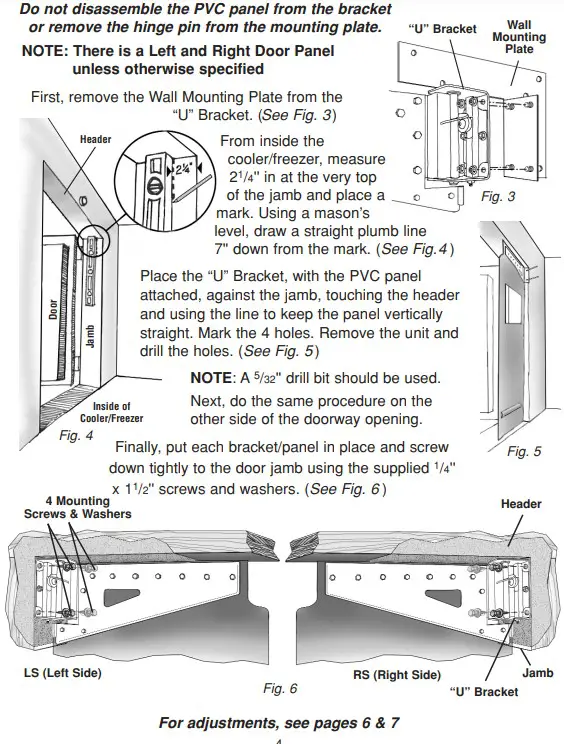
Do not disassemble the PVC panel from the bracket or remove the hinge pin from the mounting plate.
NOTE: There is a Left and Right Door Panel, unless otherwise specified.
#2. IN-JAMB MOUNTING
CAUTION: Make sure that the door jamb is strong enough to support the weight and force of the door. If questionable, check with cooler/freezer manufacturer.
#3. WALL / IN-JAMB MOUNTING
CAUTION: Make sure that the door jamb is strong enough to support the weight and force of the door. If questionable, check with cooler/freezer manufacturer
FINAL ADJUSTMENTS
CENTERING
If the panels are not aligning at the center overlap, a simple adjustment can be made.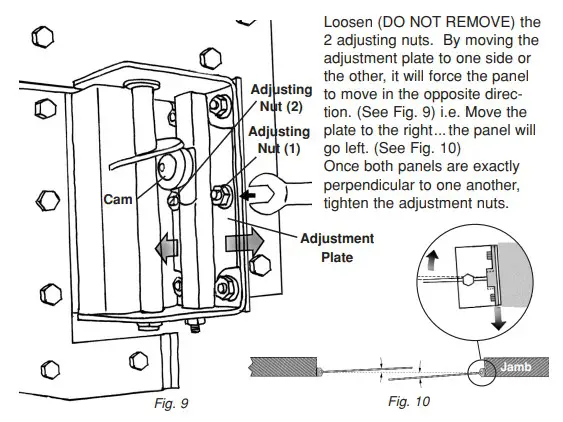
TENSION
If the door panels are not returning to a completely sealed position, increased tension might be needed.
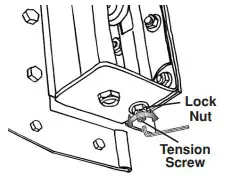
To tighten or loosen the cam spring tension, first loosen the lock nut at the bottom of the mounting bracket.
Using an allen wrench, move the tension screw clockwise to tighten or counterclockwise to loosen. Once the proper tension is determined, tighten the locknut.
FINAL ADJUSTMENTS
SEALING
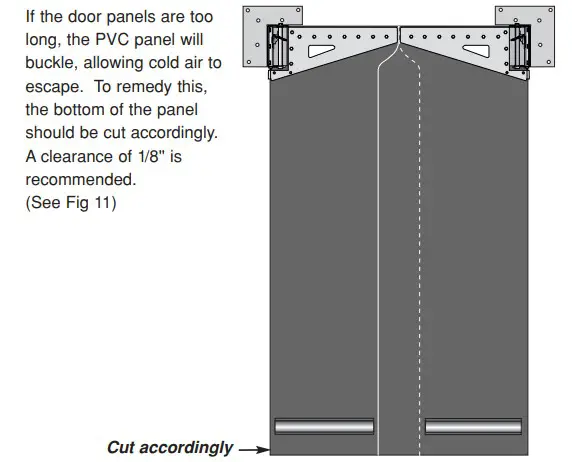
If the door panels are too long, the PVC panel will buckle, allowing cold air to escape. To remedy this, the bottom of the panel should be cut accordingly.
A clearance of 1/8” is recommended. (See Fig 11)