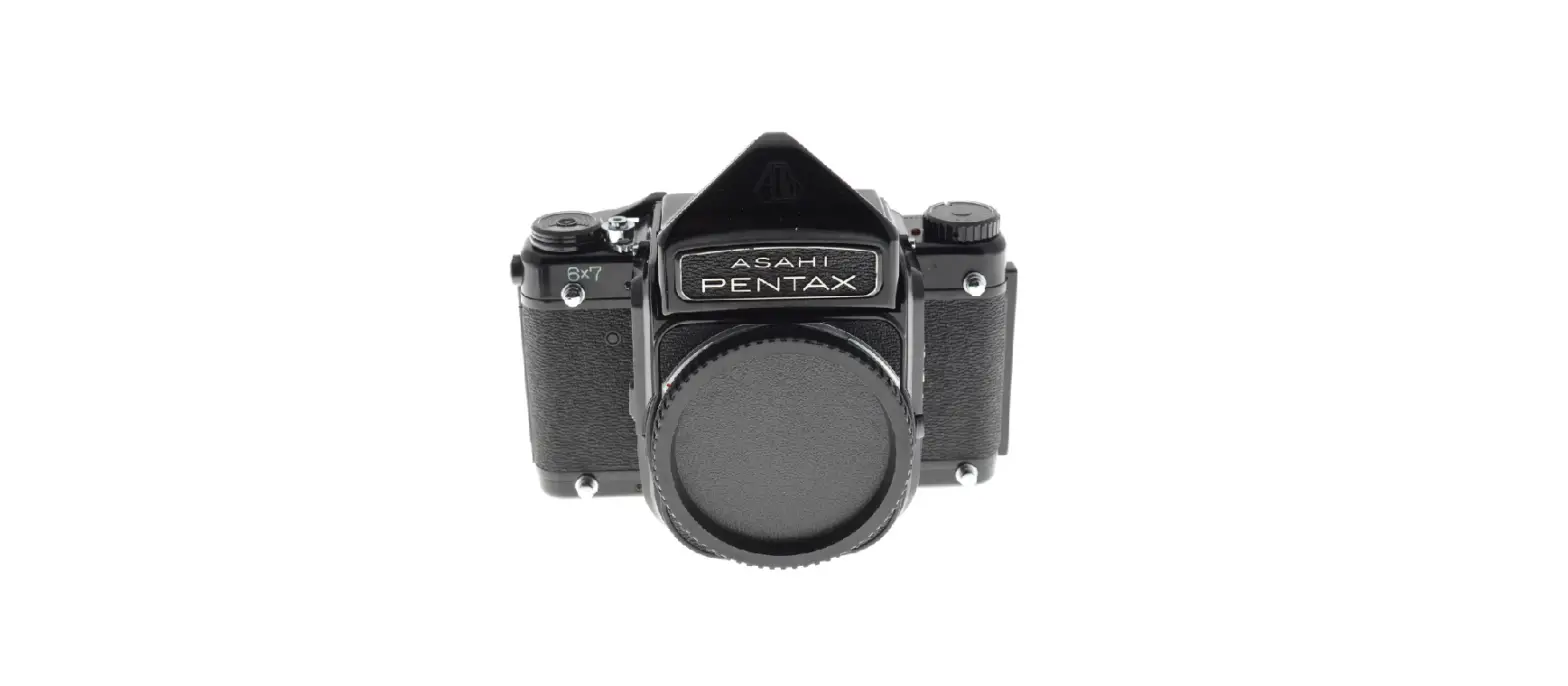
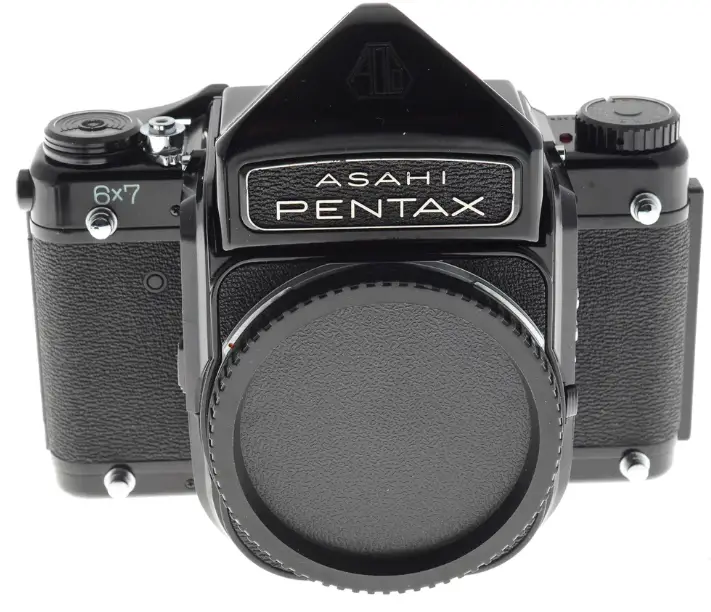
Pentax 6×7 Galerie photo
This manual is for reference and historical purposes, all rights reserved.
This page is copyright© by M. Butkus NJ.
This page may not be sold or distributed without the expressed permission of the producer
I have no connection with any camera company.
On-line camera manual library
This is the full text and images from the manual. This may take 3 full minutes for the PDF file to download.
If you find this manual useful, how about a donation of $3 to: M. Butkus, 29 Lake Ave., High Bridge, NJ 08829-1701 and send your e-mail address so I can thank you. Most other places would charge you $7.50 for an electronic copy or $18.00 for a hard-to-read Xerox copy. This will allow me to continue to buy new manuals and pay their shipping costs. It’ll make you feel better, won’t it? If you use Pay Pal or wish to use your credit card, click on the secure site on my main page.
As an experienced photographer, you know all about the basic technicalities of photography. So we have limited the contents of this manual to those instructions that apply to the operation of this ideal-format single-lens reflex camera.
Main Specifications
- Type: Ideal-format single-lens reflex
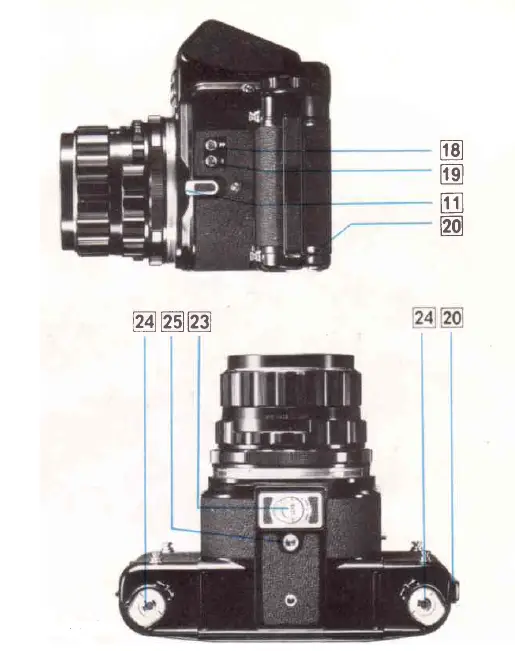
- Film & picture size: 120 roll-film (10 exposures)
- 220 roll-film (20 exposures)
- 55mm x 70mm (2-1/4″ x 2-3/4″)
- Standard lens: Super-Multi-Coated Takumar/6×7 105mm f/2.4; 6 elements; fully-automatic diaphragm; 67mm filter size; minimum focusing distance of 1 meter (3.3 feet).
- Shutter: Electronically-timed, double-curtain focal-plane shutter; X, B, 1 to 1/1000 sec.; powered wjth a 6V silver oxide battery (Eveready #544 or Mallory PX28)
- Reflex mirror: Swing-back-and-up type instant-return mirror.
- Lens mount: Two coaxial bayonet mounts; inner bayonet for lenses from 35mm to 300mm, and outer bayonet for lenses from 400mm to 1000mm.
- Flash synchronization: FP and X terminals; electronic flash synchronization at 1 /30 sec.
- Standard viewfinder: Detachable pentaprism housing with an interchangeable eyepiece.
- Dimensions: 184mm (width) x 149mm (height) x 156mm (depth) with a standard lens.
- Weight
- Body: 1,290 grams (45.5 ozs.)
- Standard lens: 630 grams (22.2 ozs.)
- Pentaprism housing: 460 grams (16.2 ozs.)
OVERVIEW
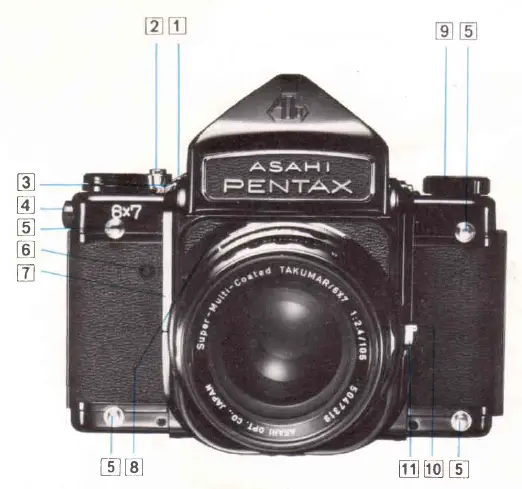
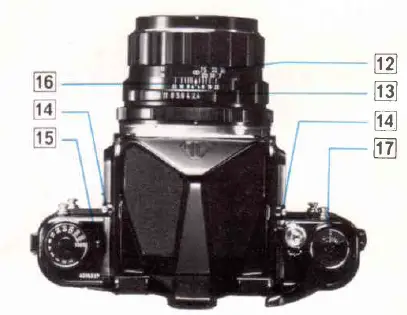
- Rapid wind lever
- Shutter release button
- Shutter release lock
- Film type dial
- Neck strap lugs
- Shutter/mirror reset button
- Mirror lock lever
- Depth-of-field preview lever
- Shutter speed dial
- Camera grip pin
- Lens release
- Distance scale
- Aperture scale
- Viewfinder release button
- Battery check lamp/Shutter speed index
- Depth-of-field scale
- Exposure counter
- FP sync terminal
- X sync terminal
- Back cover release lever
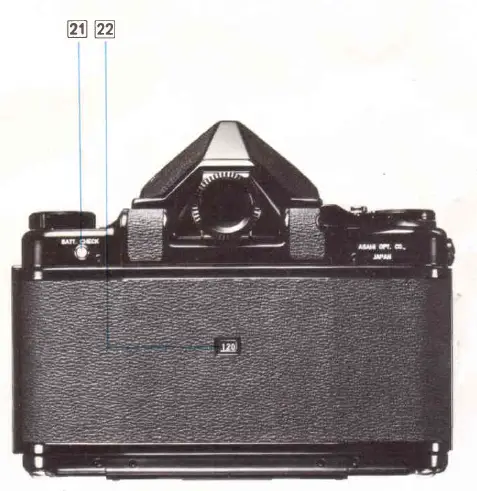
- Battery check button
- Film type window
- Battery chamber cover
- Film spool retainer knobs
- Tripod socket
Operating the shutter without film in the camera
The shutter of this camera is so designed that unless the camera is properly loaded, you cannot cock the shutter although you can freely move the rapid wind lever. If you wish to cock the shutter without film in the camera, follow either one of the following two methods (I or I)
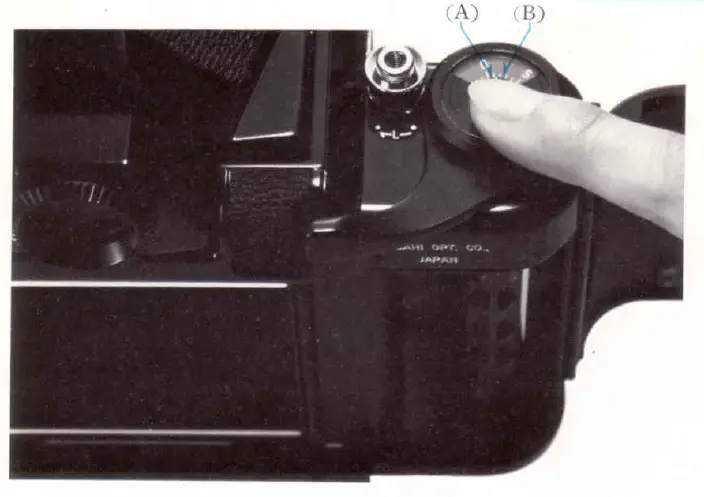
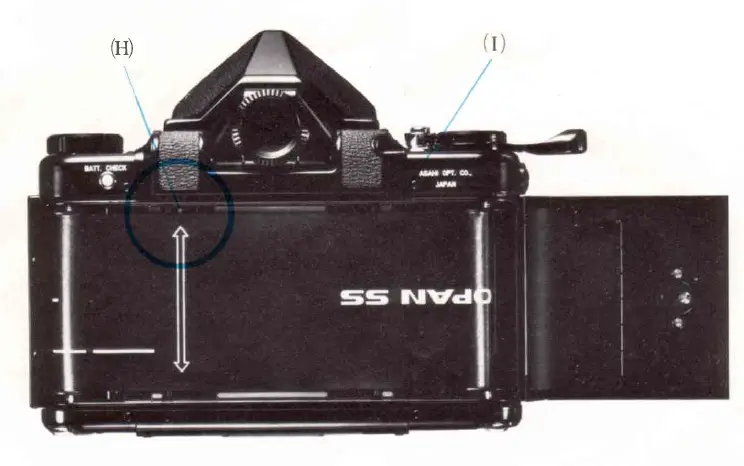
- Open the back, and with your finger tip rotate the exposure counter dial (A) to the left. The exposure counter will then move to the left. When the “0” (zero) moves to the left of the index (B), close the back while keeping the exposure counter at that position. The shutter is now ready for operating. This procedure is much easier than the next method.
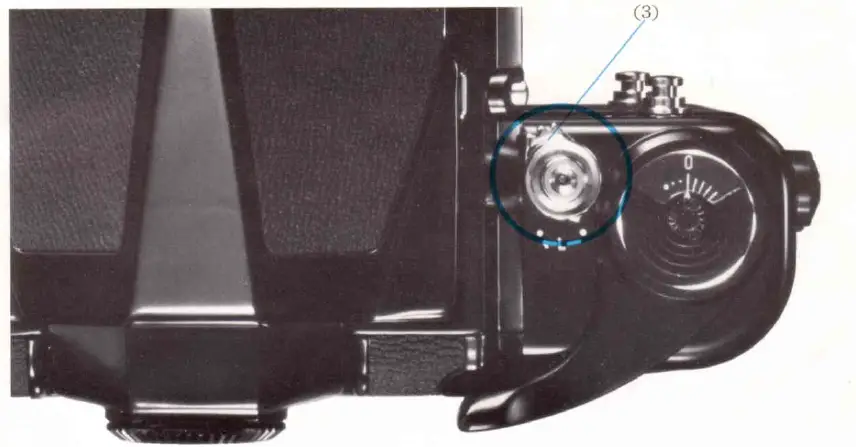
- Insert the shutter cocking key (C) into the slot (D) as illustrated, keeping the small metal bar (E) depressed. Then turn the film roller (F) TO THE RIGHT until the film exposure counter indicates UKlonel{short white line next to “0”.)
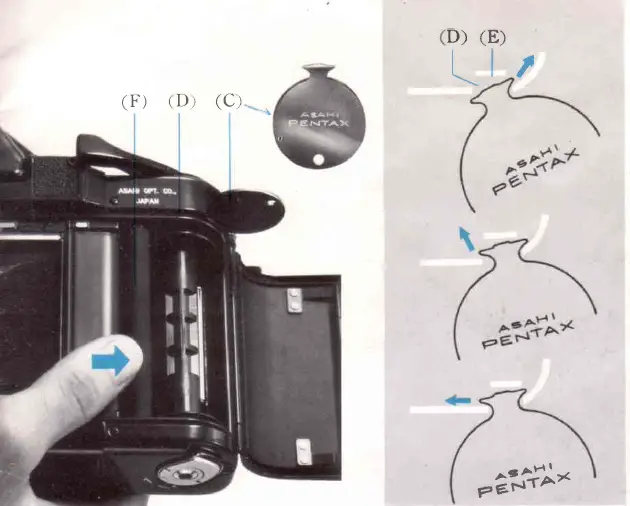
DO NOT TURN THE FILM ROLLER BEYOND THIS POINT. DO NOT TURN IT TO THE LEFT. This is extremely important to prevent damage to the precision shutter cocking mechanism. The shutter is now ready to be operated: you can cock the shutter by advancing the rapid wind lever with the back cover open. The exposure counter, however, does not operate without film in the camera. When the shutter is fully cocked, you can remove the shutter cocking key and close the back cover. You can then release the shutter as many times as you wish.
If you reopen the back, the shutter will cease operating. If you reopen the back and close it without releasing the shutter, it will continue to operate without the film being loaded, If you wish to operate the shutter successively with the back cover open, the shutter cocking key must remain inserted to keep the shutter in its operating condition.
120/220 Film type settings
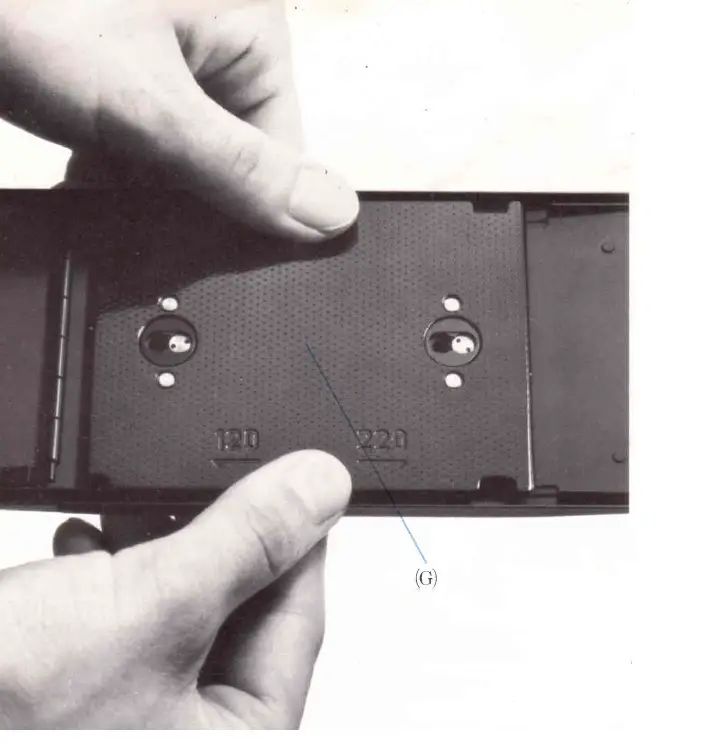
Before film loading, the pressure plate (G) must be properly positioned for the type of film to be used. Press the pressure plate and shift it to the left or right. When it is shifted to the left, it is positioned for 120 roll-film; if it is to the right, it is for 220 roll-film. The film type window (22) indicates for which type of film 4120 o 220) the pressure plate is positioned.

The film type dial (4) should also be properly set. Set it at 120 (indicated in green) for 120 roll-film, and at 220 (indicated in orange) for 220 roll film. After loading the film and closing the back cover, if necessary, this setting can be changed from 120 to 220, but it cannot be changed from 220 to 120.
Film loading and unloading
Pull down on the back cover release lever (20) to open the camera. The film spool retainer knobs (24) hold the film spools securely in place. To load or remove film, unfold the crank of the knob, turn it to the left until it stops, and pull out the knob. The Start Mark for 120 film is indicated in green and appears at the top left-hand side of the film plane. The Start Mark for 220 films is indicated in orange and is at the top of the right-hand side of the film plane (1). Align the start mark of the film with the appropriate start mark of the camera body, and close the back cover. You can keep advancing the rapid wind lever without releasing the shutter until the first film frame moves into the taking position. When the exposure counter moves from 0 toward 1, the first film frame also moves into the taking position.
The shutter enters into its operating position, and the rapid wind lever will become tense as you cock the shutter. After taking 10 or 20 exposures, according to the setting of the film type dial (4), the shutter will be disengaged from its operating condition. You can keep advancing the rapid wind lever, without releasing the shutter, to take up the remaining paper leader.

The click-stopped shutter speed dial is actually a rotary electrical switch that brings a series of individual precision wire-wound resistors into play for each shutter speed. Because of this, intermediate speeds cannot be set. The shutter release button accepts a conventional cable release. When the shutter release lock (3) points to the white dot, the shutter release button is unlocked. To lock the shutter release button, move the shutter release lock (3) to the orange dot.
Time Exposure
- By setting the shutter speed dial anywhere in the space between X and 1/1000 sec., you can take Time exposures.
- To close the shutter, turn the shutter speed dial to X or 1/1000.
- Double exposures cannot be made with this camera.
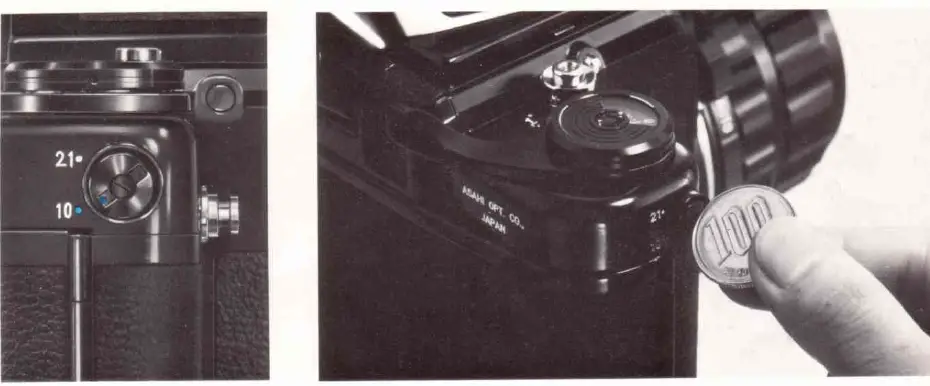
Battery check & replacement

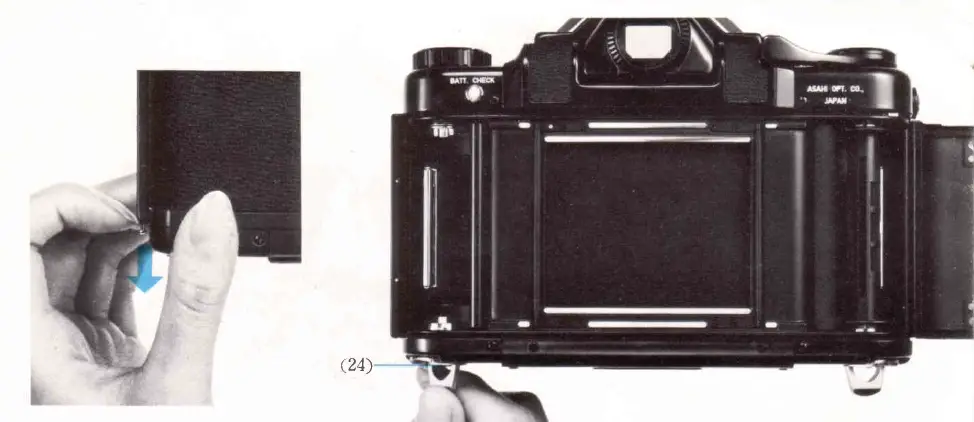
The silver oxide battery used in your camera will last for about 8,00010,000 exposures. To check the battery condition, depress the battery check button (21); the red battery check lamp (14) will glow if the battery is still in good condition. If the red check lamp does not glow, replace the battery immediately. The shutter will not operate when the battery is exhausted, or its voltage too low, or when there is no battery in the camera. At such a time, the reflex mirror will stop halfway up when you depress the shutter release button, completely locking the shutter mechanism. When this happens, insert a fresh battery, and depress the shutter/mirror reset button (6). The mirror will then complete its cycle, simultaneously releasing the shutter, resulting in the loss of one frame. You can easily remove the battery by unfolding the crank of the battery chamber cover (23) and turning it to the left. When loading a fresh battery, be sure to properly align the poles.
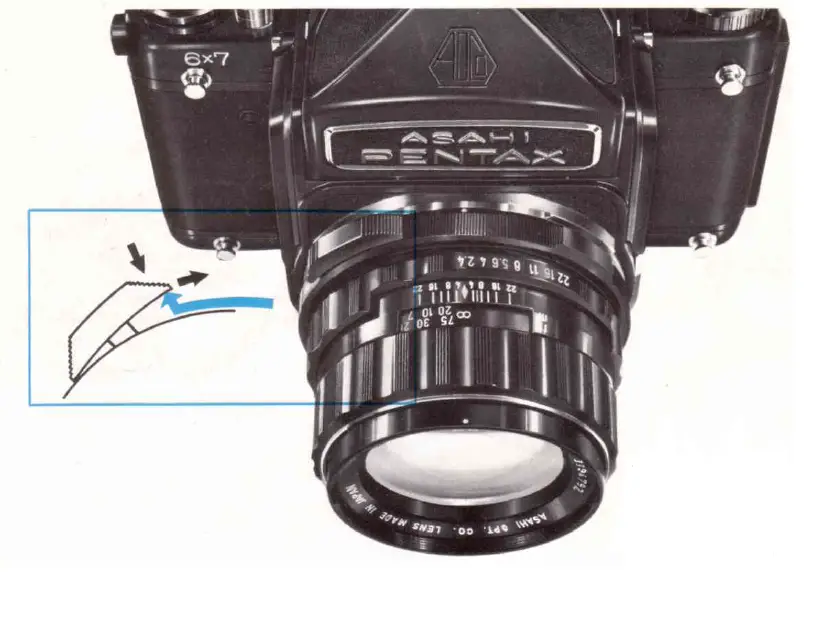
Intercahanging lenses
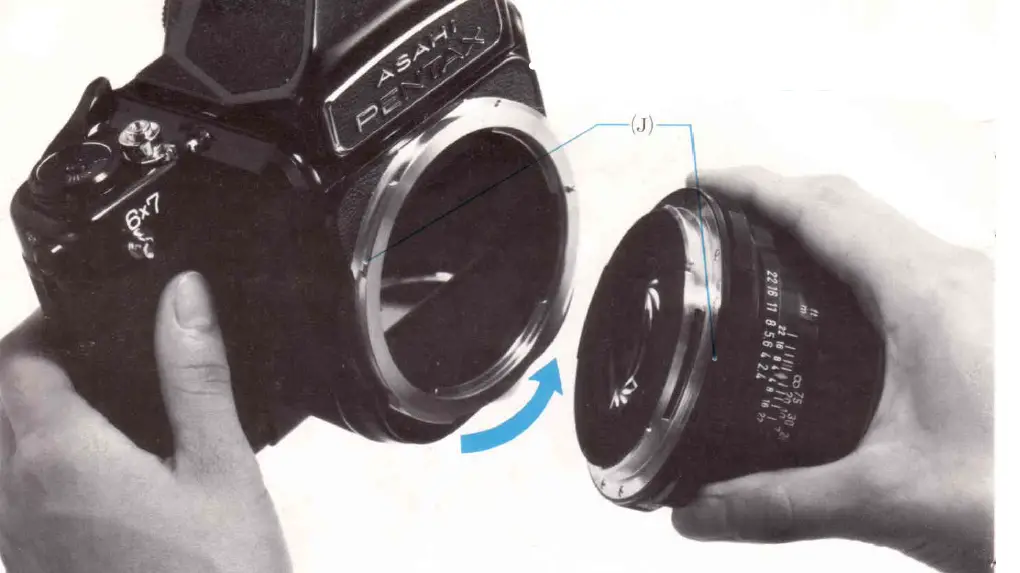
To remove a lens, depress the lens release (11) and turn the lens to the left. When mounting a lens, first match the red dots (J) and then turn the lens to the right until it securely locks to the bayonet mount. Use the inner bayonet for lenses from 35mm to 300mm and; outer bayonet for lenses from 400mm to 1000mmn.
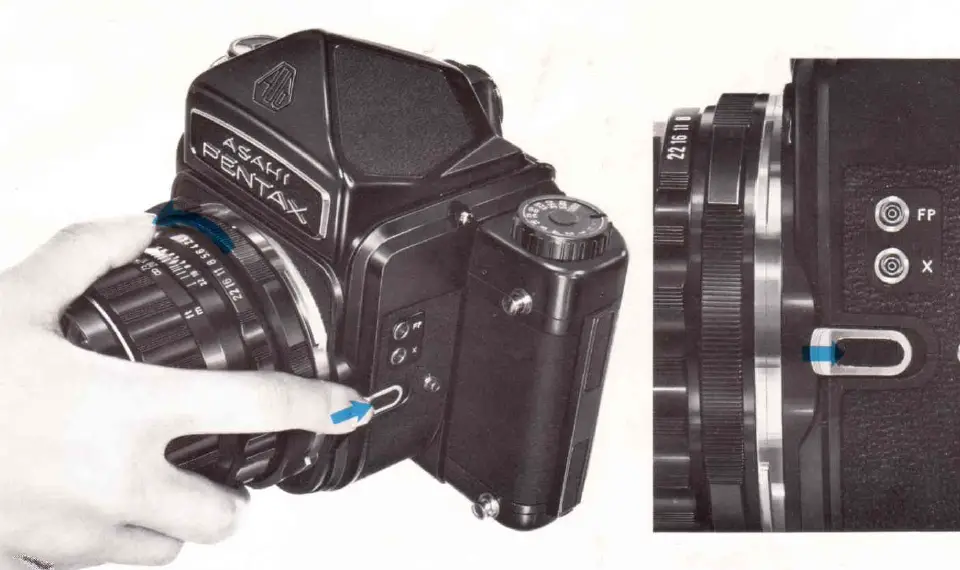
Flash synchronization
The table below shows which sync terminal, which shutter speed and which type of flash may be combined for maximum efficiency
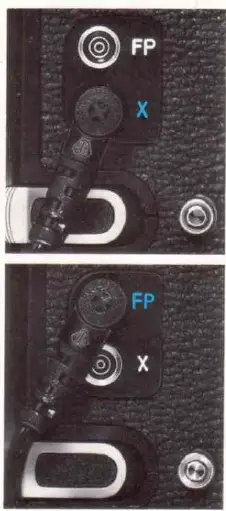
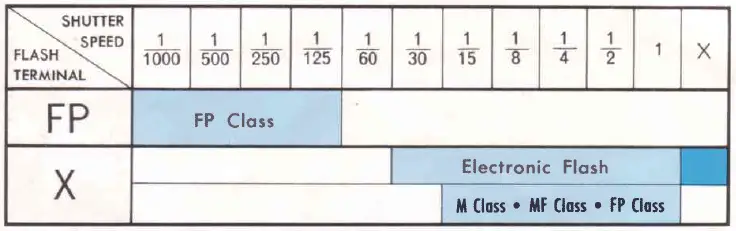
When using an electronic flash unit, plug the cord into the X sync terminal. Use shutter speeds of X (1/30 sec.) or slower. When using a flash gun, plug the cord into the FP terminal. Use shutter speeds of 1/125 sec. or faster. When using an FP class flashbulb at shutter speeds of 1/15 sec. or slower, plug the cord into the X terminal. In this case, M class and MF class bulbs for lens-shutter cameras may also be used. With an FP class flashbulb, the amount of light decreases by 50% as a higher shutter speed is used. So you must adjust the diaphragm. Check the instructions supplied with the flashbulbs.
Mirror lock provision
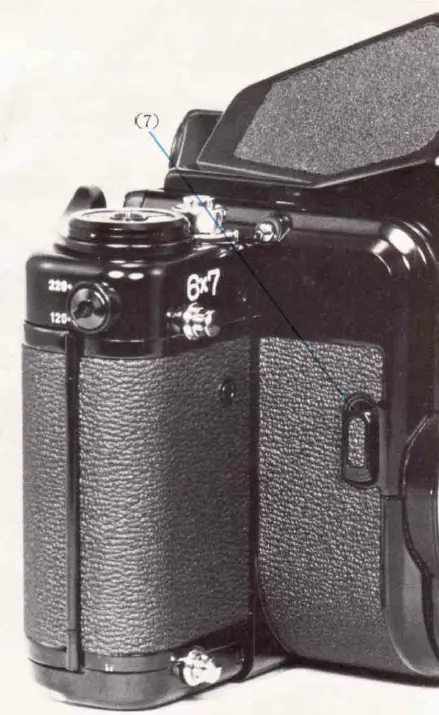
When desiring to lock the mirror in the up position, first cock the shutter and advance the film, and then push up on the mirror lock lever (7) which is located on the right-hand side of the outside wall of the mirror chamber. Finally, to keep vibrations to an absolute minimum, release the shutter with a cable release. Because the mirror lock provision is powered by the battery in the camera, the mirror is automatically returned to its normal position after the exposure to conserve battery consumption.
Caution: To avoid depleting the battery in an unnecessarily short period of time, avoid using the mirror lock provision for unduly long exposures, and avoid using it more than necessary.
Depth-of-field preview lever
The spring-loaded preview lever (8) can be pushed down and locked for depth-of-field preview. When it is in the preview position, the upper end of the lever is slightly raised; a slight touch on the raised end will return the lever to its automatic (open aperture) position.
Viewfinder and focusing screen

To remove the viewfinder, depress the viewfinder release buttons (14) and lift the viewfinder. When re-installing the viewfinder, be sure that the release buttons are securely engaged with the viewfinder. (Try to lift off the viewfinder to make sure that it is locked.)
PayPal Name: Lynndbutkus.org


